Practise what you preach.
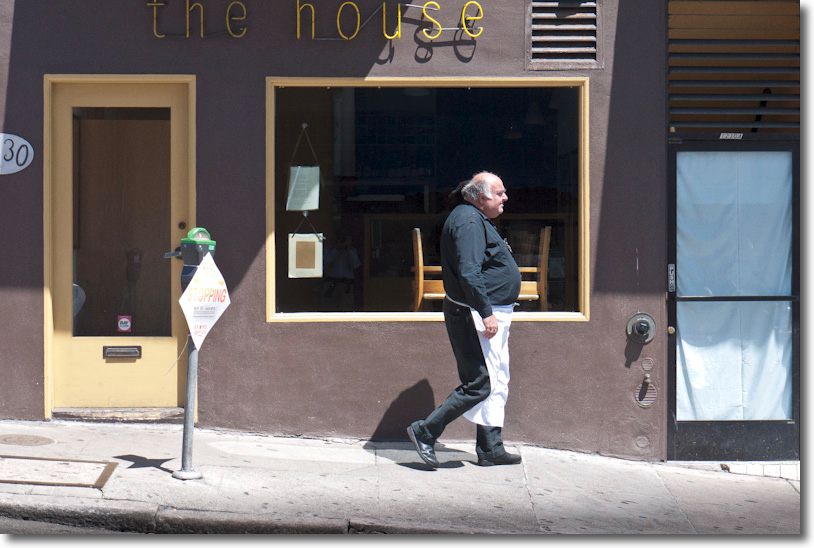
In Little Italy, San Francisco. G1, kit lens @ 41mm, 1/640, f/6.3, ISO320.
A man who obviously enjoys his own cooking!
Practise what you preach.
In Little Italy, San Francisco. G1, kit lens @ 41mm, 1/640, f/6.3, ISO320.
A man who obviously enjoys his own cooking!
Cheap and effective.
For a delivered price of $20.98 you can buy a wireless remote for any G-series Panasonic camera on eBay, shipped from Hong Kong. Mine took two weeks to arrive, complete with transmitter, receiver, a cord for the latter and the requisite two batteries. The 23A battery goes in the transmitter/trigger and the CR-2 in the receiver. The short cord goes from the receiver to the socket on the G1. Note that the CR-2 battery is wrapped tightly in plastic which must first be removed. The receiver itself fits in the flash shoe on my G1 but has no contacts of its own. If you are using the flash shoe for something else, like an external finder, or if you are using the in-camera flash, you can Velcro the receiver to some other convenient point on the camera’s body.
Here’s how it looks in practice:
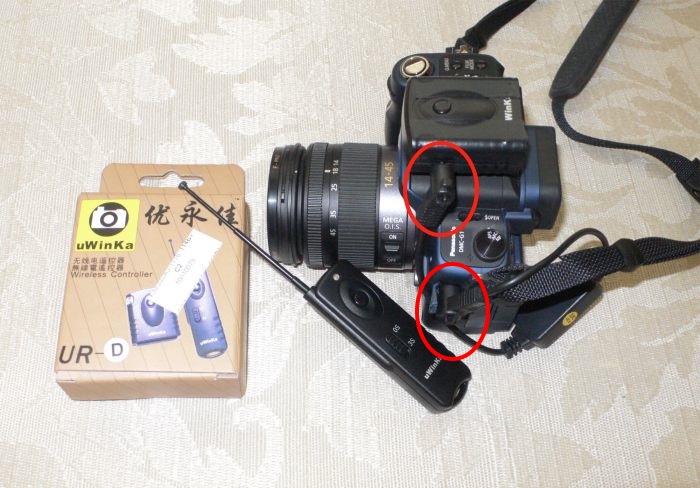
The uWinKa wireless remote. Cord connections from/to the G1 circled.
I tested it at home and it still worked fine from 50 feet away and through several walls, so the claimed range of 100 feet is believable. Flashing LEDs on the remote (taped off in the picture) confirm operation, as does a flashing LED on the trigger. The only thing you have to do is to remember to power up the receiver (camera end) with the on/off switch. There’s a choice of 16 code settings, changed with microswitches on the bodies of both devices, in the event of interference from other RF devices. Both receiver and transmitter are very small, in keeping with the scale of the Panasonic G1. Weight is negligible.
The trigger has a two position switch which is appropriately stiff on mine to preclude accidental switching – instant release or five second delay – which you can use nicely with the 3 or 10 second delay on the G1 to give you a choice of 5, 8, 10 or 15 seconds. The claimed delay is 3 seconds, but mine delivers 5. There’s also a Bulb option. You are meant to hold the button on the trigger for 5 seconds and the shutter should remain open until the button is pressed again. I could not get that to work. Hardly an issue. Finally, a brief press on the trigger button will focus the lens but not release the shutter. That worked for me. There’s an extendable antenna on the transmitter for longer range use. It’s extended in the picture, above. There’s also a release button on top of the receiver but I can’t say I have found a use for it, though it works fine.
All except the Bulb option works perfectly. The only hitch I encountered was that I had to reverse the provided cable from receiver to camera to make it trigger the shutter. The behavior is repeatable suggesting that there’s a diode in the small box in the connecting cable which transmits current in one direction only. The cable bears no directional markings so if yours does not work simply reverse it. While I haven’t tried it, I would be prepared to wager that this device will work fine on any camera which has a three pole mini-coax socket on the body. Try at your own risk.
The accessory shoe for mounting on the camera is flimsy; you can remove it by removing the one black Philips screw retaining the bottom cover and then the two chrome ones retaining the shoe from the inside. Use a fine flat file to ‘machine’ down the retaining prongs thus exposed (they are unnecessary should you decide to restore the shoe, as the two retaining screws prevent rotation in any case), thus procuring a plane base, and use industrial strength Velcro to stick the remote to some convenient flat part of your camera instead. One warning – Velcro adhesive refuses to adhere to the rubberized body on my G1!
Or, as the French might so elegantly put it, plus ça change, plus c’est la même chose. That one,, for the 5D, is quite a bit larger than the one profiled above.
Still a poor choice for photographers.
From a reading of the specs of the latest iMacs, the reasons to upgrade are:
The modest CPU and GPU speed increases are not a compelling reason to upgrade.
Further, AAPL still has issues with graphics cards overheating (which killed both our white non-glossy iMacs and made me build the Hackintosh – these were the last iMacs with a screen that could almost be properly profiled for photography use). Still? Well, yes. Why do you think the iFixit tear down shows that the graphics board in the latest iMacs is removable, rather than integrated on the motherboard? Because they expect to replace many, testament to the poor cooling of the part in the tight confines of the box. Form over substance design continues at Apple. Plus, as you need to remove the motherboard to access the removable GPU, you need to be very skilled or very lucky. And then where do you get the replacement? It simply does not solve.
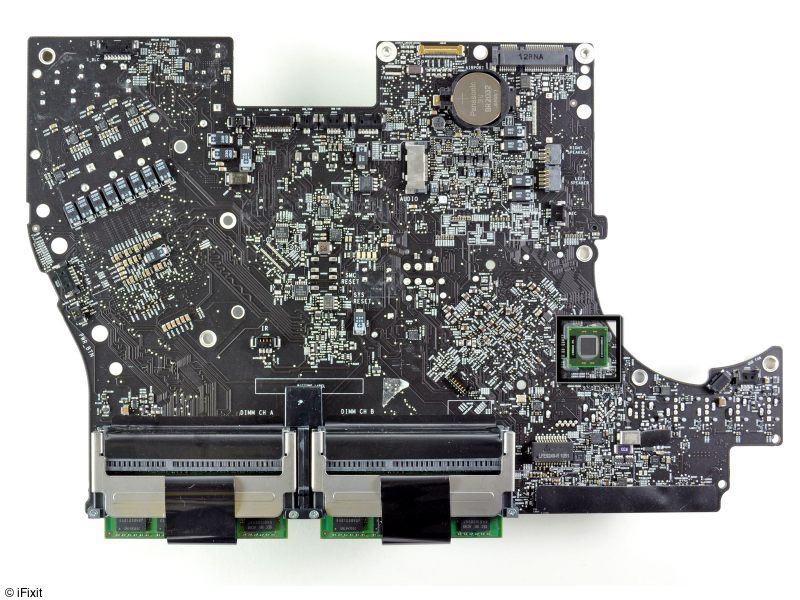
Click the picture for the iFixit teardown of the latest iMac.
If you need a good photography machine and must have Thunderbolt, the best bet is to wait for the Mac Mini to add that connector and hook it up to a couple of proper displays from Dell. Or for higher speed, build a Hackintosh.
Save your money unless the above are compelling reasons for you.
The single best thing you can do to make your iMac significantly faster is to add a Solid State Drive for the OS and applications. It can sit externally – internal installation is sheer hell – and you tell System Preferences->Startup Disc to make the SSD the one to start from. Install OS and copy over apps and you are set. You continue to keep data on your existing internal HDD which is big and cheap. The SSD is small and costly but it dramatically increases start-up speed and application loading. I added an Intel SSD (only 128gB) to the Hackintosh and the difference is night and day. I use maybe 50% of it – OS + apps only. Far more real world performance increase than newer CPUs or GPUs. It cost me $225, and prices continue to fall. Once you have used an SSD there’s no going back. Also, an SSD has no moving parts – always a good thing.
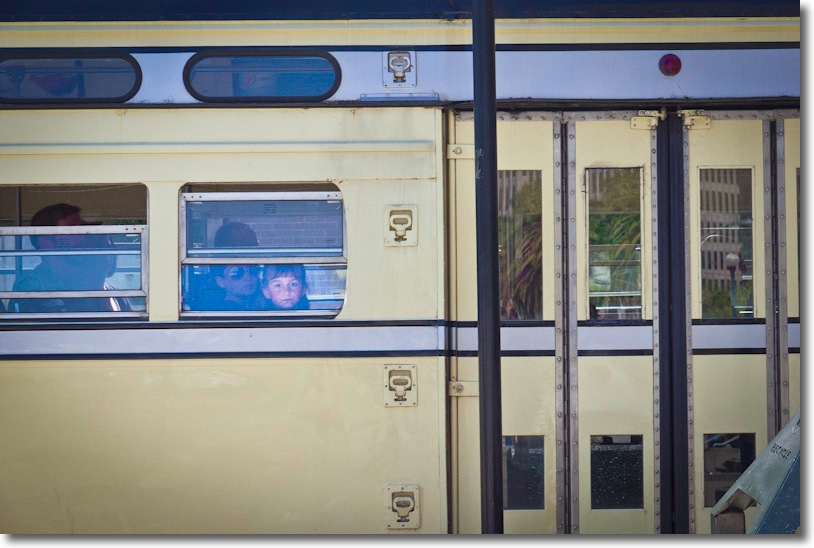
A beautiful child. A moment in time.
Years later.
I have been photographing it for years. Always there. Always on the horizon.
But, sometimes, you have to get really close.
Snapped the other day, meandering through the Business District.
I subsequently made a large print of this for the wall and the cavernous blacks produced by the HP DesignJet 90 dye printer are simply to die (!) for. What a piece of hardware that is.