Not much to choose between them.
For an index of all my Film related articles, click here.
The Sharpprints lab does an excellent job of processing Ektar 100 film and providing high quality scans (at a small premium over regular ones). The scans are clean and there is no evidence of dust or scratches, and the colors are true.
For my first roll of Ektar 100 from the Leica M3 I asked the lab to also return the uncut film by mail so that I could determine whether scans made with the Nikon D800 would be better than the high quality scans from their costly Noritsu scanner. The Nikon scans, like those from the Noritsu scanner, come in at around 30mb using 12-bit lossless compressed RAW files from the Nikon.
I use the Negative Lab Pro plugin for Lightroom Classic to remove the orange mask, reverse the negative image to positive and to adjust color, brightness, etc. After first cropping to remove unwanted margins I select the whole roll of negative orange-masked scans and use the whole roll option to analyze the whole roll and convert it in one fell swoop. After tailoring this sophisticated plugin to deliver proper colors from Ektar 100 I get good results. The plugin is rich in options and repays study of the related documentation.
It should be pointed out that the D800 scans produced using this technique are very good indeed. I had previously scanned over 2,200 black and white film images and they easily make 18″x24″ prints from 50 year old Kodak TriX originals, sharp as a tack and superior to scans from dedicated Nikon and Canon (not flatbed) film scanners. As for flatbed scanners, forget it. They deliver very poor quality very slowly.
So with my technique well established and solid, how do the D800 scans compare with those made by the Noritsu scanner? The answer is that at 100% pixel peeping it is very hard to see much difference. Resolution of the image is comparable, maybe marginally higher with the Nikon, and that’s for images taken at f/8 using the 35mm Leitz Summaron which is its sweet spot, easily comparable to the costliest and latest lenses made today. (The Summaron is now some 70 years old!). On the other hand, fine tuning colors to get them just right is a time consuming chore for the D800 scans where the Noritsu ones look pretty much perfect in the downloaded images. (Sharpprints uploads the scans to Dropbox for customer download).
Here’s a colors and vibrance comparison:
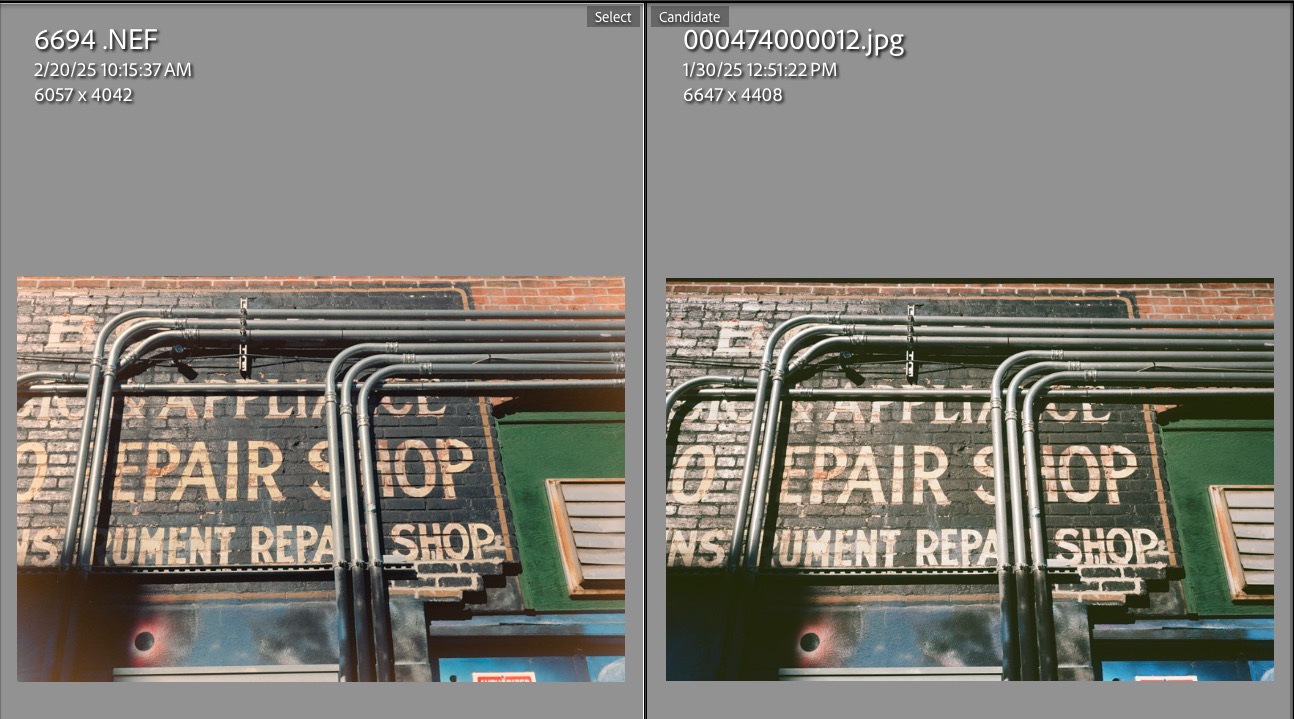
Colors and vibrance comparison.
Nikon at left.
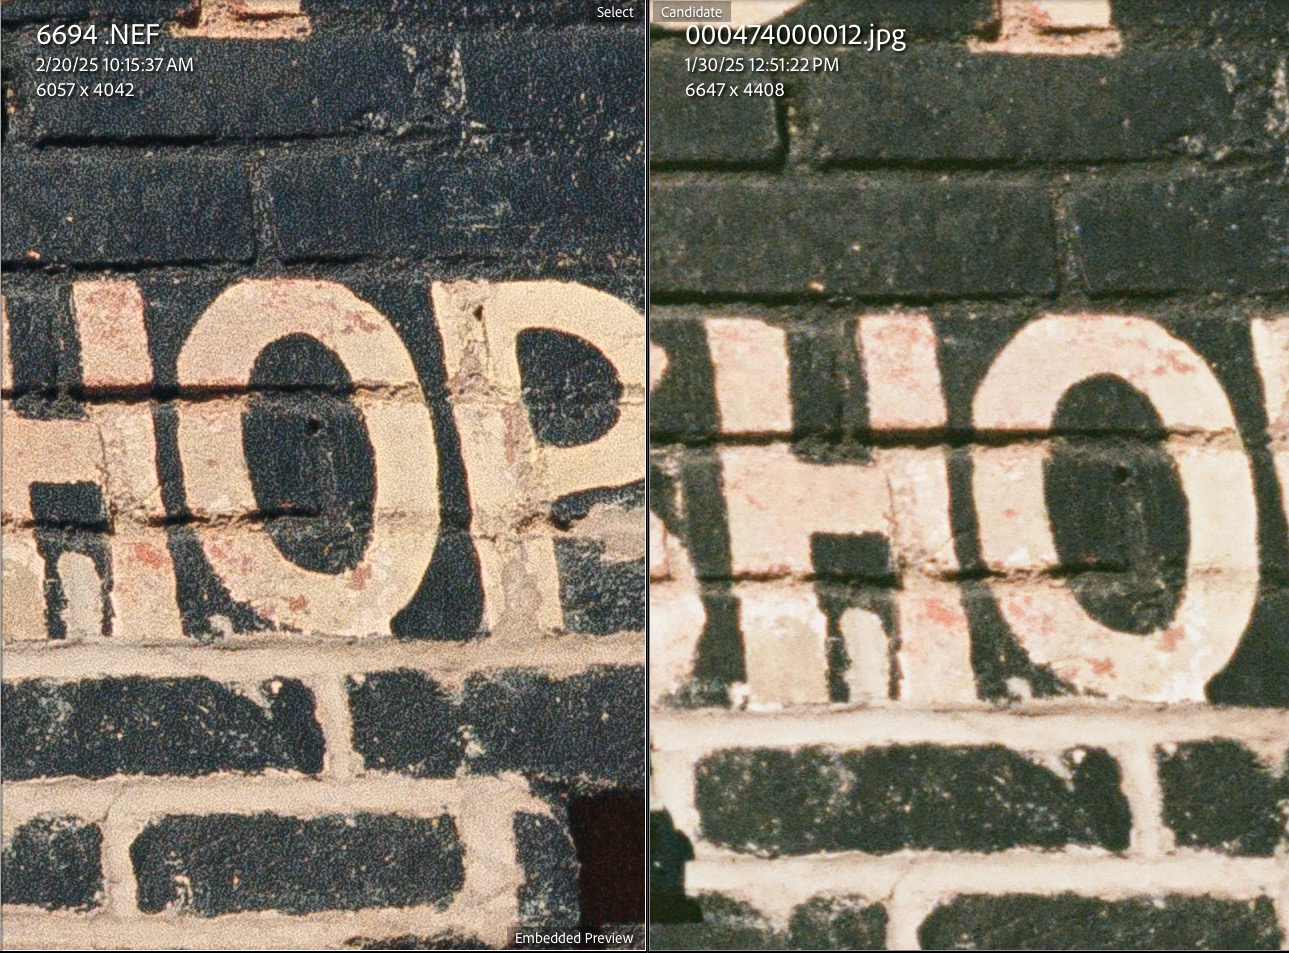
Resolution comparison at 100%.
Nikon at left.
Clearly the Nikon scan’s resolution is superior but not only does it take quite some time to get there, the above is from a 100% zoom in LRc which would yield a 72″ x 48″ monster print. It’s unlikely you will be making prints that large ….
Here’s a more colorful scene – as you can see the colors are largely identical though the Nikon scan needed quite some time in post to get there:
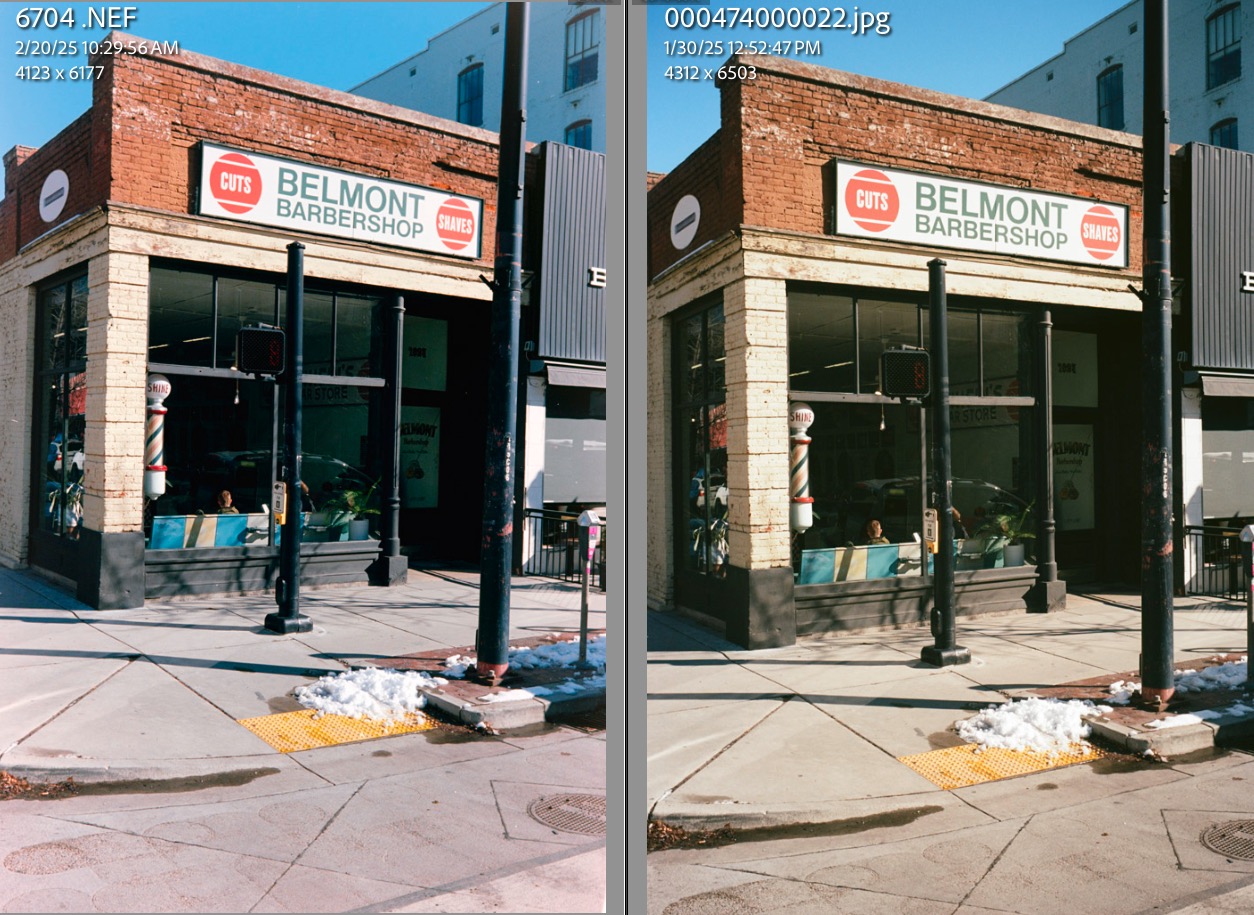
Another color comparison.
Nikon at left.
So my conclusion is that doing your own scanning, even with a high quality sensor and lens (I used the Nikon AF-S 60mm Micro Nikkor, with autofocus) is simply not worth it. It takes 11 days to get the processed film back, compared with 4 days for the scans to become available in Dropbox. You have to carefully cut the film into strips of six images to fit in the film holder for scanning – a tedious process in itself, though the lab helps by encasing the roll in a long, clear glassine protector which can be removed after cutting. You need to go through the process of using the camera to scan the negatives (which is very fast) and then crop, convert and color tune the files (which is anything but). Sharpprints charges $24 a roll for processing and HQ scans, or $25 a roll for process only and return of the uncut negatives.
Now that I have satisfactorily scanned my archive of old black and white images and convinced myself that scanning color negatives is a waste of time, my Nikon Micro-Nikkor lens is going to eBay for sale, along with the film scanning attachment from JJC which has served me so well.