Category Archives: Canon 5D

Canon’s landmark full frame camera

Stamp out sensor dust

Apple’s Aperture has a unique tool for the job

It’s no secret that image sensors in digital cameras with removeable lenses are prone to atrract dust. The Canon EOS 5D I use seems to be especially bad in this regard from what I have read on the various chat boards. While I give my sensor a swipe with the anti-static brush now and then, the reality is that sensor dust does crop up and can be a real problem if many snaps are exposed with the dust mote in place on the sensor.

The one positive about all of this is that Apple’s Aperture has a tool to remove such dust spots, as the designers recognized that any particular speck of sensor dust will have the exact same position on the resulting photographs from image to image. The dust mote does not move even if the camera does.

Apple’s Aperture provides a tool, unique as far as I can tell, which permits rapid removal of sensor dust from mutiple images. So if you have just taken two hundred pictures only to find an offending dust spot in each, at the same location, the Aperture Lift and Stamp tool is for you.

Here’s how it works. In this picture you can see the Spot and Patch tools cross-haired locator at the top of the image, where the offending dust spot makes its home:
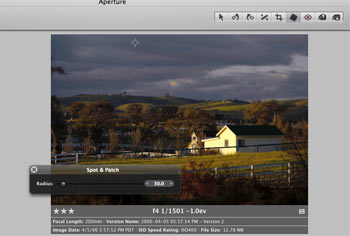
Hit enter and the circle becomes yellow, effecting removal of the spot on the selected image:
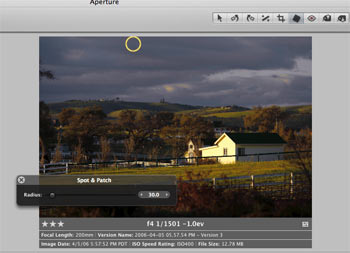
Unlike with Photoshop, there is no need to select a source for the patch – Aperture does it automatically based on the area sorrounding the defect.

Now click on the Lift part of the Lift and Stamp tool icons visible at the top of the screen – it’s the one with the arrow pointing up.
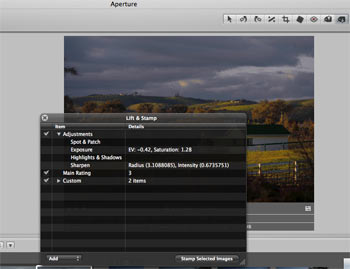
The type is small here, but the original discloses that I have made four adjustments – Spot & Patch, Exposure, Highlights & Shadows and Sharpening.

Now highlight all the images with a like dust defect (Shift-Click for contiguous ones or Control-Click for non-adjacent ones), click the Stamp icon of the Lift and Stamp tool (the one with the arrow pointing down) and click on any one of the selected images.
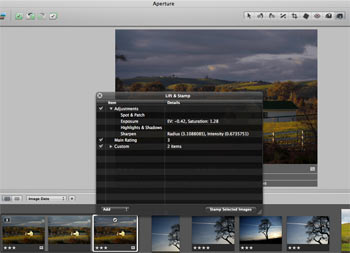
The dust mote is removed in all of them. In my case, as I have also made Exposure, Highlight & Shadow and Sharpening adjustments, these would also be conferred on all these images. So if the images are different, do the Spot & Patch and Lift & Stamp work first, then selectively change other parameters in images as you please. The images selected for dust removal can be versions of one image, disparate images, or both.

Don’t forget to clean the camera’s sensor after doing this!

See what I mean about good design? Care to find this feature in Photoshop? I think not.
A simple precaution

Protection for that exposed LCD screen on the Canon EOS 5D

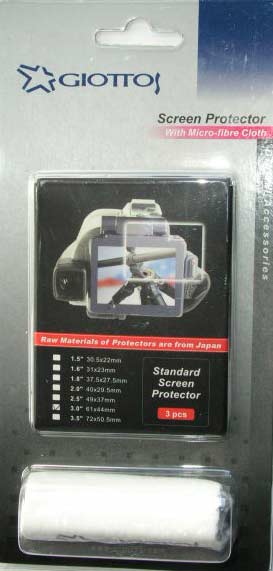
For a few dollars from the good people at B&H I picked up a packet of three sheets of matte surfaced stick-on plastic screen protectors for the exposed rear LCD screen of the Canon EOS 5D – click on the topical index to learn more about this camera.

I couldn’t get quite the right size so I purchased the 3″ one and shaved 9/64″ off the long side and it fits fine. The packet comes with a nice cloth to make sure you have removed all grease from the screen before applying the plastic sheet and also includes a small hard plastic blade to smooth the film once in place. This spreads even pressure better than your finger can.

A side benefit, apart from the protection against scratches, is that the matte surface does a far better job of supressing reflections than the smooth surface of the original.

New EOS 5D firmware

It pays to stay current

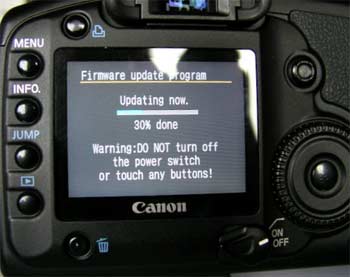
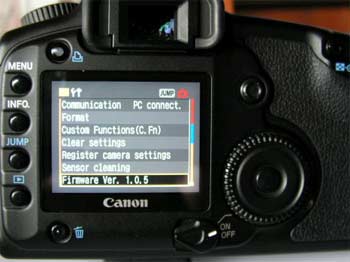
Canon has released Firmware update 1.0.5 for the EOS 5D.

Here’s mine loading and the result:


This fixes a problem with color pictures taken with the Standard Picture Style with +4 Color Density setting (the pictures would lose saturation on the sRGB setting and appear monochrome) and with the 85mm f/1.2L lens when used with the Canon 580EX flash where the shutter button would not work.

It’s nice to stay current.

Canon’s EOS Capture

Instant digital gratification?

I messed about some more with the software Canon provides with its 5D camera, Digital Photo Professional (DPP). You know the application with all those comedic spelling errors.

Well, I found more spelling errors, true, but I got to wondering about the little USB cable Canon provides with the camera that plugs into a receptacle under that silly flap on the side.

After installing DPP on my iBook, I plugged the camera in and switched the ‘Communications’ option on the Tools menu on the LCD from ‘Print/PTP’ (the default) to ‘PC Connect’. That really should read ‘iMac Connect’ but I’ll let it go. With the camera switched on, go to DPP->Tools->Start EOS Capture on the iBook and you are ready.

Take a snap in RAW format and, hey presto!, the picture appears on the iBook’s screen. It works as well in Jpg mode. You see the snap on a full screen where you can actually gauge sharpness, focus, exposure and so on, as opposed to the small LCD screen on the back of the camera where you mostly see your nose in the reflection.

For a studio photographer, whether taking product pictures or using live models, this strikes me as the bee’s knees in functionality. The pictures are automatically transferred from the camera’s card to the computer while all this is going on. Thus a smart pro could have his studio assistant view the screen shots and provide instant feedback allowing corrections to be made. After all, said assistant no longer has anything else to do as he’s not loading film any more. And you thought Polaroid invented instant gratification?

With the camera set to the lowest quality Jpg setting, a sharp picture pops on the screen in 3 seconds; with RAW it pops up blurred in 5 seconds and takes another 10 seconds to sharpen. There’s quite a bit of processinbg going on in this case and, let’s face it, my iBook’s 1.42 gHz processor isn’t the fastest on the planet. The timing with RAW + low quality Jpg is similar.

A separate panel on the iBook’s screen also appears allowing you to set many of the cameras settings using the keyboard, such as aperture, shutter, ISO, image quality. Most intriguingly, you can also enable a timer automating shots with stated intervals. Maybe astronomers will like this sort of thing?

The cable provided is ridiculously short – some eighteen inches – as to be unusable, but that’s nothing an extension cable cannot fix.

Postscript: I tried this set-up with a 15 foot long USB extension cable using my iMac G5 which has a 2 gHz Power PC processor, 2 gB of memory and very fast video processing. A sharp RAW image is displayed in 5 seconds, highest quality Jpg takes 3 seconds and lowest quality Jpg is around 1.5 seconds. These times suggest this would be an extremely capable studio installation as, by the time you have set the camera down to look at the monitor, the image will be there.

After the Purge

Equipment then and now.

I took a few moments to take stock of how my equipment has changed over the past quarter as a result of the move to full frame digital.

Before:
3 Leicas (IIIG, M2, M3)
1 Leicaflex SL for long lenses
1 Bessa T for the 21mm Elmarit
21, 35, 50 (3), 90 (2) and 135mm Leica M lenses
200 and 400mm Leica Telyt lenses
Rollei 3.5F
Rollei 6003
40, 80, 150 and 350mm Rollei lenses
Rollei extension tubes
Mamiya 6MF when I didn’t want to drag the Rollei about
50, 75 and 150mm Mamiya lenses
Crown Graphic 4” x 5” with 90, 150 and 210mm lenses
Canon 4000 35mm scanner
Nikon 8000 medium format scanner
Epson 2450 large format scanner
HP DJ90 large format printer

After:
Canon EOS5D
24-105mm Canon lens
1 Leica M3
35, 50 and 90mm Leica M lenses
200 and 400mm Leica Telyt lenses adapted to the Canon
Crown Graphic 4” x 5” with 90, 150 and 210mm lenses
Epson 2450 large format scanner
HP DJ90 large format printer

Quite a reduction in clutter! The original goal, recall, was to get medium format quality without the bulk and complexity. The 5D came though with flying colors on that front, equalling or exceeding medium format quality at 30” print sizes, while making pictures possible that would never have been taken on film, thanks to Image Stabilization and a sensor which renders grain free ISO 400 images.

Now I’m keeping the Leica M3. Not rational, I know, but it has been a dear friend for more than thirty years and we are not ready to part company. Yet. However, it seems appropriate to focus on the need for the 4” x 5” gear. If you can actually expose the film in this beast, large sharp prints are trivial, owing to the enormous size of the negative.

So I compared 30” prints from both and, interestingly, there was little to choose. It seems easier to get a broad dynamic range from negative film than from digital, the latter needing more attention to exposure. Like using slide film. My large format Kodak VC160 negatives are scanned at 2400 dpi on a well tuned Epson 2450 flat bed scanner, using Silverfast Ai software. Doubtless drum scans would be even better but after waiting for two weeks for the film to be processed, I’m not about to wait two more for the scans.

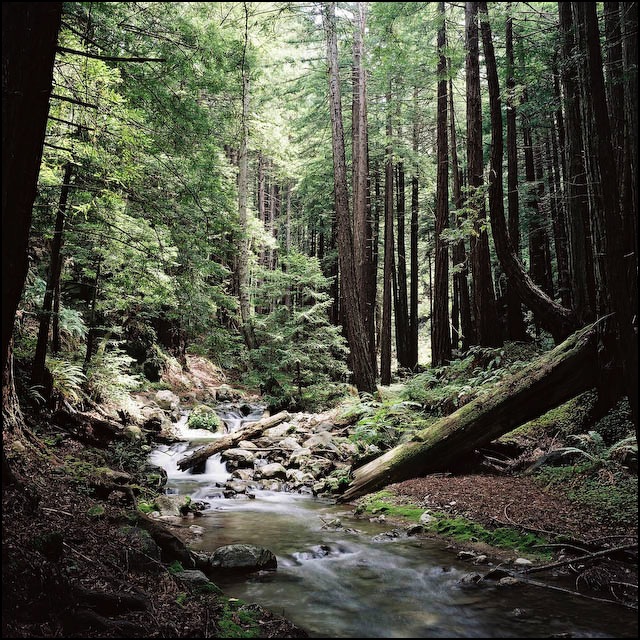
For what are very similar scenes, the technical details could hardly be more different. Here’s the 4” x 5” picture:

This was taken using a 210mm Rodenstock Sironar lens, probably 4-8 seconds at f/22. A massive Linhof tripod was used for stability. That lens is similar to a 75mm on 35mm. Setup time to take the picture was some five minutes. Processing was by Calypso Labs in California – an outfit that literally needs to clean up its act, judging from the amount of dust on the negative. The scan on the Epson took approximately 20 minutes. The file is 250 mB (!). Unsharp masking in Photoshop was 45/1/0 – in other words not a lot.

Now compare this with the Canon EOS 5D snap taken a week later.

Here I can disclose the technical details with certainty – they are part and parcel of the file. The shutter speed was 1/15th with the camera hand held on a monopod. ISO was set to 400 to allow a faster shutter speed. That’s a nice attribute of the Canon – ISO is used to control shutter speed. Up to ISO 800 grain is simply not an issue. The lens was fully opened at f/4 at a focal length of 40mm. Setup time was maybe 10 seconds. So the lighting was identical – 1/15 @ f/4 @ ISO 400 is nearly the same as 4 seconds @f/22 @ ISO 160. The original most certainly did not need any dust retouched, and I did not have to wait weeks for the negative to come back. The file size is 73 mB. USM in Photoshop was 250/3.2/0 – much more than with film and reflecting Canon’s own recommendation that the user starts at 300/0.3/0 to overcome the softening effect of the anti-aliasing filter in the camera.

So as a landscape camera the 5D excels. Meanwhile the Crown Graphic is on probation. There will be rare occasions where something larger than 30” x 40” may be called for (I cannot immediately recall ever having made a larger print) in which case a drum scan and a professional printing house would be required, with goodness knows how long a lead time. That is, of course, if color film in this size is still made when the need arises.