Doubling data storage.
For an index of all my Mac Pro articles, click here.
Preparatory work:
In an earlier article I illustrated how to install an Apricorn PCIe card which accepted a SATA III 250GB SSD to hold the OS, apps and the Lightroom catalog. The two existing 120GB SSDs were striped using RAID 0, and became the backup for the new 250GB SSD. Drive speeds and capacities doubled after this enhancement.
SATA III Hard Disk Drive:
A like approach applies to installing a larger data hard disk drive. The Apricorn card has one additional SATA III socket, permitting attachment of a large HDD, which has to be powered separately. My two data HDDs, each 1TB in capacity, are filling up, being 70% full. Spinning disk drives write data first to the periphery of the disk platters, gradually filling up toward the spindle. As rotational velocity drops as the spindle area is approached, data retrieval progressively slows as the disk fills up. So, at 70% full, I reckoned that it was time to do the same with the HDDs as I did earlier with the SSDs.
Thus I bought a Western Digital Red ‘server class’ SATA III 2TB HDD to serve as the primary data repository, with the two SATA II 1TB WD drives striped into one backup drive using Disk Utility and thus enjoying a doubling in backup speed. For details how to convert drives to RAID 0, refer to the earlier article.

The premium for these allegedly more robust drives over the standard Green and Black versions is a few dollars. Mine cost $105 plus tax. The warranty is three years, by which time these will have halved in price. Are these really more robust than plain vanilla drives? I have seen no data to prove it, but for a few dollars extra I’m not losing sleep over the hype. The estimable Tom’s Hardware site finds the Red to be a middling I/O performer but outstandingly cool and quiet, with low power consumption. That’s a trade-off I will take any day.
Power and data for the HDD:
I had earlier installed a powered USB3 card, with power sourced from the optical disk drive area – click here for details. Thus, to power the new HDD all that was required was to split the power feed to the USB3 card using a Molex 1-to-2 Y cable, then a Molex to SATA power cable to energize the drive.
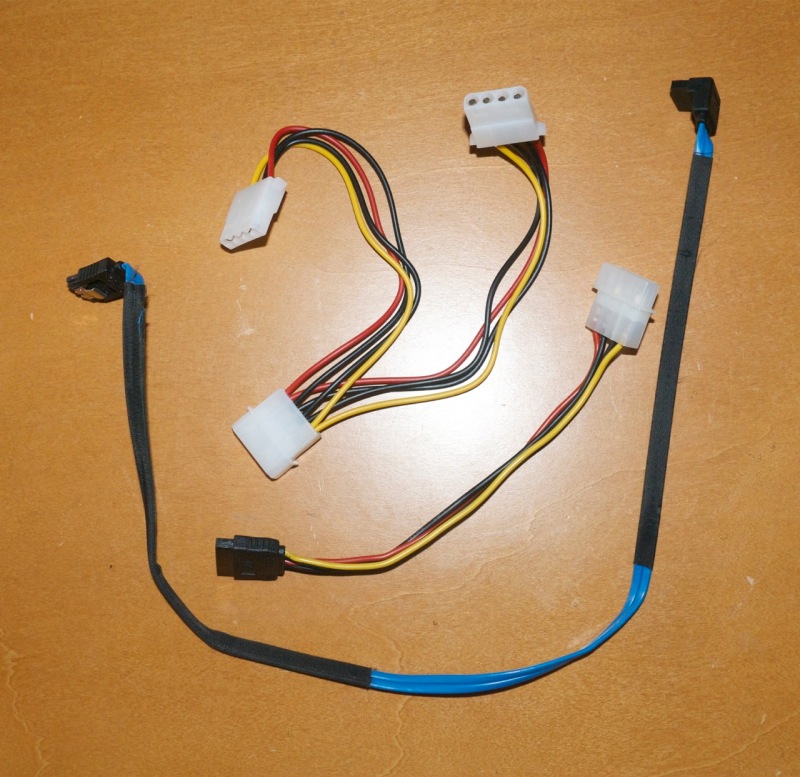
Cables – Molex splitter top, SATA power middle, SATA data bottom.
If you do not already have a powered USB3 card installed then power can be run directly from the spare unused connector in the optical drive area, the cable routed as I show in the USB3 article. The data connection is simply made with a SATA data cable connecting the spare port in the rear of the Apricorn SSD PCIe card with the data connector on the new HDD. The cable outlay is under $10.
Power use and supply limits:
Are the power supply limits of the PCIe slots being exceeded? No. The four slots can draw a maximum of 225 watts through the slots and an additional 2 x 37.5 watts from the two backplane connectors intended to power GPU cards. Here are the maximum PCIe power consumption data for my configuration:
- nVidia GTX660 graphics card – 140 watts (37.5 from the backplane board, 102.5 from the PCIe slot).
- Orico USB3 card – probably 10 watts
- Apricorn PCIe card with 250GB SSD – 4 watts
- WD Red 2TB HDD – 10 watts
So that’s a total power draw of 127 watts out of 225 watts available through the PCIe slots. That’s very conservative at 56% of capacity.
What is of greater concern is the use of top end GPU cards like the nVidia GTX780 and ATI/AMD HD 7950 and HD 7990.
- GTX780 – 250 watts – 75 from the backplane board, 175 from PCIe – OVERLOAD!
- HD 7950 – 200 watts – 75 from the backplane board, 125 from PCIe
- HD 7990 – 375 watts – 75 from the backplane board, 300 from PCIe – OVERLOAD!
Meaning that if you use one or two of these cards and drive them hard (why else buy them?), you must use an auxiliary power supply, which can be located in the DVD drive cage.
However, if you accept that a card of the calibre of the GTX660 is as much as you will ever need for still image processing (it is), then power consumption is not a concern.
Placement of the HDD:
The final issue is where to store the new HDD, as all my regular SATA II ports are taken. One option is to store the HDD in the optical drive area, but that area is poorly cooled and not the best choice.
I opted to attach the HDD to the top of the PCIe fan case using Velcro. In this location the power and data cables are easily connected and there is ample cooling. Velcro makes removal of the HDD easy. Rather than attach the Velcro directly to the HDD – heat and Velcro adhesive do not make for long term stability – I attached the HDD to the spare disk drive sled which became available when I replaced one of the 3.5″ HDDs with a 2.5″ SDD. I used the OWC sled to attach the SSD instead.
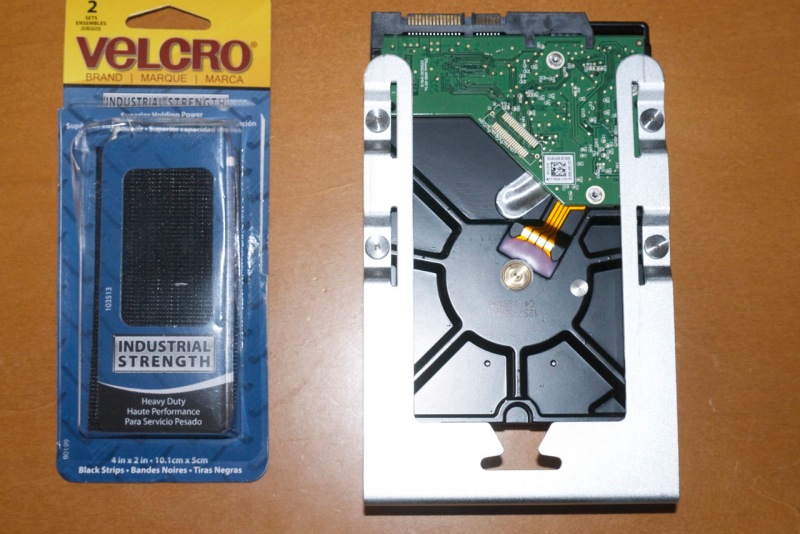
WD Red 2TB SATA III HDD installed in a stock Mac Pro drive sled.
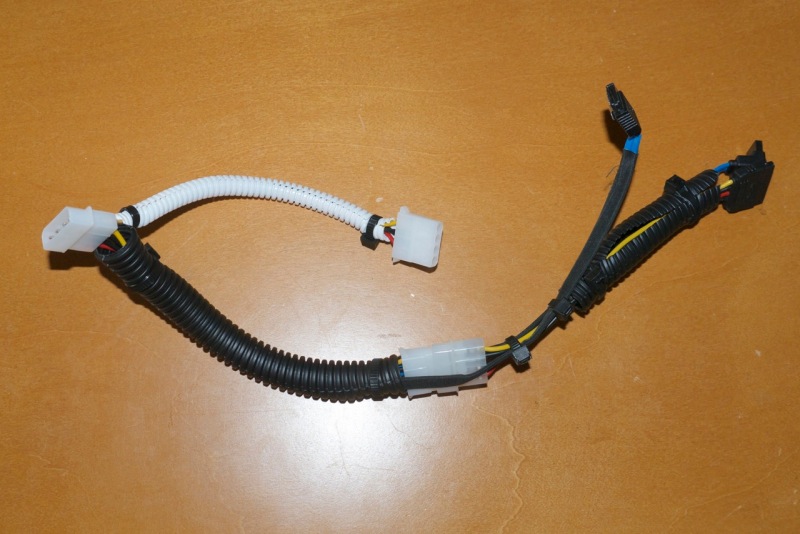
Cables neatly arranged with cable covers and tied into a harness.
The stock HDD sled is a perfect fit between the processor cage and the existing HDDs in their regular locations. I used industrial grade Velcro whose adhesive and hook-and-look surfaces make for very strong bonds and made sure to clean the mounting surfaces with a swipe of isopropyl alcohol to remove dirt and grease before attaching the Velcro.

Velcro in place on top of the PCIe fan housing.
Take double care with those ghastly Molex connectors. It’s common for a pin or socket to come loose and recede as the two are mated, making for a bad connection. Ask me how I know. If you find you have two in-line Molex male-female connectors, as here, I advocate cutting them off and crimping the wires using a crimping tool and crimp connectors. Superior in every way.
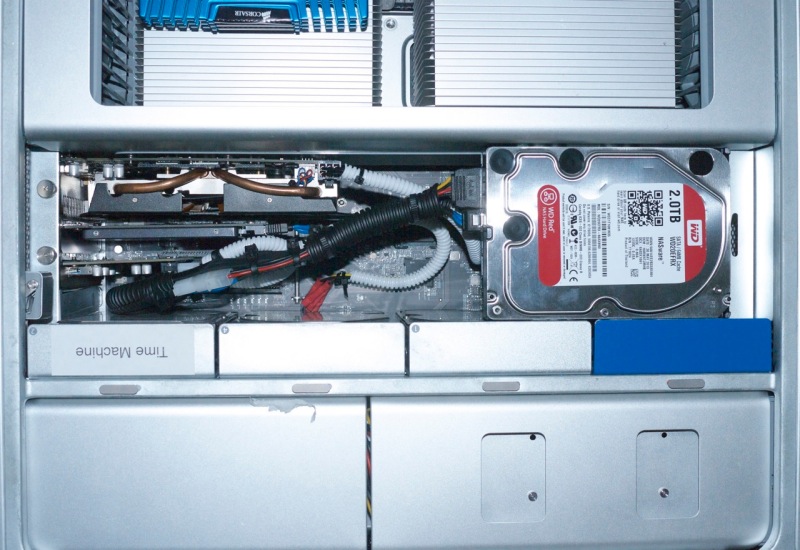
The installation completed.
Thereafter it’s a simple issue of moving data over, using Carbon Copy Cloner, from the existing 1TB data HDD to the new 2TB drive, and then using Disk Utility to make the two original 1TB drives into one 2TB RAID 0 drive, setting the latter up as the backup drive in CCC and cloning all data back from the new 2TB HDD to the RAID 0 2 x 1TB pair of HDDs. As usual, I am careful to recreate the daily scheduled CCC back up task from Data HDD to Data HDD Bak, as use of UUIDs for these disk dictates that step.
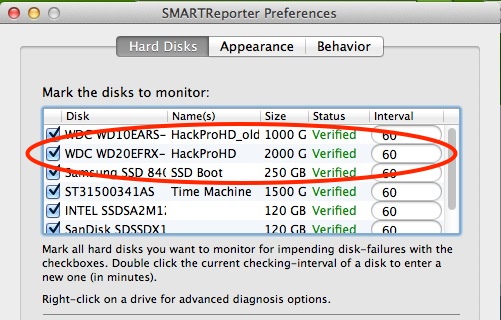
The new SATAIII HDD is correctly reported by the SMART disk utility.
Additional storage:
Need yet more storage? You can convert to 4TB HDDs. All that’s called for is money. They run around $200. Further, Seagate just announced a new storage technology known as Shingled Magnetic Recording which allows yet more data to be crammed into existing platters, starting at 5TB. You can bet we will see 8 or even 10TB per drive before long. Astounding! Rumors of the spinning HDD’s death are greatly exaggerated and brilliant electronics engineers are doing some very innovative work here.
The bottom line is that the Mac Pro owner wishing to have a minimum of external clutter and cabling can easily run internal storage up to 20TB at present, and much more down the road. That should keep most users happy, unless they work for the NSA. If yet more is needed, use external USB3 cases loaded with as many HDDs as you need, but for my more modest storage needs having everything inside the Mac Pro’s case is perfection. A CrashPlan cloud backup covers for earthquakes and fires at the Mac Pro’s location.
Measurements:
I illustrate drive Read and Write speeds below for the original 1TB SATA II HDD, the new SATA III WD 2TB Red and the two original 1TB HDDs striped into one HDD (as seen by Finder) using RAID 0.
A) Original 1TB 7200rpm HDD running at SATA II speed:

Original 1TB 7200rpm HDD running at SATA II speed.
B) New 2TB WD Red 5400-7200 variable rpm running at SATA III speed:
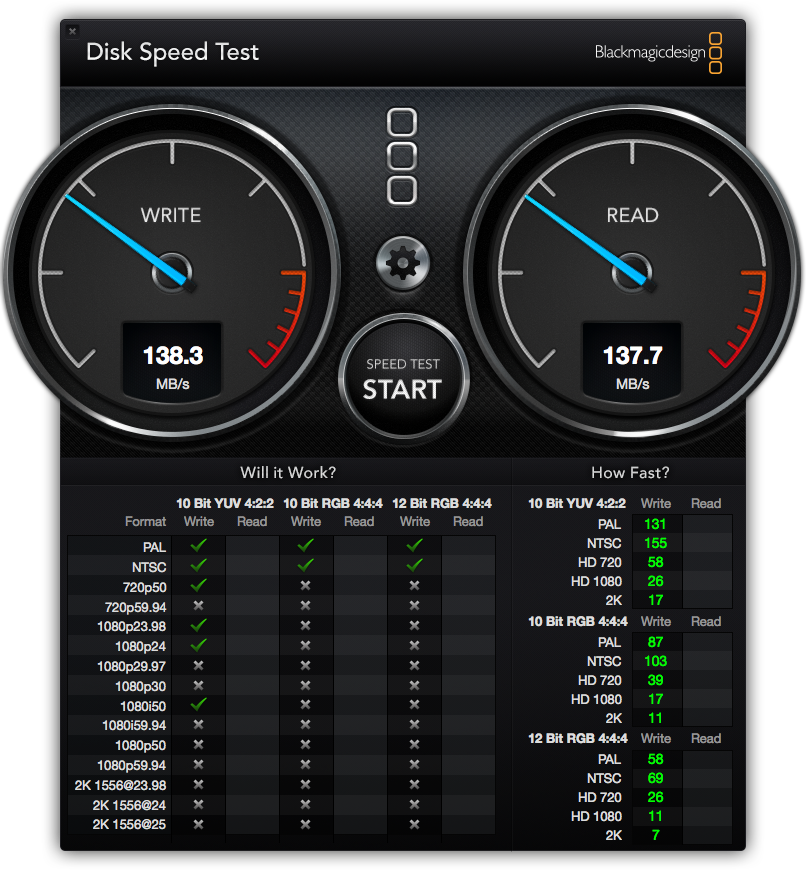
2TB WD Red 7200 rpm running at SATA III speed.
c) Original paired 2 x 1TB SATA II HDDs striped as one 2TB HDD in RAID 0 (WD Green 7200rpm) – outstanding performance with speeds tripled:

Paired 2 x 1TB SATA II HDDs striped as one 2TB HDD in RAID 0.
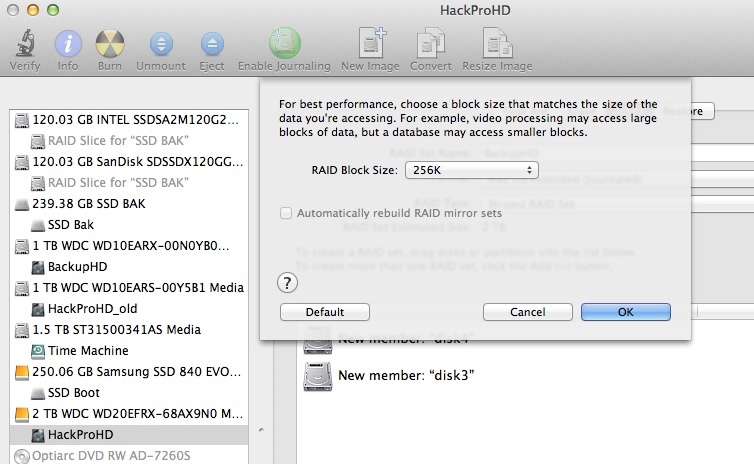
I opted for larger 256K block sizes when striping the two older 1TB drives, as most of the activity is writing large photo files:
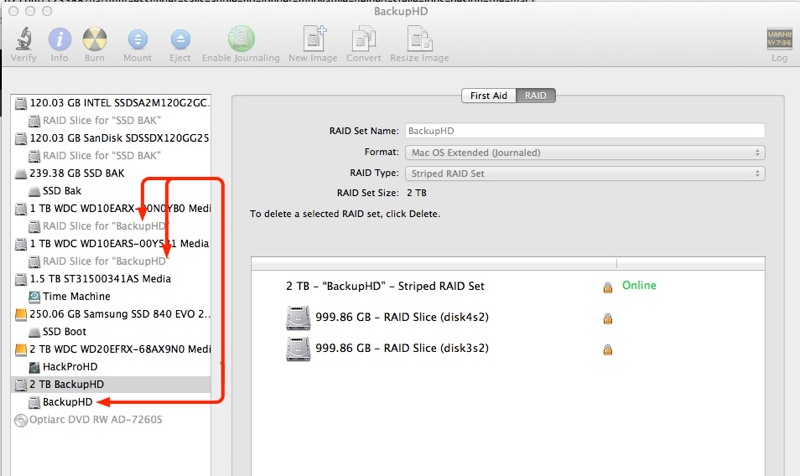
Here is Disk Utility after creating the new 2TB striped set:
Sound levels:
Addition of the WD 2TB Red drive makes no change to noise measured at ear level, two feet distant from the Mac Pro on the floor. This remains at 42-43dB – a low level susurrus of white noise.
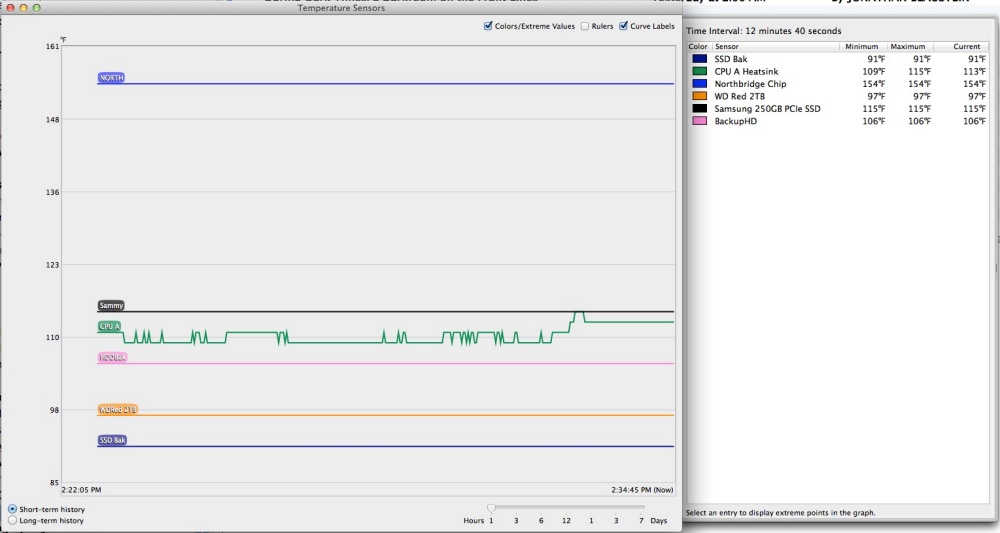
Temperatures:
As you can see, the 2TB Western Digital Red SATAIII HDD runs very cool – it’s the orange trace, below. This temperature chart was run during the clone of the newly populated Red (‘WDRed2TB’) back to the newly created 2 x 1TB Raid 0 striped HDD pair (‘BackupHD’) – the pink trace. The Samsung 250GB PCIe SSD (‘Sammy’ – brown trace) runs warm, likely owing to its proximity to the Zotac nVidia GTX660 graphics card, which runs hot. The Northbridge chip – blue trace – runs warm by design, and remains 70F below its operating limit.
Spot the drives:
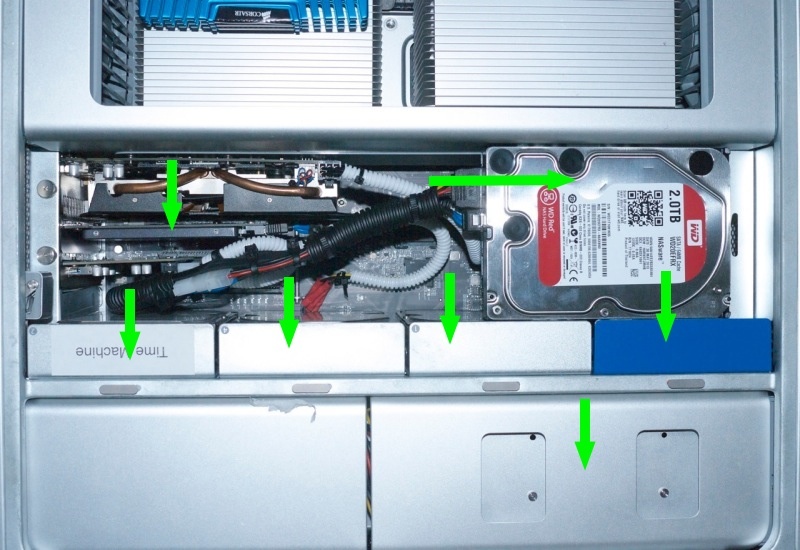
Green arrows designate drive locations.
The seventh is an SSD hidden in the optical drive cage, lower right.
Here is the drive topology and back-up design:
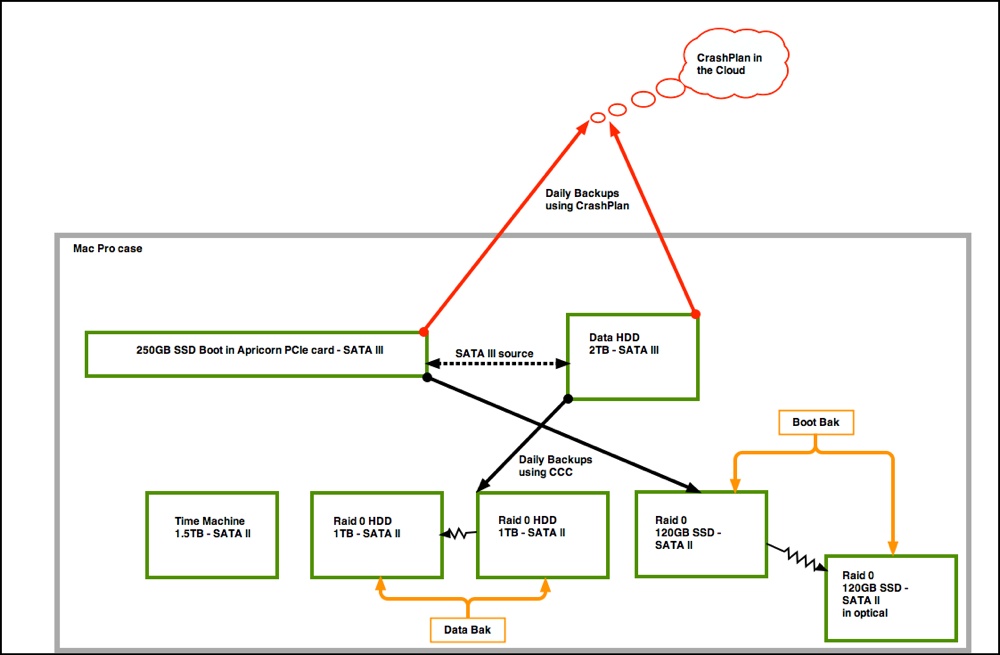
Drives in the Mac Pro’s case and in the Cloud.

All drives are inside the case.
Replacing trashed grommets:
The soft rubber grey grommets in the Mac Pro’s drive sleds both help retain the drive screws and confer a modest level of vibration damping. They rot and disintegrate with age. You can buy replacements here – the cost is for a pack of four:
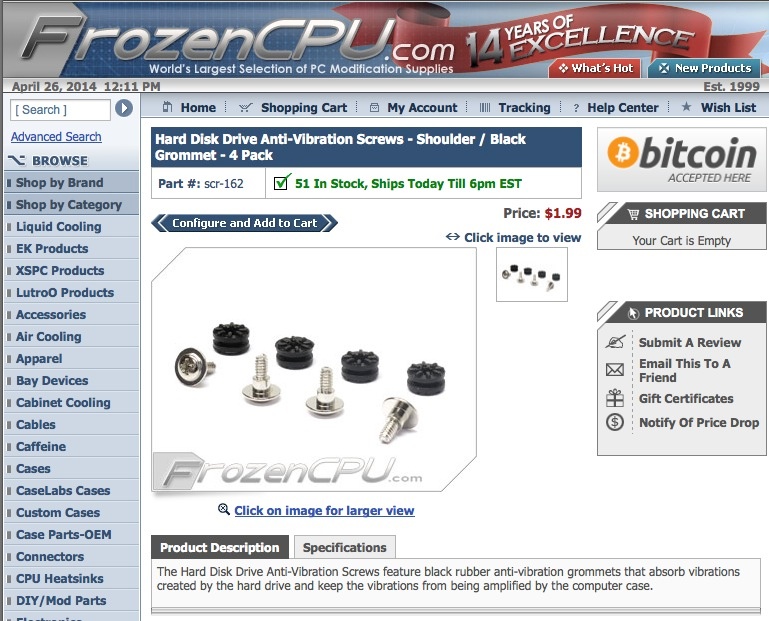
Replacement rubber disk drive grommets. Click the image to go to the site.