A tweak in Photoshop CS2
I’m finding the definition of the Canon 24-105mm IS L lens to be equal to anything on medium format or from Leica on 35mm. What is not so good, however, is that at 24mm you get noticeable barrel distortion (the sides bow outwards) and darkening in the corners.
Sometimes these aberrations do not matter but if you have strong horizontals or verticals or large smooth tone areas, they can be irritating to put it mildly.
I had thought that the only way to correct these was to take RAW images and make the adjustments in the very nice Adobe Camera Raw (ACR) interface. As I have written earlier, proper exposure technique results in little added benefit with the EOS 5D’s full frame sensor using RAW compared with JPG Fine, at least for this user. Plus I’m getting comfortable with the in-camera processing of JPGs offered through the Picture Styles option. JPGs have the great benefit that file duplication is avoided and, of course, file sizes are smaller meaning import to your computer and loading in image processing software are both much faster.
Stated differently, I’m of the growing opinion that RAW is overrated. I do not see better definition or tonal range in any large prints I care to make. I have no need for an unprocessed original. Once I have processed it I like it as it is and cannot see changing it again. And the thought of having to catalog two images of each picture is complexity in search of confusion.
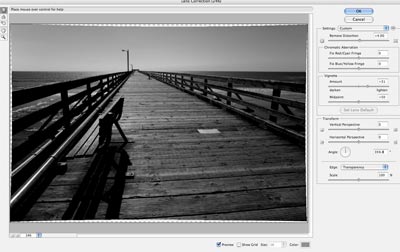
Well, looking through the myriad menus of Photoshop CS2 the other day, I chanced upon Filter->Distort->Lens Correction which offers the same ability to correct lens aberrations in JPGs as ACR does in RAW.
Here’s how it looks corrected on a screen shot:

Both barrel distrortion and vignetting are quickly corrected.
I’ll experiment some more with RAW but JPG Fine is just, well, fine for me.