Firmware upgrade and other housekeeping
To read the whole series on the Panasonic G1, click here
Panasonic’s G1 has the ability to upgrade both camera and lens firmware (built in software) separately. To date only firmware upgrades have been issued and can be found here. I dutifully downloaded v1.3, copied it to a freshly formatted SD card, inserted a fully charged battery in the camera, switched on and pressed Play (the button in the circle of the arrow quadrant) . The upgrade took all of 2 minutes.
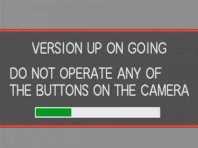
English as she is wrote – firmware upgrade in progress
Once installed I went into the Setup menu and adjusted the viewfinder display to maximum brightness (vertical arrow) and the contrast to the contrasty end of the slider (right arrow). Then a touch of the Display button on the rear switched the adjuster to color – a new function conferred by firmware v1.3. The default neutral setting was slightly bluish. I moved the slider all but one click to the left – warmer. This emulates the slightly warm look I so liked in the M2’s range/viewfinder – mine was a 1961 model. (The M3 – mine was a 1960 model – was, by contrast, slightly too blue for my taste). The blown out look referred to in Part IV is still there on very bright highlights but substantially mitigated. I can live with it.
Manual Focus: In Firmware v1.0 (as shipped) switching the top left dial to manual focus and turning the focus collar on the lens would switch to a magnified image making focusing very easy using the EVF. However, after 10 seconds, the camera would switch back to full screen view. In v1.3 I can confirm that the magnified view no longer switches off, only reverting to full screen when the shutter release button is touched. That’s as it should be and Panasonic should be commended for the change.
Matrix focus: Ugh! The 23 area focus computer displays multiple green rectangles purportedly reporting what it has focused on and I see no way of switching those off. Plus, how the heck does it know what I want to focus on? So I switched to the center rectangle for focusing and now only see one green rectangle. This can be placed over the critical area for focus and a first pressure maintained on the shutter release pending recomposition and exposure.
Autofocus and Autoexposure lock: As with my 5D, I like the AF/AE lock button on the rear to lock exposure only; a first ‘press and hold’ on the shutter release serves to lock focus on off center subjects. This requires two adjustments in the Custom Menu. First you have to switch the software to tell the AF/AE button to lock exposure (AE) only. Then, one step down in the same menu you have to enable AF/AE Lock – meaning that you do not have to maintain pressure on the AF/AE button to keep the exposure locked. AE lock is, I find, very useful with digital sensors which are prone to blow out highlights. A second pressure on the AF/AE button toggles the AE function on and off. Nice.
Auto exposure: For now I am sticking with multi-metering, rather than center weighted or spot, as it seems to work pretty well.
The Q.Menu button: Given the vast number of menus and the time it takes to get through them – they largely defeat my addled memory – I have tried to make things as menu-independent as possible. Still, there are times you want to change, say, the aspect ratio or ISO – and Panasonic has been awfully clever here. Once again, bear in mind that I really dislike LED screens and prefer not to use mine, opting for the EVF. Well, if you press the Q.Menu (Quick Menu) button on top, you can scroll through the most common settings with the front-mounted scroll wheel. Press the wheel and scrolling further changes the variable you have chosen. First, by doing this in the EVF you can actually see what you are doing, regardless of the light. Second, the action is so quick and easy one can but applaud Panny for this thinking. It begins to occur to me that they actually had some photographers involved in the design stages. Indeed, someone at Panasonic has realized that humans prefer knobs, switches and buttons to pick-and-choose screen selections. Many of the most commonly accessed controls are on dials or switches. Even when a button has to be pressed, the next step invariably involves the front mounted wheel. Someone at Panny can spell ‘ergonomics‘. Those ‘reviewers’ who have criticized the design for the space wasted by the top left focusing mode knob (single, continuous or manual focus) just don’t get it.
Some more thoughts on the EVF: The Electronic Viewfinder is the crux of the G1 and points the way to future designs. As with LCD displays, this miniature ‘TV screen’ will only become cheaper and better, with yet faster refresh rates to remove the last vestiges of blurring as the camera is moved. As it stands, the continuous video output of the G1’s EVF can be routed to a display of your choice using the HDMI socket, meaning that the studio photographer will be able to preview composition, lighting and exposure and instantly review the resulting picture once taken. Imagine an inexpensive 32″ or 42″ LCD monitor in the studio as the ultimate feedforward and feedback device! The mind boggles at the possibilities, and I can’t wait to get my studio flash and big screen connected to try this. Aftermarket remote wireless strobe flash triggers, like the one I use on my 5D, are not yet listed on eFraud, but it’s only a matter of time. Wireless remote shutter releases are already being sold. So for now it will have to be a wired connection to the Novatron studio flash with the G1.
Thomas,
For highlight management, I suggest you consider a -1/3 to -2/3 exposure adjustment for quick shooting. In any case, a dynamic range test, using a textured white paper towel or equivalent, will give you what you need to make your own determination.
As you are discovering, the G1 is a breath of fresh air. Fortunately, image quality does not disappoint.
McD