Gorgeous, if tired.
Superb old architecture in Salinas, CA, sadly somewhat the worse for wear.
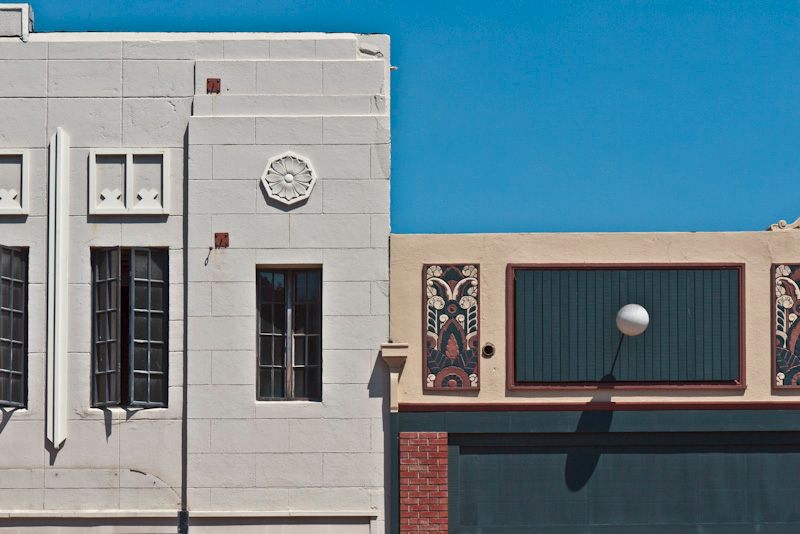
G1, kit lens @ 45mm, f/10, 1/640, ISO 100
For another variant on the Mondrian theme, seen in Carmel, click here.
Gorgeous, if tired.
Superb old architecture in Salinas, CA, sadly somewhat the worse for wear.

G1, kit lens @ 45mm, f/10, 1/640, ISO 100
For another variant on the Mondrian theme, seen in Carmel, click here.
Great price beats Photoshop.
Stupidly named, GIMP, or “The GNU Image Manipulation Program”, this Mac application does itself no justice with that dumb name. It’s a fine alternative to Photoshop for users who, like me, detest the user interface of that Adobe application and like the ridiculous price asked even less.
One of the reasons I still make do with Photoshop CS2 (an older version of the current CS4 which runs under the Rosetta PPC emulator in Snow Leopard) is that the upgrade price makes no sense for this photographer who gets most of the tools he needs in Lightroom and basically roundtrips to Photoshop from Lightroom to fix converging verticals and pincushion and barrel lens distortion. (Try Canon’s 24-105mm at 24mm to see real barrel distortion).
The problem is that Snow Leopard suffers from a huge problem in the Rosetta emulator, as widely reported on Apple’s Discussion Forum. Rosetta applications are prone to spontaneously reboot your Mac! This has happened to me on all three I run – Quicken 2005, Excel v.X and Photoshop CS2. It has never happened with any Universal/Intel applications. Maybe Apple will admit error and fix this. Who knows? More likely they will just tell users to upgrade to Universal versions of the affected applications (impossible with Quicken where none exists, by the way).
GIMP fixes all of that. It’s a Universal application so there are no Rosetta issues. Exporting to GIMP from Lightroom is merely a question of setting Lightroom’s Preferences->External Editing to use GIMP as the external image editor. Then hitting Photo->Edit In->Edit in GIMP in LR moves a TIFF copy of your image to GIMP for distortion or perspective correction. Correction is applied in Filters->Distorts->Lens Distortions (for lens distortions) or in Tools->Transform Tools->Perspective to fix leaning verticals. Unlike in CS2, there is no need to create a Background Layer when doing the latter – it’s much easier in GIMP. When you tell GIMP to save the processed picture it will save it right back into Lightroom alongside the original, in a stack. Just like CS2.
GIMP can only handle 8-bit files. I have experimented with it and compared output to the 16-bit ones from Photoshop and cannot tell the difference in 30″ x 40″ prints. You can read lots of technical articles explaining why 16-bit is better but not a one of those will be illustrated with the only thing that matters – real pictures. The Label Drinkers are at work again.
Here’s a ‘before’ and ‘after’ showing the use of perspective correction to get rid of extraneous detail on the right of the picture – I simply could not get into a better position from which to take this:
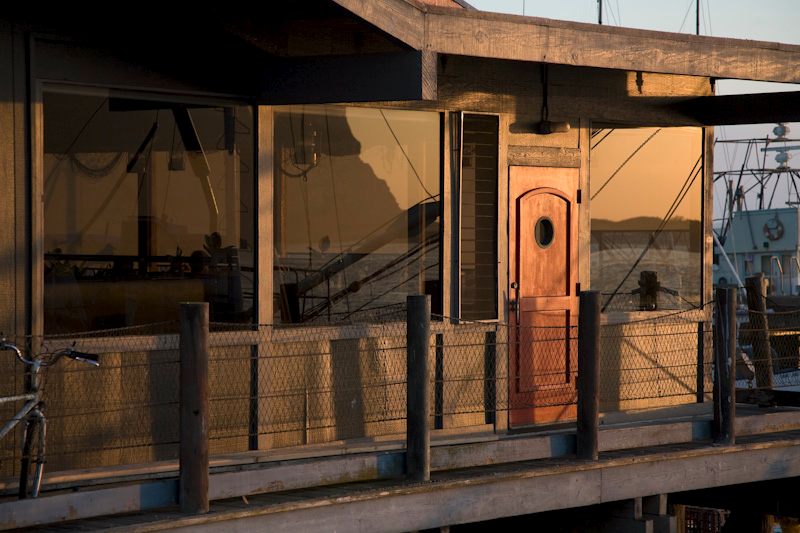
Original snap before applying perspective correction.
Here’s the ‘after’ image:
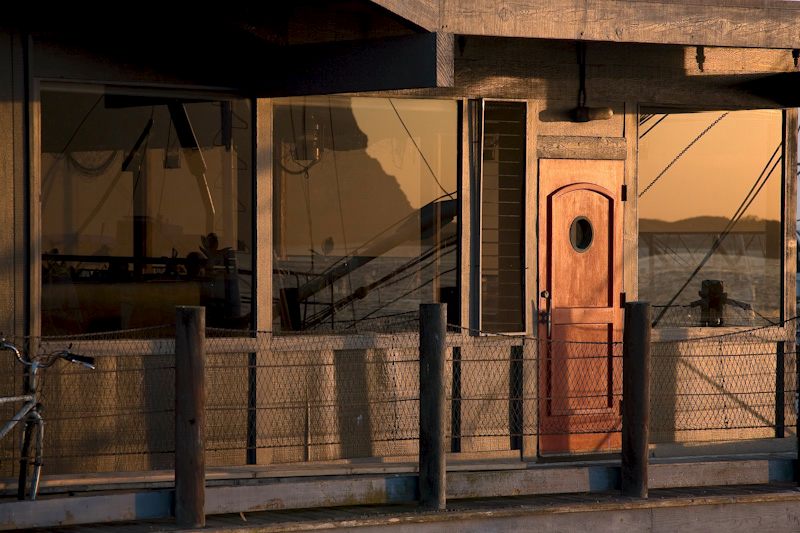
Morro Bay at sunset. 5D, 24-105mm @ 105mm. Perspective corrected in GIMP.
The price of GIMP? How about free?
You can download it here and it runs fine on Snow Leopard 10.6.1. If you need the Help file, that’s a separate download (strange) but it integrates nicely. Just use a keyword search to find what you need after invoking Help from within GIMP.
Friend of the blog Greg Littell has pointed me to a couple of useful links. To make GIMP feel more like Photoshop and to use your old Photoshop plug-ins, click here. For a complete directory of hundreds of GIMP plug-ins, click here.
American history.
The rise and fall of The Greyhound Bus (can there ever have been a greater misnomer?) tells the story of America. At first offering cheap transportation to the poorest, it gradually fell into disfavor as affluence increased and with it car ownership. Now it’s probably the second worst way to travel, the first being on commercial air flights.
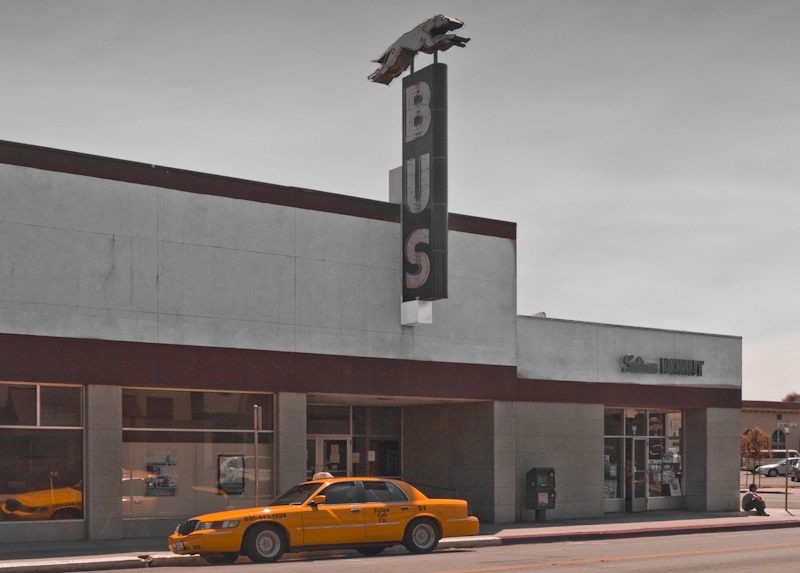
Greyhound Bus depot, Salinas, CA. G1, kit lens @ 18mm, f/8, 1/800, ISO 100.
This sad little scene in the center of California’s farm country, Salinas, typifies much of what Greyhound is about. The waiting yellow cab, the lonely passenger stumped for a fare and the tired depot, still proudly displaying the greyhound mascot, in the worst part of town.
Another view.
This one was snapped from inside the shopping area in the Embarcadero.

G1, kit lens @14mm, f/3.5, 1/1000, ISO 160
I processed this in the Beta version of Lightroom 3, a free download at this time. While some of the enhanced processing controls are nice to have, Loupe previews are simply impossibly slow to render after sharpening or correction of lens aberrations, making the application unusable. Doubtless Adobe will fix this as the Beta release progresses.
The best of both worlds.
Take a suspension proven in British trials racing and drop in a huge Cadillac V8 engine and you have something both nimble and fast. That was the post-war Allard J2, a detail of which appears here:
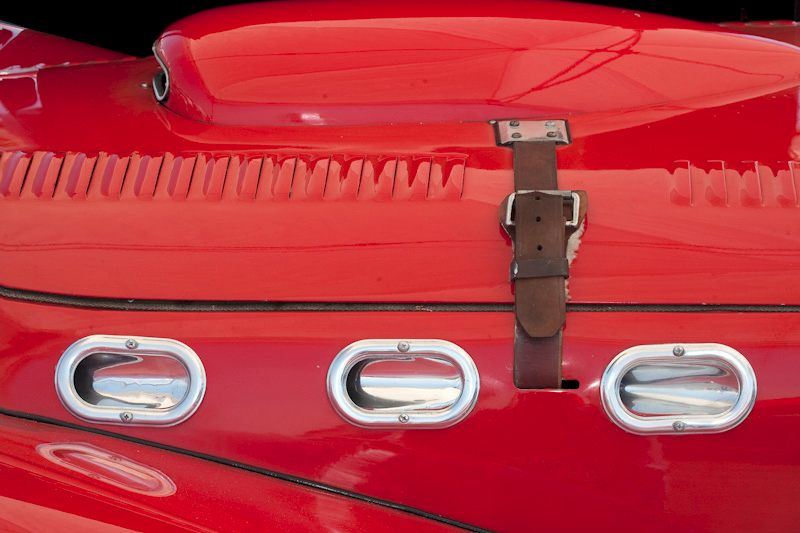
Allard J2. 5D, 100mm Macro, ring flash, f/9.5, ISO 250.
Those air intakes mean business and the car was successful on both sides of the Atlantic, the big American engine proving reliable and easy to work on.
I took five pictures on my Helicon Focus Rig, as I increasingly think of it, the camera perched on a monopod. The Rig comprises a Canon 5D, the 100mm Canon Macro and an aftermarket ring flash, with a QR base mounted on my indispensable Manfrotto monopod. The monopod is not there to stop the shakes but rather to keep the camera more or less in the same position between snaps as the lens focus setting (on manual focus) is gently varied to cover the depth of the subject. I round tripped the image through Photoshop CS2 to remove the reflection of the circular flash tube – I find the retouching tool in Photoshop far subtler than the one offered by Lightroom.
At these close distances the 100mm does not offer much depth of field! In the event, I ended up only using three of the images for stitching in Helicon Focus for an overall result that is breathtakingly detailed. Helicon Focus can make amends for small amounts of camera movement between snaps, and a monopod is a whole lot less trouble in a crowded paddock than a cumbersome tripod. Images like these make for lovely garage art for like-minded friends.
Here’s a detail section – and this is simply a screenshot from within Lightroom! The original, if my printer was large enough, would come in at 30″ x 45″:
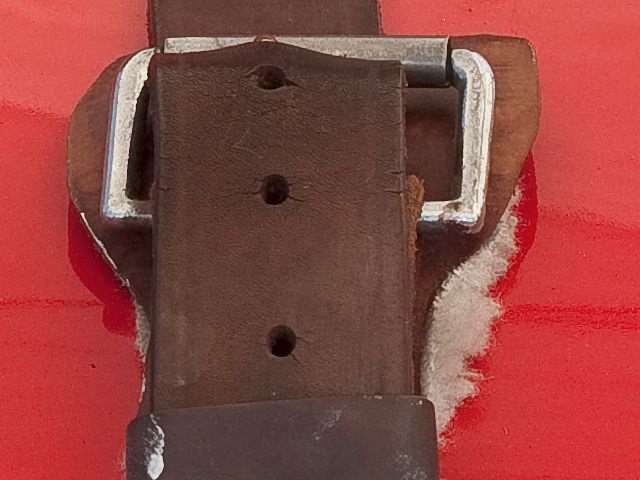
Allard – detail
As you can imagine, the original print in large format does not lack in impact. Snapped on August 13, 2009 in the paddock at the Laguna Seca Historics near Monterey, CA. My ‘rolled up on a PVC pipe’ black velvet backdrop keeps things simple behind the subject.
Now do you see why I refer to the Canon 5D as my ‘medium format’ camera?