Yearly Archives: 2011

Olympus gets serious

Two new lenses.

[column width=50% padding=3%]

I have but three lenses for my Panasonic G1 and that’s pretty much all I need.

Two are from Panasonic, with OIS built in – the stellar 14-45mm kit lens and the wonderfully compact 45-200mm. The third is from Olympus and it’s the ultrawide zoom, the 9-18mm MFT.

While the Olympus zoom suffers from barrel distortion to varying degrees, click this link and you can download my profiles to remove these distortions in LR3 or in Photoshop. Unlike for the Panasonic lenses, the G bodies do not correct distortions from the Olympus lens range, so if it matters you have to do it manually. It takes seconds for the occasional architectural snap which requires such correction. That apart, I have found the 9-18mm to be an outstanding optical performer, indistinguishable in practice from the excellent Panny 14-45mm kit lens as far as definition goes.

[/column]

[column width=45% padding=2%]

The Olympus 9-18mm is an indication that Oly is getting serious about making better lenses for its underwhelming Pen MFT bodies. I write ‘underwhelming’ as any camera whose primary mode of viewfinding requires the user to hold it arm-outsrteched, inches from his face, is not a serious camera for this photographer. First, I like to actually see what I’m viewfinding. Second, adding Oly’s clunky clip on EVF makes the whole thing bulkier than any G-series Panny with a built-in (and outstanding) EVF. Third, I prefer to remain unobtrusive. And last, I would rather not look like a dork. The sole advantage I can see to Oly’s bodies is that OIS is built into the body, meaning it works with any lens, whereas with the Panny lenses, selected lenses have OIS built into the lens. The Oly 9-18mm has no OIS but it is hardly missed at those focal length on my G1.

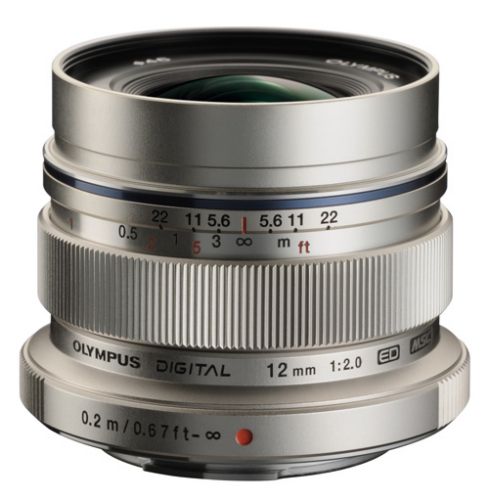
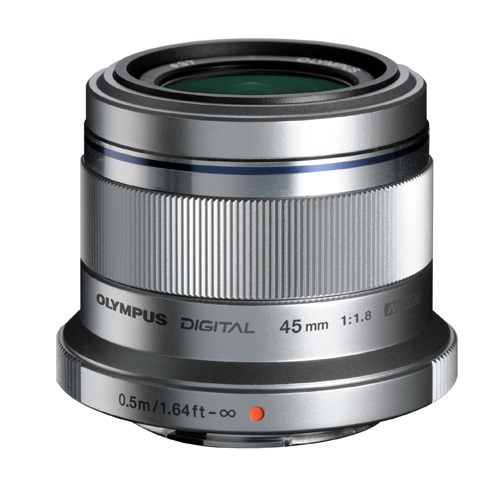
Now Olympus has announced two very interesting lenses for MFT – the 12mm f/2 (24mm FFE) fast ultrawide and the 45mm f/1.8 (90mm FFE) portrait lens.

[/column]

[column width=50% padding=3%]

Priced at $800 and $400, respectively, and available in July and September 2011, these fill two important niches, but it’s the latter lens which especially interests me. Since selling my 5D outfit, which included Canon’s simply superb 85mm f/1.8 portrait lens I have lacked a wide aperture portrait lens.

Sure, I can emulate shallow depth-of-field by selectively blurring details in Photoshop, when they are rendered too sharp with the Panny kit lens at 45mm. At 45mm the Panny kit lens is a modest f/5.6 and often has too much d-o-f for head-and-shoulders portraits. But using PS in a studio portrait to keep the eyes sharp and the ears blurred is not so easy. The Oly 45mm is a full 3.5 stops faster than the kit lens at 45mm so will afford far greater control over (shallow) depth of field. Thus it interests me greatly.

[/column]

[column width=45% padding=2%]

It remains to be seen whether these new Oly lenses are up to the performance of the 9-18mm, but at the prices asked I would guess that the quality will be fine. Obtrusive chrome finish? Who cares what color it is in the studio? Size? The Panny kit zoom at 45mm protrudes some 3.4″. Best as I can tell, the 45mm f/1.8 is much more compact, protruding maybe 2.5″ or as much as the kit zoom at 14mm, its smallest size. So this promises to be a truly compact portrait lens but with enough barrrel to permit support from underneath the lens. Lack of OIS? I’ll be using it with my Novatron studio flash outfit so camera shake is not an issue.

It will be a long wait to September for my 45mm f/1.8!

Curiously, the machining of the Oly’s focus collar is identical to that on my first portrait lens, bought in 1972, the estimable 90mm Elmar f/4 for my Leica M3:

[/column]

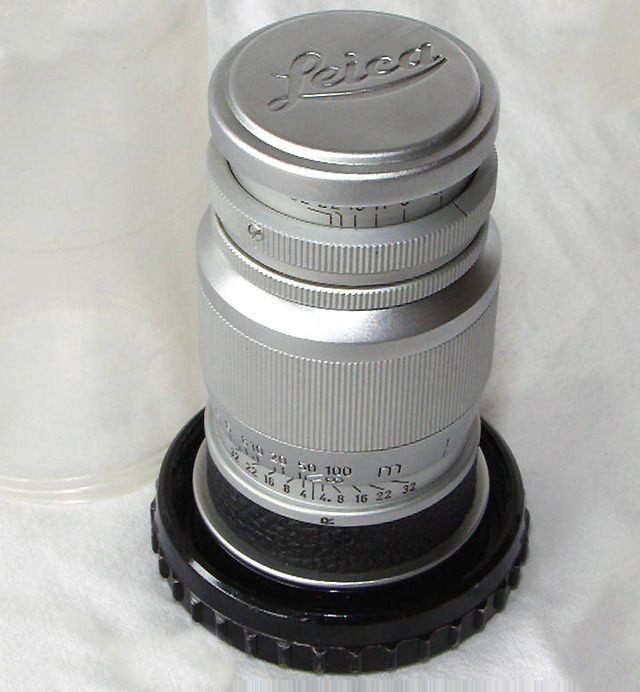
The Oly’s technology is just a tad more sophisticated. The Elmar was f/4, manual focus, manual aperture (the aperture ring rotated with the focus collar!), was twice the length of the Oly and the lens head unscrewed for use on bellows and close-up devices. There were no electronics in sight and construction was serious chrome coated brass. A fine optic which ran me £32 or $492.61 in today’s money. So the Oly is almost 20% cheaper!

SSDs and TRIM

Easily added.

Snow Leopard users should be aware of Apple’s latest sleight of hand.

TRIM – garbage management for SSDs which maintains their performance – has been added in Snow Leopard 10.6.8, the last version of Snow Leopard before Lion comes to market in July, 2011.

But that’s not all good news. You see Apple, in its greed for every penny they can squeeze from buyers of its overpriced jewelry passing as computer hardware, has made sure that TRIM support will only be available if you bought your computer with its SSD from Apple. Meaning you were well and truly hosed down at a 100% premium compared to what you could have bought an SSD for yourself. Or, worse luck, maybe that SSD option was simply unavailable when you bought your hardware so now you are forced to use an aftermarket SSD to upgrade. No TRIM for you, my lad. So much for backward compatibility and planned obsolescence.

Apple has made it extremely easy to replace HDDs in MacBook Pros and MacPros (and extremely hard in iMacs and Minis) but if you slot that nice new SSD into your MBP/MacPro/Mini, TRIM will not work. Upgrading your HDD to an SSD in your MBP, a plug-and-play operation which does not invalidate the warranty, is the single best thing for the performance of your laptop. However, when you do so, this is what OS 10.6.8’s System Profiler will report:

No TRIM for you, sucker.

Mercifully, there are many smart people out there who believe in freedom of speech and refuse to be stolen from. Hop over to the good people at Groths and you can download their utility and have TRIM up and running on your aftermarket SSD in no time at all. My SSDs are recent Intel X25-M 120gB models, and this fix works perfectly on both, after a restart.

As usual with these things, I suggest you try this on a bootable backup drive first, to be on the safe side. After you complete the installation, your System Profiler->Serial-ATA->SSD should look like this, and your SSD’s performance will be enhanced for the long term:

TRIM enabled on the HackPro.

As you can see, the fix uses no space, merely modifying existing files, speaking loudly to Apple’s increasingly cynical attitude toward its customers.

If you have been using your SSD without TRIM for a while, as I have, Lifehacker has information on how to clean it up here.

Moom

Fixing the green blob.

One of the weakest features of Apple’s OS X operating system is the Finder. It has never supported split windows, though that was put to rights with Total Finder which I have been using for six months now and recommend unreservedly. True, it’s $15 for something which should come with OS X, but the makers do a stellar job of keeping it updated for each new OS major or minor release and once you have used it there’s no going back if smooth file movement between drives and directories is your thing. TotalFinder addresses one of the few remaining shortcomings of OS X.

As for the other major one, well, it’s a ‘feature’ which didn’t work in Cheetah, OS X 10.0. And it has continued broken in all of Cheetah’s successors – Puma, Jaguar, Panther, Tiger, Leopard and Snow Leopard.

And I’ll bet you it will not work in Lion.

I am talking, of course, about the wretched green blob. It’s the colored ball toward the top left of every window you open in OS X.

Clicking it is meant to expand the window to full screen. What could be simpler? .

Except that clicking it has results about as predictable and consistent as the pronouncements of your elected representative. Meaning it simply cannot be trusted as what it does seems to vary with the day of the week, the weather and the demeanor of your dog. Maybe it needs a good bribe, like your Congressman or Senator, to actually do what it’s paid for?

And if, like me, you have no fewer than three displays with multiple windows attached to your computer, then moving windows around is a real pain. But I know better than to complain to a company which rarely listens to its customers and curse quietly every time I try to grab the window size repositioning area at the lower right of an open window, miss, try again, then curse some more when moving the window into place, only to find that I have to resize yet again.

So I have given up complaining about the green blob, having long ago assumed that it’s just one of those non-facts of life like US military intelligence (MIA), US Energy policy (none) or the US electoral system of one-man-one-vote (in the US we have one-dollar-one-vote).

Well, with Moom, the green blob finally works. And it works as well with multiple displays as with one.

Moom accomplishes what none of the alternatives does. A simple and intuitive way to make any window full screen, properly positioned. Or half-screen come to that, which is even more useful. For real masochists, you can even go to quarter screen or any rectangle or position of your choice. Moom allows you to program any shape and position you like and those will be added to the pop-up-on-hover, below. The implementation could scarce be improved upon. Just hover your mouse cursor over the green blob and this is what you will see:

The rest is self-explanatory.

It works perfectly, and the download gives you 100 free goes. Thereafter it’s $10.

Click the picture below to go to Moom’s web site:

Click the picture for Moom’s web site.

And as for you, Apple, you can kiss my Moom.

Another SSD for the HackPro

Gearing up for Lion.

As OS X Lion will likely involve the usual amount of experimentation to get it working properly on the HackPro, I have added a fourth drive to the computer and its second SSD, so it now contains two SSDs and two HDDs.

The SSDs act as OS and application drives (boot and back-up) whereas the HDDs contain data and back-up data. They also contain OS Snow Leopard as EyeOne Match, the profiling utility for my EyeOne colorimeter, will not work with Lion.

In addition to having an SSD for experimenting with Lion, I also gain a super-fast back-up boot drive. On monthly testing of the HDDs as boot drives I have been increasingly struck by just how slow these are when booted from. After four trouble free months with my first Intel SSD it made sense to add a second. For the test phase I will partition it into two partitions, using Disk Utility; one will contain a straight clone of the existing SSD boot and application drive, and Lion, once released, will reside on the other until fully debugged. Thereafter both will be converted to Lion and Snow Leopard will remain on the HDDs for use with EyeOne Match.

The second SSD will continue to act as a low risk testbed for any new software changes or upgrades.

This is how things will look:

Drive topology after adding the second SSD to HackPro.

I strongly recommend you add an SSD to your work computer. Once you have experienced the speed there is no going back. I paid $230 for each Intel X25-M 120gB SSD.

The HackPro with two SSDs installed.

The incremental heat output and current draw of the second SSD are so low that no additional cooling precautions need be taken in the exceptionally well ventilated Antec Sonata III case with its generously spec’d 500 watt power supply. Installation, which means attaching the SSD to the provided mounting plate and the plate to the Antec’s slide in carrier, plus the connection of power and data cables took FU Steve all of twenty minutes. Carbon Copy Cloner took 27 minutes to clone the existing SSD Boot drive to the new backup SSD, and it needed but two more minutes to verify that the backup was bootable and to add the backup job (Boot->SSD Bak) to Carbon Copy Cloner’s list of automated, nightly backups. You really don’t want to forget that last step!

Partitioning:

As the new backup SSD will also be used as a test bed for OS Lion, to be released next month, I first partitioned it into 90gB and 30gB partitions, using Disk Utility. The latter partition, named ‘Lion Test’, at 30gB, will be more than large enough for OS and selected application testing.

Partitioning the SSD Bak drive to make space for OS Lion.

TRIM:

TRIM is the software code which helps manage garbage on an SSD drive. Apple’s just enabled it in OS Snow Leopard 10.6.8 (the last release before Lion) and it will be included in Lion. At this time the OS will only permit TRIM to be used on Apple installed SSDs. Let’s hope that changes, as many Mac users will be replacing the HDD in their MacBook Pro with an aftermarket SSD to avail themselves of the enhanced speed and lower power consumption. Even if Apple does not step up to the plate here, hacks already exist to make TRIM in Lion work with non-Apple installed SSDs.

Meanwhile, is there anything useful to be divined by comparing the space on the 3 month old SSD in my HackPro with the newly installed backup SSD?

Here’s are the drives inside HackPro as reported on the Desktop:

HackPro drives before partitioning SSD Bak.

In the case of the SSD drive pair, the base drive reports a little more space than the backup one, but not enough to make any difference. Both the backup drives, which include a full Snow Leopard OS, are bootable. So after three months of intense use of the first SSD (top of the above screen snap) there seems to be negligible difference in available space, suggesting that the absence of TRIM has made no material difference. However, be assured I will be looking into adding TRIM support once Lion is installed and will be explaining how to do that in these pages.

Update June 2012: For data on the newer, faster SATA 3 6gd/s SSDs, click here.

Brown bagger

A spot of luck.

I was gazing at this fine mural off 24th Street in San Francisco, trying to figure out the meaning of the bubble or raindrop between the fingers, when the pedestrian chanced along.

Mission District at 24th and York. G1, Olympus 9-18mm MFT @ 18mm, 1/800, f/7.1, ISO 320.

He glanced up for a moment and I had the snap.

The Olympus 9-18mm MFT lens is great for this sort of thing; it focuses almost as fast as the 14-45mm Panny kit lens and what distortions it leaves behind are easily fixed in LR3 using my custom, downloadable correction files which you can find here. The lens is an outstanding optical performer, especially given its pocketable size. Optically it is easily the equal of the kit lens, which is to say very good indeed. And at 9mm (18mm FFE) it’s as wide as you need in all but the most demanding settings. While Panny’s considerably costlier 7-14mm MFT goes quite a bit wider, there’s no way to protect the protruding front glass with a filter, so Panny’s glass does not pass my ‘throw it in a jacket pocket test’, given that I have no inclination to futz with lens caps.

The only drawback the 9-18mm Oly has compared to the kit zoom is that there’s no OIS and you have to extend the lens from its collapsed position for use. If you forget to do that the G1 will refuse to work.