Yearly Archives: 2011

CrashPlan – Part III

Alternatives.

Cloud backups are not for everyone and, as I explained earlier, should never be your first line of defense against loss of your photographs. No one foresaw Fukushima happening. The power supplies ended up below the water line, useless. If it can go wrong it will and one of the great disasters to befall the world in the twenty-first century will likely be a massive failure of the ‘cloud’ through human error or enemy action.

What prompts this thought is an email from a friend of the blog who points out the futility of adopting CrashPlan for his very large photo library. A picture being worth a few words, here is his problem:

A reader’s problem.

I am a patient man but, even so, waiting for the best part of a year for your initial upload to complete is unrealistic. While CrashPlan does offer to provide you with a ‘seed drive’ by mail where you copy your pictures and which you mail back to them, this particular reader is in the UK where no such service exists. Eventually, this reader decided to upload smaller JPGs and not RAW files, so he will have a credible recovery source, albeit not of the highest quality afforded by RAW originals.

So here are some ideas, in addition to the JPG one, where your upload broadband speeed is slow and your picture catalog large:

  • Identify the best pictures and upload first. In Lightroom the ‘star rating’ system makes it easy to create a separate catalog with just the highest rated pictures.
  • Use the CrashPlan software to populate a friend’s computer if you can get comfortable with all the issues of trust, integrity and competence this approach raises.
  • Adopt my CarBak approach, meaning offsite storage, and encrypt the data in case of theft.
  • Don’t waste time backing up applications, movies (unless they are home movies) and music. You can always buy those again. And with Apple shortly migrating to cloud storage of all your movies and tunes, recovery will be easy as long as no one rains on their cloud. The problem with Apple’s cloud storage, unlike with CrashPlan’s, is that everyone knows where it is in North Carolina, open to attack. CrashPlan wisely keeps mum on the location(s) of its drive farms.

Wi-fi dongles

Cheap speed.

The location of my Hackintosh makes it uneconomical to run wired broadband from the Airport Extreme router in the adjacent room, so when I built the machine I installed a PCI-E wireless card to receive wireless. This card emulates the Airport card in Macs and works natively through the System Preferences->Network pane. Yes, a lot of brain cells were destroyed trying to find the right driver to make this work!

The other day, wanting to add a little more computing power to my office, it occurred to me that I had an older MSI Barebone in the closet. This inexpensive computer had been used as a media center but the poky Intel Atom CPU and Intel GMA 950 GPU struggled with routing movies, resulting in stuttering. So I replaced the Barebone with a MacMini and the problem went away, owing to the faster CPU/GPU in the Mini. The Barebone was consigned to the closet – it has negligible resale value.

However, for my use – streaming stock quotes – the Barebone would be ideal. The only snag is that it had no wireless capability and as it had been hacked to run OS X Leopard adding wireless would be tricky as there are no expansion slots in the machine.

Now my Apple Airport Extreme router is not the latest dual band version. It can deliver 802-11n in either shared b/g/n mode at 2.4gHz or n mode only at 5 gHz. I cannot use the less interference-prone 5gHz mode (where baby monitors, cordless phones, etc, do not venture) as that makes my older iPhone unworkable and also disables the HackPro whose internal card runs at 2.4gHz only, albeit in n mode.

So when I started shopping around for a device to add wireless to the Barebone, I limited my search to 2.4gHz devices, as I could not use 5gHz because of these limitations, and I did not want to spend another $180 to upgrade to the latest dual band auto-switching Airport Extreme router. I bought one of these, having owned one ages ago to add n mode to an old Mac iBook:

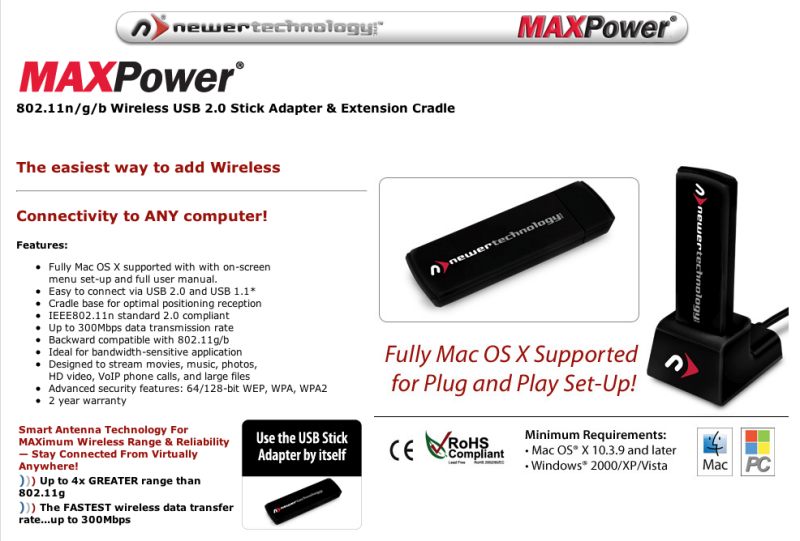
The Newer Technology n mode wireless dongle. Click the picture for MacSales’s site.

I plugged it in to the Barebone and, voila, after installing the driver (I downloaded it from NT’s site rather than using the older one on the provided disk) I was up and running.

The next thing was to run Speedtest.net on the Barebone and …. blow me down …. but the dongle was far faster than the Hackintosh with the internal card.

Ping/Download/Upload measurements were as follows (Ping, or latency, should be as low as possible, the others as high as possible):

MSI Barebone: 71/7.6/1.2
Hackintosh: 24/6.5/1.5

Both machines are in the same location.

So now, getting ambitious, I switched off Airport in the Hackintosh and plugged in the Newer Technology Dongle. Wow!

Hackintosh with NT dongle: 24/9.1/1.5 (The maximum download speed possible is 10.0 with my service)
Hackintosh with internal PCI-E card: 24/6.5/1.5

So the download speed was 40% higher with the dongle in the Hackster than with the PCI-E internal card!

Finally, I went to the MacMini which is hard wired to the cable modem which pipes broadband to the home:

MacMini hardwired: 26/8.6/1.3

So the Hackster + dongle on wireless, in a remote location, was faster than a hard wired MacMini!

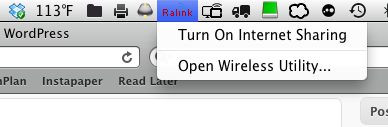
These dongles run their own software and do not use the Airport app. In the past they deposited an ugly icon in your dock but the latest version of the software now places a discrete Ralink icon in the status bar, thus:

Click the icon and you get:

The Ralink software supports WPA2 secure encryption, even if it’s not pretty to look at:

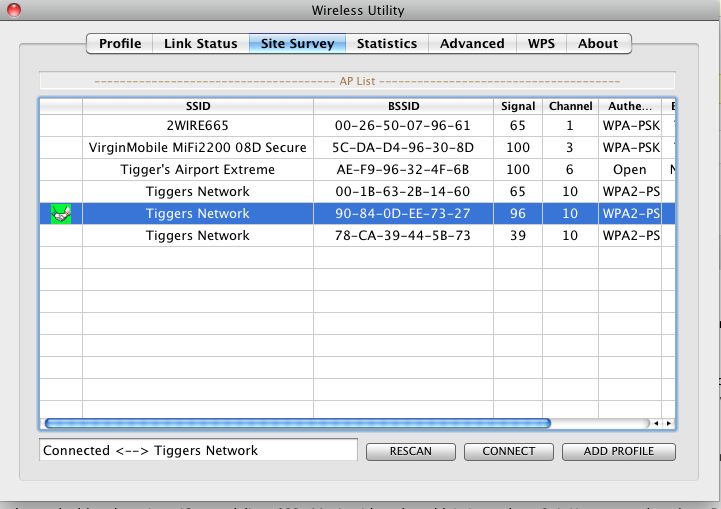
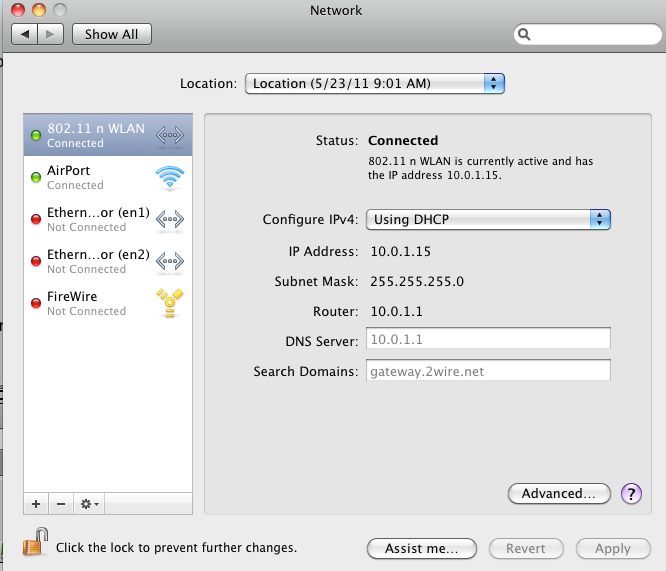
All those disparate wireless sources reflect the additional Airport Express wireless extenders throughout the home, and the Virgin one is the MiFi portable 3G wireless gadget, of which more here. ‘2WIRE665’ is the router provided by AT&T. Fire up System Preferences->Network and you will see both the Airport-emulation PCI-E card inside the Hackintosh and the external dongle, identified below as ‘802 11 n WLAN’. In practice, the slower of the two – Airport – is switched off and the Hackintosh enjoys the faster speed conferred by the $30 dongle. You can save the Profile for your network, thus obviating the need to enter your password every time you reboot or restart. As I never switch off my desktop computers, it’s not an issue for me.

Bottom Line? If you are OK with using 2.4gHz n mode wifi and want speed with a minimum of futzing about in your Hackintosh, or you want to add n mode to an older computer which has b/g mode only or has no wireless capability, plug in one of these NT dongles into an available USB port, download the software from NT’s site and off you go. It protrudes some 2 3/4 inches. If that does not work, plug it into the provided cradle and connect the cradle to your Mac using the provided USB cable.

Snow Leopard 10.6.8 update – late June, 2011: The existing Ralink wireless utility fails to work after upgrading Snow Leopard from 10.6.7 to 10.6.8. However, the maker, Ralink, is on the ball, and you can find an updated version here – it’s the file named USB(RT2870 /RT2770 /RT3X7X /RT537X) and dated 6/21/2011. I had to try the installation twice before it worked and after rebooting all was fine again.

CrashPlan – Part II

Getting there.

Details of CrashPlan, a cloud storage backup system, appear here.

After 5 days of chugging away, CrashPlan now reports as follows:

So at this rate I expect all 170gB of my pictures/data will be in the cloud in ten days’ time. Thereafter the rate of adding new snaps will be much lower, of course. That’s still within the 30 day free trial which should give me time to test incremental uploads as pictures are added and also to test the Restore function. It’s not 143,000+ pictures, BTW. Most of that count is system files in my User directory which CP uploads by default.

If all is well I will likely sign up for 12 months for $50.

I will report back in Part III.

iMac HDD swap? No way.

Another consumer unfriendly move from the fruit company.

I wrote of the clear evidence that the new iMacs continue to have cooling problems here.

Now yet another reason has surfaced to avoid these machines. You cannot change or add internal hard disk drives yourself!

While accessing the drives in an iMac has never been easy, the post-white aluminum shell models with the ghastly glossy screens are easier to dismantle than their white predecessors. The glass screen is removed with a couple of small suction cups, the glass being retained by magnets. (Talk of form over function). A bunch of Torx screws retaining the LCD in place is removed and the LCD carefully raised while connecting cables are detached. The drives are then easily accessed. There’s room in there for an SSD in addition to the HDD. SSDs rock and I highly recommend the use of one as a boot and application drive.

But forget about swapping the HDD for a bigger one or replacing a blown one yourself, because Apple has made jolly well sure that your replacement will not work properly. You see, the greedy fruit company has installed unique connectors in its machines and in the HDDs they use. The connecting cable to the HDD controls the cooling fan speed for the HDD. Install a regular off-the-shelf HDD and the fan will spool up to a roar at 6,000 rpm, rather than the <2,000 rpm at which it ordinarily runs. So the only way you can get an HDD exchanged is to tramp down to the local Apple Store with your whopper iMac and tramp back there weeks later when it has been fixed. And if your 'local' Apple Store is 200 miles away, well then you are going to have to move closer, right? Or would you rather drive 800 miles per round trip? All so that they can hose you down an extra $100 for installing a replacement drive. A supremely thoughtless move by Apple, which I can only think is motivated by greed. Hard to explain it any other way. Here's the scoop from the fine people at OWC where I buy all my hard drives:

Any hard user of a Mac should avoid the iMac like the plague. When it does overheat or blows out its HDD, you will be stuck without a machine for a considerable period of time. And if that happens after the warranty has expired you are looking at very high repair costs. Remember my old 20″ and 24″ white iMacs which fried their graphics cards? Apple wanted $900 to repair that and to this day refuses to admit fault despite widespread comment on the flaw. Ridiculous.

There has never been a better time for demanding users to build a Hackintosh, at a fraction of the cost of the overpriced MacPro. Why, you could build two – talk of redundancy – and still have over $900 to spare, not to mention superior performance. Oh! and by the way, replacing an HDD in my HackPro takes two minutes – and that’s with one hand tied behind my back with breaks to play with the resident border terrier.

Overheating issues? Get real.

Intel SSD in the HackPro. Two 1 tB Samsung HDDs to the right. Drives slide in and out on spring-retained mounting plates.
The massive cooling fan at the top cost all of $10 and is many times the size of the one in any iMac. A replacement
can be found at your local computer store.

My HackPro has 2 x 1tB HDDs and the smaller SSD for the OS and applications. Replacing the HDDs with 3 x 3tB ones would give me nearly 10 tB of storage for a total cost of $575. I just don’t need that much storage (though my movie file server is now up to 10 tB!) but it’s nice to know I can use any off-the-shelf HDD if I ever do.