Don’t recycle it!
I wrote about this splendid TV some 7 years ago here.
Recently the sound became intermittent after some 15 minutes of use. I use an external amplifier and speakers and some tests confirmed these are working fine so the fault lies with the TV. Some digging disclosed that loss of sound or vision on warm up is nothing new with LG TVs of a certain age, and it appears the problem is attributable to the use of solder with too low a melting point, causing loss of electrical continuity. That’s either sloppy design or planned obsolescence. Your call.
So I determined to try fixing the issue, which means installing a new motherboard – there are two circuit boards in the TV, the motherboard and the power supply, both passively cooled. There are no fans. In addition to swapping in a new motherboard I decided to enhance the ventilation in the area of both circuit boards. I had noticed that, while waiting for delivery of the new board and leaving the rear panel off, that the sound intermittency problem did not occur, likely due to better ventilation.
Because the TV screen is extremely slim – thinner than an iPhone – it is very fragile, so I moved a cocktail table up to the TV table, covered the former with soft padding and tipped the tv forward onto the cocktail table, allowing access to the rear panel and the stand. Both have to come off and the power supply feed has to be removed – one screw, a small panel and a click fit connector. The stand is retained with four large screws which come off and then the screws holding the back panel can be removed. They are clearly marked with arrow symbols. The top of the rear panel is retained with a bunch of clips – ugh! – so the panel has to be gently popped off, one clip at a time working from one end with fingers inserted between panel and screen. Not a lot of fun. Then all is revealed:
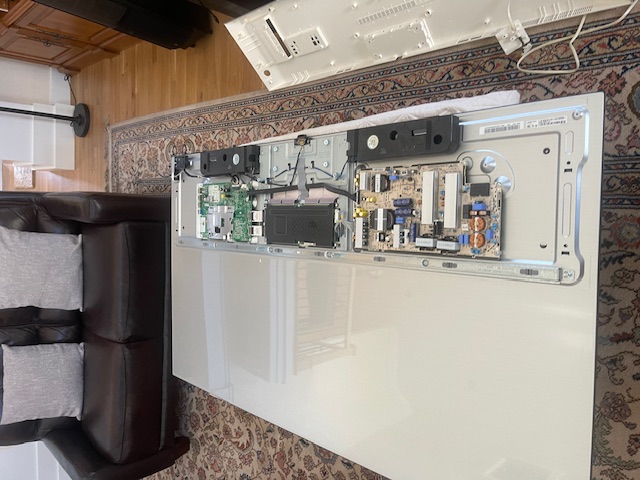
The rear cover removed. The motherboard is at the top, the power supply at the bottom.
Measurements were then made to establish the positions of the two circuit boards and penciled grids were drawn on the rear cover:
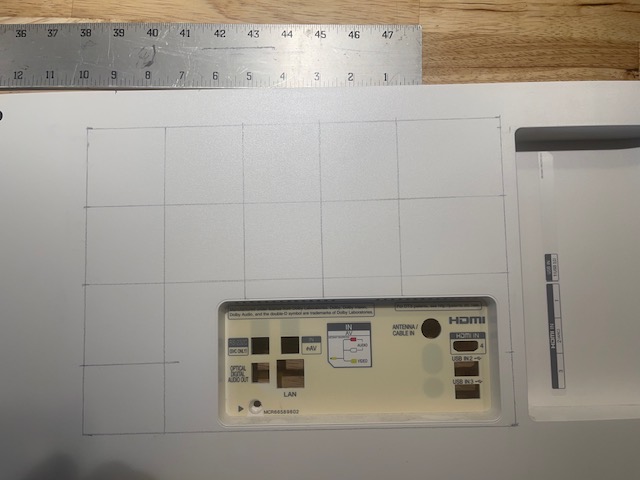
Penciled grid in the motherboard area.
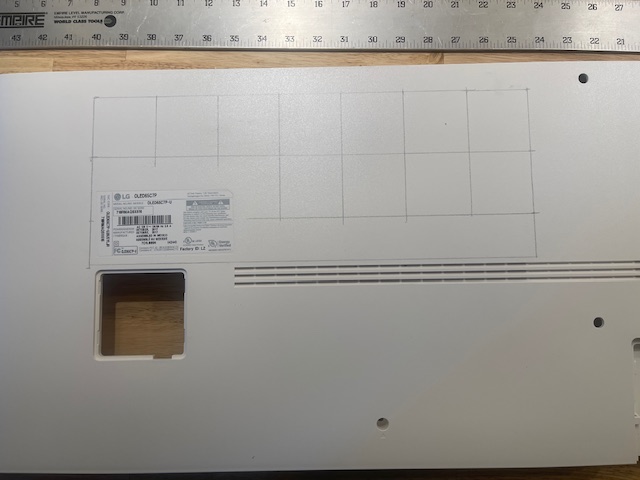
The grid in the power supply area. The opening is for the mains cable.
A Forstner bit is used to drill the holes. A regular drill bit will wander and the result will look awful, whereas the pointed tip of the Forstner bit allows precise placement on the grid intersections. Be careful not to drill in locations where there are spigots on the inside of the cover – which is why some holes appear to be ‘missing’.
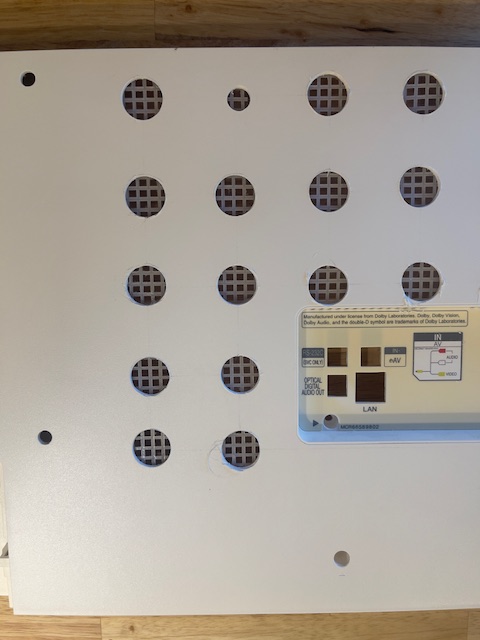
Holes drilled with protective plastic mesh installed.
The mesh is glued in place using Permatex 80050 Silicone adhesive which the maker’s excellent data sheet states is good to 400F. 24 hours are required for a full cure. The purpose of the mesh is to prevent fingers being poked into the electronics. Do not use metallic mesh. Should it come unglued you’ll risk a short circuit. A check with a tele-thermometer with the cover off and the TV warmed up disclosed a temperature range of 88-108F for the motherboard and the PSU had one component at 143F, so the adhesive will do the trick. Don’t even think of using cyanoacrylate ‘superglue’ – it’s useless. Once the holes are made the penciled grid can be removed with isopropyl alcohol.
The motherboard is retained with 6 screws and the white retaining plate at right is removed and placed in position on the replacement board. There are five connectors, all ‘click’ captive and it took me a while studying these with a magnifying glass to determine how to release the connectors without breaking anything. The two ribbon connectors at top left are real bears and quite fragile, so study carefully before removal.
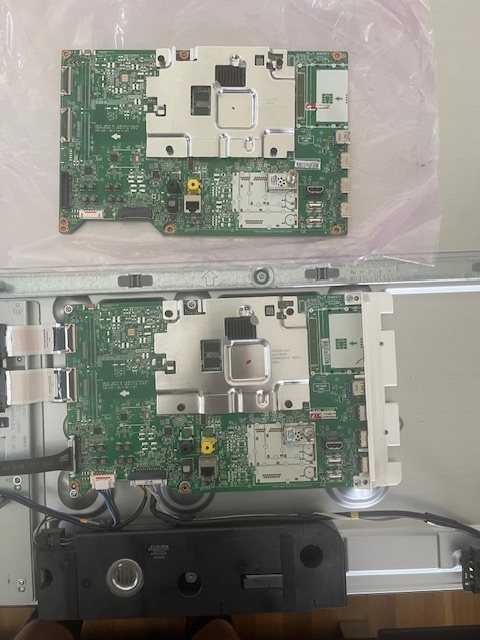
Old and new motherboards.
After testing the result at high volume for 3 hours – failure formerly occurred after 15 minutes – all is well.
Why DIY? Well you can risk taking this to the repair shop and it is a bear to move and very fragile, whereupon you will be charged $800 for the repair by someone who very much struggles with the English tongue, and then you will have to go through hell again getting the monster screen home. And then if the TV is faulty when you get home, guess whose fault it’s going to be? Or you can do it the American way, recycle the set and buy a new one. The original ran me $2,800 7 years ago, and a similar replacement (with more invasive advertising) is $1,600 today. Still not cheap, reflecting how hard it is to manufacture fault free large OLED panels. And OLED beats anything else into a cocked hat.
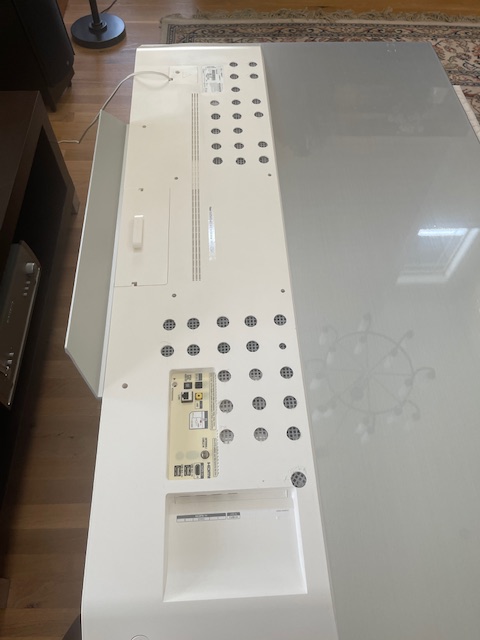
Reassembled.
I used TVPartsToday for the motherboard which cost $129 shipped. Their excellent service insists that you provide a picture of the bar code(s) on your existing motherboard before you can place an order as that means an exact match will be shipped. Mine was right the first time. Their site states that they have almost 8,000 parts in stock! By the way, if the TV simply refuses to turn on it’s likely the power supply board that is blown, and these are under $100.