Handy.
For an index of all Leica-related articles click here.
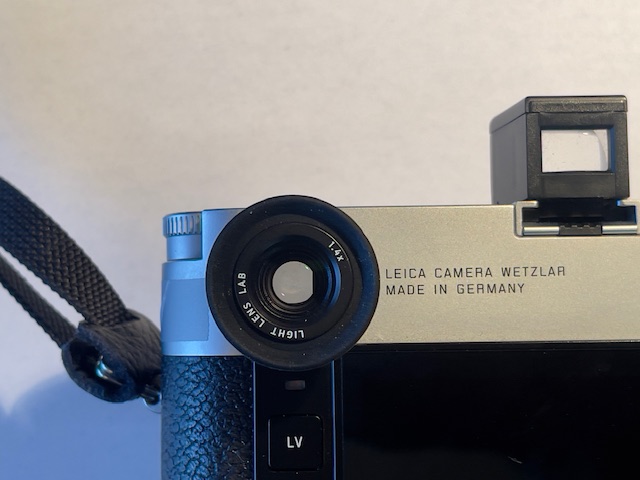
The magnifier in place on the M10. 21mm finder atop.
When Ernst Leitz released the 135mm f/2.8 Elmarit lens for the Leica M body in 1963 they concluded that the only way this long and fast lens could be accurately focused using the rangefinder was with auxiliary magnifying ‘goggles’, which came attached to the lens. They even contemplated a 180mm focal length with like goggles for use on the M but common sense prevailed and that lens was never released.
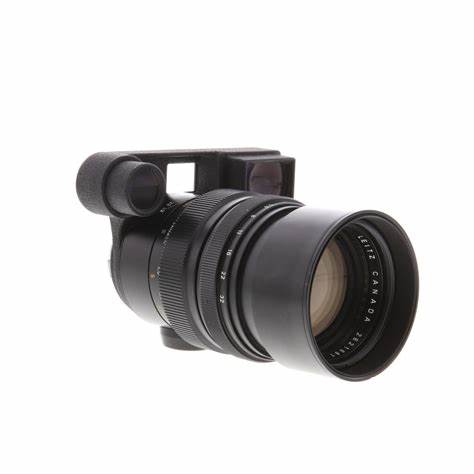
Leitz’s whopper, the 135mm f/2.8 Elmarit, goggles and all.
Some five decades later it finally occurred to the factory that a simple eyepiece magnifier would do the trick with less bulk, weight and cost. Well, less bulk and weight. This is Leica after all. So they released two eyepiece magnifiers in 1.25x and 1.4x strengths. Better fasten your seat belt before checking the prices. And to add insult to injury, you have to pony up an obscene additional $118 for an adapter to allow the magnifier to screw into the larger eyepiece which was fitted to the M10 and later models.
When I published a resolution test for the fine 135mm f/3.5 Canon LTM lens I wrote:
The 135mm focal length, especially used at large apertures and/or close focus distances, is really stretching the rangefinder accuracy of the Leica M to its limit. In such cases I advocate using ‘bracketing focus’ – one image nearer than seems right, one at the best apparent rangefinder setting and one too far if you want assurance of peak resolution. With digital that’s a realistic approach. With film reckon on $45 for 3 snaps with one sharp one …. Alternatively there are both 1.4x Leica aftermarket viewfinder magnifiers ($250 used) or aftermarket variants ($100) which enhance rangefinder resolution, but having to screw one into the eyepiece every time you take a picture seems like a royal pain. Further, you will barely be able to see the 50mm frame lines with the magnifier fitted and the 35mm ones will not be visible. So removal is the order of the day if you mount either focal length.
Well, I stand corrected, having just bought the Light Lens Lab 1.4x eyepiece magnifier from the US distributor, Popflash Photo. You can buy it from China on eBay for less but whether tariffs will allow it to get through is unknown.
The shipping box contains:
- The 1.4x magnifier
- Two identical rubber eyecups
- The thread adapter for use on the M10 and later bodies
- A screw on rear protective cover
My shipped cost was $163 compared with $600 for the Leica version with adapter ring.
The LLL magnifier includes +/- 3 diopter corrections (missing from the Leica version) using a rotating ring to which the eyecup attaches. This is good for users of corrective lenses but bad as the focus motion is far too loose, at least on my sample, but that is easily cured. (Do the makers ever actually use their product?) After dialing in the diopter adjustment for maximum resolution I simply cut a small piece of electrical tape and taped it around the rubber base of the eye cup and the abutting metal ring – they are flush so in practice the fix is invisible, and reversible. It would have been nice if the magnifier offered a flip up feature when not in use, but I suppose that’s too much to ask.
Fit and finish are excellent – all glass and metal, plus the rubber eyecup. I measure the inside eyepiece diameters of the respective cameras as follows:
- Leica M3 and all models through the M262/240 digital bodies – 11.42mm
- Leica M10 and later digital bodies – 13.51mm
That makes the tiny adapter ring just 1mm wide. Don’t lose it!
You have two choices in fitting this adapter ring – tight on the camera, in which case the screw on protective cover will fit on the magnifier when removed, or tight on the magnifier in which case the rear cover is useless. I went for the latter, preferring to keep the camera stock for eventual resale. The adapter ring has notches for a lens tool but I found that a clean handkerchief did the trick just fine.
The rear lens does not protrude so the absence
of a protective cover when removed is not an issue.
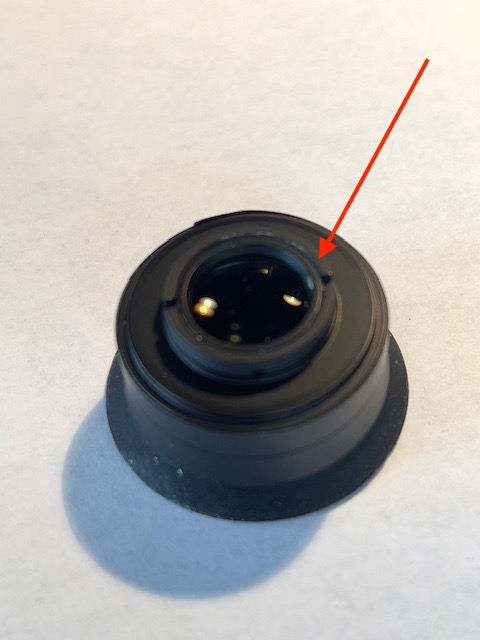
The notched adapter ring – arrowed – is installed in this image.
The magnifier with adapter requires 2 1/4 turns to fit on the M10 and is extremely unlikely to unscrew accidentally if snugged up nicely in the first place. I added a white ink index dot to designate the start point for engaging the thread when the adapter is being attached to the camera’s eyepiece. Yes, it’s still a pain to use because the 50mm frame is not fully visible without ‘pan and scan’ action from the user so for any lens shorter than 75mm the magnifier has to be removed if the finder frames are to be fully visible and easily used. With my 21mm lens no removal is needed as I have a 21mm finder fitted in the accessory shoe.
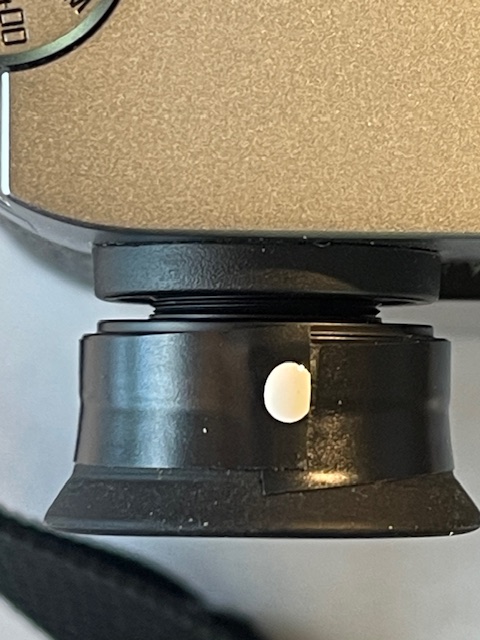
The thread index starting point white ink dot.
This is placed on the electrical tape which locks the diopter setting.
It minimizes risk of dropping when being attached.
The magnifier protrudes in this image as it has not been screwed into the eyepiece.
How is the optical performance? I see no distortion of the view or of the frame lines for the 75, 90 and 135mm lenses. Everything is bright and clear. It’s a quality product. Here are the finder magnifications with the magnifier fitted for the five different Leica M finder designs:
- 0.58x finder (wide finder versions of the M6TTL) appears to be 0.81x
- 0.72x finder (M2, M4, etc.) appears to be 1.01x – life size
- 0.73x finder (M10, M11) appears to be 1.02x – life size
- 0.85x finder (high magnification version of the M6TTL) appears to be 1.19x – very large
- 0.91x finder (M3) appears to be 1.27x – huge!
How well does it work? I used my ‘bookcase at 45 degrees to the camera’ test, with the M10 on a tripod. The focus point is indicated by the red line and the result is bang on. Images are examined in Lightroom using 100% magnification, equivalent to a 72″ wide print using a 32″ monitor. Why not simply examine images on the camera’s LCD display using magnification? Because the resolution of that display is nowhere near that of a large computer monitor using Lightroom. There are no short cuts here if you want perfection.

Focus test with the 135mm Elmar at maximum aperture of f/4.
The red line indicates where I focused. 7.5 feet from the camera.
Click the image for a big version.
As is clearly visible the depth of field at this distance, focal length and aperture is just 1″. I tried the same test without the magnifier fitted and nailed focus just one time out of three. With the magnifier I was spot on every time. The point is that an accurately adjusted rangefinder is more than up to it but sans magnifier my eyes – and maybe yours – are not.
When does this gadget add value? With any super fast lens, regardless of focal length – meaning f/1.4 or faster for 50mm and shorter, or f/2 or faster with a 90mm lens and with any 135mm lens – all when used at or close to maximum aperture and shorter focus distances. In all instances depth of field is very shallow which is when the magnifier comes into its own.
A key prerequisite is that your rangefinder is correctly adjusted in the first place, according to this illustration:
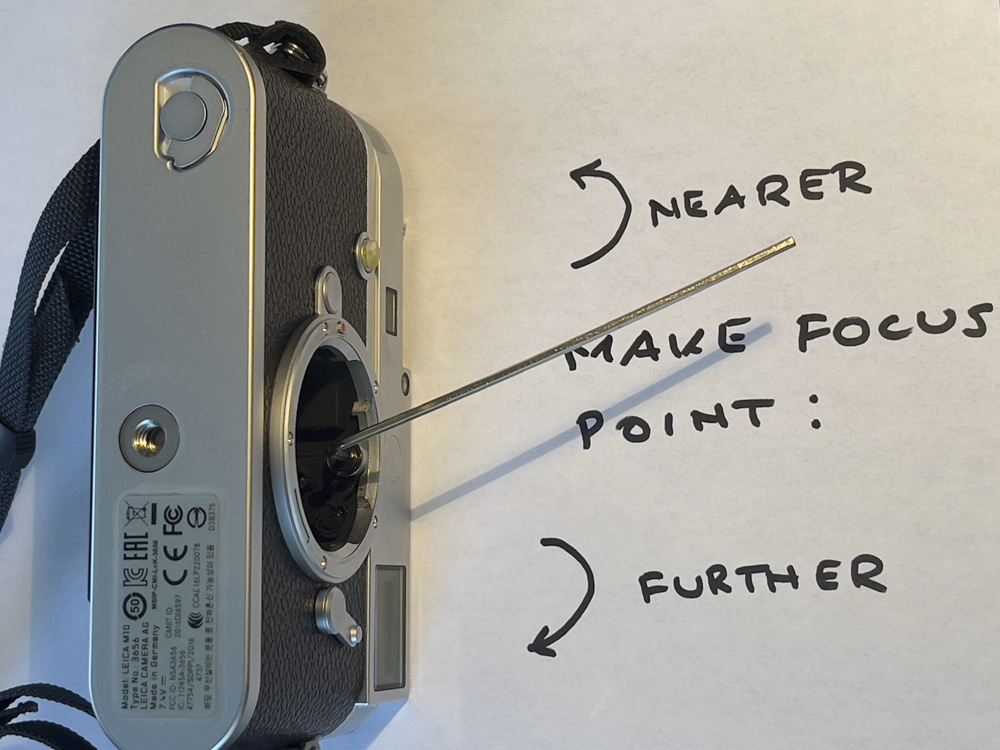
A 2mm Allen wrench is used to adjust the cam follower for optimum focus.
Explanation of which direction to turn the Allen screw adjuster: If the sharpest point in the LR magnified image is further than where you focused, then the focus point must be brought nearer, meaning you turn the Allen screw adjuster away from you, with the camera resting as in the above image. If the sharpest point in the LR magnified image is nearer than where you focused, then the focus point must be set further away, meaning you turn the Allen screw adjuster towards you, with the camera resting as in the above image. Take it easy with those adjustments – just a couple of degrees’ movement will shift the dice point noticeably.
Light Lens Lab is an interesting Chinese company, seemingly catering to the locals’ fascination with 1960s Leitz products. Witness their near perfect knock-off of the 50mm Type 2 Leitz Summicron of that era, albeit at a very high price. (Unlike the original whose closest focus is 1 meter, the LLL copy focuses to 0.7m, the closest rangefinder focus of the later Leica M cameras). Still, that remains one of the most beautiful – and optically alluring – lenses of the past century, and imitation is the sincerest form of flattery.
The Light Lens Lab 1.4x magnifier is recommended for those with the special needs it addresses.