By Paul Hendrickson.
You can find more of Hendrickson’s beautiful writing in his biography of the Depression Era photographer Marion Post Wolcott.

More here.
By Paul Hendrickson.
You can find more of Hendrickson’s beautiful writing in his biography of the Depression Era photographer Marion Post Wolcott.
More here.
Large format, Leica quality.
Mention of my recently acquired Linhof Twin Shank Pro tripod prompts a further piece on the Linhof company.
The Linhof Company of Munich started business in 1887, which makes it the longest surviving camera producing business. They make medium and large format cameras to this day, and their web site is here. I’m not too sure who uses these large format film cameras any more as medium format digital easily manages to compete on output quality with far lower production costs and faster turnaround, at a comparable price. But they remain things of beauty.
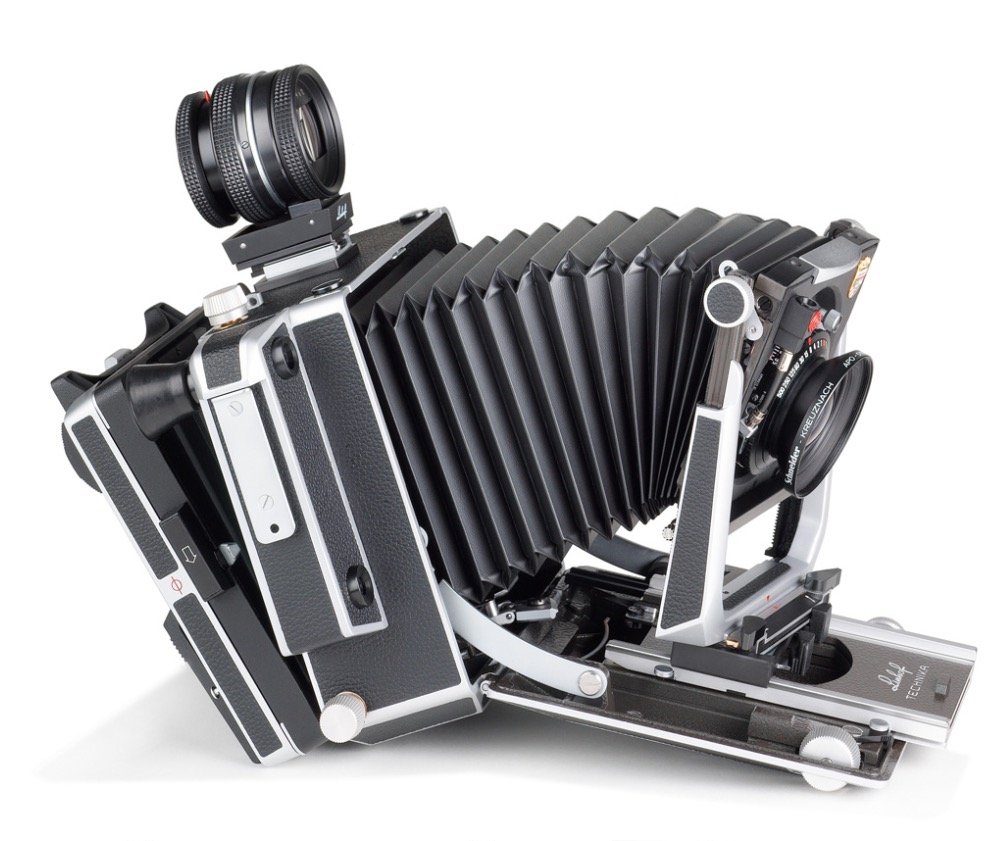
Back in the 1940-1970 time frame Leica made a bewildering range of accessories for their film cameras but they were mere pikers compared to the prodigious output of Linhof.
Click on this image to download their 1957 70th anniversary product catalog which is no less than 119 pages long:

In addition to a long section on the care and training of employees – right down to a picture of the resident nurse standing by to deal with machine shop injuries – there’s this wonderful image of a Leitz optical measuring machine:
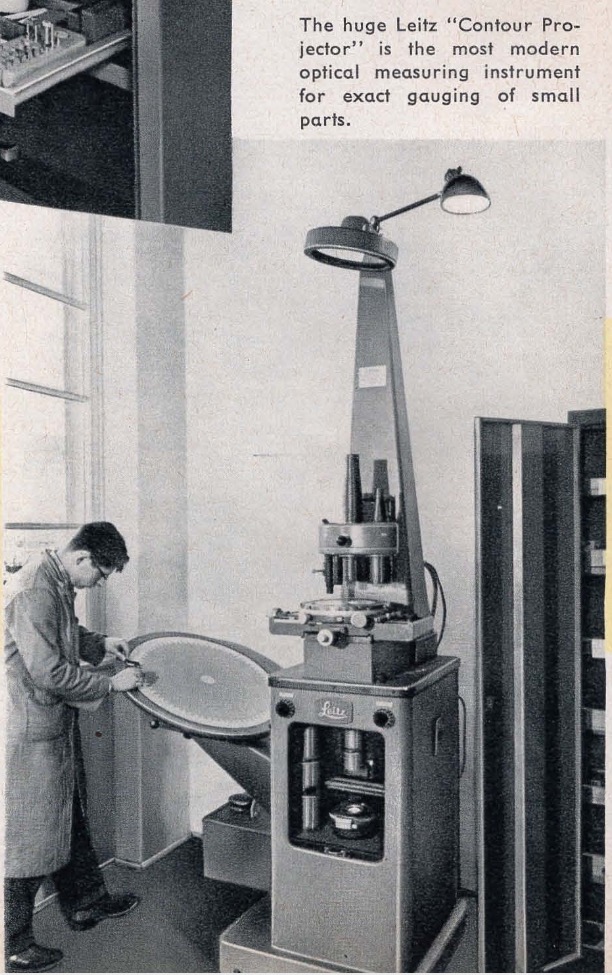
Have fun perusing this wonderful journey into a past of exceptional mechanical engineering.
If 4×5 is something you want to experiment with be warned that used Linhof prices are high. A lower cost of entry – with similar functionality if lower engineering quality – can be found in the affordable Graflex range of US made cameras. I had a lot of fun with my Crown Graphic.
As much fun as it gets.
For an index of all Leica-related articles click here.
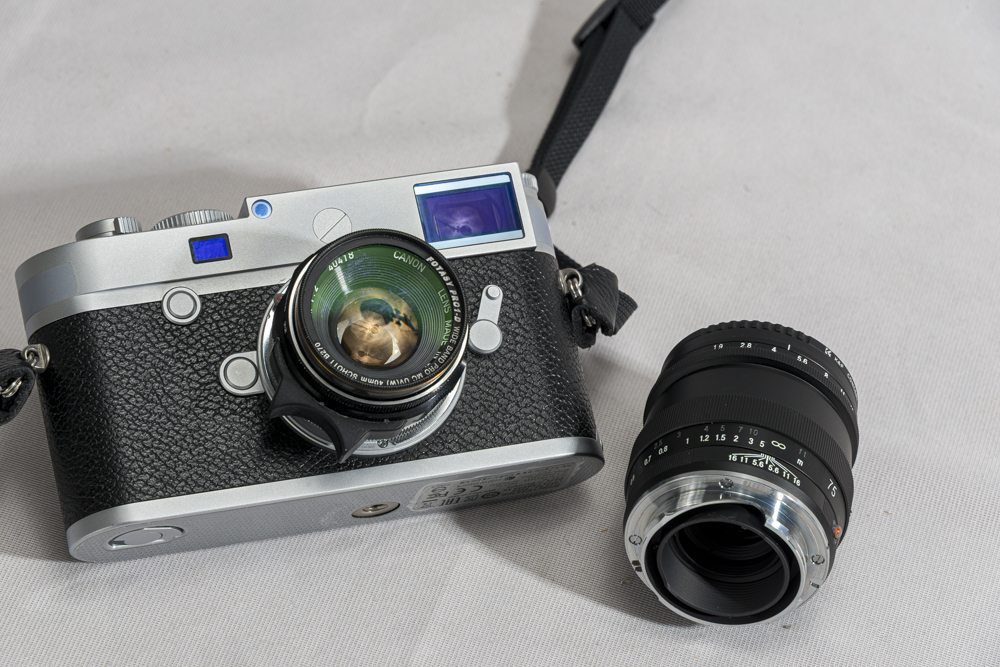
When I bought my first Leica M3 in 1971 it was about as fast a street snapper as there was. Later autofocus, anti-shake and auto exposure were added to more modern cameras by the great Japanese camera makers and the Leica went from hero to zero when it came to operational speed. Only the stealth factor remained, something I always believed was enhanced by the amateur looking silver finish. For some reason that attracts less attention than the black favored by most camera makers today.
And speaking of stealth, no-one needs the stock red ‘Leica’ dot which screams ‘Steal me now’, so here it has been replaced with a faux silver ‘screw’ – you know, the one Leica charges $1000 more for on the M10-P. ‘P’ for ‘Professional’, you understand.
Yet the M body, now in digital form and, with the M10 and M11, finally identical in size to the film bodies of old, remains a favored street snapper. With the 35mm lens, stopped down a bit, zone focusing is as close as you get to fast autofocus, the shutter is quiet and the whole package is small and unobtrusive. With the 75mm lens, when detail is sought, a more contemplative approach to focusing is called for, especially with the unforgiving nature of the sensors in the M10 and M11. In turn these sensors will ensure you will never use film again. The M10’s sensor is as noise-free at ISO 6400 as Kodak Ektar film is at ISO 100, which is 6 stops faster. As for color rendering, the magicians at Leica have seen to it that colors are rendered every bit as well as that fine Kodak film delivers, but without dust, scratches and interminable processing delays. And film is not film any more. It’s all digitally scanned. Enough with the ‘film look’, already.
For street use I set the aperture priority exposure measurement to Auto and the film speed selector likewise, limiting the slowest shutter speed to 1/4f where ‘f’ is the focal length of the lens. That pretty much ensures an absence of movement blur, even when pixel peeping. Both lenses are 6-bit coded (by me!) which ensures that the correct focal length is communicated to the body, allowing proper determination of that 1/4f factor.
You can read more about the 35mm Canon LTM here with the 75mm Ultron profiled here.
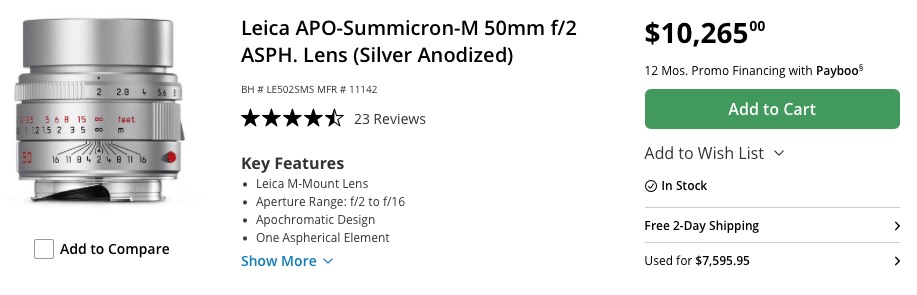
Don’t for one moment think that there is any concept of value with a modern digital Leica M. Even a beater M10 will set you back over $4,000 and only the truly insane – or insanely wealthy – spend the $3,000 and up demanded for a used current Leica lens. The ancient Canon LTM and Leica lenses I use, over 50 years old, and the modern sensor in the Leica body makes these optics sing. Simply stated, those old lenses are better than ever. And Voigtländer fills in the gaps with its modern Leica clones at 21 and 75mm.
Sure, you can take street snaps with any number of modern, inexpensive digital cameras for a fraction of the cost of that digital M body. So why use the modern Leica? Well, nothing feels quite so perfect in the hand or so satisfies with its fit and finish. The optical finder – which shows details outside the frame – is a sheer delight, now made even better with LED illumination of the finder frames and with a higher eye point for the eyeglass wearer (me!) than the finders found in the film bodies. Further, my history with the Leica M goes back over 50 years and its use is second nature to me. So there are elements of familiarity and nostalgia in my choice. The only thing I had to unlearn when moving from the M3 to the M10 is film winding. There is no film winding lever and, strangely, I rather miss it.
The M10 remains my favorite street snapper and while the M11’s 60mp sensor is tempting, I don’t need that sort of pixel density. Plus I would rather stay solvent. The 24mp sensor in the M10 delivers perfect, noise free prints at 13″x19″ at pretty much any ISO setting, and if you want to print larger the viewer will be forced to step back to take it all in. So if it’s perfect at 13″x19″, it’s perfect at any size you want.
* There’s One Born Every Minute.
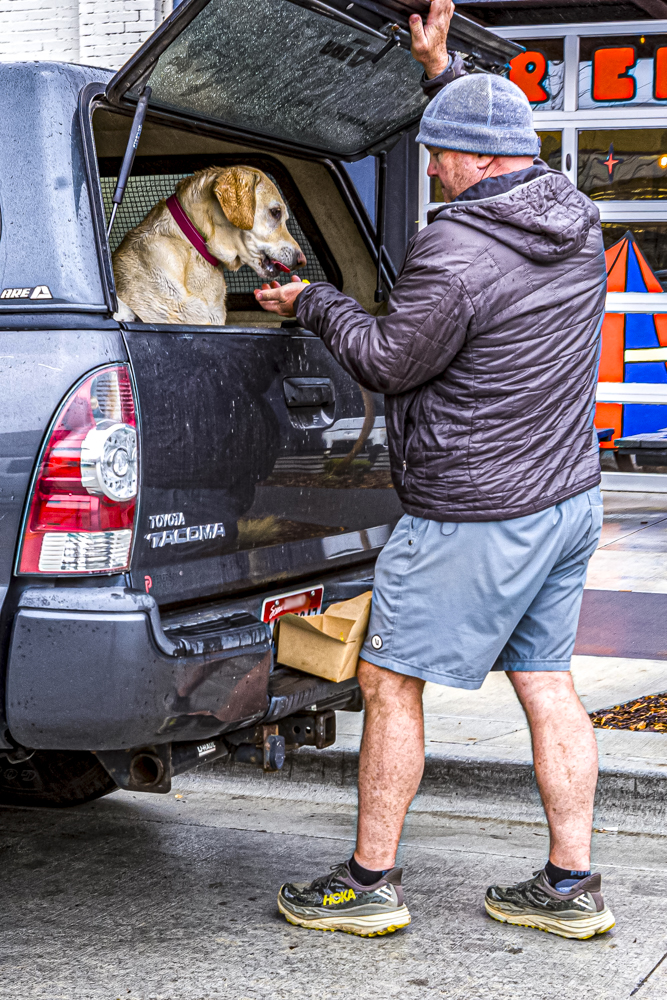
Here is a handful of recent street snaps, all taken with the M10 and the 35mm f/2 Canon LTM:











A remarkable value.
When I documented Carmel’s gorgeous Christmas windows with the monster Nikon D3x body and the exceptional resolving power of the 35mm f/1.4 Sigma Art lens in 2014 I uses a Sirui ball and socket head on my ancient but sturdy Linhof tripod. On completion of that project I sold the Sirui as I do not do landscape photography and in the studio strobes permit the camera to be hand held rather than mounted on a clunky tripod.
Recently I have again developed a hankering for some more night time photography and needed a competent ball and socket head to mount on my old Bogen/Manfrotto 3016 monopod. While old it has only three sections, meaning just two levers to undo and tighten, and is made of light alloy. Even 1/15 second exposures with the monopod are sharp for the device removes any possibility of vertical motion, the bugbear of sharp images. The 3016 is readily found on eBay for $30 or so and is recommended without reservations. If the locking levers loosen with age they are easily adjusted and a monopod is a great deal easier to use than a tripod. It’s also a handy weapon when on the wrong side of the tracks ….
My tool of choice for nighttime street snaps is the Leica M10. Not a fast to use camera by modern standards, no AF or IBIS, but it’s a small package, inconspicuous and comes with fast lenses, my street favorites being Canon’s 35/2 and 50/1.4 offerings.
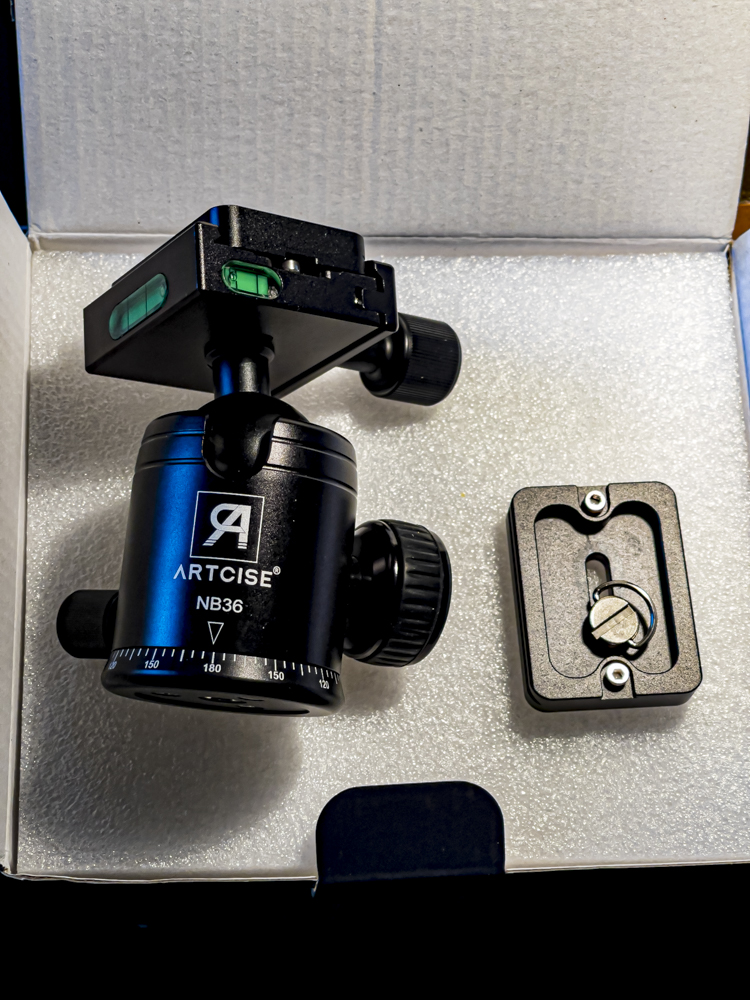
The Artcise NB36 ball head comes with two Arca Swiss QR plates to attach to the base of your camera(s). The female socket is 3/8″ so a small adapter is required if your tripod or monopod uses a 1/4″ size screw.
The head has no fewer than three spirit levels if that’s your thing, two in the top plate and one in the knob which fastens the QR plate. Good luck seeing these at night.
But the real appeal of the Artcise head is the price, which is under $20! It’s a remarkable value for a device which is nicely made, all operations are smooth and the weight capacity is a claimed hefty 33lbs. Not as much as the Sirui’s but hardly a limitation with modern 35mm and digital cameras. None of the three knobs can be fully unscrewed/removed/lost, a nice piece of engineering design. And at $18.70 it’s a keeper as the resale value is precisely zero.
Highly recommended, and some nighttime pictures from the Leica M10 should be available soon.
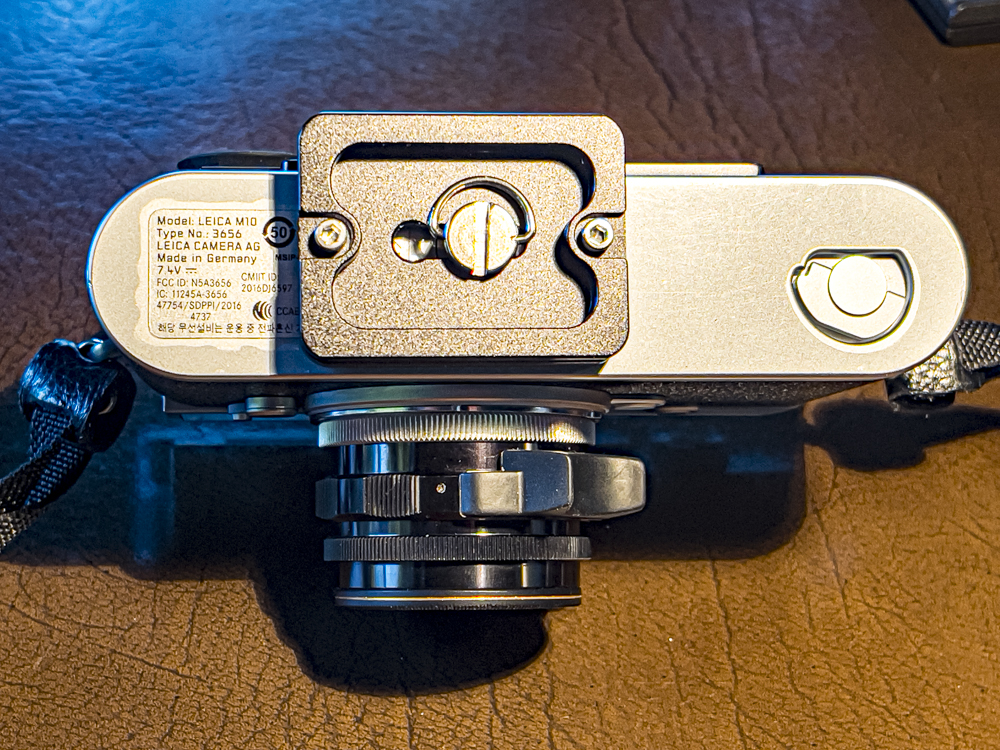
Attached to the M10. Because of Leica’s slavish devotion to a dated removable baseplate, the Arca Swiss style plate must be removed to swap the battery or storage card. The plate may clear the battery door on the M11 if mounted transversely – I don’t know. not having an M11 (I wish!)
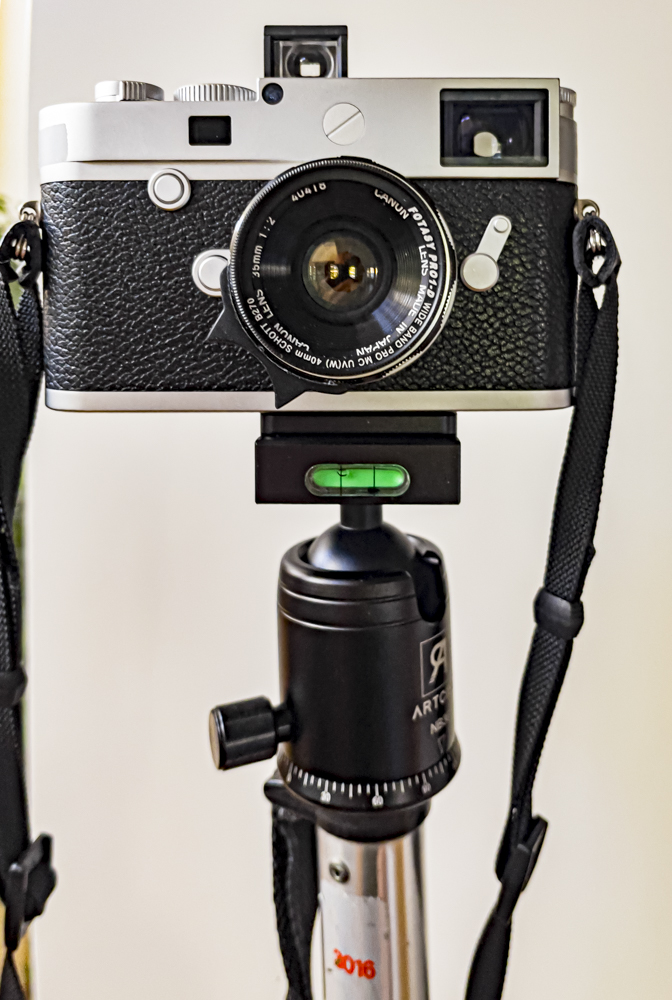
Mounted on the Bogen/Manfrotto 3016 monopod.
Finally here!
For an index of all Leica-related articles click here.
I ordered the Keks meter for Leica-M the day I profiled it here on March 8. It finally arrived today from Hong Kong, 18 weeks later.
Why buy this? To my knowledge this is the first meter since the Leicameter – discontinued in its various guises decades ago – which offers coupling with the shutter speed dial of the Leica M for speedy shutter priority readings. Users of older Leica M film bodies have been waiting for this every bit as long and, as what follows discloses, I doubt they will be disappointed.
Weight: The meter weighs 1.6ozs.
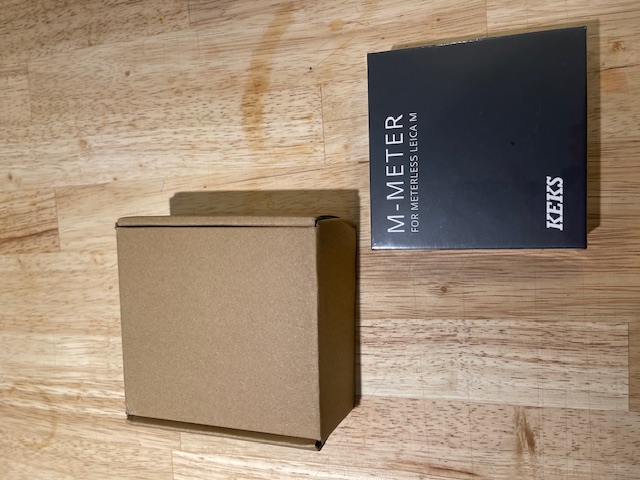
Charge as received: As received the state of charge was 40%, and rose to 90% just 15 minutes after plugging it in using a USB-C to USB-A cable. 90% to 100% took an additional 15 minutes. Not at all bad. (Keks claims 60 minutes for a full charge from flat). As the image below shows, the meter ships with a short USB-C to USB-C cable. I prefer to use a USB-A wall mounted power socket with a USB-A to USB-C cable, which is nice and fast, but the meter should charge nicely from a modern laptop or desktop computer equipped with USB-C, if maybe not as quickly.
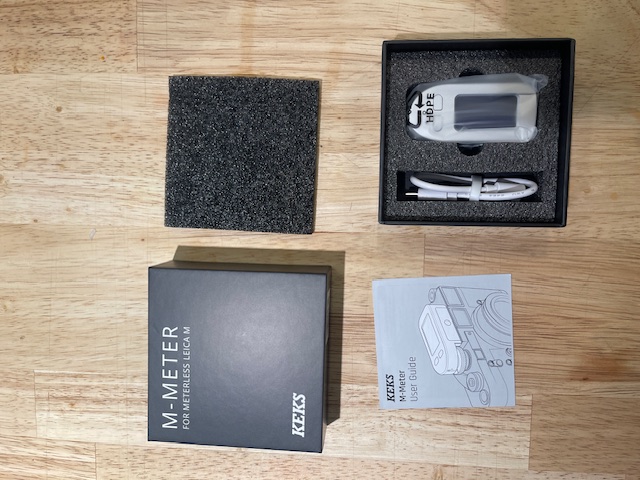
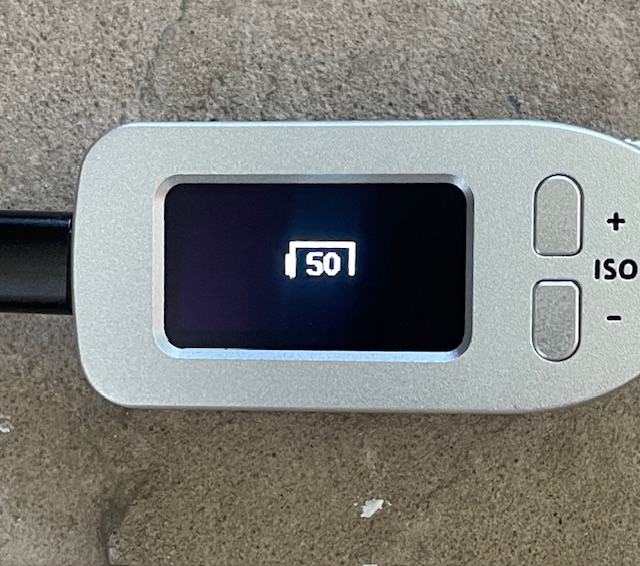
Setting variables: A host of variables can be tailored. You can see how to do this by downloading the manual here. Here is how the meter is shipped, with parentheses showing my preferred setting:
* Using 1/3 stop settings with a film camera is confusing precision with accuracy.
The last setting allows the user to dial in the 1, 1/2, 1/5, 1/10, 1/25 etc. steps for early Leica M3 bodies. Wonderful that the manufacturer thought of this. (Check my Comment, below, how to do this). As I said in my initial review, Keks is going to sell a lot of these meters and I see they are already on backorder at B&H.
The claimed replaceable battery: At this time I have yet to summon up the courage to remove the baseplate to discover what sort of (purportedly replaceable) battery is used. The specifications state only that it is a 220mAh cell. Suffice it to say that the base is retained with four Allen head bolts and these fit a 1.5mm (tiny!) Allen wrench. Update: See the conclusion of this piece, below.
Coupling with the camera’s shutter speed dial: The shutter speed coupling dial turns to ‘B’ smoothly whereupon it is lifted and turned further CCW to a stop. The meter can now be slid into the camera’s top plate mounting shoe, with the camera’s shutter speed dial first set to B. The process is identical to that with the earlier Metrawatt meters. The knurled ring on the meter is then turned CW until the pin drops into the corresponding slot on the shutter speed dial of the Leica. The meter is now coupled to the shutter speed dial and offers far superior ergonomics for shutter speed setting owing to the larger diameter of the meter’s knurled knob. The Keks meter engaged perfectly on my 1959 single-stroke Leica M3.
Use with long shutter speeds: The Keks meter can display shutter speeds as long as 30 seconds. To access these you set the shutter to ‘B’, lift the knurled knob and keep turning counter-clockwise. Coupling is lost but the shutter speed dial is set at ‘B’ where you want it, and you can count the indicated seconds long exposure when making the exposure using a cable release. This function is identical to that in the various Leicameters.
Acceptance angle: Using a point light source and a protractor I measured the horizontal angle of acceptance of the meter at 36 degrees (Keks claims 30 degrees), which is close to the 27 degrees (=90mm lens) claimed by Metrawatt for the Leicameter MR/MR-4, meaning that with the 90mm frame line invoked on the camera semi-spot readings of the area indicated by that frame line are possible with the Keks meter. Now I’m getting the sense that some real Leica M enthusiasts were involved in the design of this meter.
Design errors: Five boo-boos, and none is a big deal.
First, the meter displays Exposure Values (EVs) below the ISO setting, as shown below. Who on earth uses these with a Leica M, which is not equipped to display them?
Second, why show EVs (to two decimal places!) when no decimal places are used in practice with EV equipped cameras like certain Rolleis, Retinas and Hasselblads? It would be nice if the EV display could simply be hidden as it adds useless clutter. Perhaps a piece of black insulating tape is called for?
Third, it would be nice if the aperture was indicated as f/4 etc. not 4.0F.
Fourth, the display sometimes indicates 1/50th (the flash setting) when it should display 1/60th, especially when moving from a slower to a faster shutter speed. This error is accounted for by sample-to-sample variations in the Leica shutter speed dial’s detents and is not Keks’s fault. Keks is to be applauded on delivering a fix – see “Shutter speed calibration”, below.
Fifth, on one or two occasions I got wildly inaccurate readings on a first press of the rear button (the readings come on instantaneously), cured by a second button press. The errors are so egregious that you are not about to be fooled. Just press the button again.
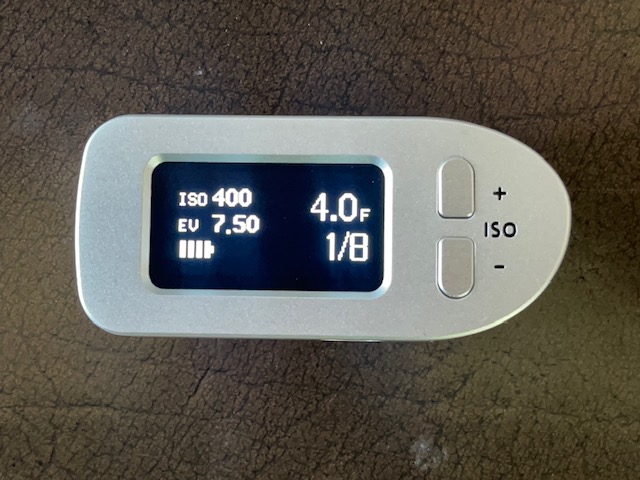
Continuous exposure readings: A double press of the rear button is required to enable continuous readings – a ‘C’ will appear on the display to the right of the battery charge indicator. A single press will lock the reading, exiting continuous reading mode. Beautifully implemented.
Shutter speed calibration: The shutter speed dial click stops are equally spaced on the Leica except for those between 1/30th and 1/50th and between 1/50th and 1/60th. 1/50th is the electronic flash synchronization setting and the click stops between the adjacent speeds of 1/30th and 1/60th are half the spacing of all the others. As shipped my Keks meter could not distinguish between shutter speed dial settings of 1/50th and 1/60th, showing 1/50th for both settings as the shutter speed dial was rotated toward shorter shutter speeds. So a speed of 1/60th was incorrectly shown as 1/50th. Keks includes a useful calibration function to address the issue of the set speed and the indicated speed differing, as here.
With the shutter set at 1/60th but the meter indicating 1/50th press the power (rear) button and the ISO ‘-‘ button to enter Settings. Then use the ISO ‘+’ button to cycle to ‘Reset’. Press the power button then press the ISO ‘+’ button until you see ‘Calibrate SS’. Press the power button. The display will read ‘Shutter: B-2’. Using the ISO ‘+’ button keep pressing the button until you see ‘1/60’, then press the power button once more. What was formerly displayed erroneously as 1/50th second is now correctly displayed as 1/60th second. This calibration function works for all shutter speeds, though in my case only one shutter speed was being displayed incorrectly. Given that there will be sample-to-sample variations in Leica M bodies Keks can only be applauded for adding this function. Clearly the designers are avid Leica M film camera users. Ingenious.
Tech specs for the sensor:. Keks uses the Vishay VML7700 sensor and you can see the full technical specifications by clicking here.
Setting shutter speeds with the meter off: You cannot set shutter speeds on the camera when the meter is off. It must be on for these to be visible. But it’s just a quick press of the rear button to illuminate the display so, again, not a big deal.
Battery level: This is disclosed as shown at the lower left in the image above. 4 bars = 100%. The Leicameter MR/MR-4 uses a front panel battery level check, notorious for mechanical failure. The Keks approach is better, acting as a continuous reminder in use, with no buttons to press.
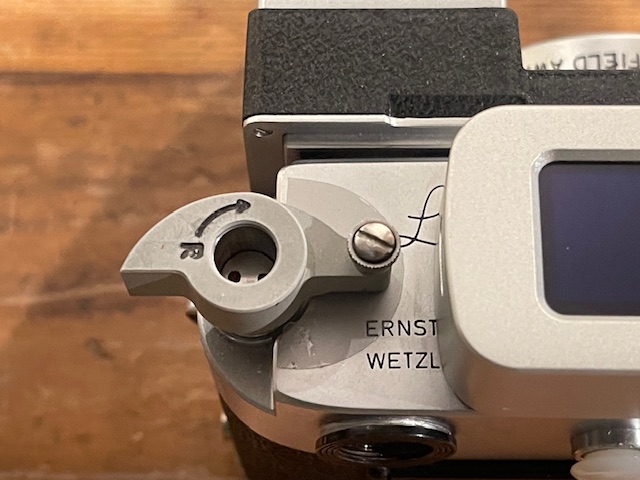
Clearance for a rewind crank: Unless your camera is one of the M4 variants with the angled rewind crank, you may prefer to fit your earlier Leica M with a rapid rewind crank, as I do. In this case clearance with the side of the meter’s case is important as you really do not want to have to remove the meter to rewind the film. As the image below shows, clearance is more than adequate:
Use in poor light:. Far superior to the older Leicameters as the Keks meter’s OLED display is internally illuminated. I just wish it was black on white rather than white on black.
Beyond the limit? If the light is below the meter’s sensitivity range the aperture display simply changes from an f-number to three dashed lines. Fine with me.
Sensitivity: Keks claims EV1 at the lower end, which is 1 second at f/1.4 with ISO100 film or 1/4 second at f/1.4 with ISO400 film. My tests suggest this is fairly stated. The upper limit is stated as EV20 which is jolly bright sunshine! I could get it as high as EV21 in the brightest setting.
Accuracy: I compared readings from the Keks with those from my Leica M10 (built-in meter) and from my Gossen Luna-Pro F under a broad variety of lighting conditions. Used properly the Keks was in agreement with both.
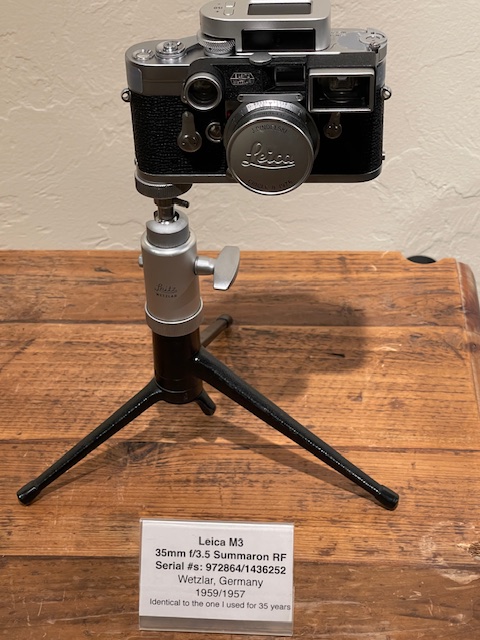
The Keks meter for Leica M is recommended without reservation, especially at the price asked.
Battery replacement: I screwed up my courage and decided to take the top cover off to see about battery replacement.
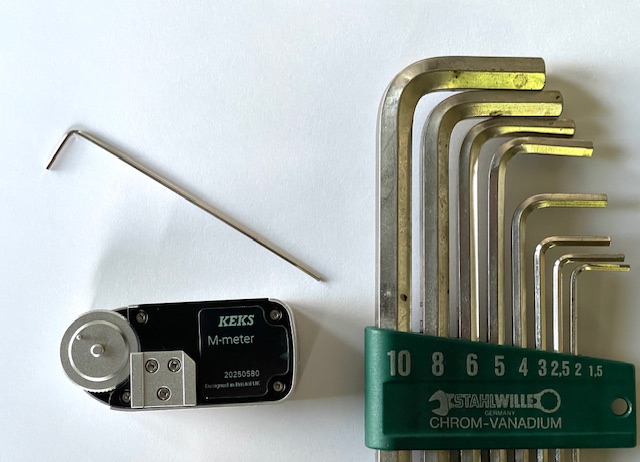
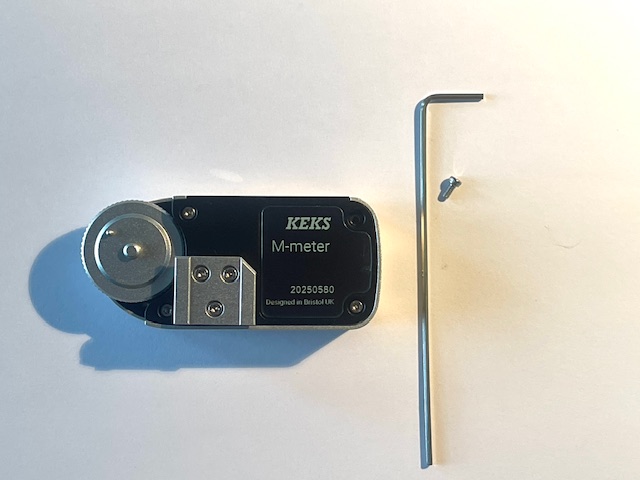

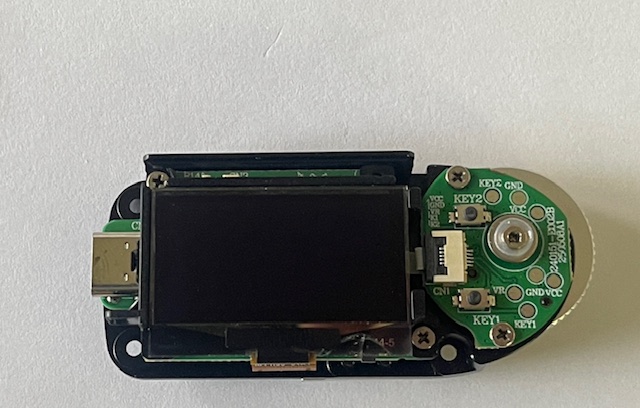
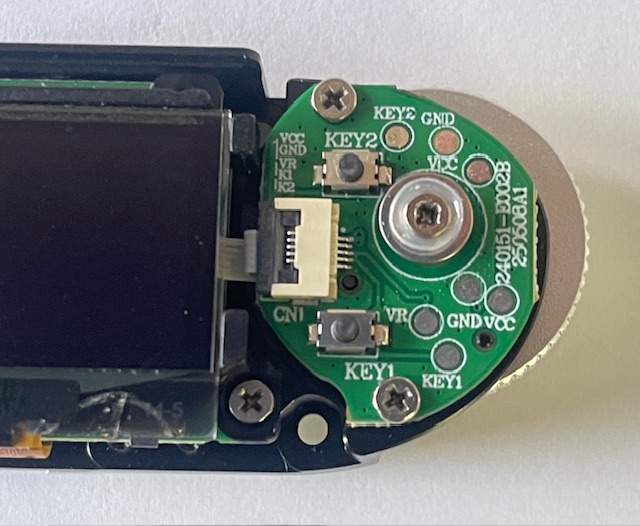
The battery is not immediately visible after this first stage dismantling. I suspect it’s under the right hand assembly – last image above – but fear that dismantling that will make reassembly difficult as it houses the shutter speed dial/rotator. So I called it quits at this point. (Check the Comment by Keks, below).
So my suggestion to Keks – their comment below suggests they read this blog – is to publish the battery replacement procedure for those mechanically adept. The economics of sending the meter in for battery replacement likely do not solve. Now, sure, that battery should last many recharge cycles and several years, but as a legacy product – and a fine one at that – it would be nice to know that the meter can be kept functional in the long term.