Don’t emulate the Poles in 1939
I can claim some authority in writing about the ostrich-like behavior of my noble Polish ancestors in 1939. You see, my ancestry goes back for more centuries than I care to admit in that most conquered, yet most proud, of nations. When I was growing up, I looked around, and once old enough to appreciate these things, I realized we were poor. Why so?
That was in London. Back in 1939 when the Stukas threatened and the Panzers loomed and the Polish army prepared to charge on horseback, my parents placed all their valuables in a safe in Warsaw. You might well question this asset diversification strategy when the most powerful, aggressive nation known to man was massing on Poland’s borders. I hold no rancor for my parents’ behavior. Hindsight tends to be perfect and if I could only get the Wall Street Journal a day or two early, place just a couple of hot trades, I would be writing this from my Gulfstream private jet. It happened. Get over it.
My parents, of course, were in deep denial. After all, how do you move 15,000 acres of some of the most beautiful land man has seen? Deep denial. Like modern users of film.
To get in the mood for this piece, I thought I would turn on an LP, for old times’ sake. They do sound good, we all know that. If you can disregard the scratches, the click and pops, the cleaning ritual and on and on. So I pulled an old Louis Armstrong number out and it’s playing as I write. There on the inner sleeve, forgotten, was a lovely note from my dear departed mother to herself. She wrote ‘od Tomeczka’, meaning it was from me. I had given her this LP on December 7, 1985.

So what has all this to do with photography?
Well, that little note on the inner sleeve of the 20 year old LP speaks to obsolescence every bit as much as film speaks to the sea change in photography. Like Proust’s madeleine dipped in tea, it brought thoughts of the need for change flooding back to my brain.
Like most of us, I have been forced to change. LPs gave way to CDs. CDs eventually moved to the iPod, 300 discs in the space of a shirt pocket, fidelity uncompromised. The cathode ray tube gave way to the flat screen. VHS tapes moved on as DVDs came in. They must be due for obsolescence any time soon. How else are the electronics manufacturers going to stay alive?
And, like the aggressive German masses congregated on the border of my parents’ estate in September, 1939, that change is now rolling over the serious photographic world faster than we can begin to realize.
It started with the mass consumer. Easy prey for innovation, digital cameras were sprung on him seemingly overnight and, even if he still struggles to get the picture while squinting at the barely visible screen in broad daylight, the digital camera has become as de rigeur as the SUV. A staple of American life, meaning the rest of the world will follow in short order.
The professional press photographer got the idea three or four years ago when up-market SLRs started sporting acceptable definition and the city desk editor wanted to beat the competition with the latest picture of the celebrity of the day behaving badly. The studio and wedding professionals followed suit and Apple recently jumped on the bandwagon with software aimed solely at enhancing digital workflow with RAW files. It’s called Aperture. Some one third of the content in the leading Macintosh monthly, Macworld, is now dedicated to digital capture. Capture. That’s hip talk, I have learned, for snapping pictures.
The Art Photography set, however, held out, clutching their platinum prints to their troubled chests. Nothing can equal the quality of a darkroom print. Deep denial.
One second – I have to attend to my 80 year old technology and flip the LP after all of 20 minutes of playing time.
Well, I think the Art Photography set, while not wanting to admit it, is getting the idea. The last ball to fall.
I subscribe to a couple of top quality photo magazines. Strictly minority material. LensWork and View Camera. They showcase fine work and offer a good reading of the pulse of the market.

LensWork has a very high opinion of itself, right down to its small size masquerading as Art. The magazine has very high production values. Printing is fabulous (as it should be for so small a format), writing is excellent, the whole thing reeks of quality. Until a couple of issues ago they refused to accept ink jet prints for publication! Suddenly, seemingly 50% of their content is all digital – camera and print – and the equipment, which they invariably mention, is pretty much at the consumer end of the spectrum, meaning mid-range SLRs and the like. Nothing like market forces. Needless to add, content is strictly monochrome. They say it’s for aesthetic reasons, which means they cannot afford color with their miniscule print run. No matter. It’s a fine magazine whose content always makes you think. It’s going digital fast.
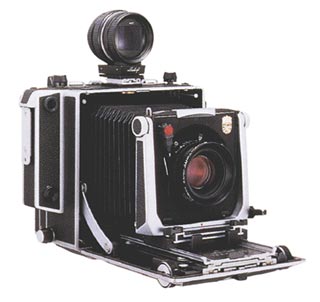
View Camera, on the other hand must have either some of the most dyslexic, or most stoned, proof readers in the world. It reminds me of that old leftie standby of English newspapers, The Guardian, known to one and all as The Grauniad. Beloved reading of faded academics in tired tweeds who think fondly of Stalin as a great liberator. An issue of either VC or TG without typos is like a US Congress without crooks. But once you get past this slovenliness, you find a fine magazine with a balanced mix of the photographic and the technical. I just received the current issue and what do I find? Articles on digital backs for 4â€x5†cameras! Reminiscent , it is true, of Lord Chesterfield’s thoughts on sex – “The pleasure, momentary. One’s position, ridiculous. And the cost …. damnable.†Now you not only have to lug the camera, lenses and tripod, you need a laptop computer, back-up hard disks, cables and a very, very costly digital back. We are talking the cost of a new car here. Of course you save the weight of all those film holders. Great. And if you use a scanning back every picture takes many minutes to expose. Go on line to one of the advertisers selling scanning digital backs and you find a comparison of full frame 35mm digital (meaning Canon) with scanning 4â€x5†backs. Now is that defensive or what?
Another article in Veer Pamela, sorry, View Camera, speaks to ULF. That’s Ultra Large Format to the ignorant, meaning people silly or strong enough to lug around 8â€x10†cameras so they can make contact prints from the negatives, allowing them to be printed smaller than actual size in photography magazines. No, I’m not kidding. These poor photographers pool their meagre resources (all that’s left after their chiropractors’ fees) to convince Kodak, Ilford et al to make just one more batch of 8â€x10†or 16â€x20†film. Please. Humor us. Just one more time. The fact that Kodak and Ilford even bother confirms that they both deserve to go out of business. You want to own stock in a company engaging in this sort of trivial pursuit?
Denial. My parents were graduates of the art. These fellows are post-grads. The only difference is they are not risking their lives.
Aargh! The needle on that LP is stuck again, right in the middle of Basin Street Blues.