Hanging huge prints

Not a lot of fun.

Having mounted and framed the three 24″ x 36″ prints for my living room it came time to hang them. The post production time for printing, mounting, framing and hanging is a multiple of the time required to take and process the images, but there are no short cuts. Scrupulous cleanliness is dictated as even the smallest particle of grit will destroy the mounted print’s surface and white cotton gloves for handling everything are mandatory, if greasy fingerprints are to be avoided. In other words, the whole process is a royal pain.

First my son and I debated in which order the prints should be hung. After trying all the variations we decided on this:


Common Ninebark, Common Blanketflower and Flax wildflowers.

The print location is above three sets of louvered window shutters and we used a self-leveling laser level which projects a pair of 90 degree laser light lines on the wall, making alignment with the center of each pair of shutters a simple matter:


Laser level on the Linhof tripod.
A very tall ladder is involved.

As this location has a 19′ ceiling and we wanted the prints approximately half way up a very tall ladder was called for. Not much fun, I confess.

Here is the result after much struggling with this monster ladder, not to mention moving furniture around to accommodate it.


Common Ninebark, Common Blanketflower and Flax wildflowers.

A lot of work, with much fun finding the wildflowers in my community and photographing them, followed by hours of mirthless, hard labor to complete the project.

This will convey a sense of the enlargement ratio. I am holding the original of the Common Blanketflower in my right hand:


Holding the original and the print.

Making huge prints revisited

It’s a little easier now.

Over a decade ago I wrote about making a 36″ x 48″ print for wall display. You can read about that here. Now that was a bit of a cheat, really, as I had to assemble the final result from four tiled 18″ x 24″ prints, the largest my HP DJ90 could output. Still the result worked pretty well.

Today the largest my Epson ET8550 printer can manage is 13″ x 19″, and while that’s fine for most purposes, not to mention easy to mount, mat and frame, I recently got a hankering for something larger, and luckily have wall space to accommodate it.

The Postal Annex nearby recently installed two very large printers, a 44″ Canon and a 64″ Hewlett Packard, selling their services to those requiring large banners and posters. The HP, according to the proprietor, can print on vinyl paper for waterproof outdoor displays, but is limited to eight inks, whereas the Canon boasts no fewer than a dozen. Given that making very large prints is a once-a-decade exercise for me ownership of either of these monsters makes no sense (the HP costs a stunning $38,000), so when it came time to make three 24″ x 36″ prints I duly delegated the task and emailed the TIF files – each some 60mb in size – to Postal Annex. Four hours later saw the job completed and I was on my merry way home to attend to mounting and framing tasks, poorer for the modest sum of 3 x $45. Not at all bad, and the print quality, on Canon’s satin photographic paper, is everything one could wish for. Too bad they do not offer a glossy option.

Until mounted these prints are very fragile so the quicker this task is completed the better. I use 24.5″ wide mounting tissue and my Seal Jumbo 160M heated dry mounting press requires six ‘bites’ (90 seconds each @ 170F) to do the task after first tacking the print, tissue, and mount together using a heated tacking iron. The prices for a new press and iron are ridiculous, and given that’s there’s little to go wrong I recommend a search on eBay where the press can be found for $500 and the iron for under $50. Much of the cost of the press is for shipping as this whopper weighs a stout 60lbs. Repair parts for the press, should anything fail, are available. The press is now marketed under the D&K name, though it’s otherwise unchanged,


Six passes needed for a 24″ x 36″ print.
Release paper protects the print’s surface.

I opted for plain wooden frames with plexiglass – cheaper than glass and, more importantly, much lighter. Given that hanging the framed prints involves my least favorite pursuit – ladder time – light weight is an issue. The unstained pale wood contrasts nicely with the black backgrounds in my wildflower images. The plexiglass has a protective clear film on both sides and it does well to remember to remove this as it robs definition. Here’s the first of the three framed prints ready for hanging:


Ready for hanging.

After removing the pressed wood backing board I retain the print in the frame using a framing points driver tool. Owing to the thickness of the mounting board the backing board can no longer be installed, so a couple of hanging hooks is attached to the frame for the hanging wire.


Framing points replace the backing board, which no longer fits.
The hooks and wire came in this kit.

The all in cost of each framed print including printing and all framing materials is a reasonable $102, each.

Now it’s ladder time. Ugh!

Common Blanketflower

Picked locally.

For an index of all Leica-related articles click here.

This charmingly named flower gets its name from the colorful blankets made by American Indians.


Click the image for a larger version.

Taken with the best macro lens I have, the 135mm El Nikkor. Leica SL2S, Nikon PB4 bellows, 36 images focus stacked. Helicon Focus really struggled with this one owing to the considerable depth, and I had to do quite a bit of retouching to remove ghosting. The long focus rack of the Nikon bellows works well here. That lens cost me just $65 …. no one wants enlarging lenses today, and it’s cheerfuly ‘repurposed’ here. It delivers an almost etched rendering. Just sent it out for a 24″ x 36″ print on the 44″ 12-ink Canon printer at the local Postal Annex.

In the style of the Dutch Masters

Lighting is the key.

For an index of all Leica-related articles click here.

Whereas the southern European painters of the 16th and 17th century typically focused on the adulation of religious figures, northern artists – Germany, Belgium and especially Holland – were more interested in showing property, a secular conviction. Never was this more so than in the 17th century work of the Dutch Masters which typically had a high window light one one side with the other half of the subject in the shade, some light captured from an adjacent white reflecting wall. And whether the subject was possessions, food, flowers or people, much the same lighting approach was used, to great effect.

A fine example is the work of Jan de Heem (1606-1684) who specialized in still life painting. This splendid Vase of Flowers (1660) can be found in the no less splendid National Gallery in Washington, D.C.:


Jan de Heem, Vase of Flowers, 1660.

In my image of the Common Ninebark wildflower I have emulated the Dutch lighting approach and while the subject is simpler than de Heem’s complex one, the lighting effect is similarly dramatic:


Common Ninebark

Leica SL2S, 100mm Macro-Elmar-R at f/11, Bellows-R, three Novatron strobes, ISO 100. Composite of 55 images, focus stacked in Helicon Focus. I prefer a touch of light on the black background to emphasize depth.

I had the local Postal Annex print this on their Canon 12-ink 44″ wide printer in a 24″ x 36″ size for wall display and the results is a knockout. The file I uploaded included the related Adobe sRGB color profile. With this not so little hummer costing over $5,000 and a set of ink cartridges running over $2,000 alone I’m not about to buy one for home use, especially when the print cost me a modest $45, and the color rendering is exactly what I see on my monitor. I would imagine that maintenance of this monster must be an absolute nightmare, what with 12 ink jet nozzles just waiting to clog …. definitely a case of where delegation beats ownership.

My close-up and macro journey

Tons of fun.

For an index of all Leica-related articles click here.


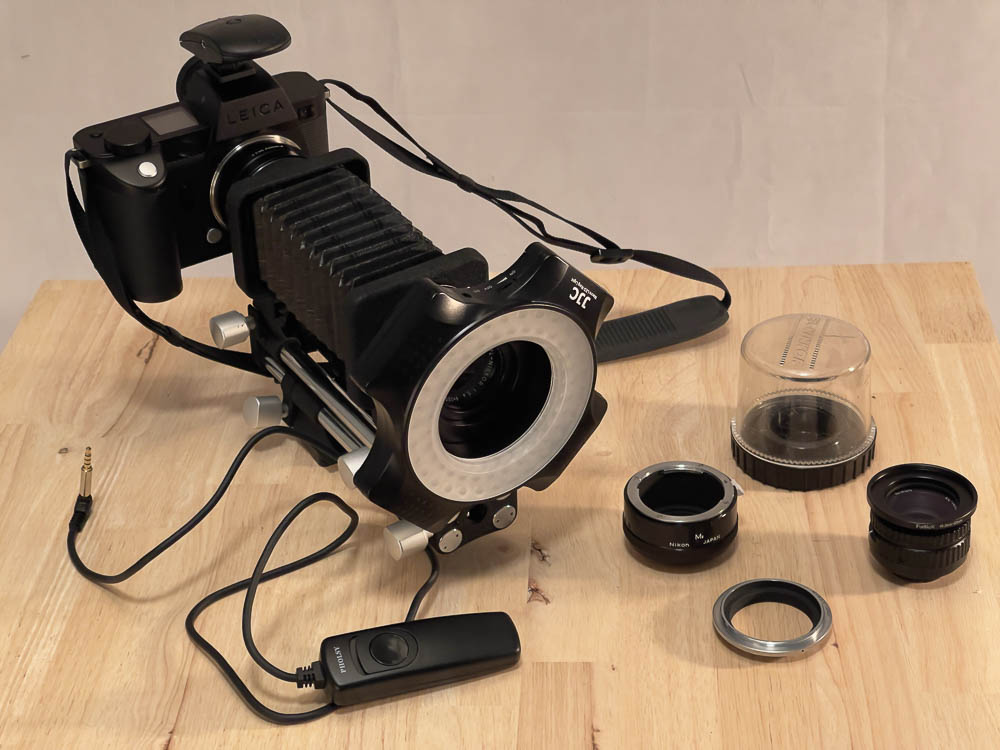
My kit. 135mm El Nikkor on the PB4
bellows. 80mm El Nikkor standing by. Remote
strobe trigger atop the Leica SL2S.


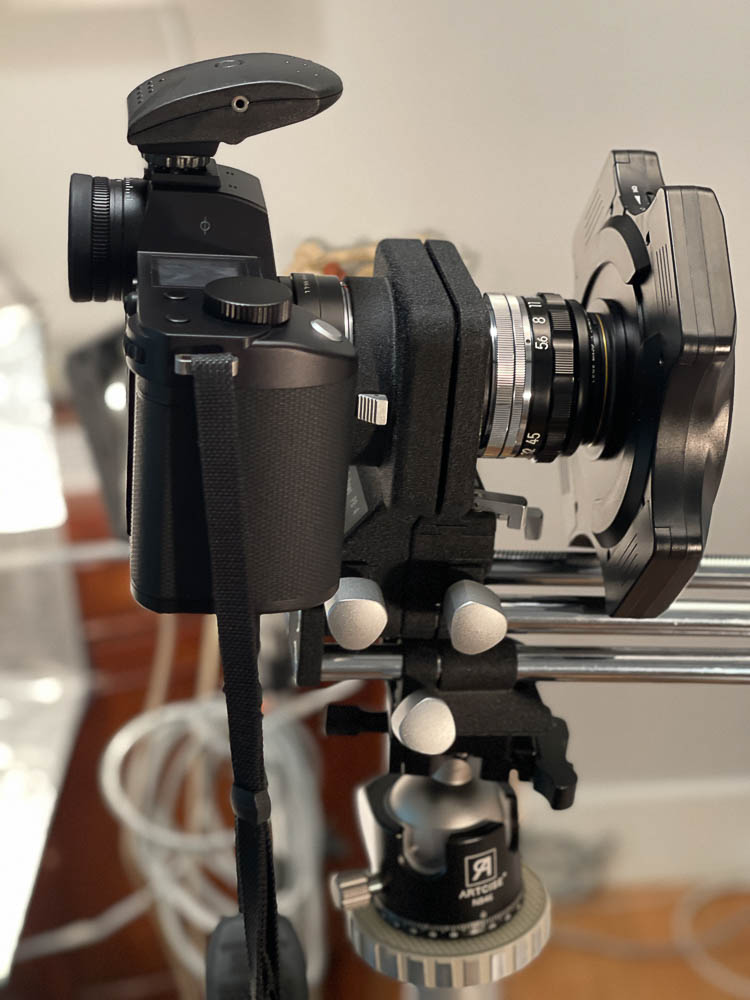
Heavy duty ball and socket head and
massive Linhof cantilevered tripod.

I have published several hardware articles detailing my approach to close-up and macro photography over the past few weeks, as well as many images. I continue working on improving my technique.


Click the image for a larger version.
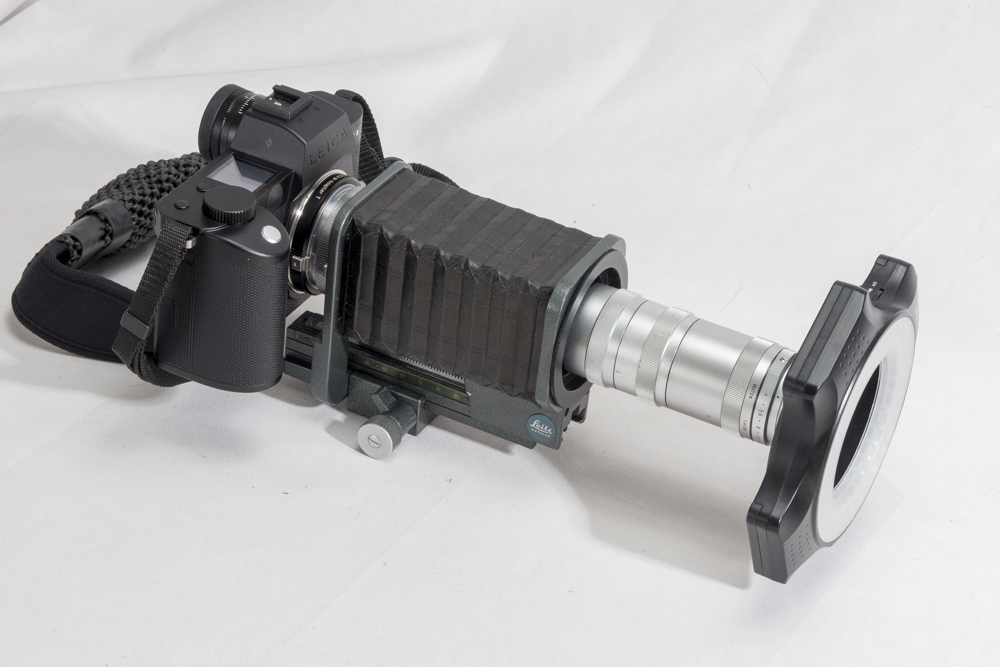
Leitz Focusing Bellows II and 135mm Elmar lens head.
An early attempt with flat lighting.


Click the image for a larger version.
200mm Micro-Nikkor. Note the considerable
improvement in lighting technique.

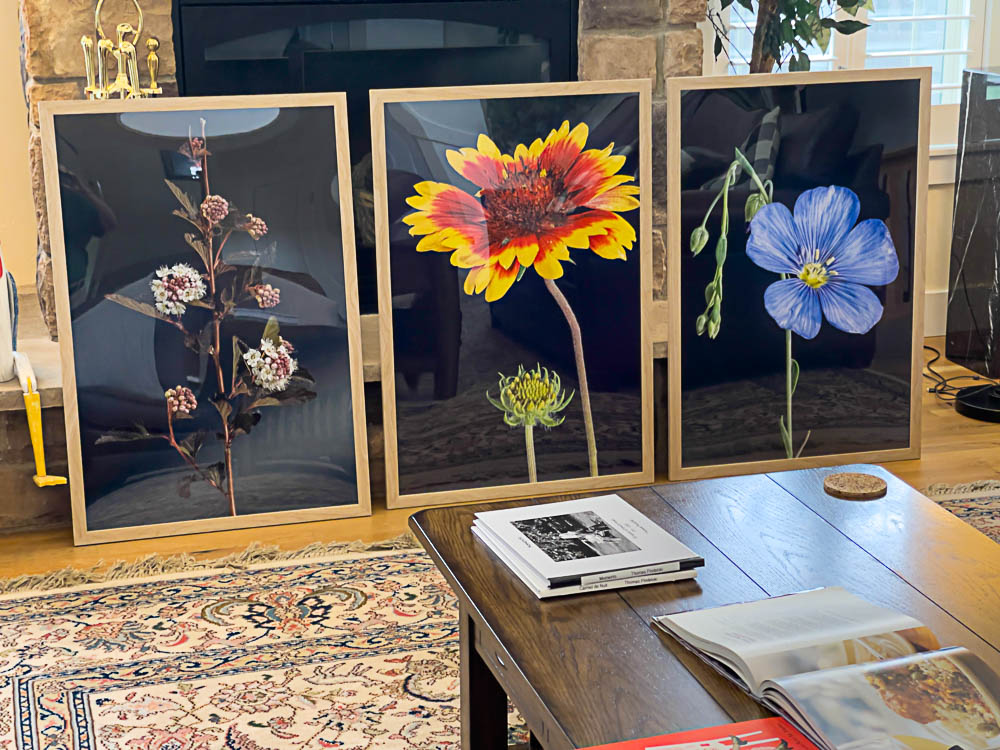
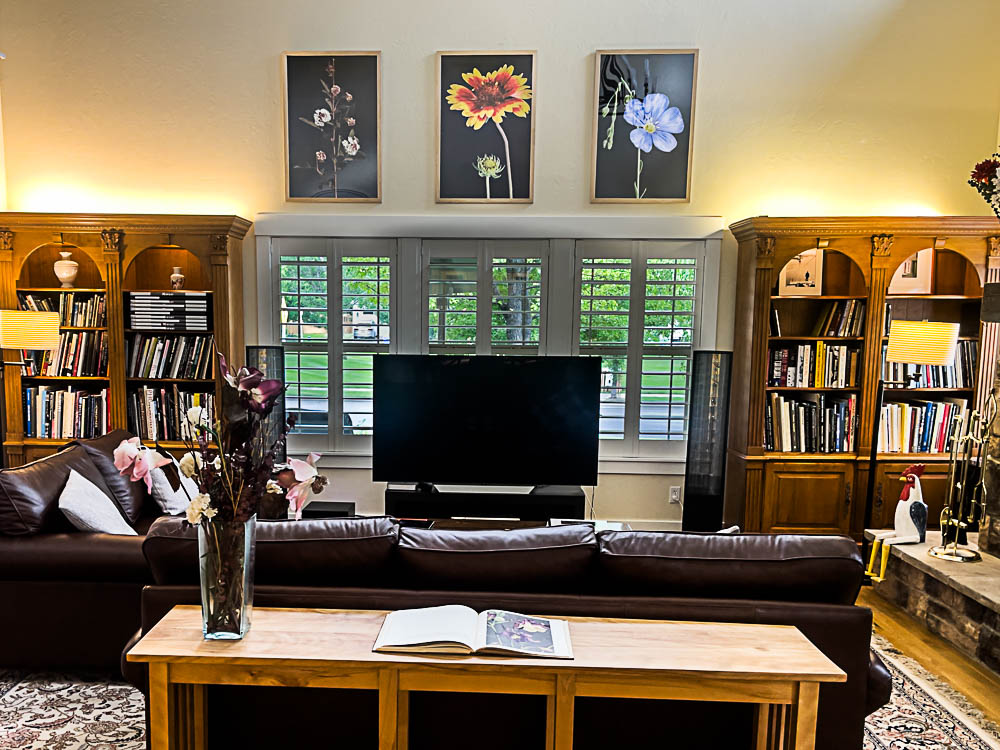
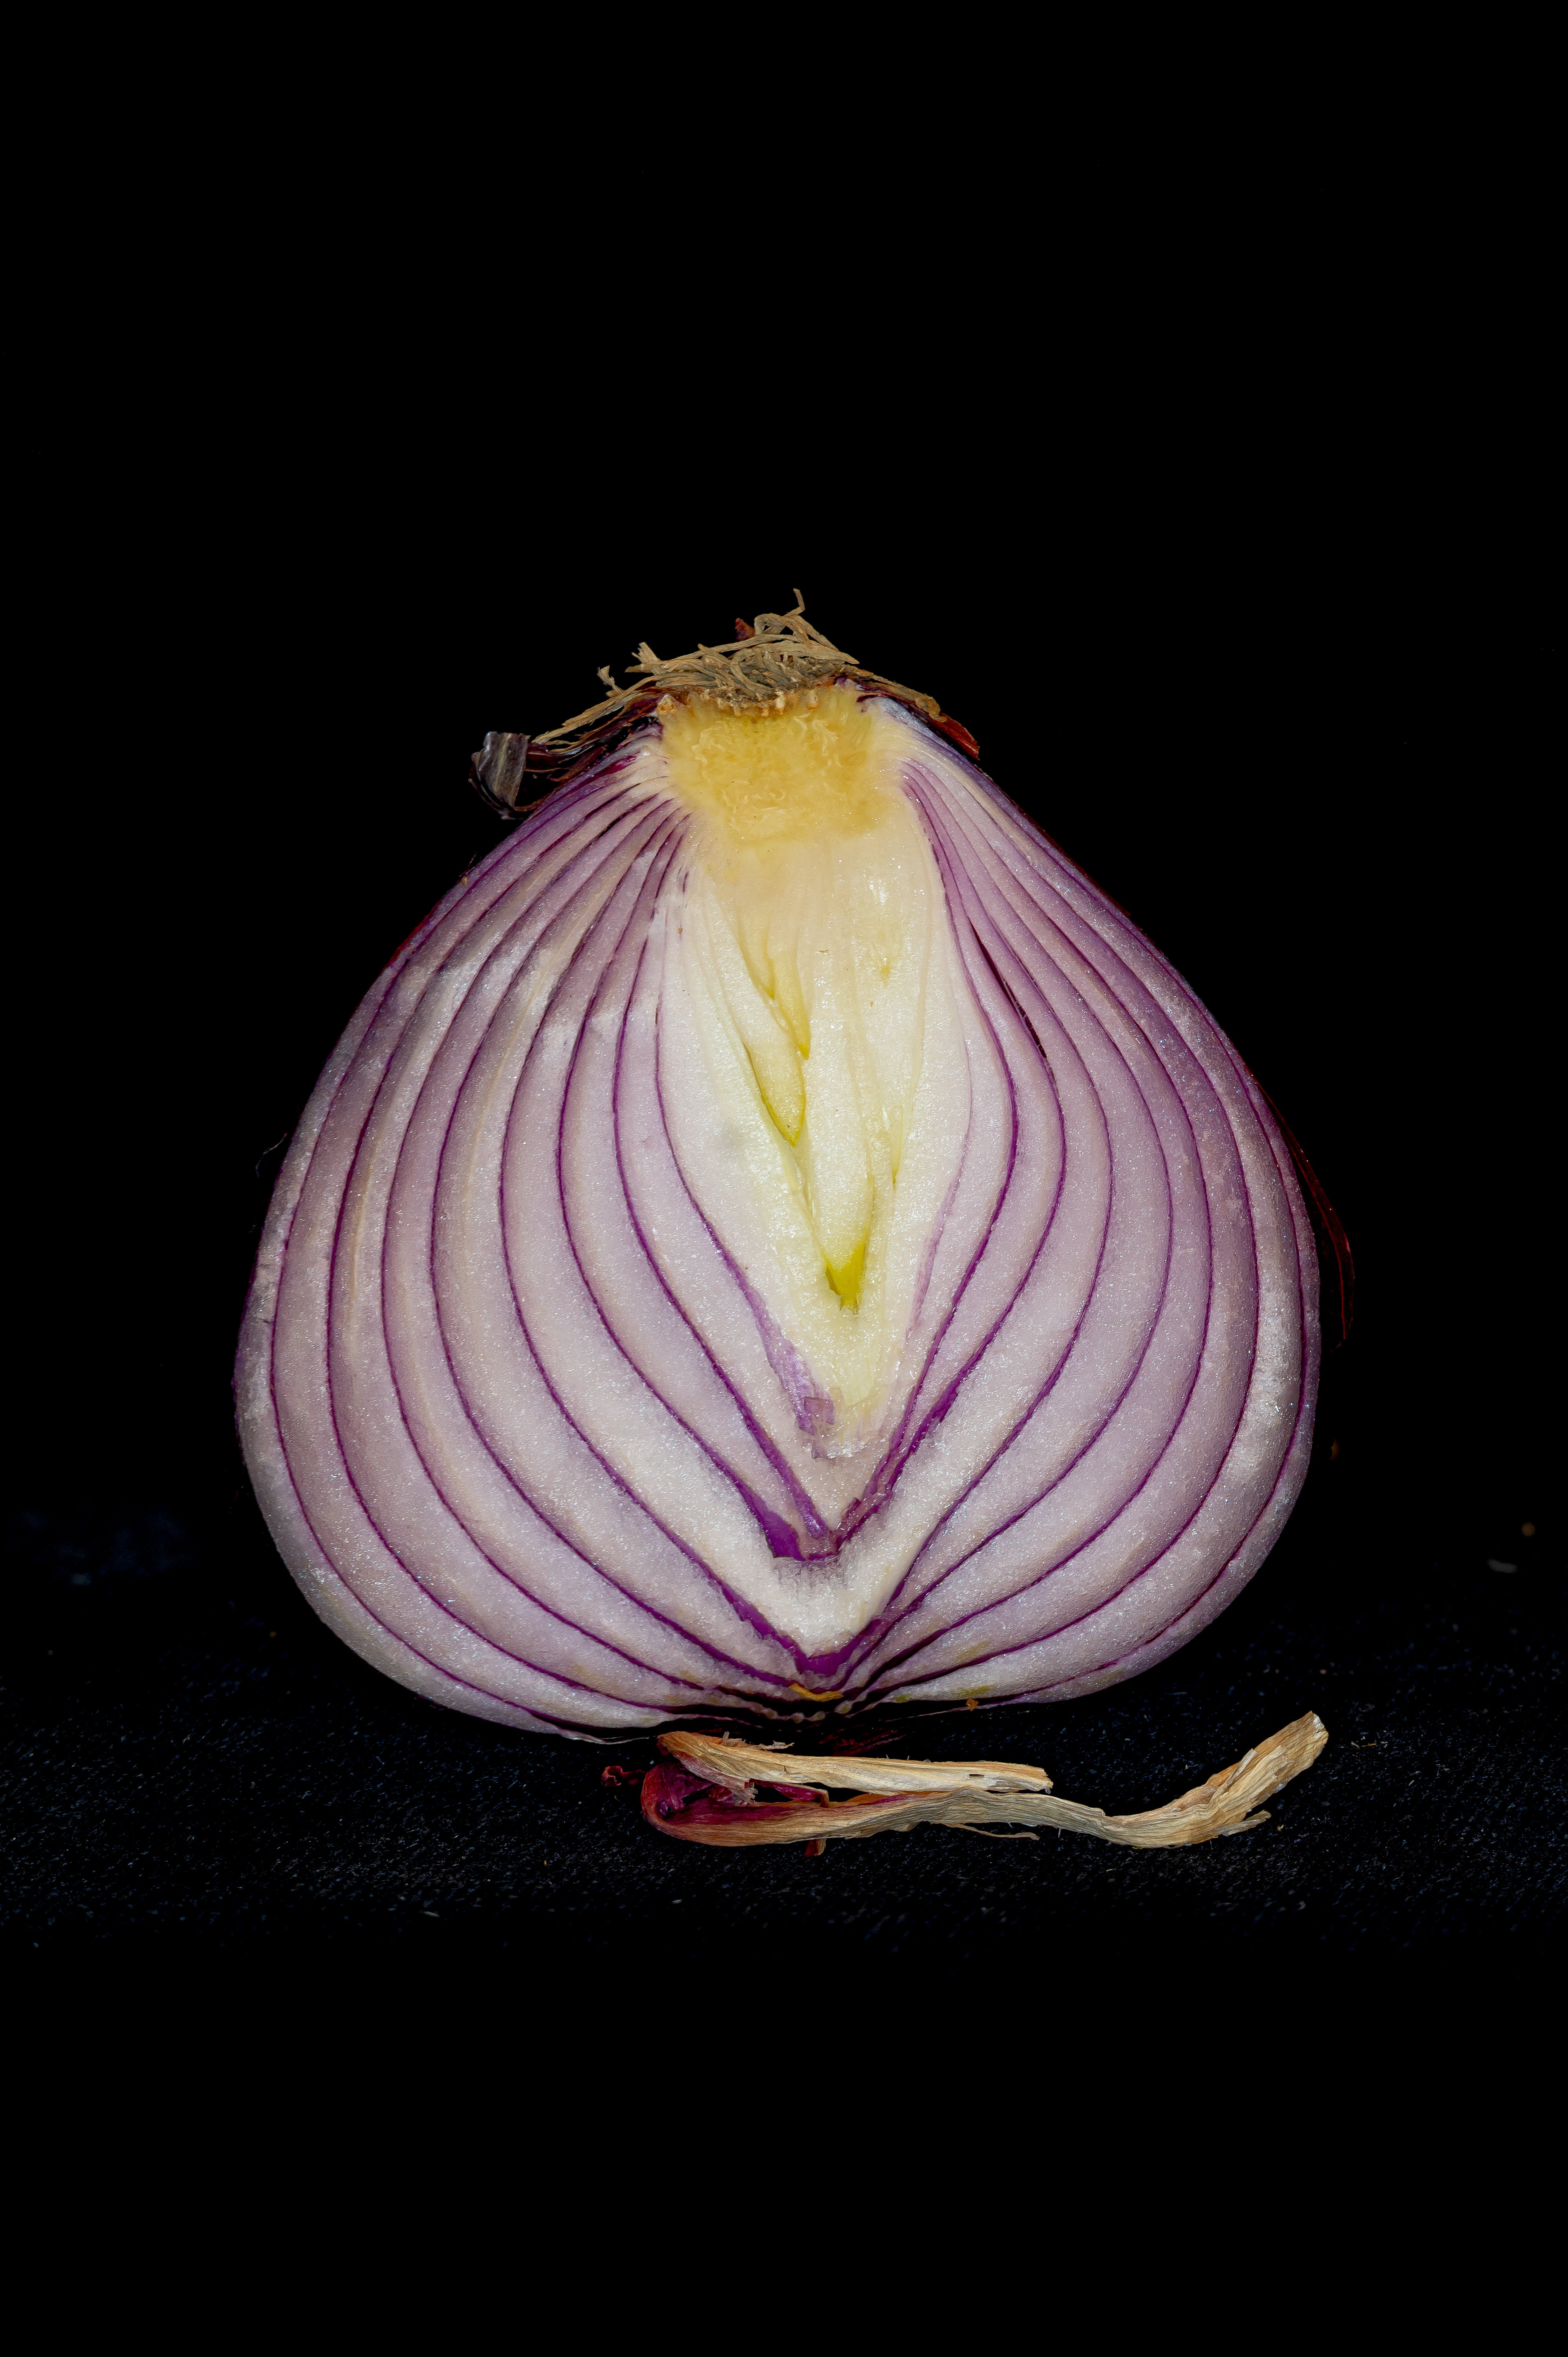
My goal is to illustrate the beauty of everyday foods and flowers, from the simple red onion to the complexities of the Showy Milkweed.

Working mostly in the one half through two times life size range using a full frame sensor, I started my journey with the Leitz Focusing Bellows II adapted to my Leica SL2S mirrorless digital. Any mirrorless digital will work, obviously, and adapters are abundantly available to fit everything together. The Focusing Bellows II, a monorail design, worked very well and I discovered that the lens head of my Leitz 135mm f/4 Elmar, normally used in the RF focusing mount on my Leica M10, was a splendid performer in the close-up range. The one advantage of mirrorless versus DSLR camera bodies is the ability to magnify the image in the EVF for critical focus. Further, the short lens flange to sensor distance (no flapping mirror) makes adaptation of just about any lens out there a simple matter.


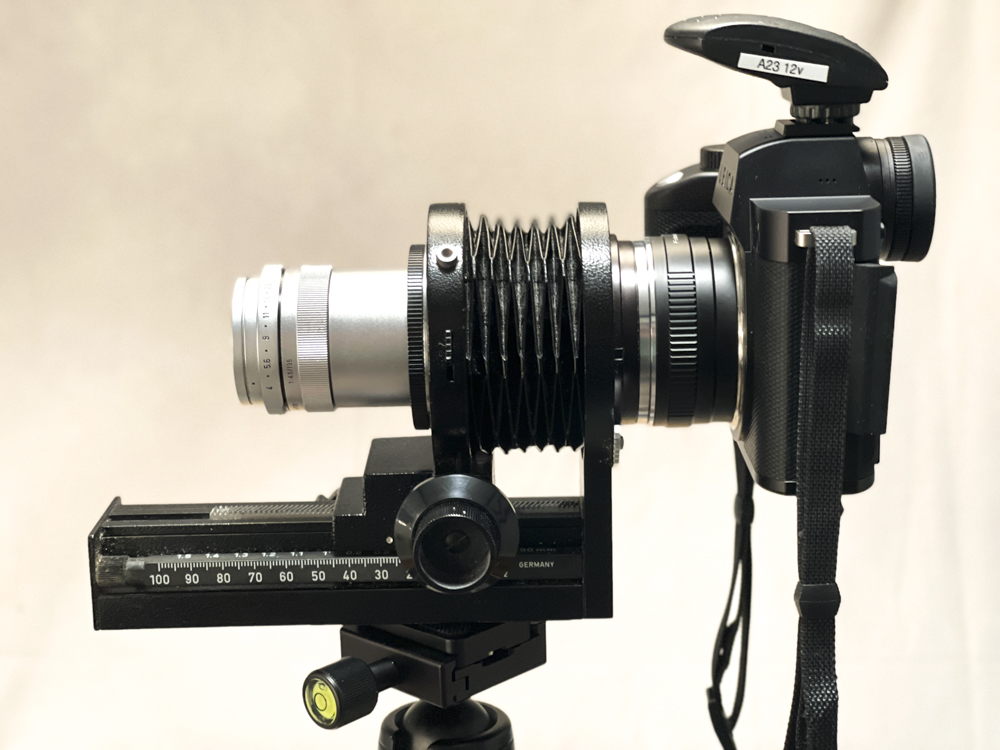
Leitz Focusing Bellows II.

Because I tend to prefer an ‘everything sharp’ rendering I procured a license for Helicon Focus image stacking software, which I has first used decades ago. It’s easy to use via a round trip of differentially focused images from Lightroom and is better than ever. The license fee is a bargain and I see no reason to try alternatives, given how good Helicon Focus is at the job. Apparently Photoshop has a focus stacking feature but from what I have read it’s a bit of a dog, and bog slow. HF is fast and (mostly) accurate.

Though I was perfectly happy with the Focusing Bellows II I chanced on the later Leitz Bellows R complete with a 100mm Macro-Elmar-R lens head, which delivered infinity through life-size focus. Also a monorail design it was, if anything, even more robust than the Focusing Bellows II and the minimalist design proved easy to use with the lens head. The Macro-Elmar-R delivered results indistinguishable from the 135mm Elmar.


The Leitz Bellows-R with the 135mm Elmar lens head.

Later still I discovered the Nikon PB4 bellows, the only one from Nikon’s extensive range which offered front panel tilt and shift, making for easier overall sharp focus with objects not plane to the sensor. This is a traditional four rail design, rather than monorail, and is the ne plus ultra of small bellows hardware. Immensely robust and, like the two Leitz bellows, it includes a rack and pinion focusing rail allowing the camera + bellows + lens assembly to be moved to or from the subject as one unit, making differential focus child’s play.


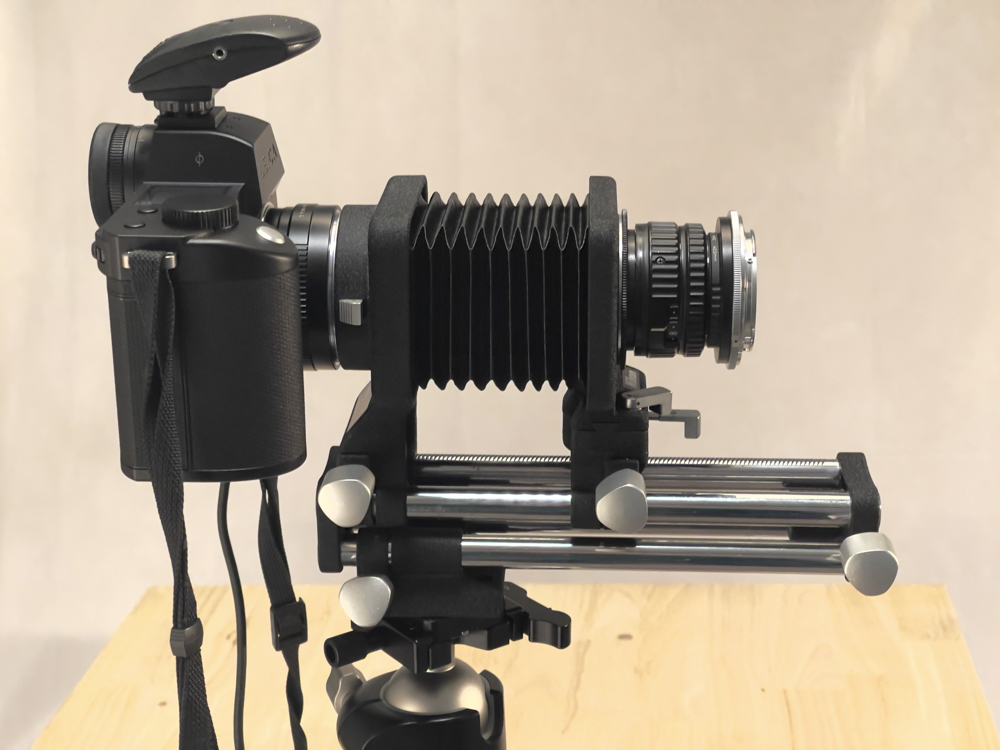
The 80mm f/5.6N El Nikkor on the PB-4 bellows.

For lighting I took a dual approach. Focus is aided with a JJC ring light which attaches to the lens. Image lighting is from my ancient Novatron studio flash and I find that I generally use three heads – a main umbrella light, a top umbrella light to light the innards and a no-umbrella strong side light to confer modeling and plasticity. The recharge time is a scant 2 seconds, less time than it take to rack the kit for the next image. An inexpensive wired remote makes doubly sure that there is no camera shake, though the brief duration of the strobe lights probably makes that accessory redundant.
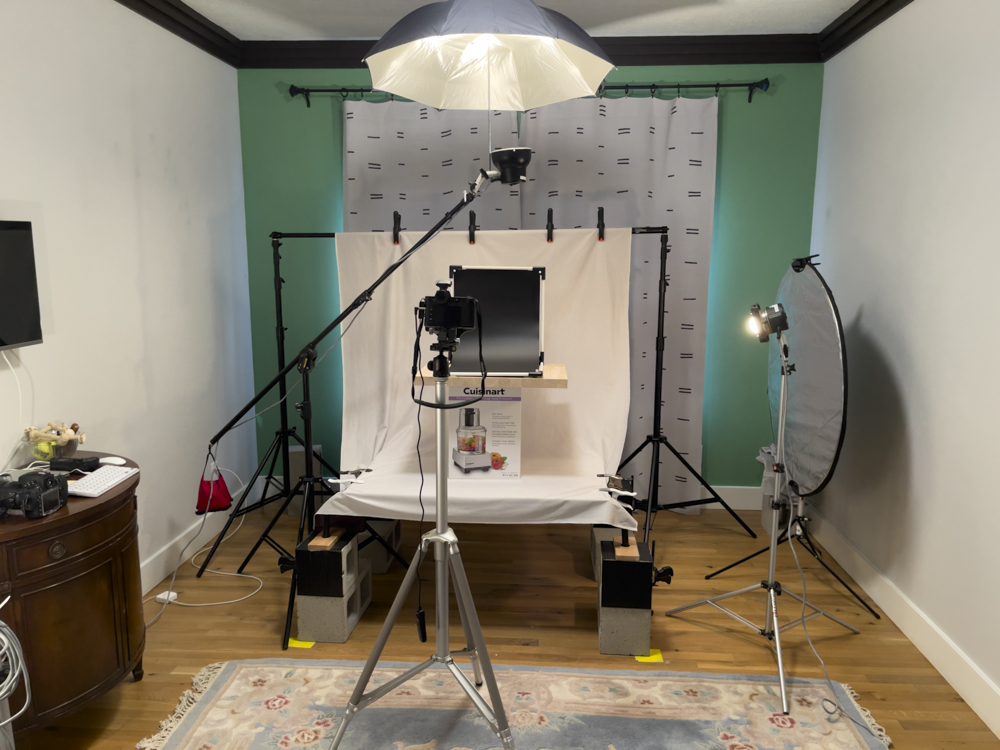
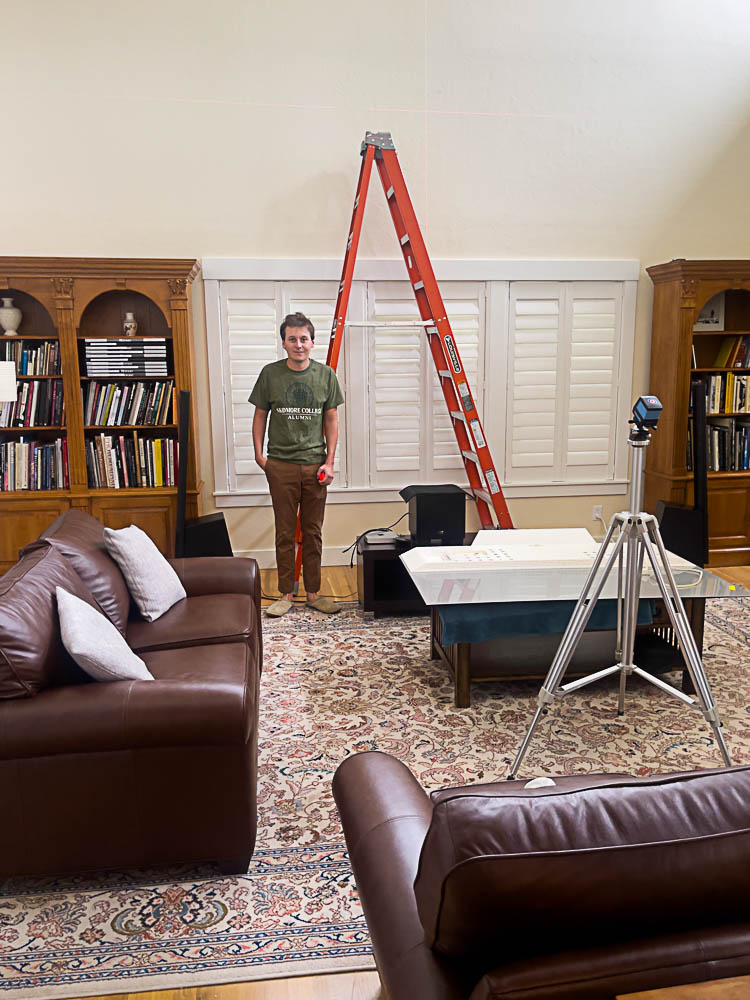


The studio.

With the tilt and shift capability of the PB4 available, I quickly realized that the image circles of the 100mm and 135mm Leitz lenses were inadequate. Tilt the front standard of the bellows and the image circle is too small, so I put on the thinking cap and quickly realized that Nikon made a superb series of 6-element enlarger lenses which not only have very flat fields but also boast very large image circles. They are also insanely inexpensive and have proved to deliver very high resolution. I purchased the 80mm f/5.6N El Nikkor and the 135mm f/5.6 El Nikkor. These are computed to cover 2 1/4″ x 2 3/4″ and 4″ x 5″ negatives, respectively, and have no issue with even the maximum tilt of the PB4.

And that’s where I am today. The earlier experiments are for sale (though I’m keeping the 135mm Elmar for use on the M10 and SL2S in non-macro mode) and I’m delighted with the simplicity and quality of the remaining kit.

Along the way I added a Nikon BR2A reversing ring for use with the 80mm El Nikkor in larger than life settings and also a 200mm Micro-Nikkor which goes down to half life-size without bellows, or one-and-a-half times life-size on the bellows with both lens and bellows full racked out. I’m not too sure I really need this lens but in addition to its macro capabilities it’s also a fine general purpose 200mm optic with Nikon’s butter smooth and light Internal Focusing movement.

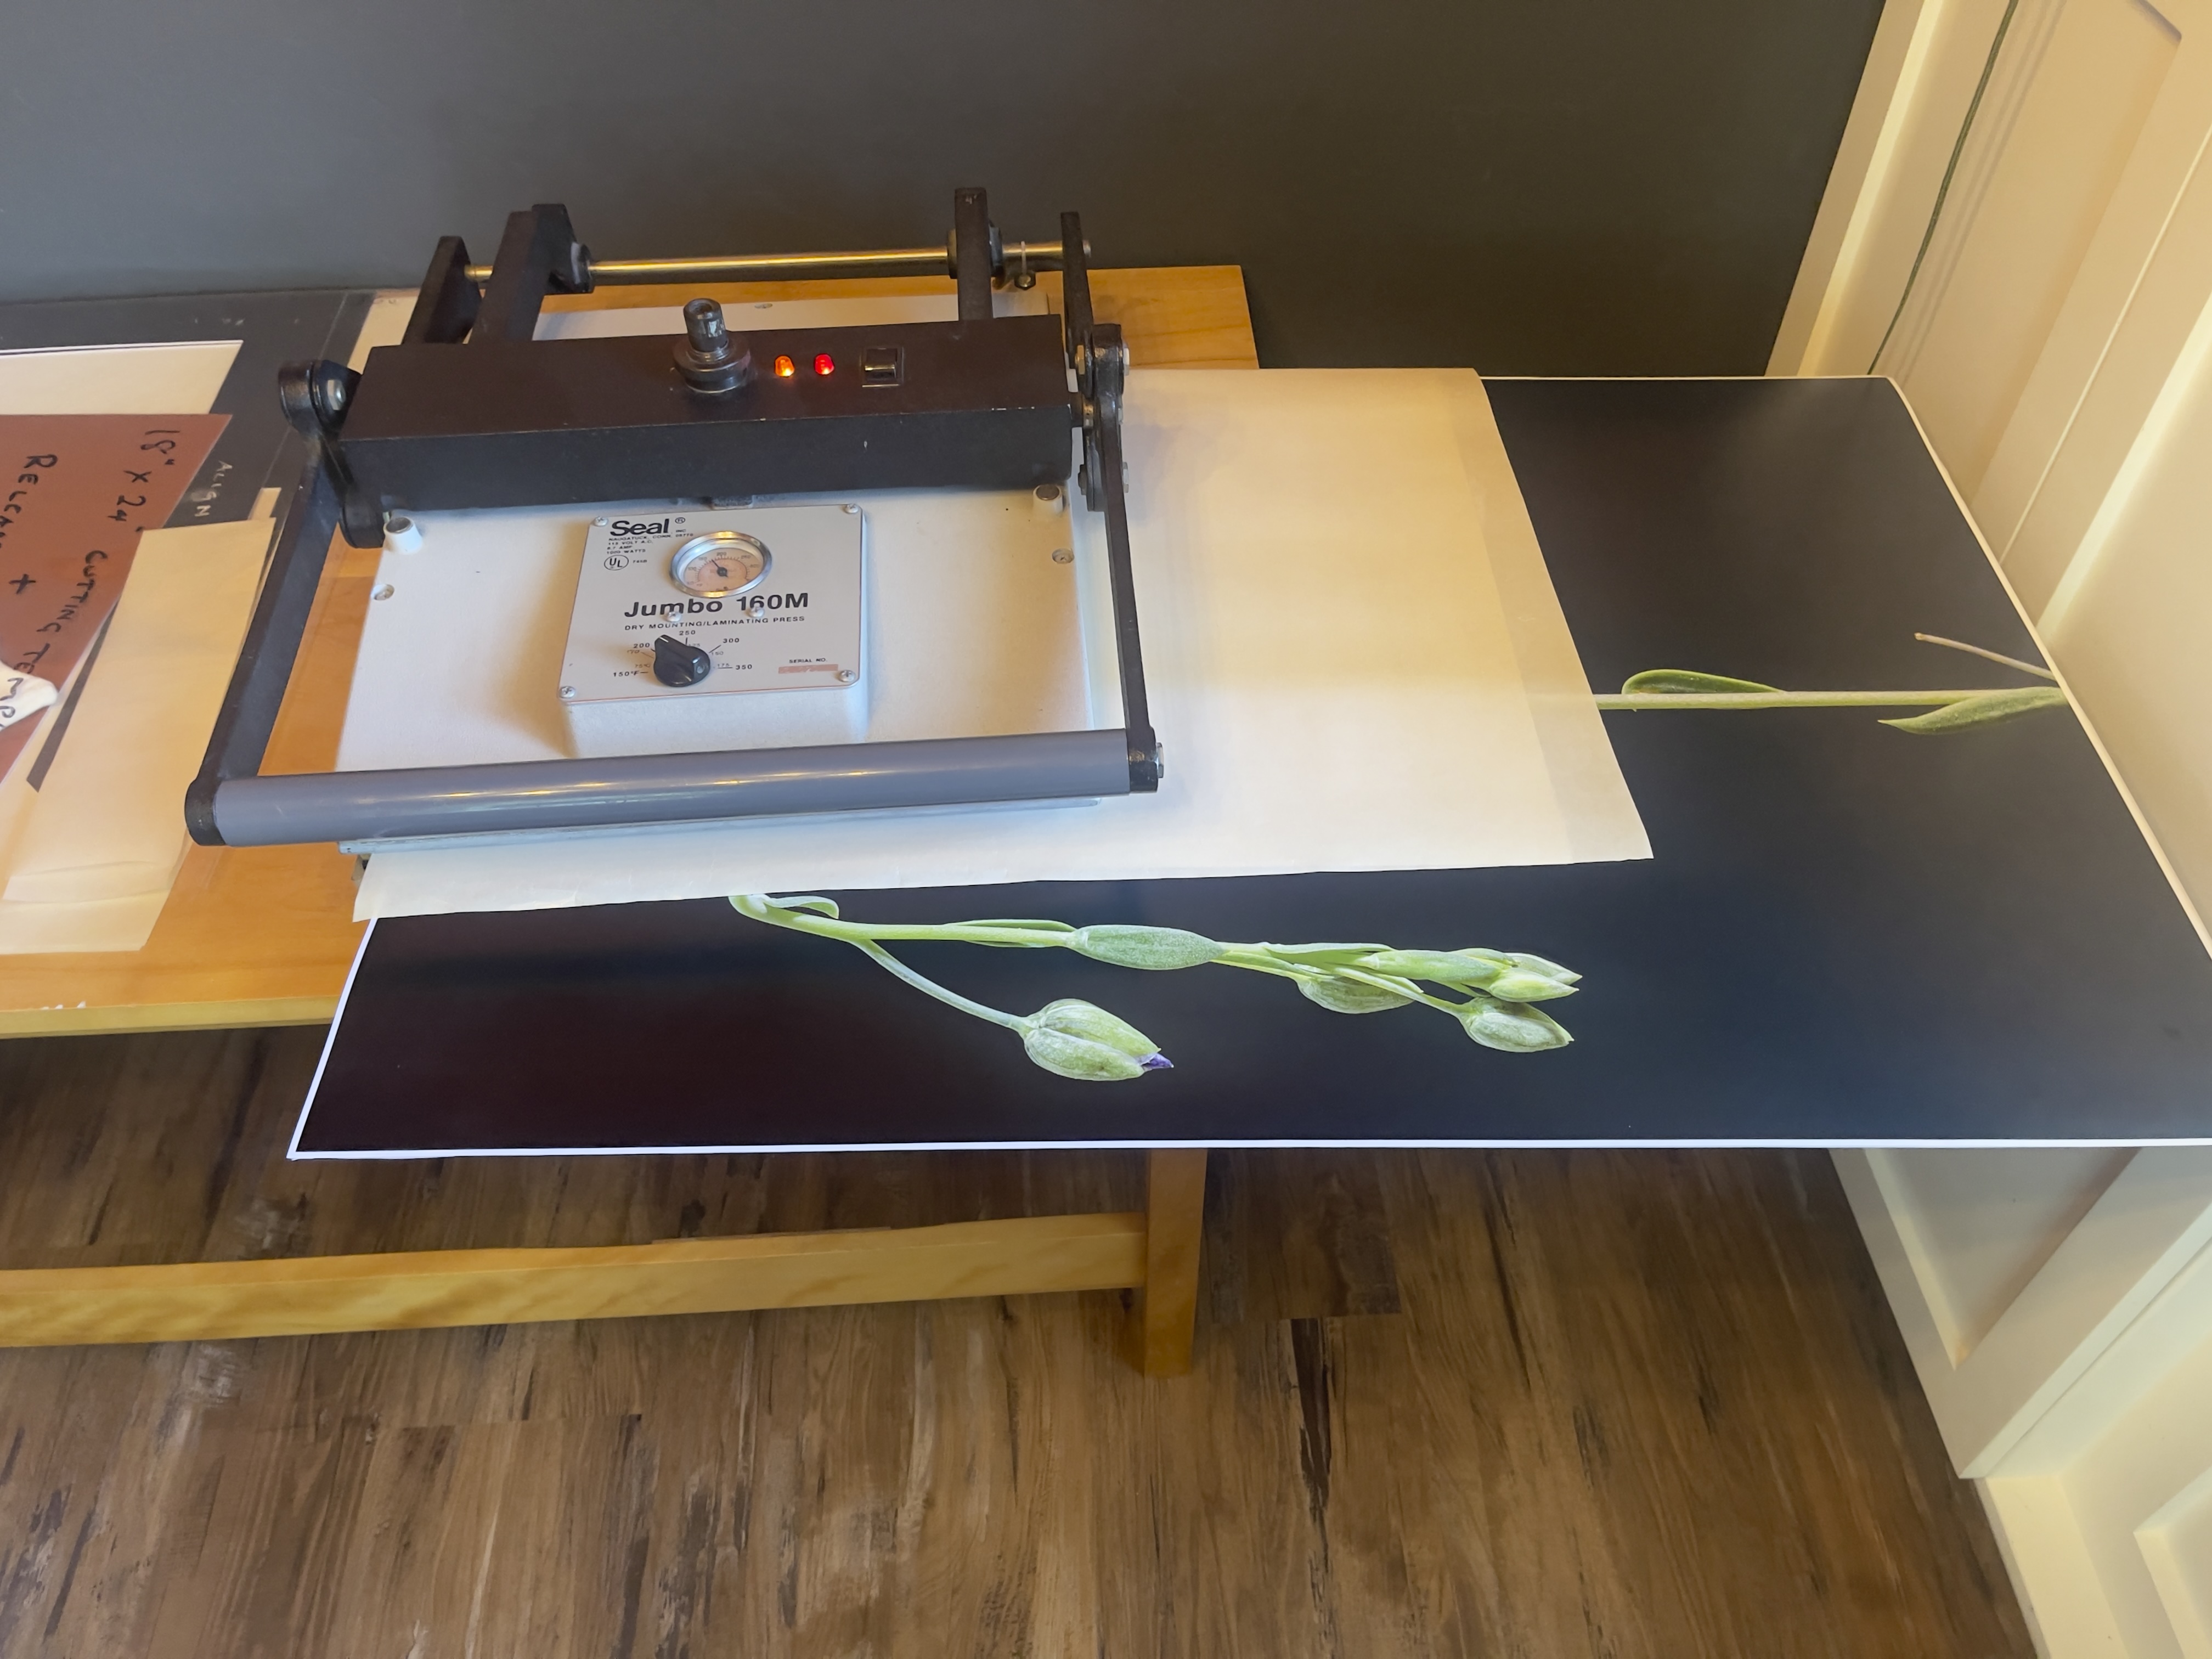
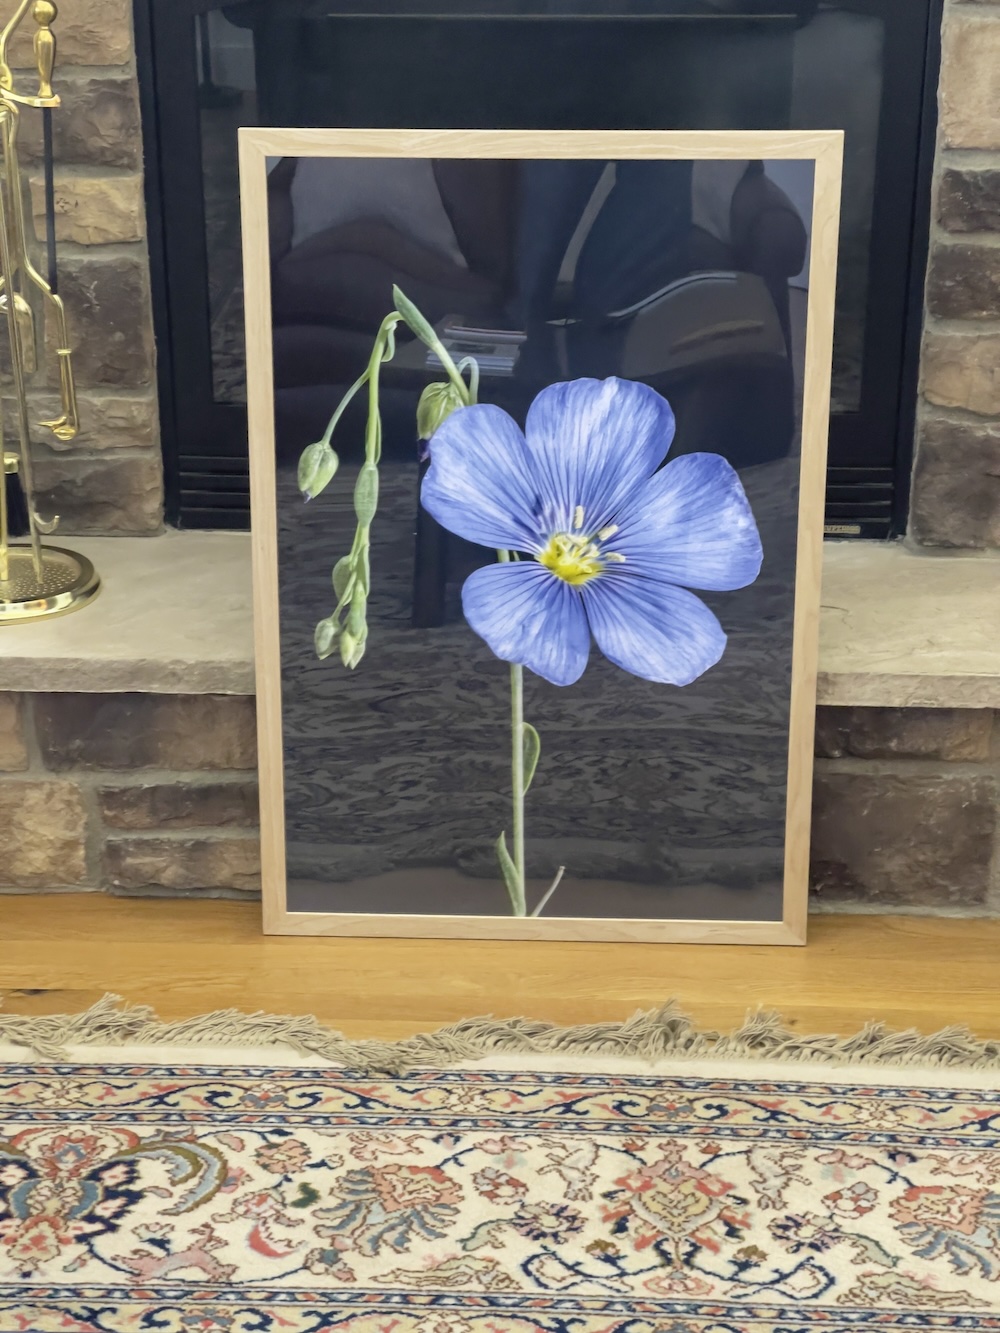
Did I mention these focus stacked images are high resolution? Here’s a 24″ x 36″ print made at the local Postal Annex on a Canon 12-ink inkjet printer. A serious piece of hardware. The bloom is maybe 1/2″ across:


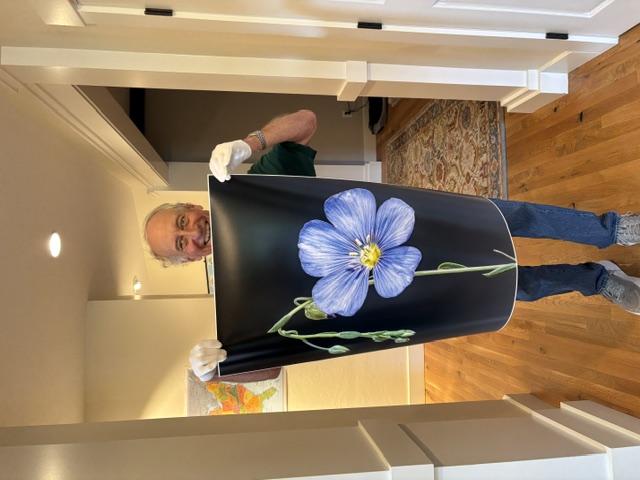
Flax wildflower print.
55 images focus stacked.