Better and better.
I mentioned the addition of vertical and horizontal distortion corrections when first taking a look at some of the new features in Lightroom 3.
I have been using these quite a bit recently and find that my round tripping to Photoshop is greatly reduced (hooray!), limted to only the most dramatic distortion correction needs.
Here’s a case in point. Taking the original I had no choice in the matter – the cafeteria’s sign could only be shown against the skyscraper’s backdrop withsome serious tilting of the camera and as I couldn’t even get in line with the sign the whole thing is off kilter to boot. Anticipating that I would want to make some pretty serious corrections when processing, I zoomed to a wider than required lens focal length, as corrections will cut off much peripheral details.
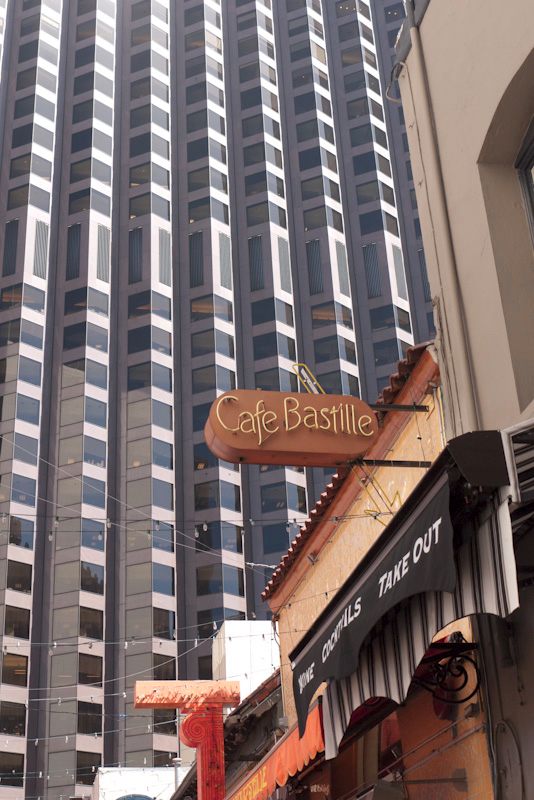
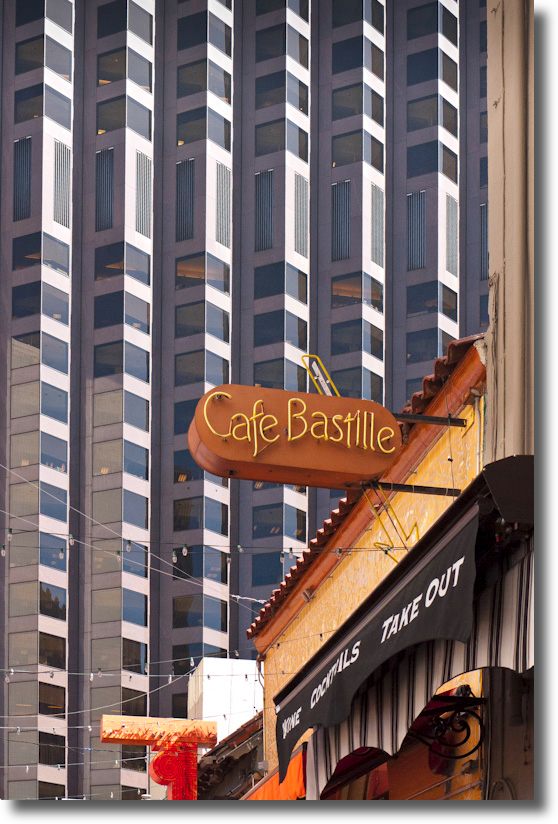
To correct this I first rotated the image a few degrees clockwise so that the keystone distortion was evenly distributed. Then I simply used the Lens Corrections->Manual->Vertical slider, adjusting it to -35 degrees. LR3 shows you a handy grid to preclude having to guess when your verticals are really vertical. A quick tweak on the Clarity and Saturation sliders and I was done.
G1, 1/500, f/5.6, ISO 320, kit lens at 25mm
It takes far less time to do than to describe and is a feature which adds significant value to Lightroom 3, especially if you do not want to spend the large amount asked by Adobe for Photoshop or, if like me, you dislike Photoshop with a passion. (Part of that emotion, I confess, is an admission of incompetence!) A related benefit is that your Lightroom catalog suffers no data bloat if you avoid the PS roundtrip, as all the correction settings are stored in a small sidecar file, unlike the TIFF or PSD monster that PS will foist on you when you save it back into your LR catalog.