Tailoring the EOS 5D to my working method.
No one could accuse the Canon EOS 5D of lacking adjustability. Or maybe I should say ‘tailorability’. What with all those custom function, buttons and dials, there’s probably more combinations than there are dollars in the US deficit. However, like most of these things, it’s an 80/20 equation. 80% of the benefit is derived from 20% of the controls. The rest can be largely forgotten in the interest of sanity.
First, I got a bit daring and did a firmware upgrade. I learned this does not involve opening that silly rubber flap on the left of the camera; rather, you drop the software upgrade from the Canon website onto a CF card in your card reader (we are talking to Mac users here; Windows users need to get a life and switch), insert the card in the camera, click a few buttons and you are done. I upgraded from 1.0.1 to 1.0.3, something about avoiding accidentally gargantuan file sizes when the camera is held vertically, as well as brightening the LCD display. The body of the 5D must have a pendulum sensor as when you pick it up the activity light on the back flashes. I’m guessing this sensor tells the camera whether it is being held horizontally or vertically so that the image can be suitably rotated for viewing on the built in, useless, screen. Seems like the sensor circuit must have been interfering with something. Glad they fixed that. Maybe. Anyway, when they add the ‘Can I make your coffee in the morning?’ option at least I will know how to do the upgrade.
So far I have been taking pictures using the Standard Picture Style, meaning the camera adds three out of four parts sharpening and leaves everything else alone on JPGs. I added +1 to the Contrast setting as the images seemed a bit flat. Now they look great in Photoshop without the need to add contrast or mess with curves. At the same time USM needs came down from 150/1/0 to 100/1/0, suggesting that sharpness and contrast must somehow interact. Beautiful, large prints straight from the camera’s files!
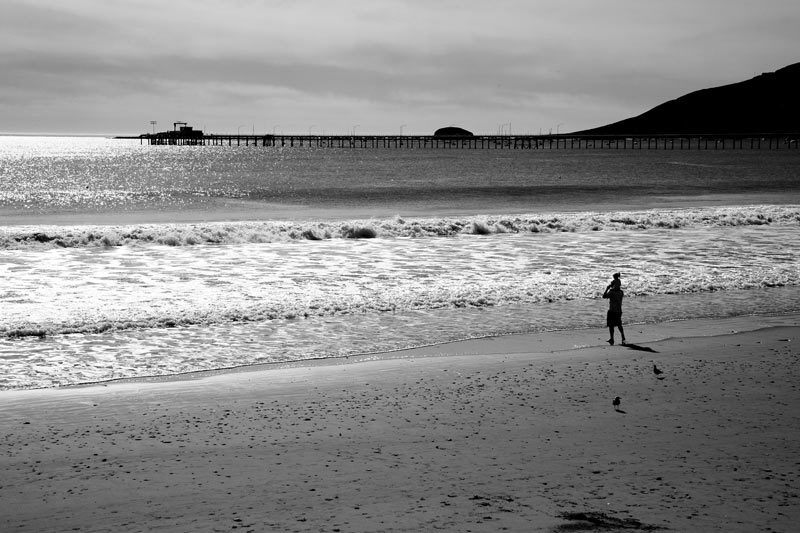
Here’s a snap, taken earlier today, converted with the TLR B&W Action in Photoshop using those settings; the tonal range is nice and long:
Then I messed with some of the custom functions (‘CFn’). I set CFn 06 to 1/2 stop increments rather than 1/3rd. Who on earth thinks in 1/3rd stops? That’s confusing precision with accuracy. I set CFn 08, ISO Expansion, to ‘On’, meaning I add the 50 and 3200 ISO speeds. 50 is of no interest as even 400 is grain free, plus ISO 50 apparently compromises dynamic range, but 3200 might be fun. For some obscure reason the camera reports these as L and H rather than 50 and 3200, but it’s a small detail. The boys at Canon had thrown away their occupational psychology cookbooks when they added that feature. Then in CFn 16 I enabled the safety shift in Av or Tv (Aperture and Shutter priority). Meaning if I really screw up on the aperture setting in Av (I tend to think ‘Aperture’ rather than ‘Shutter Speed’, so I use Av or aperture priority), the 5D will adjust the shutter speed appropriately. Clever. That’s it for Custom Functions.
That leads to an interesting philosphical side track. I am convinced there are two types of photographic minds. The right brain artistic crowd who think ‘aperture first, let the shutter speed look after itself’ and the left brain formulaic set which thinks the other way. The right brainers think in terms of depth of field, differentiation, effect. The left brainers take sports photographs. At 8 frames a second. Substance over form.
On the exposure front I was noticing that several of my snaps were over exposed. So first I tried setting the exposure compensation to minus half a stop. You have to set the three position power switch to the third position to do this, so exposure compensation cannot be changed accidentally. A nice safety feature which is poorly explained in the instruction book. That, however, did not do it. So I switched to the 3% center area spot metering option and everything was sweetness and light. You meter on the key area, press the little asterisk-marked button on the back with your thumb to lock the light reading (an asterisk lights up below the viewing screen to tell you this has been done) and then press the shutter button. The last twenty pictures using this technique were perfectly exposed. So much for Canon’s much vaunted ‘Evaluative Metering’ – right up there with those great oxymorons ‘Military Intelligence’ and ‘US Democratic Party Tax Cuts’. In fairness, I have had a lot of experience doing this with the fabulous meter in the old Leicaflex SL, which was a semi-spot type. The even narrower angle of measurement of the EOS 5D’s spot mode just makes things easier, though I should add it’s not for the inexperienced. You have to know what to meter and why. In my minds eye I can visualize the center grey moving along the continuum of the dynamic range histogram…. Think of it like making love or riding a bicycle. Pretty intimidating until you get the hang of it, thereafter a lot of fun.
Here’s an example of that technique, also taken today – I metered on the rusty brown stain area on the side of the boat – a nice mid-point which I knew would wash out the white and benefit the blue:

So putting my preaching into practice, I swung by Montaña de Oro (“Mountain of Goldâ€) State Park today, just 35 miles south of home. Yes, yes, this was today also. A bright, 72F California winter day (if this doesn’t get you moving here nothing will), providing hugely contrasty lighting. Here’s spot metering at work:
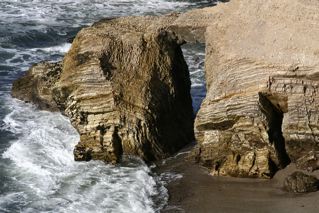
The reading was from the foot of the, well…. foot, at the lower center right. No, I did not bracket. The dynamic range of the original is huge. The quality? 20x enlargements no problem.
As the advertisements said twenty years ago in National Geographic, ‘Now, It’s Canon’. They were just a bit premature, as digital was still a dream. No problem. I am gradually getting this machine to work for me and finding that post processing comes down to a minimum.
By the way, for an interesting interview on the topic of going digital with a really great British photographer, Patrick Lichfield, click here.
Hi Thomas, nice to read about your change to digital. I made this change too and i am having a nice time with my pentax ist ds…
For me the biggest issue with DSLRs is the FOV crop…but the 5d is a full frame sensor, so this problem is gone for you…
I started as you did..shoting JPG and trying to get a perfectly exposed JPG to do less in PS…My camera tend to underexpose some pictures and i changed to spot metter too, but now i am using RAW..of course i am trying to get the best exposed image that will genarate a good RAW, but i do a lot of corrections in RAW, exposure corrections and some sharpness…
Try to explore RAW…you will see the difference..it is a lot better tha JPG. You will only need a software that organizes your workflow…camera raw is very slow..and dosn´t has a good workflow…Try phase one software (capture one pro)
My camera is a 6mp sensor, wich, for me, produces very good images…i really don´t need more at this time.
I am using some old pentax lens, manual focus and with A at aperture…some 50mm 1.7 and a 28mm 2.8 …i have also a 24mm 1.8 (sigma)..i like old lens, because the quality is very good, they are sharp and have minor flare problems…and they are very little and well built…
I didn´t know about this blog…i i will try to visit more often..
Thanks for all the information
all the best
Daniel G.
from Brazil
Hey..if you have some time visit my page at flicker (i put the link as my webpage here)…i have some street and documentary pictures there and would love to know your opinion…