CubicConnector does the trick.
That rather intimidating title is nothing more than the addition of ‘click here’ functionality to a QTVR movie/panorama.
This is best illustrated by the enhanced version of the 360 degree panorama of my home theater which has graced these pages before.
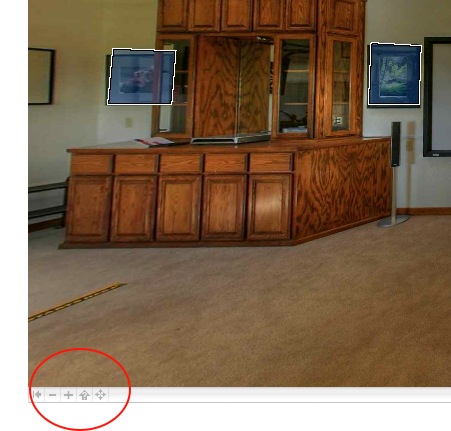
Once the QuickTime image loads – click below – cursor over any of the pictures on the walls and the cursor will change to a finger pointing to a globe. Click and you will be take to a high quality image of the picture. Click the ‘back’ button on your browser to return to the panorama.
This is done using CubicConnector which allows ‘hotspots’ to be defined in a panorama. Each hotspot can then be connected to an image – not good as the file size swells and the image is distorted – or to the URL of an image on your web site. I used the latter approach as it maintains the relatively small size of the QTVR movie and gives you complete control over the size and quality of the image displayed in response to the mouse click. The CubicConnector software is so well designed that the process is intuitive and the whole thing – including learning time – took me one hour to do, which involved creation of fifteen hotspots, one for each hanging picture.
Click on the arrow at the lower left of the QuickTime screen and you can toggle hotspots on or off so that you can see where they are:
You can still zoom in or out in the QuickTime panorama using the Shift and Control keys on your keyboard. The panorama was made using HDR techniques; the photographs on the walls are all straight prints as I had no idea what HDR was when I took them!
In addition to a hotspot for every picture on the walls, try clicking on the snuggle ball to the lower right of the projection screen. The owner was away when this was taken. And, yes, the box he is sitting on contained none other than the Canon 5D used to take the pictures for the panorama, but not one of those on the walls.