The BMW is on board.
Part II appears here.
Before attempting to mount my 1975 BMW R90/6 on the Handy lift, I installed two sets of longitudinal strips of 80 grit non-slip paper under the front rubber mat, spaced to match the front wheels on the lift, and long enough that they just protrude from the rubber mat, allowing correct positioning of the lift. The requirement is that the wheels of the lift bear on the non-slip surface through the rubber mat. The 240″ length of the roll is just right for six 40″ strips, as shown below:
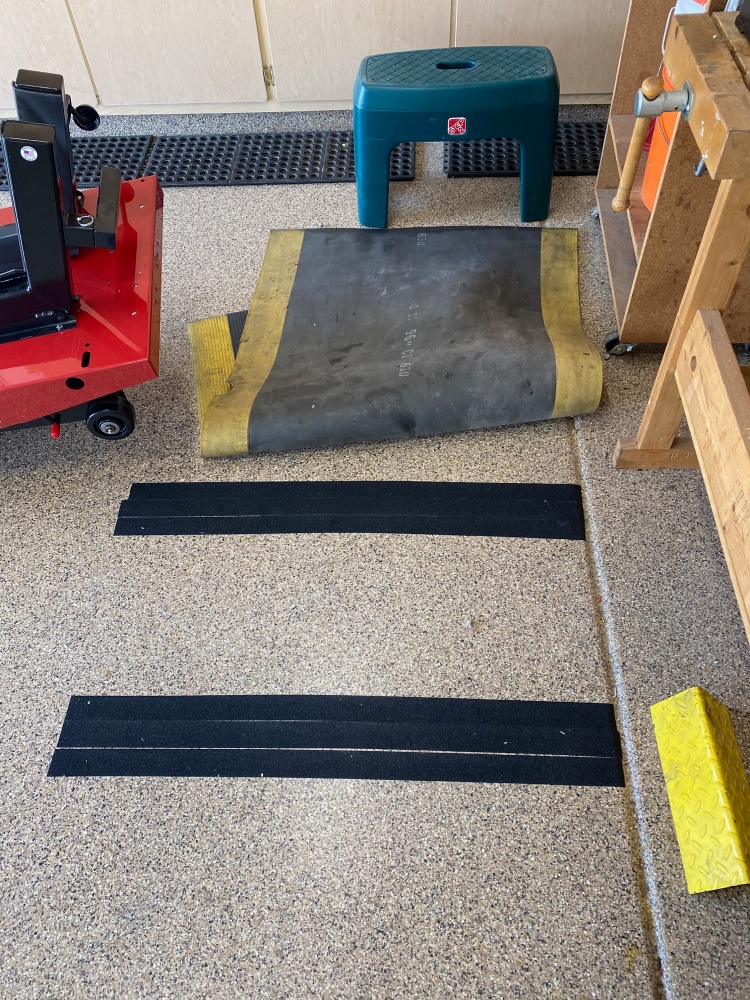
Installing the 80 grit non-slip paper beneath the rubber mat.
This works perfectly. There is absolutely no slippage of the rubber mat when a machine is rolled onto the lift’s table and the rear rubber mat (see Part II) can be dispensed with.
Before rolling the BMW onto the table I popped off the gas tank – 2 gas lines, 2 thumbscrews and 2 minutes. Try that with any other bike. The weight savings is 30-50lbs. , all of it carried high up and adding unwanted moment of inertia in case the bike starts to tip when being rolled on. Just for luck I solicited my son to push the bike from behind while I got a good run at the ramp. In the event, I could have safely done this solo. With the front wheel in the vise, the two tie downs are installed, just enough to compress the front shocks a half-inch or so, and we are ready to work:
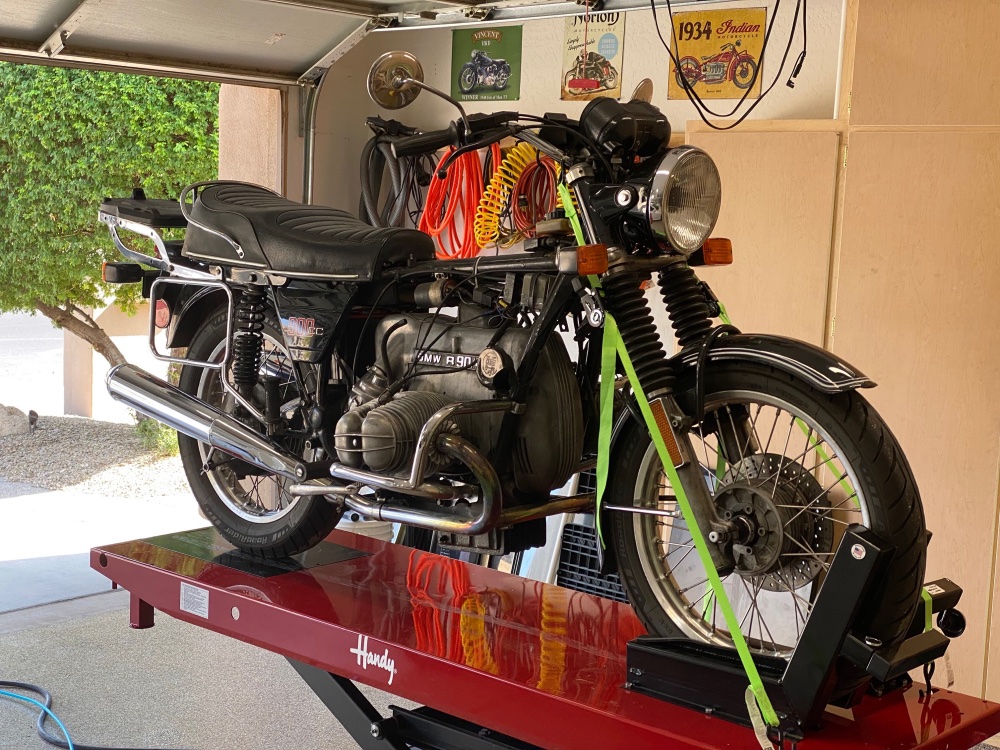
Raised, with tie downs in place.
Note that the rear wheel is positioned exactly over the removable, black panel at the rear.
As my first task is to remove the sump to replace a leaking gasket, I had to drain the engine oil, and with everything at eye height it really could not be simpler:
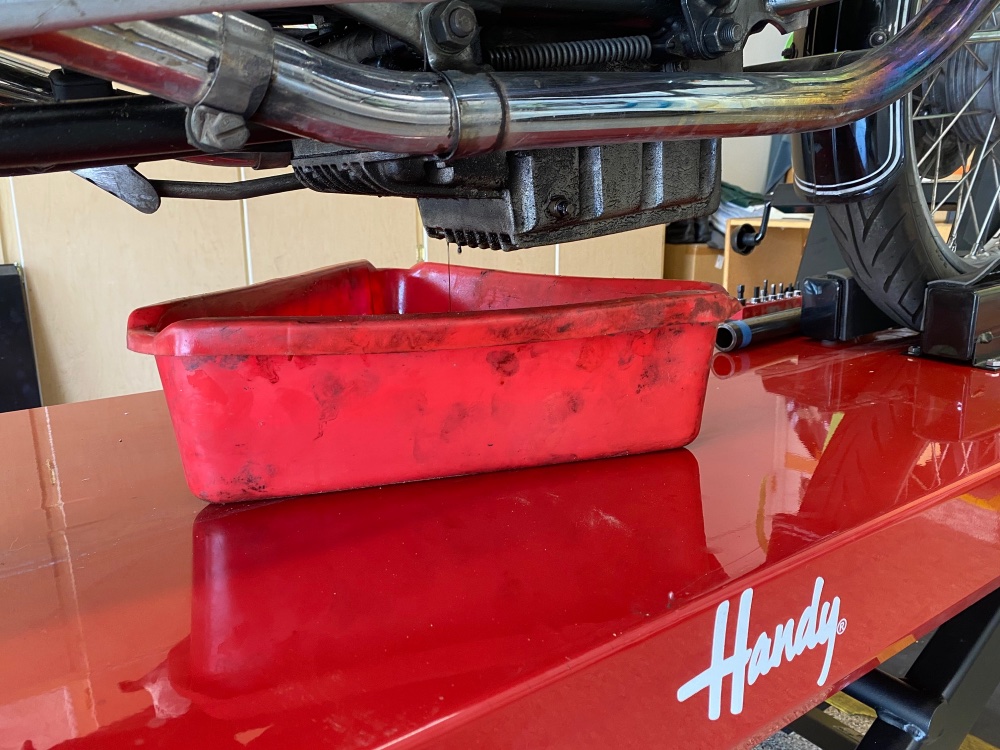
Draining the oil. The aftermarket MX deep sump holds 3 liters, 1 liter more than stock.
The deep sump cannot be easily removed with the center stand in place so the vise + tie downs approach is just what the doctor ordered.
You can see the lift in operation here.
I have read comments on chat boards from some users stating that the pedal makes excessive noise when releasing air in the down cycle. I have not found this to be the case, and the video, above, confirms my finding.
Conclusion:
My reaction after a couple days of getting familiar with this superb tool? The same as that of any lift buyer: “Why didn’t I get this earlier?”
Why the costly Handy? First, it’s made of thick gauge American steel by American workers. The Iowa factory has been making these for over half a century. It will not tip over or trip you with a base frame as there is none. And at 39″ maximum height it rises 10″ higher than most imports and that is a huge difference. The collapsed height, at 8″, is 1″ more than most of the competition, meaning a little more effort to push a bike up the ramp, the extra height possibly dictated by the rubber bellows. But countersinking this lift into your garage floor is not a good idea. Yes, it will be trivial to roll a bike on or off, but you will lose 8″ of elevation.
The Handy lift is unreservedly recommended for the amateur bike mechanic.
The first task:
On sunny days – we have only 350 of those in a bad year – I like to park the bike on the cement path in front of the home, easily accessible for the afternoon ride, and on display to the neighbors. That cement path shows any oil drips immediately, in the guise of ugly black stains, and such stains had started showing up recently. The cause was a leaking sump gasket, which was finally beginning to give up the ghost after 30 years on the job. The job requires removal of 14 M8 x 1.0 bolts after the oil is drained, a task made impossible by the center stand with the aftermarket deep oil sump I fitted 30 years ago. With the bike on the lift there is no need for a center stand, making those bolts readily accessible. Raising the table to the Handy lift’s full 39″ height places those bolts at a very comfortable height, and after a very leisurely hour or so I had the bolts removed and the sump pan popped off without the need for any persuasion:
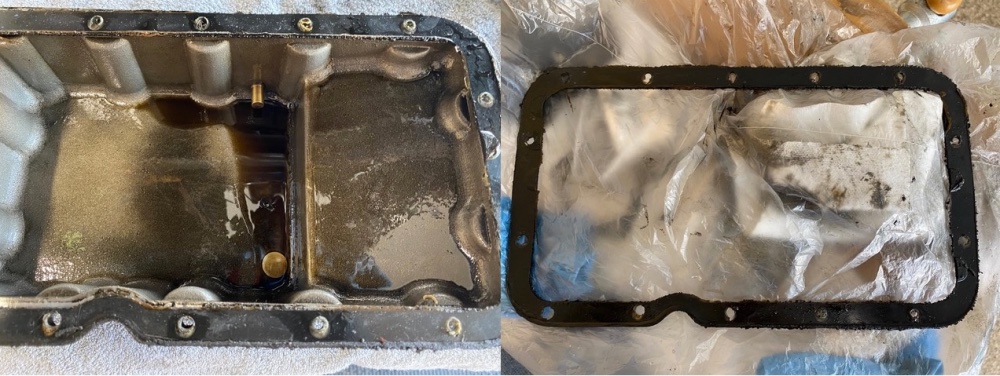
Sump at left, trashed gasket at right.
The total absence of any oil sludge in the sump along with the absence of any metal shards in the residue testify to the diligence of regular oil changes during my 30 years of ownership and, indeed, the first 15 years with the original owner. The gasket is made of a paper composite impregnated with a heat sensitive material which helps it seal once the engine and oil are warm, so there’s no need to obsess about absolute planeness of the pan’s mating surface. Just for fun I measured this on a piece of glass and found that the sides were ever so slightly uneven, resulting in a 0.05″ gap. Insignificant, and not worth fixing given the new gasket’s pliability.
The key on reassembly is to use an accurate low range torque wrench to secure those 14 bolts. Hard steel bolts in soft alloy female threads are a recipe for disaster, and are easily over-torqued, resulting in a stripped thread in the engine block. I fastened these first by hand, then using a criss-cross pattern to 4 ft.lbs, using the torque wrench, then a second round with the torque wrench at 8 ft.lbs. That is not very much but it’s all that’s needed. Suffice it to say that the bike passed the cement path test with flying colors, denoted by an absence of any new stains after a vigorous ride. Yes, I cleaned up the old ones. ….
You want to do this job without a motorcycle lift? Good luck.
In Part IV I look at the modifications needed to an inexpensive automobile scissor jack which will allow the rear wheel of the motorcycle to be raised when it is on the motorcycle lift. The jack will also permit easy deployment of the center stand on the motorcycle when it is on the lift with the front wheel clamped in the lift’s vise.