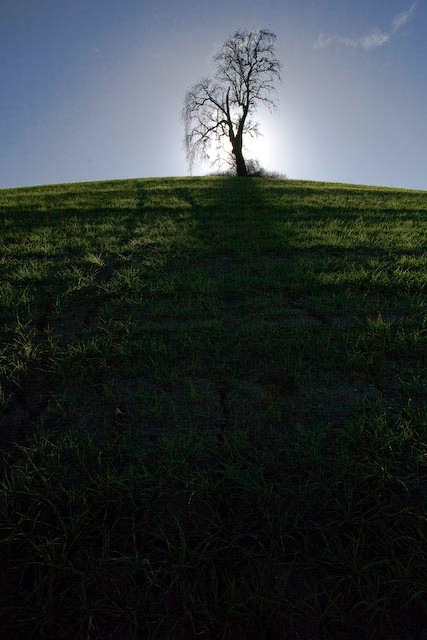
Two stops under does the trick.
Because very high dynamic range pictures will result in burned out highlights, notwithstanding the fine CMOS sensor in the Canon 5D, I underexposed this one two stops (spot metered on the sky) then brought the detail in the foreground back with the processing controls in Lightroom. Here’s the Before and After – a very well engineered function in Lightroom allowing all sorts of comparisons.

Lone oak. 5D, 20mm. 1/4000, f/8, ISO 250. RAW.
As the controls in Lightroom indicate, I had to add substantial noise reduction and sharpening. As the sun was directly behind the tree, regular exposure would have made the branches unrecoverable – sort of like halation in films of days past. This magnitude of correction could not possibly be done in a Jpg file. The histogram testifies to the complete absence of burned out highlights – there’s no crowding at the right end.

Adjustments made in Lightroom.
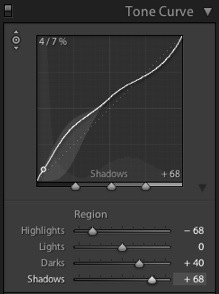
I also boosted the Tone Curve substantially in the shadows – this control is perfectly implemented in Lightroom – I used the small pointer tool, which you can see at the top left of the following screen picture,allowed me to see the tone curve in the shadow range by placing the pointer in the foreground of the picture. This helped me determine where to adjust. The dotted line shows the reference starting point.

Here’s the final result after slight straightening of the horizon – the sunlight was quite blinding and it was not easy to see much in the viewfinder!

Once stopped down the rather ‘iffy’ Canon 20mm lens is free from color fringing, so no lens corrections were needed.