…. a little color there.
The beauty of the adjustments in Lightroom (I’m on 1.4.1) is that the results are seen instantly on the screen and the sliders for these are really quite intuitive – not something that can be said of the industrial might of Photoshop with its poor user interface. Further, unlike Aperture, which I no longer use, you do not need the latest liquid helium cooled MacPro with 16 gB of RAM and the latest $2,000 graphics card to run the thing at half decent speed – an old iMac G4 more than suffices and you can probably pick one of those up for $50 with a nice big screen at a yard sale.
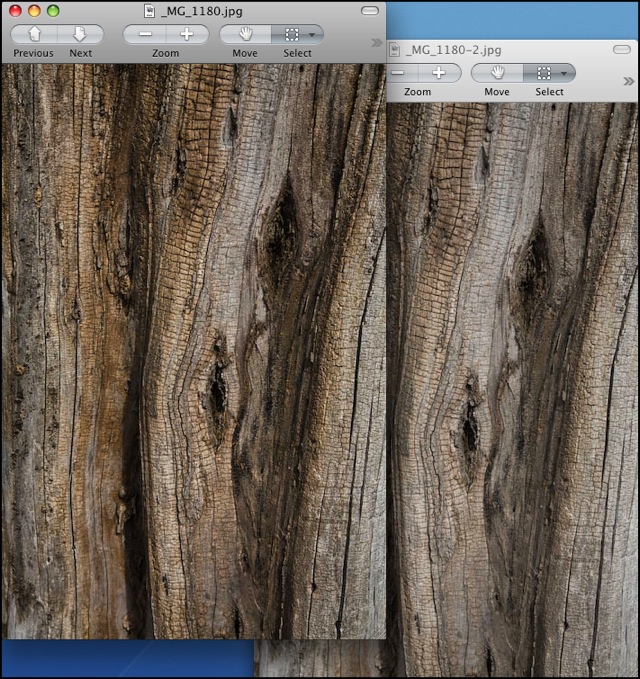
Canon 5D, 24-105mm at 58mm, 1/250, f/8, ISO 100
Here you can see the bland original (underneath) and the final versions of this snap. The final adjustments can be seen here from Lightroom’s History panel – look at the right hand column of data.
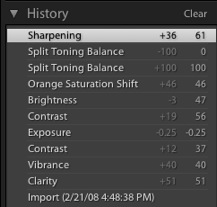
Adjustment history for the image above
That seems like a lot of work until you realize it took about a minute or so to do, aided by the nice large 21.6″ Samsung LCD screen attached to my MacBook. Exotic? Hardly. Available today for under $200 from many makers. Viewsonic now lists a 22″ screen for as low as $160 – a perfect accessory for the MacBook’s small screen whose gloss finish does little to help photographers. The aftermarket screens come with matt surfaces, as they should. Another example where Apple’s marketing focus does little to serve users. Unless you are in a pretty dark room, the glossy screen is a real pain to use, but Apple no longer markets a matt screen version.
The Vibrance and Clarity sliders are especially useful in giving your image ‘pop’, but I find it’s easy to overdo things. A little goes a long way. Unlike the 50mm Canon f/1.4 optic, the 24-105mm L zoom used here displays no color fringing. Instead you get severe barrel distortion at 24mm, not something that’s visible here.