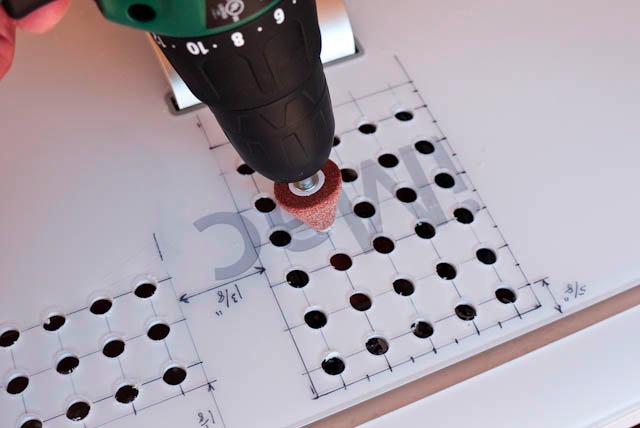
More drilling.
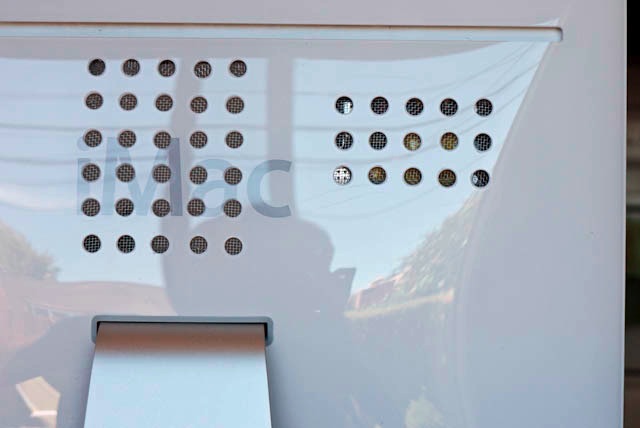
Here are the measurements you need to drill your 20″ iMac case for better ventilation. Use the ‘iMac’ logo as an additional guide. I will provide data for the 24″ iMac in a subsequent piece.
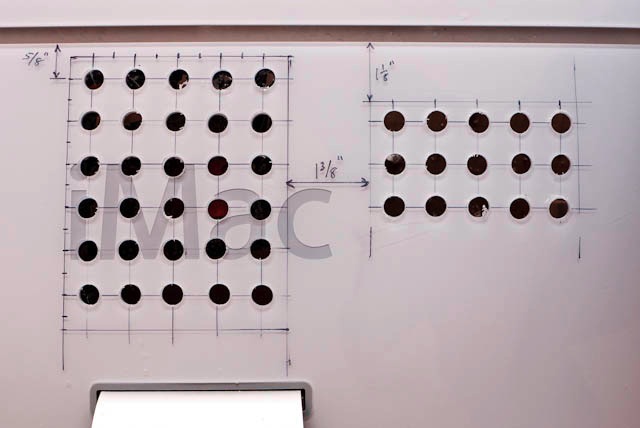
Drilling specs for iMac 20″ – 2006 models
These are for use with a 3/8″ Forstner drill bit, as explained yesterday. The second set of holes to the right is to enhance cooling of the power supply, the other major heat generator in the tight confines of the iMac enclosure. The grid spacing is 3/4″ – use a Sharpie ultra fine market then remove the markings with Isopropyl alcohol when finished.
Here’s how the power supply holes look from the inside – the aluminum sheet has been cut away:
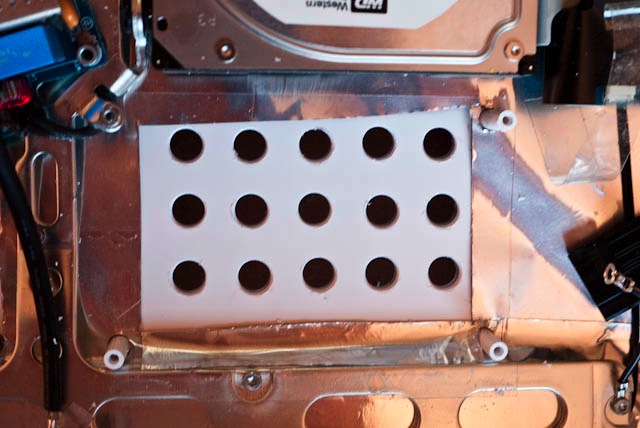
Power supply cooling
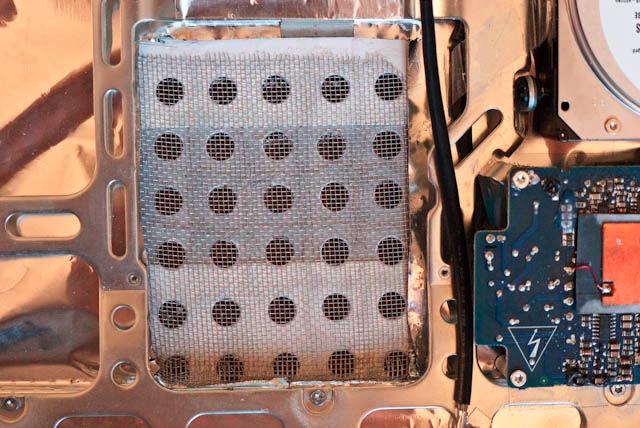
Here’s a like picture for the GPU cooling unit:
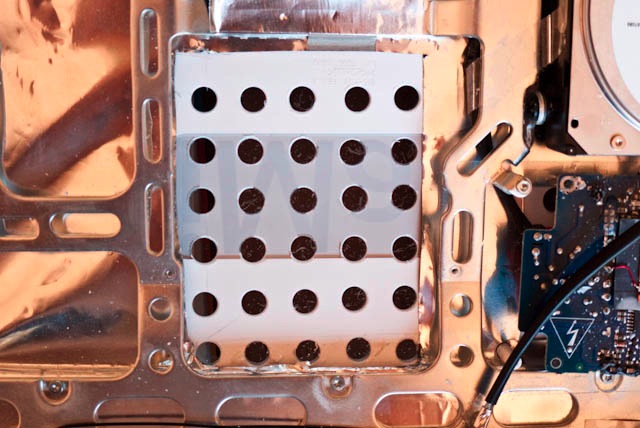
iMac GPU cooling holes
Before gluing in wire mesh to restore conductivity to the static shield and to help reduce dust intake, the holes are de-burred on both sides with a conical abrasive bit:
De-burring the holes
I use Loctite Repair Extreme for gluing the mesh in place, as it is rated for high temperatures and adheres well to the aluminum mesh and the iMac’s plastic casing. The specs on the package state that the glue will function in a temperature range of -58F to 248F (5C to 40C); their web site states -50F to 400F. Either is more than adequate. If your GPU or related capacitors get up to 200F you have bigger things to worry about than melting glue! The Loctite product code is 01-06821-02.
This adhesive has a five minute work time before it starts to set, which means there’s no need to rush to get the mesh positioned just so. Just make sure it’s flat before you install it, then you can simply tamp it down on the adhesive beads with a stick or whatever. It takes 24 hours to fully cure.

Glue lines
Here’s the mesh in place for the GPU cooler. The power supply mesh has already been installed and the power supply – lower right – has been refastened to the case:
GPU wire mesh
And here’s the final view from the rear after removing the Sharpie marks using Isopropyl alcohol. The mesh is visible through the holes. As you can see, with a bit of planning and care the result can look reasonably professional:
The final result
I wore out two more new Forstner bits doing this. Seems they pretty much give up the ghost after 40-45 holes have been drilled.
Now I have to wait for the logic board to come back from the repair shop.
I will start work on the 24″ iMac once the Nvidia 7600 GPU arrives – it’s in the mail right now. The Forstner bit is completely shot so I have blown another $8 on a new one for the 24″ iMac. The last thing you want to do is force a blunt drill bit though the iMac’s plastic casing, robust as it is. You only get one chance to do this.
For those proposing to do this surgery on their late-2006/early-2007 24″ iMac, you can download Apple’s Technical Service Manual here. It makes a seemingly complex task easy.
Manuals for many other more recent models are listed here.
In Part III I will address the correct application of fresh thermal paste between the heat sinks and the ATI GPU and related diodes, respectively. This is a key step before reassembly, which is currently awaiting the return of the repaired logic board.