Monthly Archives: September 2011

Nikon V1

Incredibly useless.

It takes quite an effort to accomplish all of these design criteria:

  • Make the ugliest camera since digital was invented
  • Equip it with a microscopic sensor in a body the size of the MFT competition
  • Trash your reputation and an expectant, loyal user base

Nikon, with its new mirrorless V1 has accomplished all three at the highest possible level of failure.

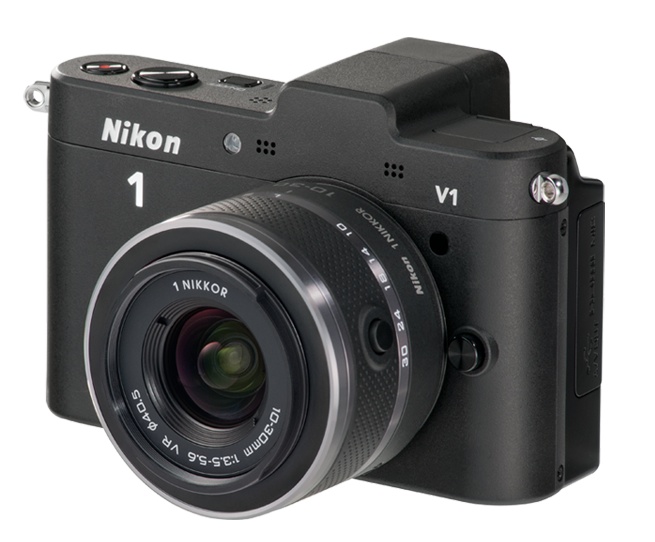
Nikon V1 – camel as camera.

It’s said a camel is a horse designed by a committee. Well, the V1 is a camel of a camera, doubtless with lots of costly market research thrown in. Steve Jobs has famously stated that Apple uses no market research. Rather, it gives the consumer what Apple thinks they need – the Next Great Thing. But had you told Nikon to listen to their user base and give them something useful, like an APS-C camera with an EVF and a range of small, fast lenses, they would doubtless have deferred to the committee. And you would still have ended up with a V1.

The funniest part? They will make an adapter which will allow use of gargantuan Nikon-mount lenses on this piece of crap.

At least Fuji’s equally worthless X10 is pretty to look at. And if you don’t think looks matter, how do you feel about your picture taking chances when you have to fight the gag reflex every time you pick your camera up?

For those looking for portability and other uses for their pocket camera, get an iPhone 4 or, better, next month’s iPhone 5 with an 8mp sensor.

The Panasonic G3 – Part II

Finally shipped!

Part I is here.

A sharp eyed reader dropped me a line to say that black Panasonic G3 bodies were in stock at B&H (thank you, Bill!) and it took mere seconds to cancel my Amazon order for the G3 and buy the body from B&H, along with a spare battery. The G3’s small size means the battery is smaller than in the G1, so I’m playing it safe.

Given that my AMZN order was placed on May 12, I felt it only right to splash out $22 on expedited shipping from the center of the world to the left coast!

I’m getting 80% of the quality of my (sold) Canon 5D from G1 snaps in 18″ x 24″ prints, and as the G3 is the first MFT camera to use the latest generation 16mp sensor I’m hoping that results in a little more headroom when the light is poor or the original needs a bit of cropping. The bulk and weight saving with MFT hardware over full frame digital is tremendous and the main reason I switched.

Stay posted as I wring this new body out with my existing complement of Oly (9-18 MFT) and Panny (14-45 and 45-200 MFT) lenses, all known quantities extensively covered here in past articles.

Part III is here.

Using GPS coordinates

Easy with an iPhone.

Many photographers like to record GPS data with their pictures, thus saving the exact location of the snap. While GPS receivers are gradually making their way into cameras and some makers offer add on gadgets to record such data – the poor man’s route is available to anyone with an iPhone. I suspect Android phones offer the same technology, but do not know. My cell phone is an iPhone 3G – two generations old, soon to be three generations old.

Any picture taken on an iPhone records GPS coordinates which can be viewed in Lightroom 3, iPhoto or any number of other processing applications.

Here’s an example using the snap of my lunch at Nova Bar the other day, imported into LR3:

GPS coordinates for lunch.

Simply typing these into Bing Maps (I refuse to use products from the criminal cabal that is Google) you get the location:

The location of the photo on a map.

In a Bird’s eye view the coordinates disclose the location on the wrong side of the road, all of 30 yards out. Not bad.

Nova is on the other side of the road – pretty close!

So unless you have the latest and greatest in camera technology, a quick snap with your cell phone will allow you to save the GPS locations for your latest ‘shoot’.

Thomson Machine Works

Almost faded away.

This lovely brick building soldiers on, dwarfed as it is by the poor later efforts of structural engineers who designed the boxes around it.

G1, kit lens @36mm, 1/100, f/5.6, ISO 320.

Located at First and Clementina Streets in San Francisco, the original tenant’s name is barely visible in the brickwork. But there’s no disguising the beauty of the brickwork or the architect’s sense of style and proportion. It’s now home to a German manufacturer of high end kitchen cabinets, doubtless made in China.

Rotating your artwork display

Mirror retainers do the trick.

As any art museum creator what fraction of his inventory is on display at any time and you will learn that most of the catalog is in the basement. Museums rotate displays all the time, thus exposing new works from their basement for all to see and making the viewer’s repeat visit always fresh, without overloading the visual senses.

For large prints I have long standardized my mounts at a 22″ x 28″ size. This allows the use of like-sized mats with varying apertures, be they 8″ x 10″, 13″ x 19″ or 18″ x 24″. Traditionally I have glassed and framed these into what is a pretty costly ‘per print’ assembly, and a labor intensive one at that. At $70+ a framed, glassed original, two-thirds of the cost is comprised of the frame and glass.

I am moving away from this semi-permanent approach by using mirror mounts to hold prints on the wall. The prints are not glassed or framed. The mirror mounts run $2 a packet of four at the hardware store and the provided, ugly, drywall screws are replaced with 1″ roofing nails. These have a large, flat, shiny top and can be hammered into place in seconds, needing only a spirit level to get things aligned just so.

Mirror mount and roofing nail in place.

Using a 3/16″ mount and standard thickness mat, the mat + print + mount ‘sandwich’ can be replaced with another like-sized print in seconds, simply slid into place using the existing mirror retainers. The thickness of the sandwich is just right to allow the mirror mounts to gently hold things in place, the rest being done by gravity. The mat is glued to the mount using 3M Double Sided tape.

The finished display is simple and elegant, with the mirror fasteners sporting a pleasant Art Deco retro look. And, like that museum curator, you can switch what is on display with ease.

Redimat sells archival mounting board in 22″ x 28″ for $7.10 with mats running some $22.05 plus shipping. So call it $26 a print if bought in quantities of more than ten. That’s a lot less than a glassed, framed print will run you. It’s also a great presentation for those interesting in selling their work, requiring just the addition of a glassine envelope ($0.50) for protection when displayed in a sawhorse at an art show.

Want to distinguish a photographer from an equipment fetishist? Simply ask what percentage of his annual outlay is on gear compared to prints. The higher the percentage, the lower the quality of the work, for the most part.