Instant preview.
Tethered shooting refers to a connection – wired or wireless – between your camera and a display device, allowing near instant preview of images, typically in a studio environment, on a decently sized laptop or desktop display. ‘Chimping’ the small rear LCD on the camera pales by comparison.
In this way you can instantly assess composition, lighting, exposure and focus and, most importantly, if you have a client present, you can give him faster-than-Polaroid previews of the session’s photographs.
Before you start spending money on cables I suggest you check that your processing software on your computer supports the camera of your choice. Not all software supports all cameras and you can bet that older versions of software will not support many of the latest camera models. Of all manufacturers you can be assured that Adobe will have been first on the planned obsolescence wagon, forcing you to upgrade your software at considerable cost.
My gear is relatively dated – Lightroom 6.4, a Nikon D800 and a 2015 MacBook Air, the latter no speed demon by modern standards. I use a wired USB2 connection between camera and laptop. Wireless solutions are available for those with more money than sense. Mine involved diving into the cable box in the garage and finding the right cable, free.
Plug the cable into the laptop and camera, turn the latter on, and Lightroom requires these steps:
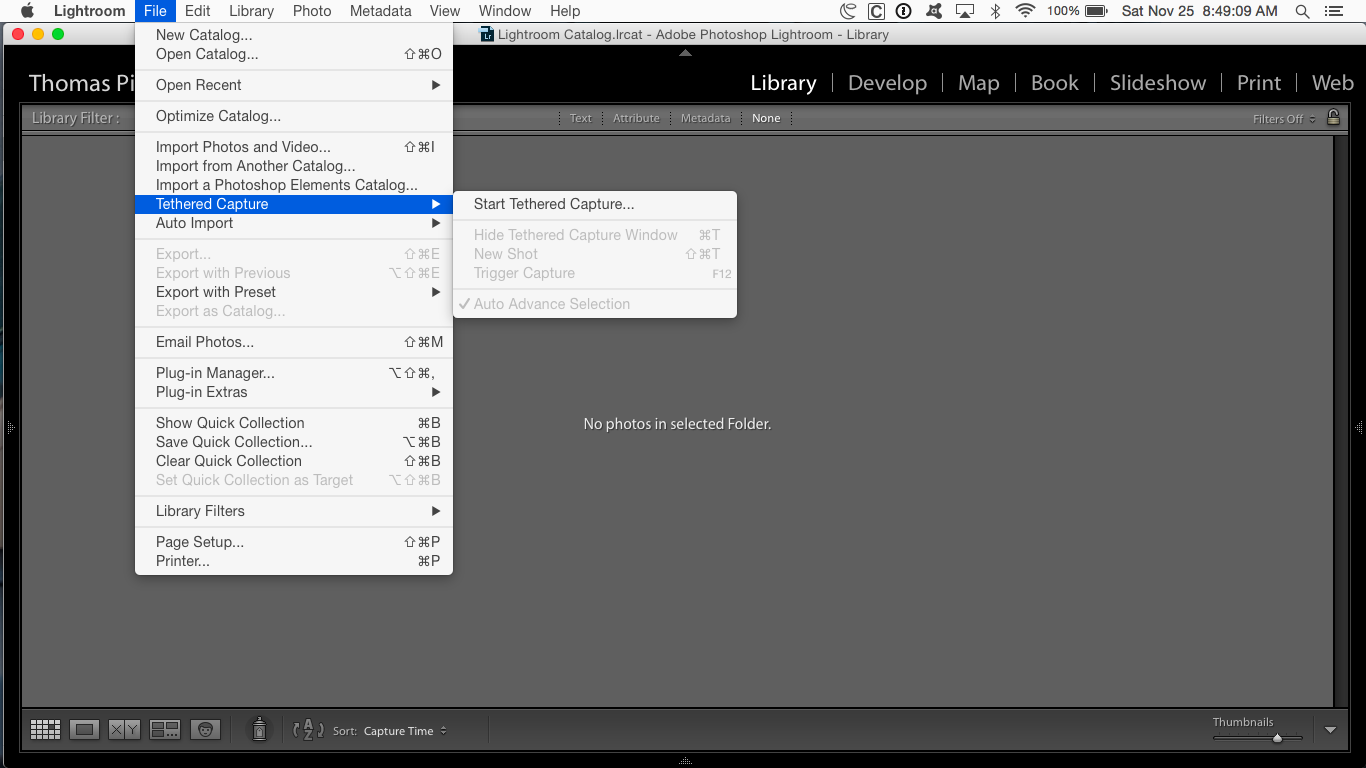

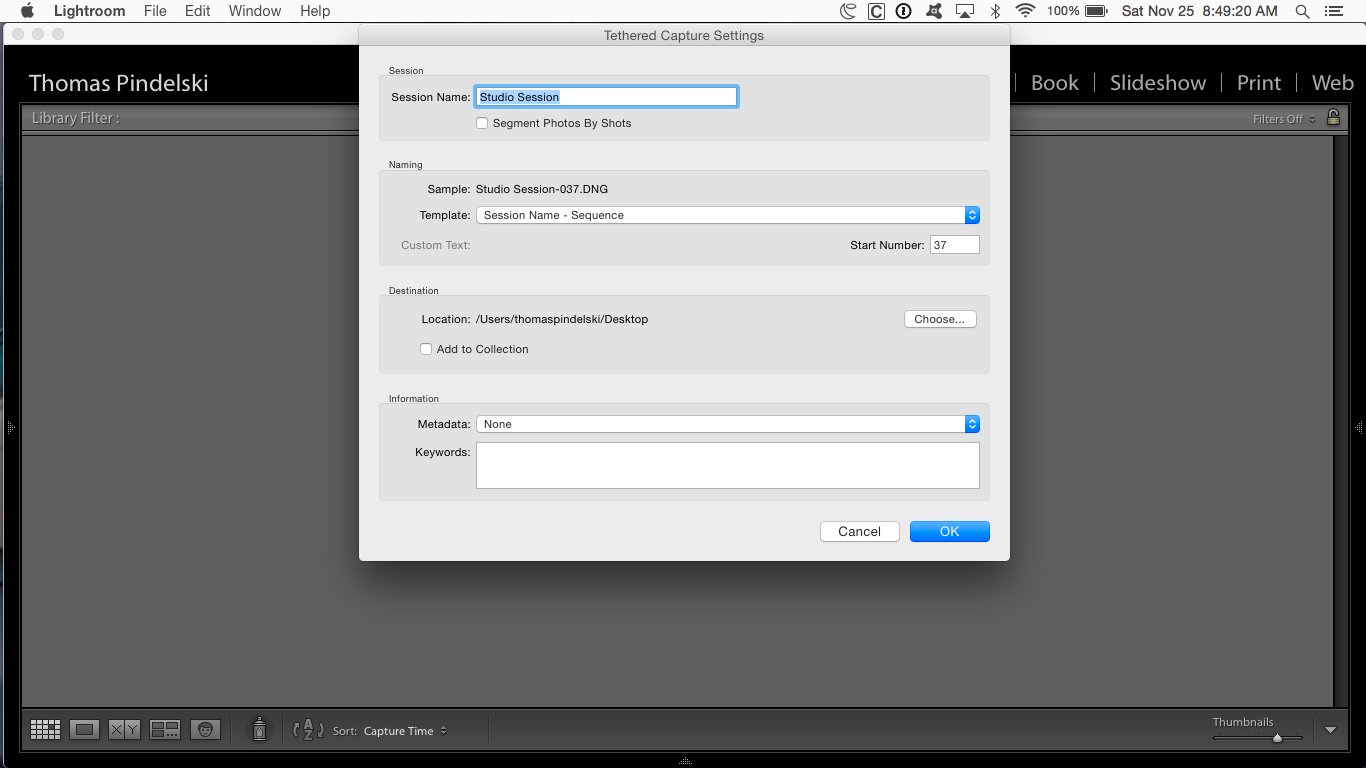
Enabling tethered capture in Lightroom.
Once both ends of the cable are plugged in the Nikon D800 no longer shows a frame count on the top LCD:
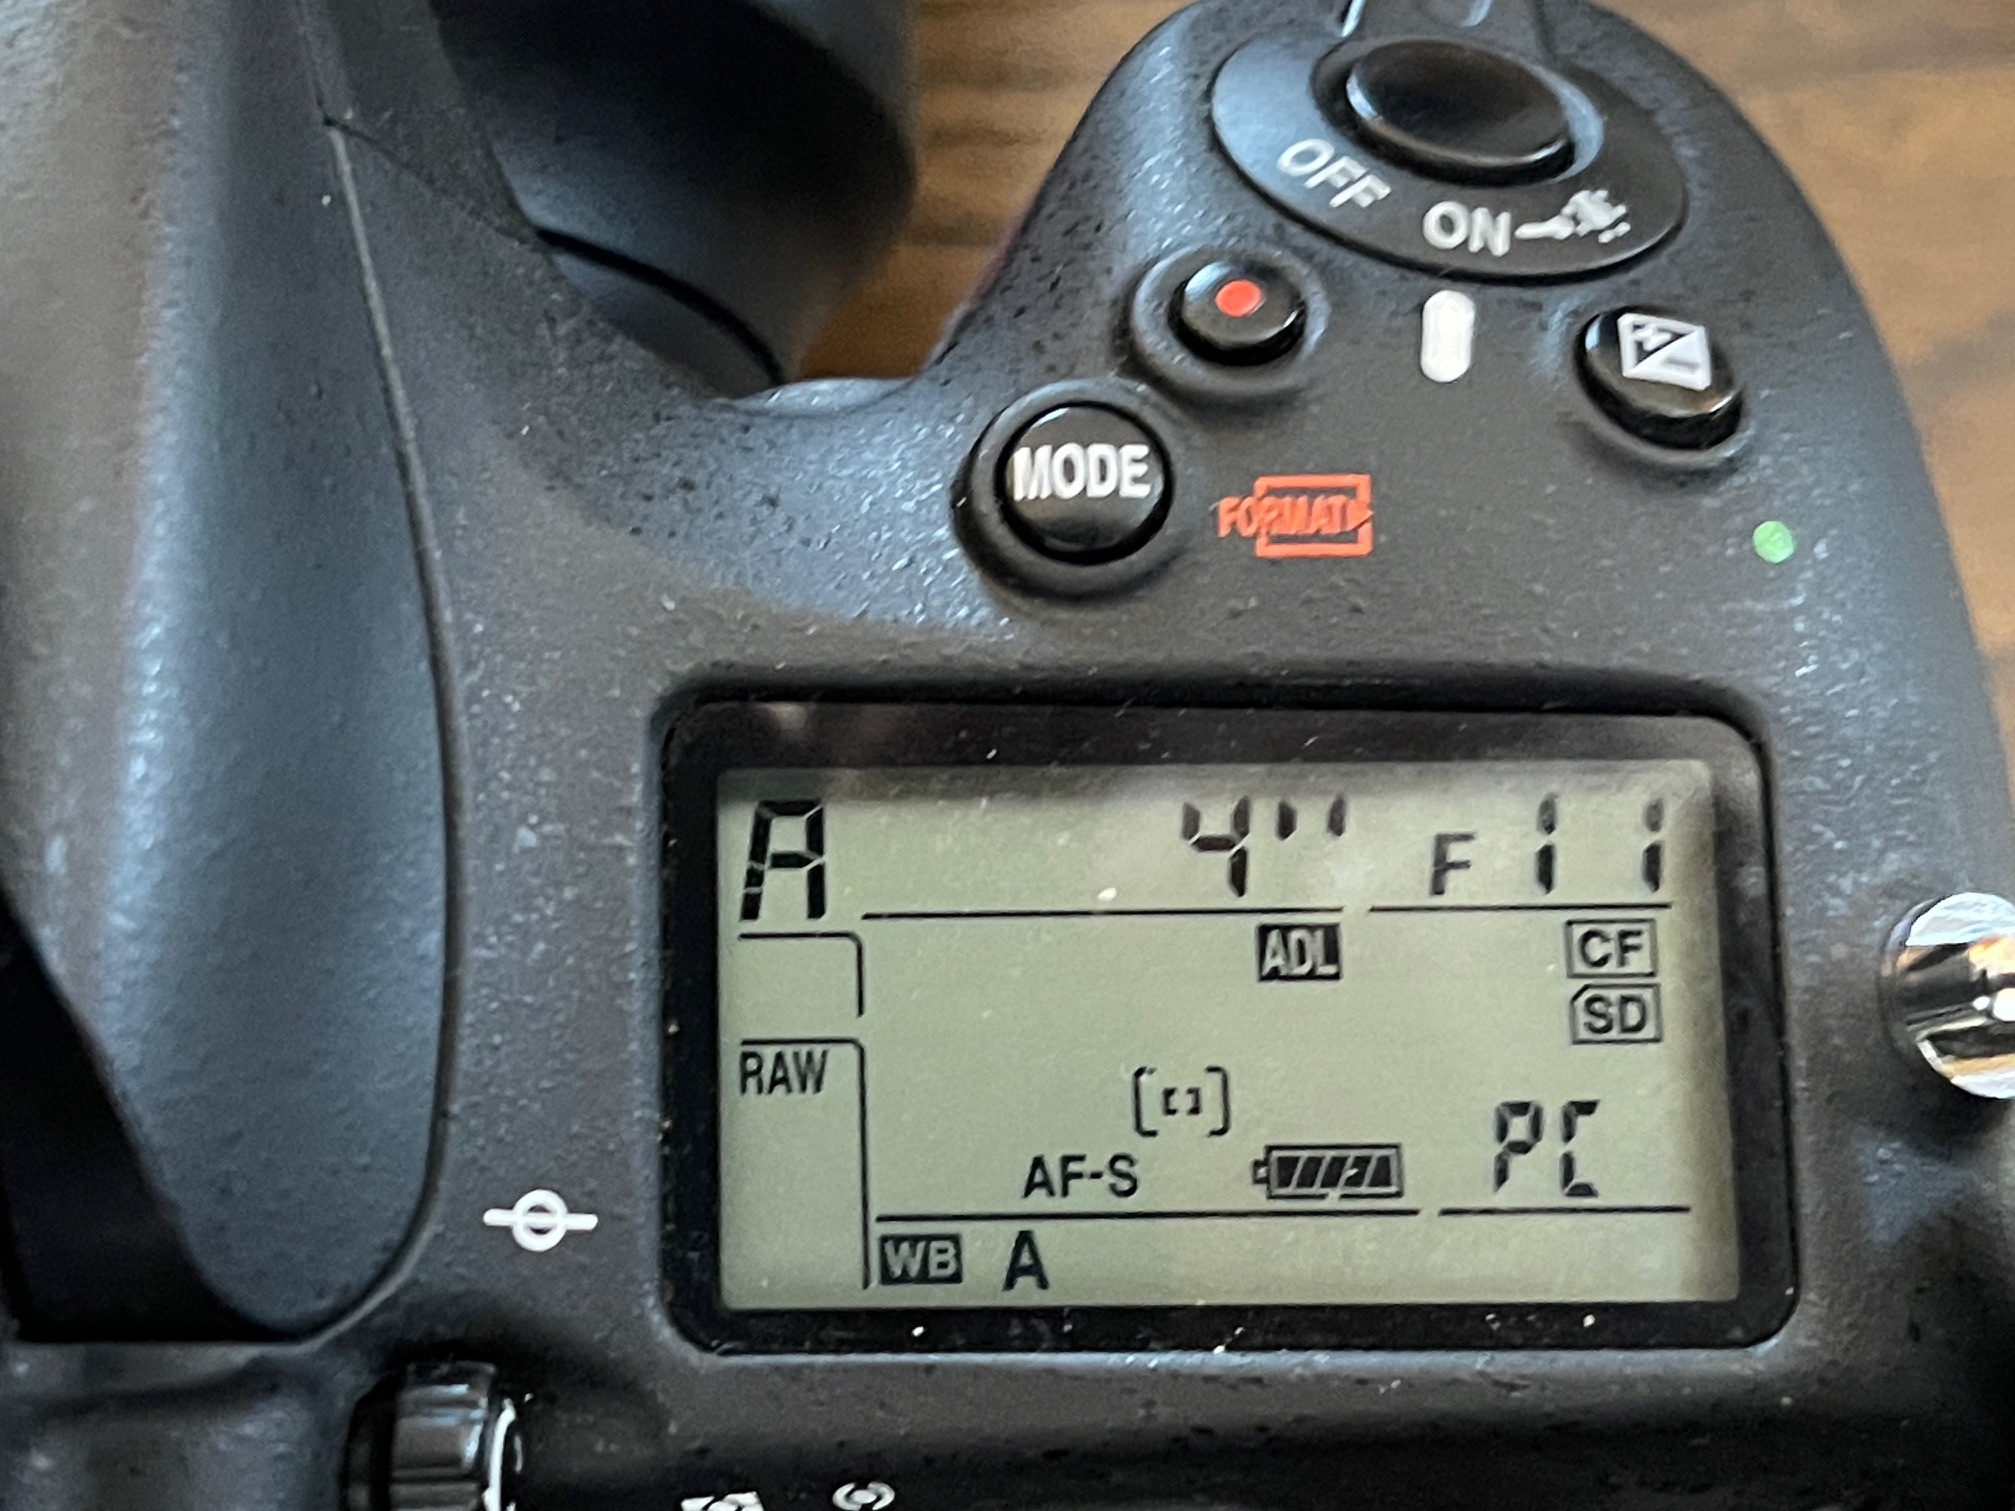
The frame count display in tethered capture mode.
If you do not see ‘PC’ in the frame count location unplug the cable from the computer and reconnect it. As a further check, a display panel will pop up in Lightroom and will show the model of the connected camera if the connection has been properly made.
‘PC’ indicates that the storage card in the camera is not being used to store images, which are being sent directly to the connected computer.
One word of caution. The camera socket for the connecting cable in the D800, if using a wired solution, uses a USB2/3 Micro USB design. This is unarguably the worst connector ever made, being unidirectional, fragile, small, and easily damaged. What’s worse the cable is subjected to tugging and stress in use, inviting disconnection as a minimum, damage at worst. So, instead of a costly solution what is needed is a simple twist tie, attached between the left strap lug or key ring and the cable, acting as a simple and free strain relief thus:
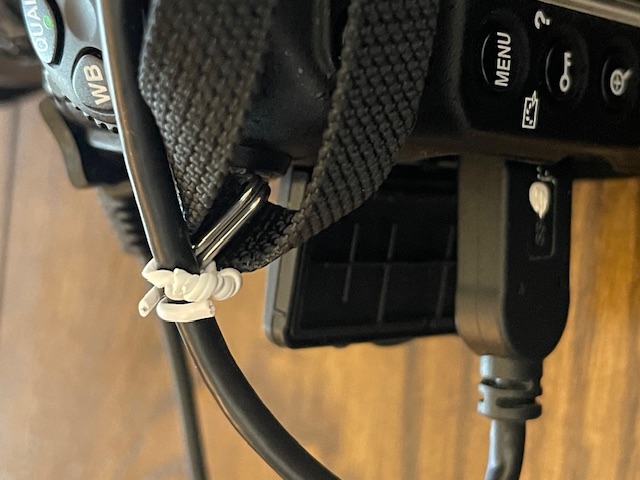
A tether for the tether. Highly recommended. The white paint mark has been added to indicate orientation when plugging the connector into the camera.
Acknowledging the awfulness of the Micro USB socket and connector, Nikon did make a strain relief clip but mine did not come with the secondhand body I bought. They crop up on eBay from time to time for very little; mine ran me $9.45:
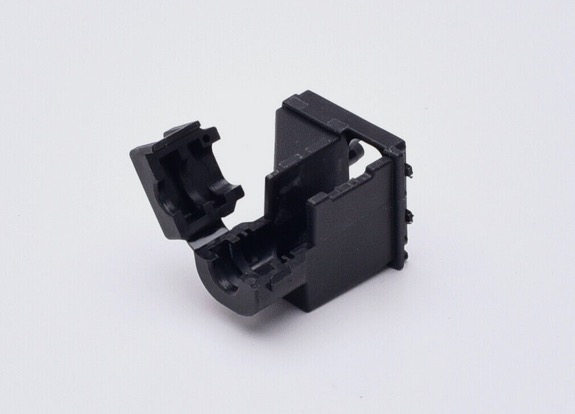
The Nikon USB cable clip.
Here it is installed. Be aware that the MicroUSB connector comes in both USB2 (narrow) and USB3 (broader – two connectors in one) versions. The casing for the USB3 version on the cables in my box will not pass the opening in the Nikon USB Cable Clip (you could always try sanding it down if that is all you have), while the narrower USB2 version passes through just fine. There’s a locating peg and a couple of shark teeth to hold the whole thing in place on the camera and the cable itself is secured with a locking foldover bar. Indeed, as the image below shows there’s an unused adjacent peg hole which suggests there may be a wider USB3 version of this clip. I do not know. It works well:
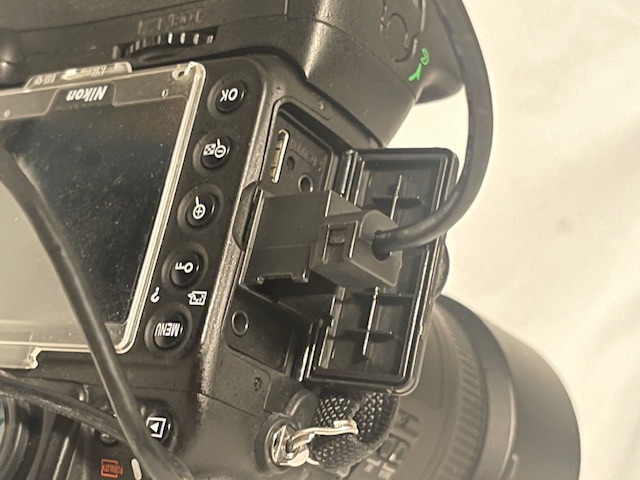
The Nikon D800 USB Cable CLip installed on my camera.
I have found no difference in transfer speed for the USB2 vs. the USB3 cable, both allowing LR to render the image on the laptop’s display in 5 seconds after the shutter button is depressed. using my ancient 11″ MacBook Air and the 14-bit RAW file format. That’s a whole lot faster than a Polaroid! Edwin Land would be proud.
My strong inclination is to rip off that awful, intrusive rubber cover for the connector area, but I have not yet summoned the courage to do that.
I switch Lightroom to full screen display (hit ‘F’ on the keyboard) and the latest image is the one displayed in maximum size. Hit ‘G’ for the familiar LR grid display. The advantage of the full screen display is that it’s far easier to judge the image in full size.
And that’s about it. Once the session is completed the LR catalog can be exported to your desktop of choice for post-processing in the usual way. I simply network my desktop Mac Pro with the MacBook Air and transfer the catalog into the Lightroom software on the Mac Pro. You use Windows? You are on your own.