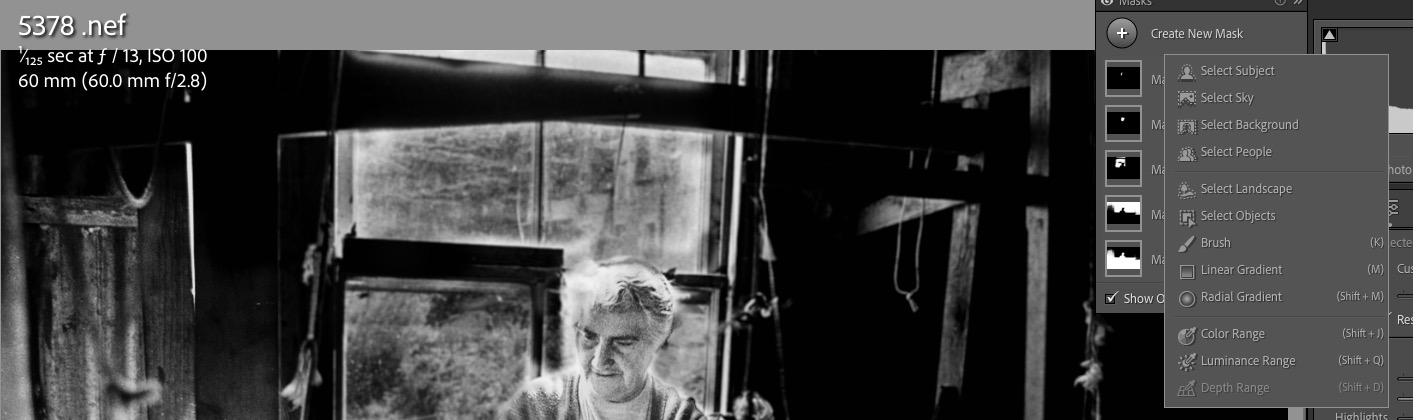
A period of no use sees issues.
For an index of all articles about the Epson ET8550 printer, click here.
Having upgraded (meaning Adobe forced me to upgrade using a strategy of planned Mac hardware obsolescence) to the subscription version of Lightroom, I went to print a favorite image the other day and everything was wrong. The 13″ x 19″ print shot out in seconds and what little color there was in the printed image was completely wrong.
The problems were twofold.
First, Adobe managed to lose all my preferred printer settings on the upgrade to the latest version of Lightroom. In the print module LR switched to Print Job->Color Management->Managed by Printer. This is exactly wrong. What you want is for Lightroom to manage color, not the Epson printer. This permits use of the right paper profile for the printing paper used. It means you control – through Lightroom – color matching rather than having some unknown profile used by the Epson printer. Here’s what you want to see:
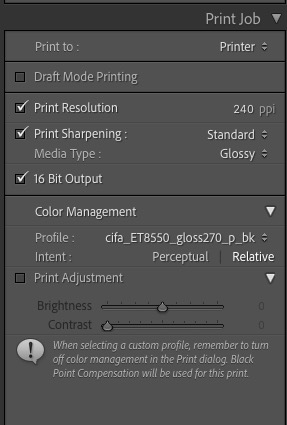
The color profile is the one for Canson Photogloss Premium RC paper.
You can check that LR is using this profile in the Print module by going to Printer->Printer Options->Color Matching, where you will see two options, neither selectable (both are greyed out) with ColorSync being the selected option, thus:
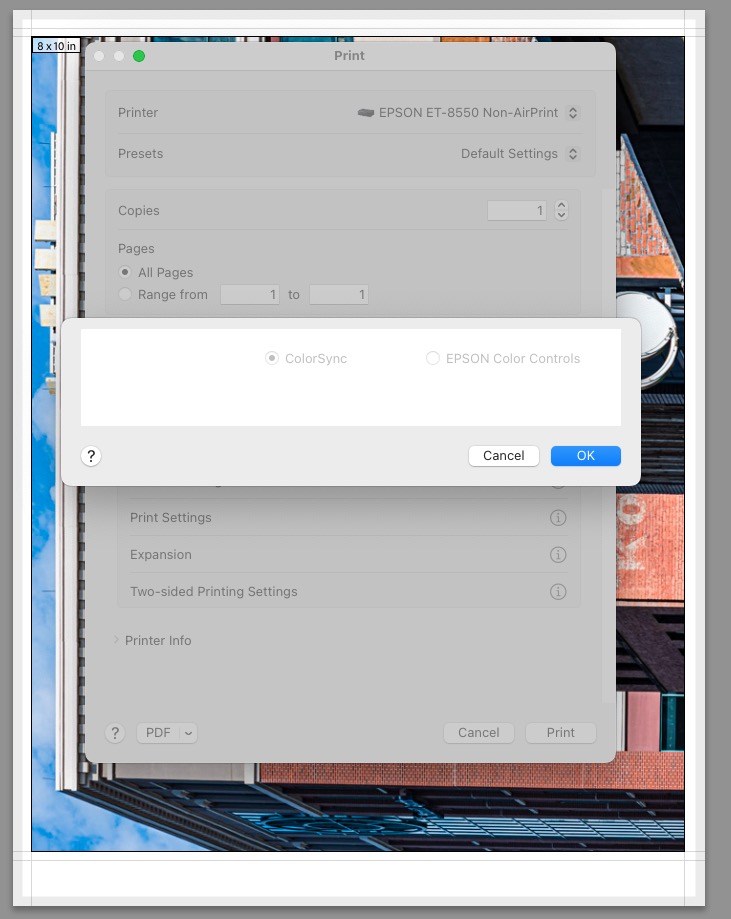
ColorSync is invoked by Lightroom.
Click ‘OK’ NOT ‘Cancel’ to make sure this setting remains undisturbed. Next, click on Print Settings and you should see:
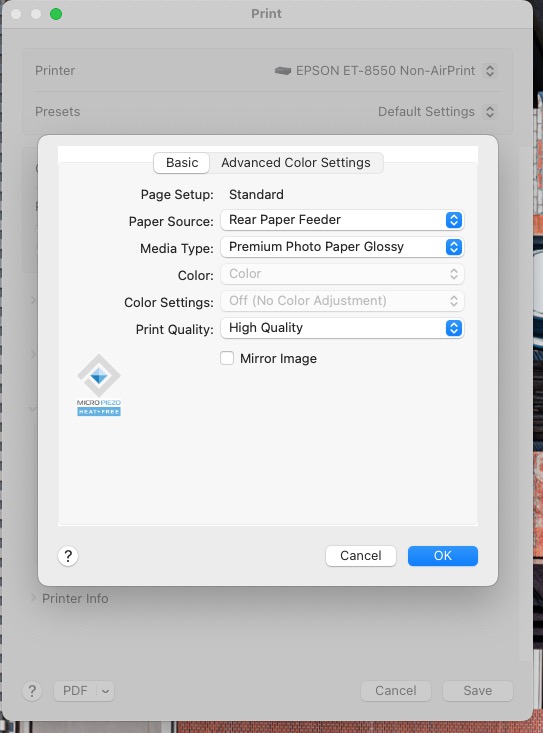
Print Settings after dialing in the correct Paper Source, Media Type
and Print Quality. All three were incorrect.
Now in that same dialog box click on Advanced Color Settings. You should see:
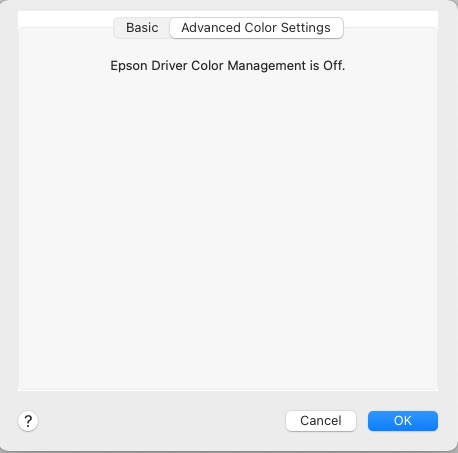
Confirmation that the printer is NOT controlling color.
So now I had LR set up for the right paper, paper source and paper specific profile, but the print quality was still awful.
Going to the touch control panel of the Epson ET-8550 go to Maintenance->Print Head Nozzle check, load some 8.5″ x 11″ plain paper in the second tray, and run the check. Mine came out showing bad clogging of both the Magenta and Grey print heads, disclosed by jagged lines in the print out. After running the Maintenance->Print Head Cleaning process twice, again using the touch screen on the printer, I finally got continuous lines for all six heads, thus:
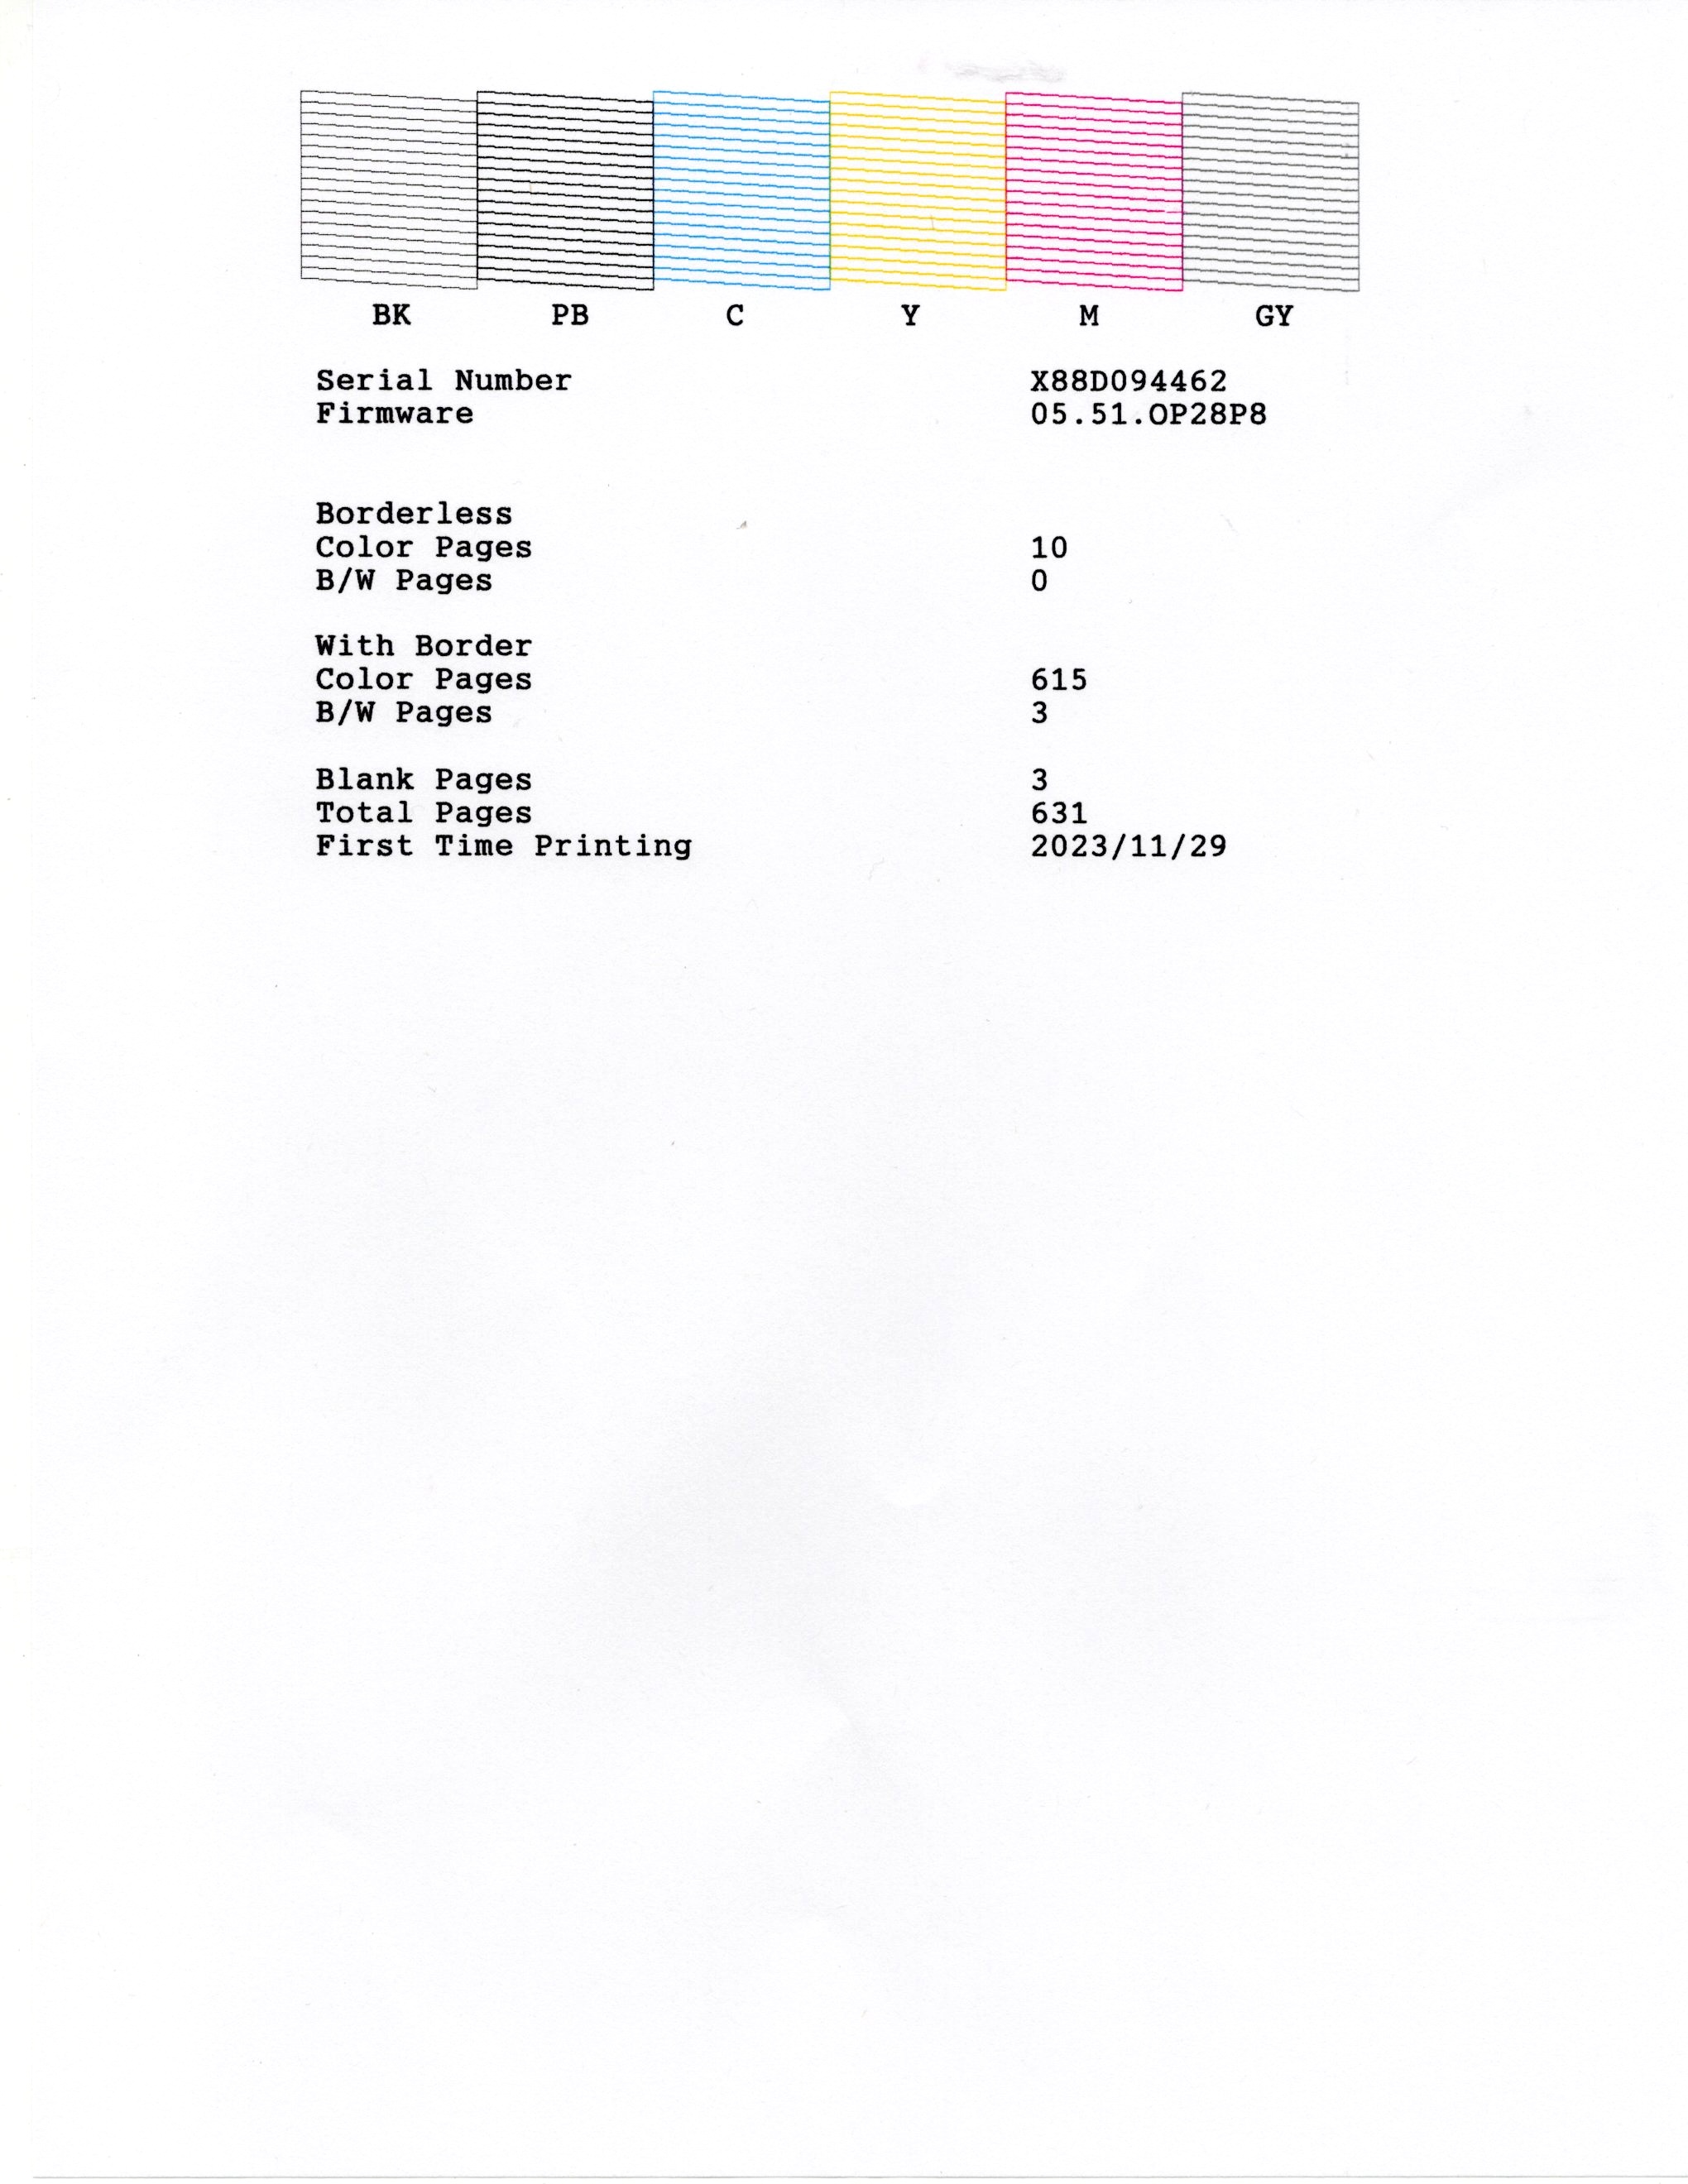
Six clean ink nozzles, designated by continuous lines in the print.
Finally I checked Settings->Printer Settings->Bidirectional and, sure enough, either dastardly Adobe or dastardly Epson had switched this setting to ‘Bidirectional->On’, which is sub-optimal for best print quality, if faster. I switched Bidirectional ‘Off’ and had at it with LR. A couple of minutes later a pristine 13″ x 19″ print was lying on my desk:
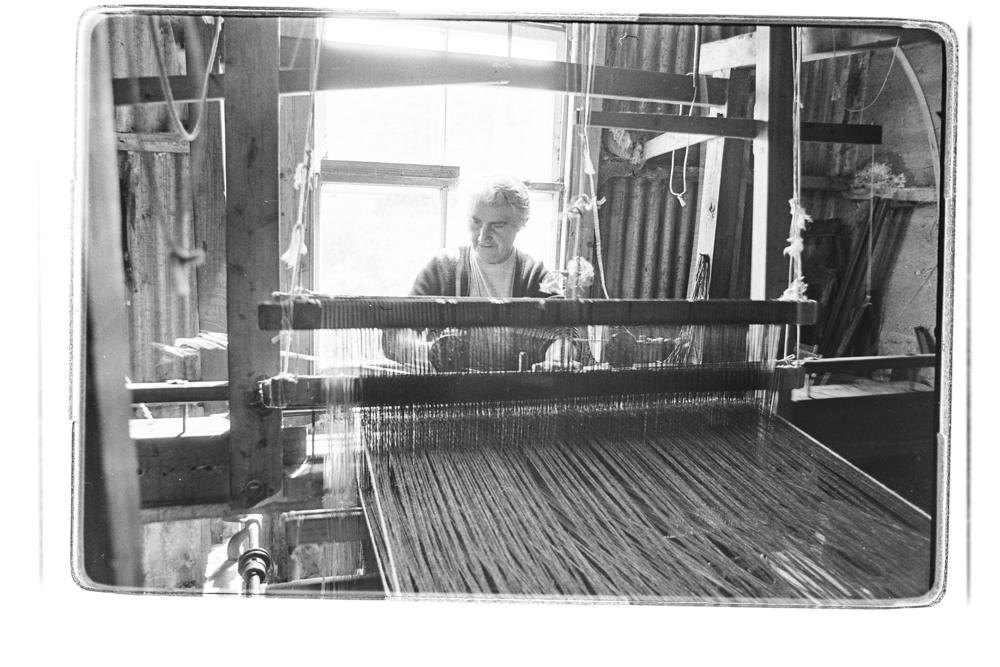
Perfect printing once more. Leica M10, 135mm f/4 Elmar at f/8 – as good as lenses get.
So a conspiracy of errors – Adobe’s poor ‘upgrade’ engineering and the printer’s recent lack of use resulting in clogged ink nozzles – is the sort of thing to expect in that most fragile of hardware devices, the ink jet printer. In conclusion, if your printer has not been used for a few months, run a nozzle check using plain paper before inserting costly photo paper.