6-bit coding comes into its own.
For an index of all Leica-related articles click here.
My earlier piece on 6-bit coding of Leica M-mount lenses concluded with the following codes for my four lenses:
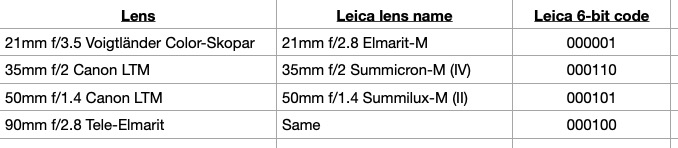
Lightroom stores lens correction profiles, which correct for vignetting and distortion, for the first three. Strangely the Tele-Elmarit is missing.
While 6-bit coding corrects for edge color effects in-camera, there is still a need to apply lens corrections in LR or LRc for the best results. Ordinarily this is done manually, frame by frame, a very laborious approach. You have to check the lens maker and then choose the correction profile from a very long list, one frame at a time. Not good.
Here is how to have Lightroom do that automatically when the files are imported. Even if the imported files were made with more than one lens, the correct profile will be applied to each, along with chromatic aberration correction. Here’s the process.
Take a picture with each of your 6-bit coded lenses and import those into LR or LRc. Go into the Develop module on the first image and scroll down to the ‘Lens Corrections’ pane at right. Check the first two boxes as shown below. My examples are specific to the lenses I own. Choose as appropriate for yours.
21mm f/3.5 Voigtländer Color-Skopar Aspherical VM:
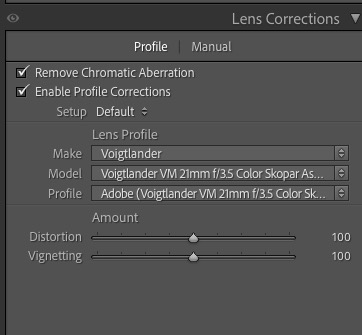
- Click on ‘Make’ and choose ‘Voigtländer’
- Click on ‘Model’ and choose ‘Voigtländer VM 21mm f/3.5 Color-Skopar Aspherical’ from the long list
- The correct Adobe profile will appear in the box ‘Profile’
- Click on the drop-down ‘Default’ above under Setup
- Click on ‘Save New Lens Profile Defaults’
- My 21mm Color-Skopar is 6-bit coded as a Leica 21mm f/2.8 Elmarit pre-ASPH, which is what Lightroom sees in the imported file
- You have now instructed LR that every time it’s importing a file with the 6-bit code for the 21mm f/2.8 Elmarit-M to apply the profile for the 21mm f/3.5 Voigtländer VM Color-Skopar Aspherical lens.
The next time you import a file taken with the Voigtländer lens, the correct correction profile will be applied along with correction of chromatic aberrations.
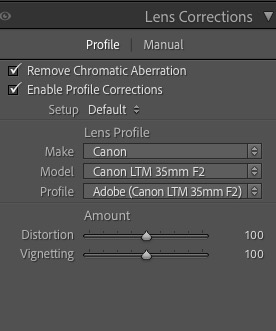
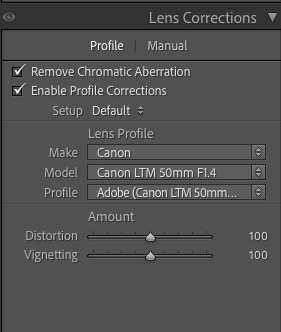
Now repeat this process for files taken with your other lenses, selecting the appropriate Make and Model each time, then saving the result. Here are my settings for the other three lenses I own with 6-bit coding. Amazingly LRc has corrections for the two Canon lenses, each over 50 years old:
35mm f/2 Canon LTM:
50mm f/1.4 Canon LTM:
90mm f/2.8 Leitz Tele-Elmarit:
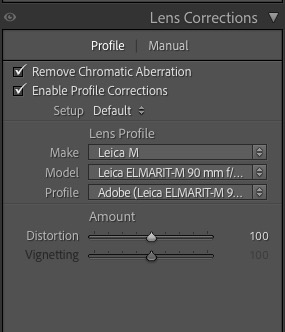
In the case of the Tele-Elmarit there is no lens profile stored in LRc so I chose the one for the 90mm f/2.8 Elmarit-M which is very similar. Both lenses are almost distortion free so you really do not have to check the ‘Enable Profile Corrections’ box, but you still want to correct for chromatic aberrations.
Now on your next import these profiles will be applied automatically. The next step is to correct the lens’ names in EXIF data using the tool I describe here which takes little time and allows the serious business of post-processing to commence.
A note on changing lens names:. For my three non-Leitz lenses I like to change the names from the Leica 6-bit coded names to the correct ones – 21mm Voigtländer and 35/50mm Canons. If I apply the EXIF tool to do this any Lens Correction changes made using the above method are erased, and the lens corrections have to be applied anew after the lens name change. To avoid this, instead of using the above method to apply lens corrections, create Develop presets for each lens with the appropriate corrections profile selected, saving them in the Develop modules Preset pane (click the ‘+’ sign’) thus:
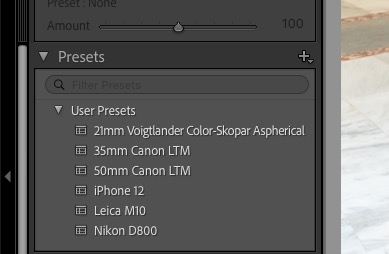
Develop presets in LRc’s Develop module
Import the images in the usual way, run the EXIF tool to change lens’ names as required then in the Library module of LRc select the images to which you wish to apply Lens corrections using the Quick Develop panel at the right, thus:

Applying Lens Corrections using Quick Develop
For 100 images this takes a mere 2-3 seconds.
So the order of events is:
- Import images from the SD/SDHC/SDXC card
- For non-Leica lenses use the EXIF tool to change lens’ names
- For non-Leica lenses apply the lens correction profile using the Quick Develop panel in the Library module of LRc after selecting images from each lens in turn using the Metadata panel in the Library module
- You cannot select multiple images in LRc’s Develop module to apply lens corrections. This workaround lets you do so.
- You are done