Not your father’s superzoom
For an index of all Leica-related articles click here.
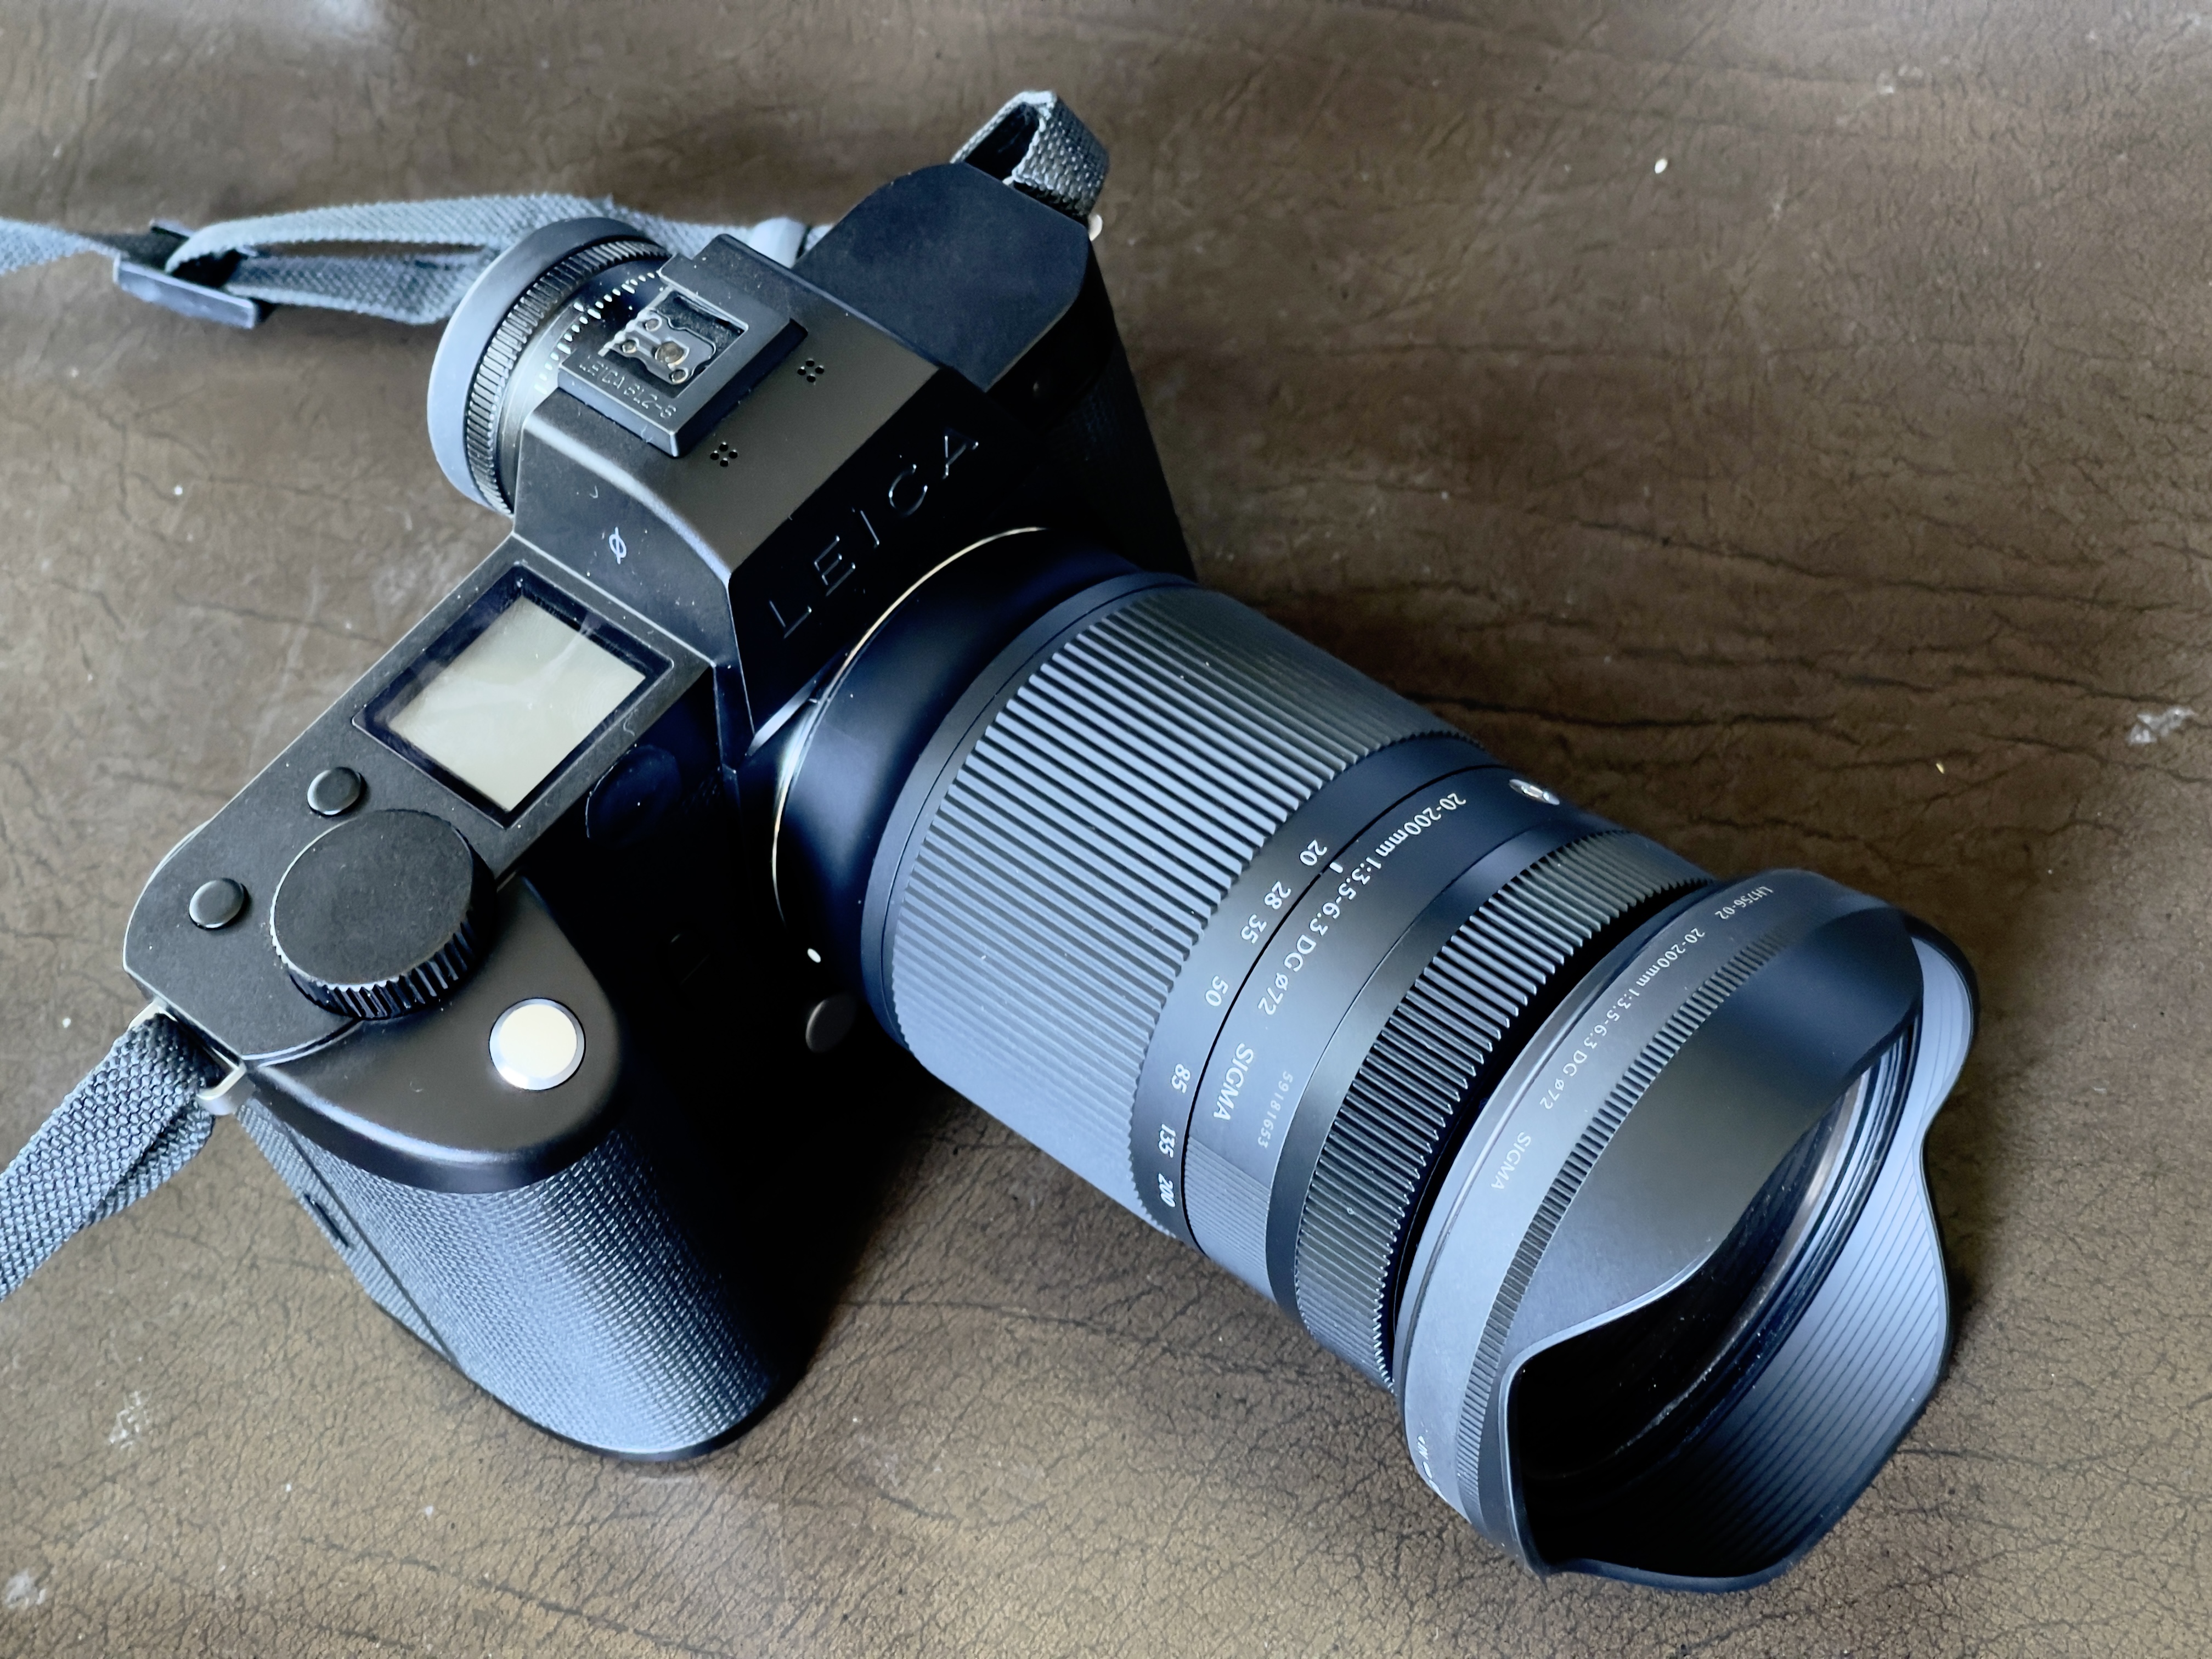
The Sigma 20-200mm zoom on the Leica SL2-S.
Background:
The Sigma 20-200mm f/3.5-6.3 DG Contemporary Lens in L-Mount easily qualifies as a ‘superzoom’, with its 10:1 zoom range. Boasting no fewer than 18 elements in 14 groups – a testimony to computer-aided design – it weighs in at a modest 19.4 ounces. Four of those elements are aspherical. This relatively low weight is attributable to Sigma’s use of polycarbonate plastics for much of the chassis, in lieu of the typical construction of Leica SL lenses which come in all metal construction. The bayonet mount is stainless steel and the innards are made of light alloys. It’s no secret that Sigma’s optical designs find their way into many Leica branded L mount lenses, where metal is added and the price is hoiked by 50-100%. German labor costs, you understand.
Optics:
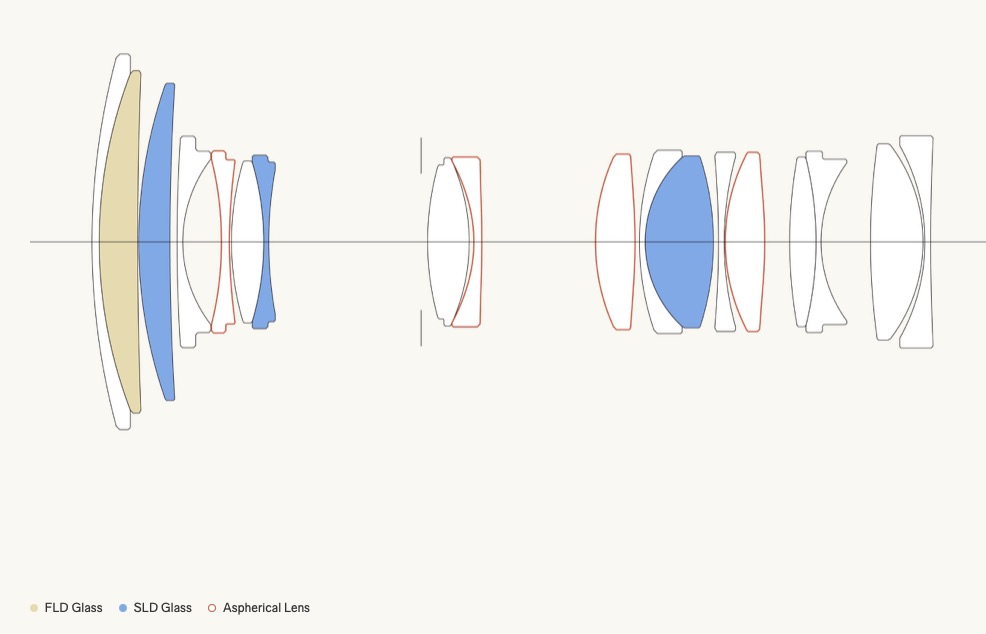
Generous use of aspherical surfaces – outlined in red.
FLD? Standing for ‘F’ Low Dispersion, the material is claimed to have performance equivalent to fluorite glass, but at a more affordable price. Its optical characteristics apparently allow excellent correction for residual chromatic aberration, while its lower density compared to traditional optical glass allows lighter lenses.
SLD? Special Low Dispersion glass enables the mass production of high-quality lenses; it’s a material which reduces optical aberrations at lower cost than fluorite glass.
Macro capability:
The Sigma 20-200 is available in Sigma branding only and, as far as I can tell, is the L mount full frame lens with the widest zoom range. Not content with making a lens with an extraordinary zoom range, Sigma added a macro capability with the lens focusing down to half life-size in the 20-85mm zoom range. At 200mm the maximum reproduction ratio is 1:3, or one-third life size. At 20mm the lens to object distance is really too small but at 85mm it makes for a very useful macro lens and even at 200mm the macro capability is substantial.
Feel and controls:
The focus ring, which is an electronic ‘fly by wire’ design, not a mechanical one, is butter smooth. There are no focus stops, just continuous rotation, and the lens’s length does not change as it is focused. It feels metallic.
The zoom ring, rather counterintuitively, has to be rotated counterclockwise to lengthen the focal length. One adapts quickly. It’s a tad stiffer than I would ideally like but expect it will loosen up with use. It feels rubberized with somewhat coarser fluting than on the focus ring.
Air venting:
I wrote about the very poor air venting when zooming in the Canon EF-L 24-105mm zoom lens here. Despite the presence of a mirror, which would divert the incoming air+dirt wind stream, the sensor of the Canon 5D needed very regular cleaning.
I have not read any lens reviews which address this topic, yet it’s of increased importance with mirrorless cameras where there is no mirror to block incoming air. Applying the ‘hold it to my cheek while vigorously working the zoom collar’ the rush of air from the Sigma lens is very weak, suggesting that trombone blasting of dirt into the innards will be largely mitigated. Experience will tell.
Despite the extensive use of plastics for the focus and zoom collars the overall feel of the lens is that of a high quality optic. Amazingly, when fully extended at 200mm (7.5″ lens length) there is absolutely no play in the extended barrel. Well done, Sigma!
Autofocus and lens switches:
Until now all my lenses for the Leica SL2-S have been either Leica M mount lenses used with Leica’s competent adapter, or old manual focus Nikkors used with an inexpensive aftermarket Nikon F to L mount adapter. The Sigma is my first autofocus lens for the SL2-S. Mine was purchased new from B&H and came with a pouch, lens hood and front and rear caps. The filter mount size is 72mm. There are two switches on the lens – AF/MF and a zoom lock at 20mm. While my sample does not extend under gravity, wear and age may yet make the lock switch useful. The lock can be unlocked using the switch or with a twist of the zoom ring. Nice. The diaphragm has nine blades.
The lens does not maintain focus as it is zoomed, but AF makes this a non-event. I doubt the AF is fast enough for sports photography but for my intended uses – street snapping and travel – it’s fast enough. The AF motor is silent.
Manual focus:
Switch to MF and a touch on the focus collar brings up a magnified image in the finder of the SL2-S making nailing focus trivial. (This feature can be turned off in the SL’s controls). Touch the shutter release to revert to normal magnification in the EVF. Beautifully implemented.
The manual focus option is intriguing, Turn the focus ring rapidly and you get from infinity to closest focus in a half turn of the ring. However, turn the focus collar slowly and it takes a full two turns to span the focus range. This is especially handy for focus stacking of multiple macro images where one would usually use a rack to drive the whole camera + lens assembly to and from the subject, as using the focus collar the minute focus changes required between images are almost impossible to apply using a lens with a regular focus collar. With the fine focus changes possible with slow movements of the Sigma’s collar focus stacking is readily achieved. A brilliant design of ‘fly-by-wire’ electronic focusing.
The Contemporary lens line:
Sigma has three lens lines. The Art series lenses are mostly large aperture and bulky, with high optical quality and fixed maximum apertures in the zooms. I owned the 35mm f/1.4 and it remains the sharpest lens I have used. The Sport series mainly comprises long zooms and fixed focus optics, with the zooms having a fixed maximum aperture. Finally, the Contemporary series, which includes the 20-200mm zoom, is the budget line and boasts 14 full frame primes and four zooms, two of which have fixed maximum apertures – the 16-28mm and the 28-70mm, both f/2.8. That’s not the case here where the maximum aperture at 20mm of f/3.5 falls to f/6.3 (2 stops slower) at 83.3mm and up. I suppose that compromise keeps weight and bulk down. Contrast that with my current Nikon superzoom, the 28-300mm AF-S Nikkor G, whose apertures range from f/3.5 to f/5.6, with a similar 10:1 or so zoom range. With the Sigma you get the far more useful 20mm at the wide end, sacrificing 100mm off the long end. That works for me. Sigma claims the lens is weather sealed, with seven internal seals, and there is also an external rubber O-ring on the bayonet mount.
Country of origin:

From the booklet included with the lens.
Image stabilization:
There is no image stabilization in the lens, but the Leica SL2-S’s IBIS does the trick. Also, in the L mount version distortion correction – barrel and wave at the wide end and pincushion at the long one, along with substantial vignetting at the shorter focal lengths – is done in camera. That’s a smart approach which further frees up the designer and likely reduces weight and bulk. See below for examples of how well this works.
Weight and bulk:
And how do weight and bulk compare between the SL2-S with the 20-200 and the Nikon D800 with the 28-300mm? Both are fitted with Upstraps, SDHC cards, a lens hood and a UV protective filter:
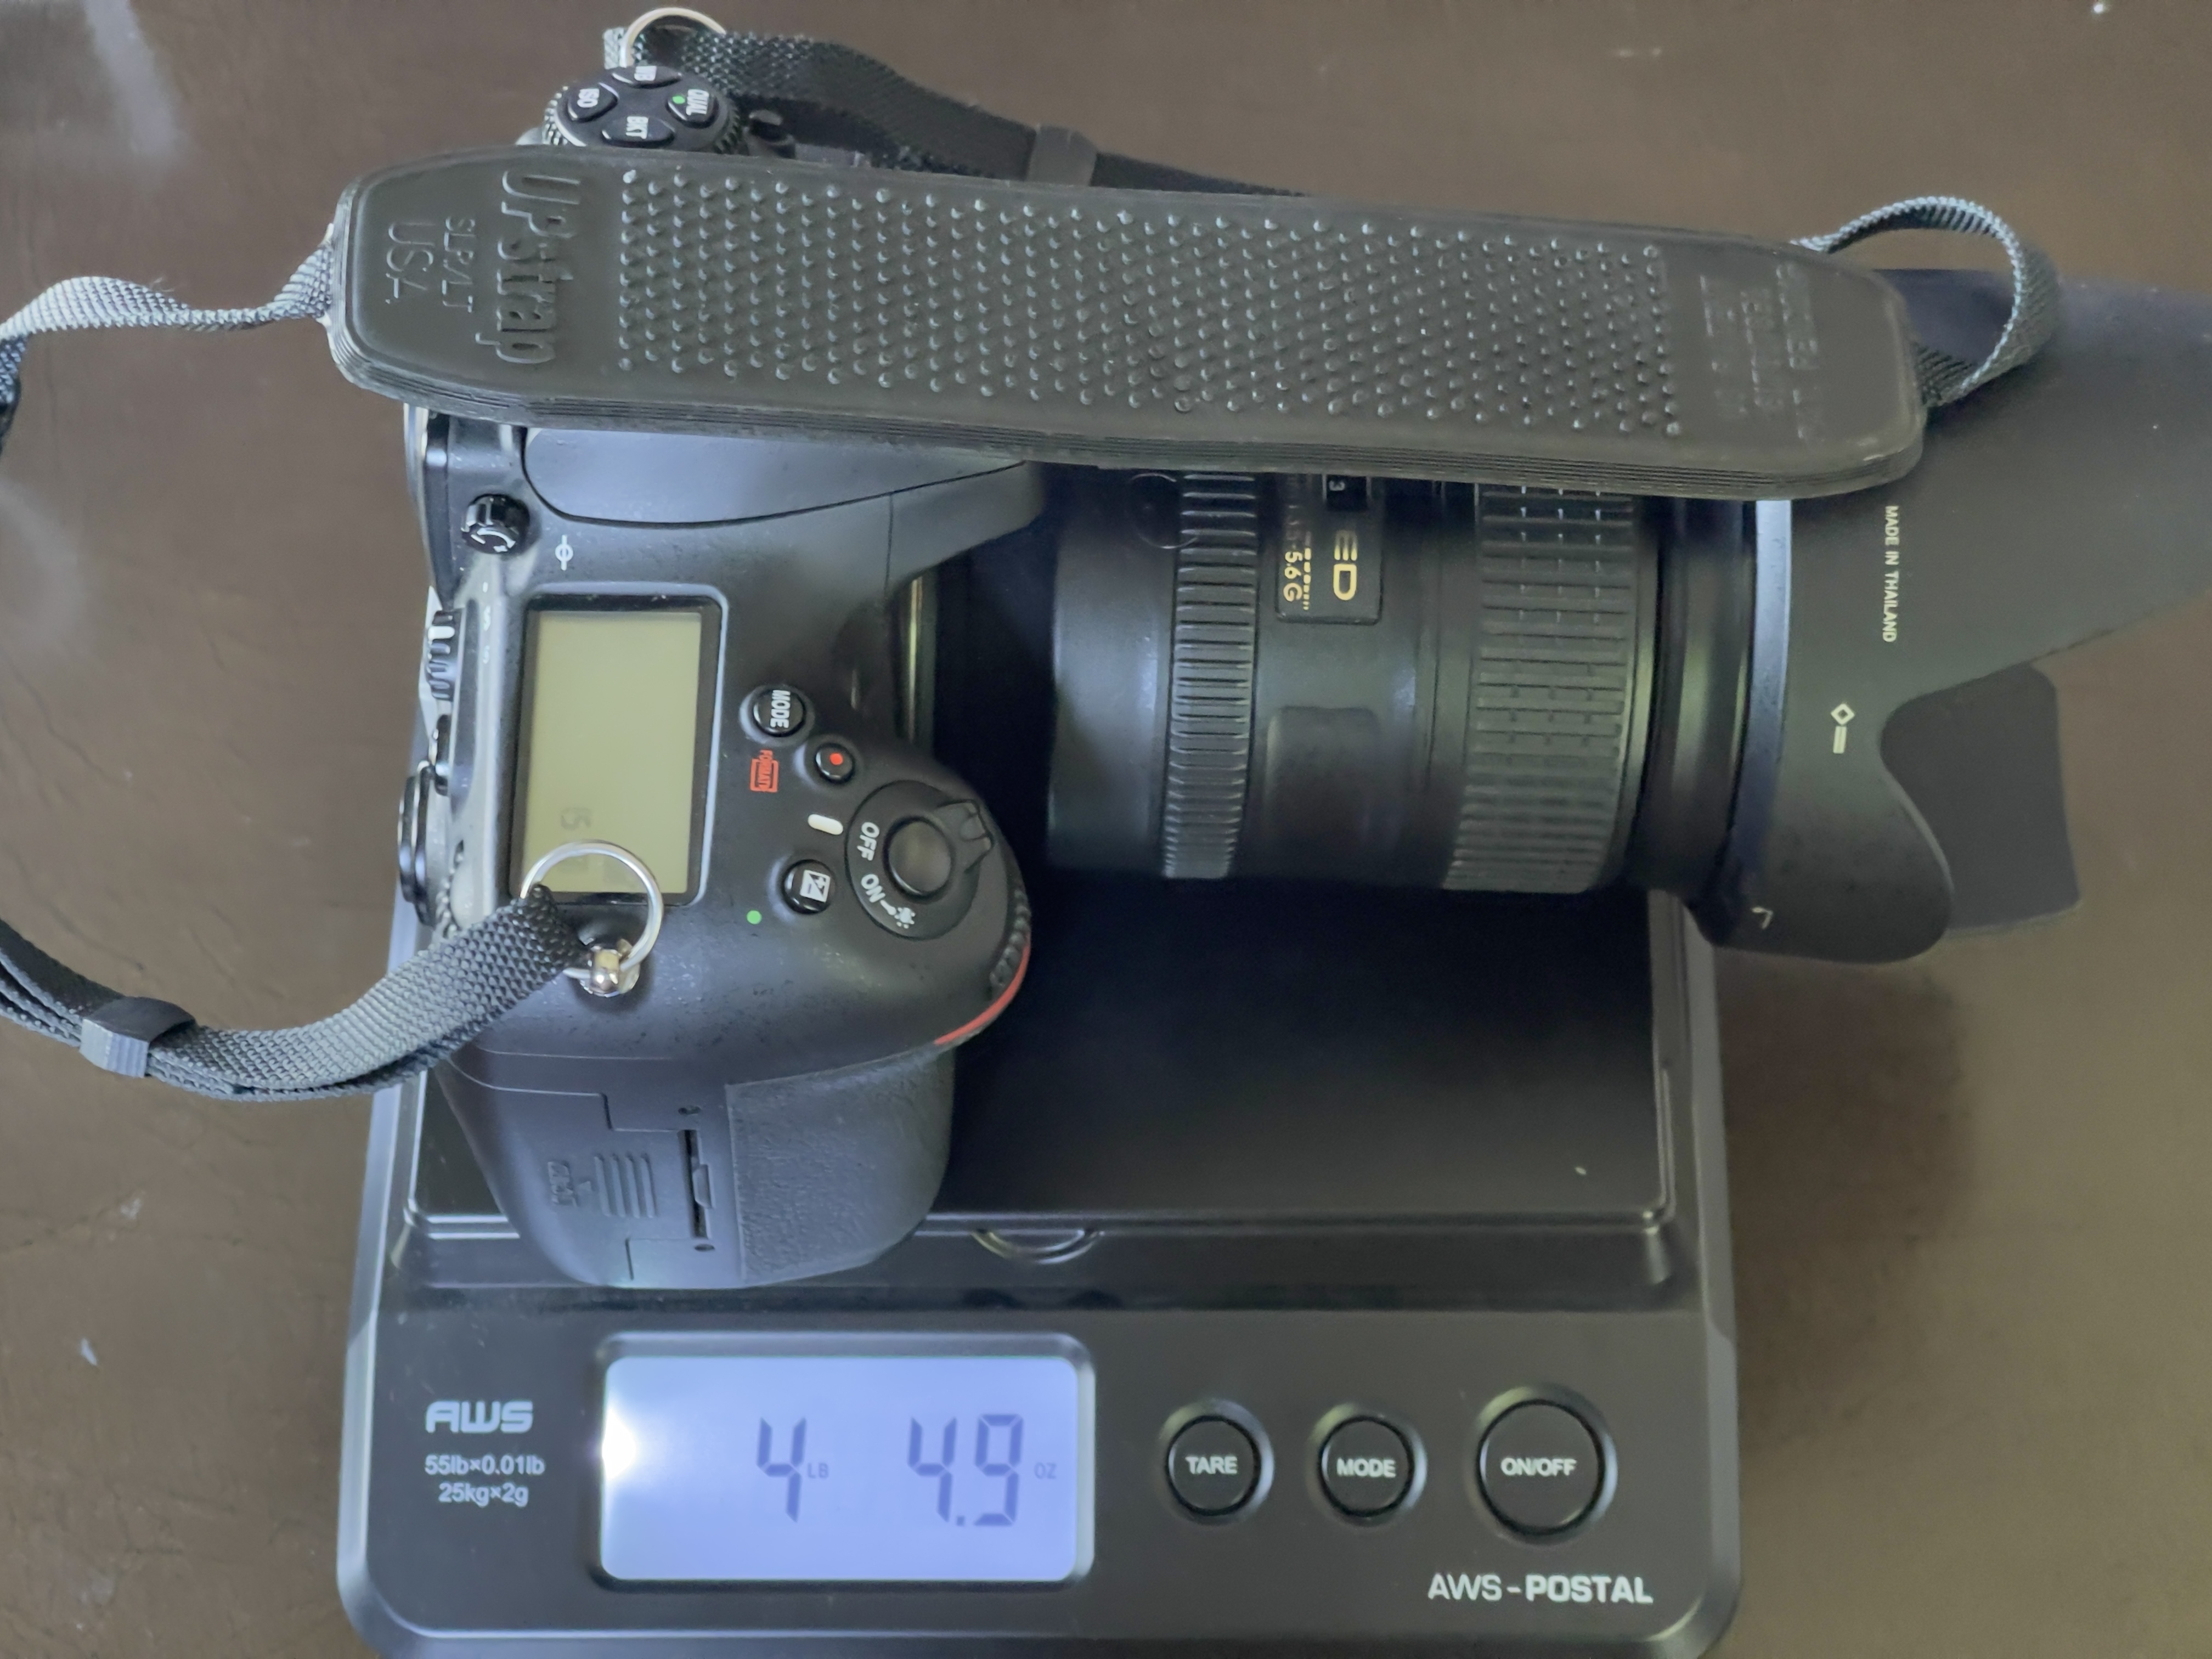
Nikon D800 with the 28-300mm AF-S zoom.
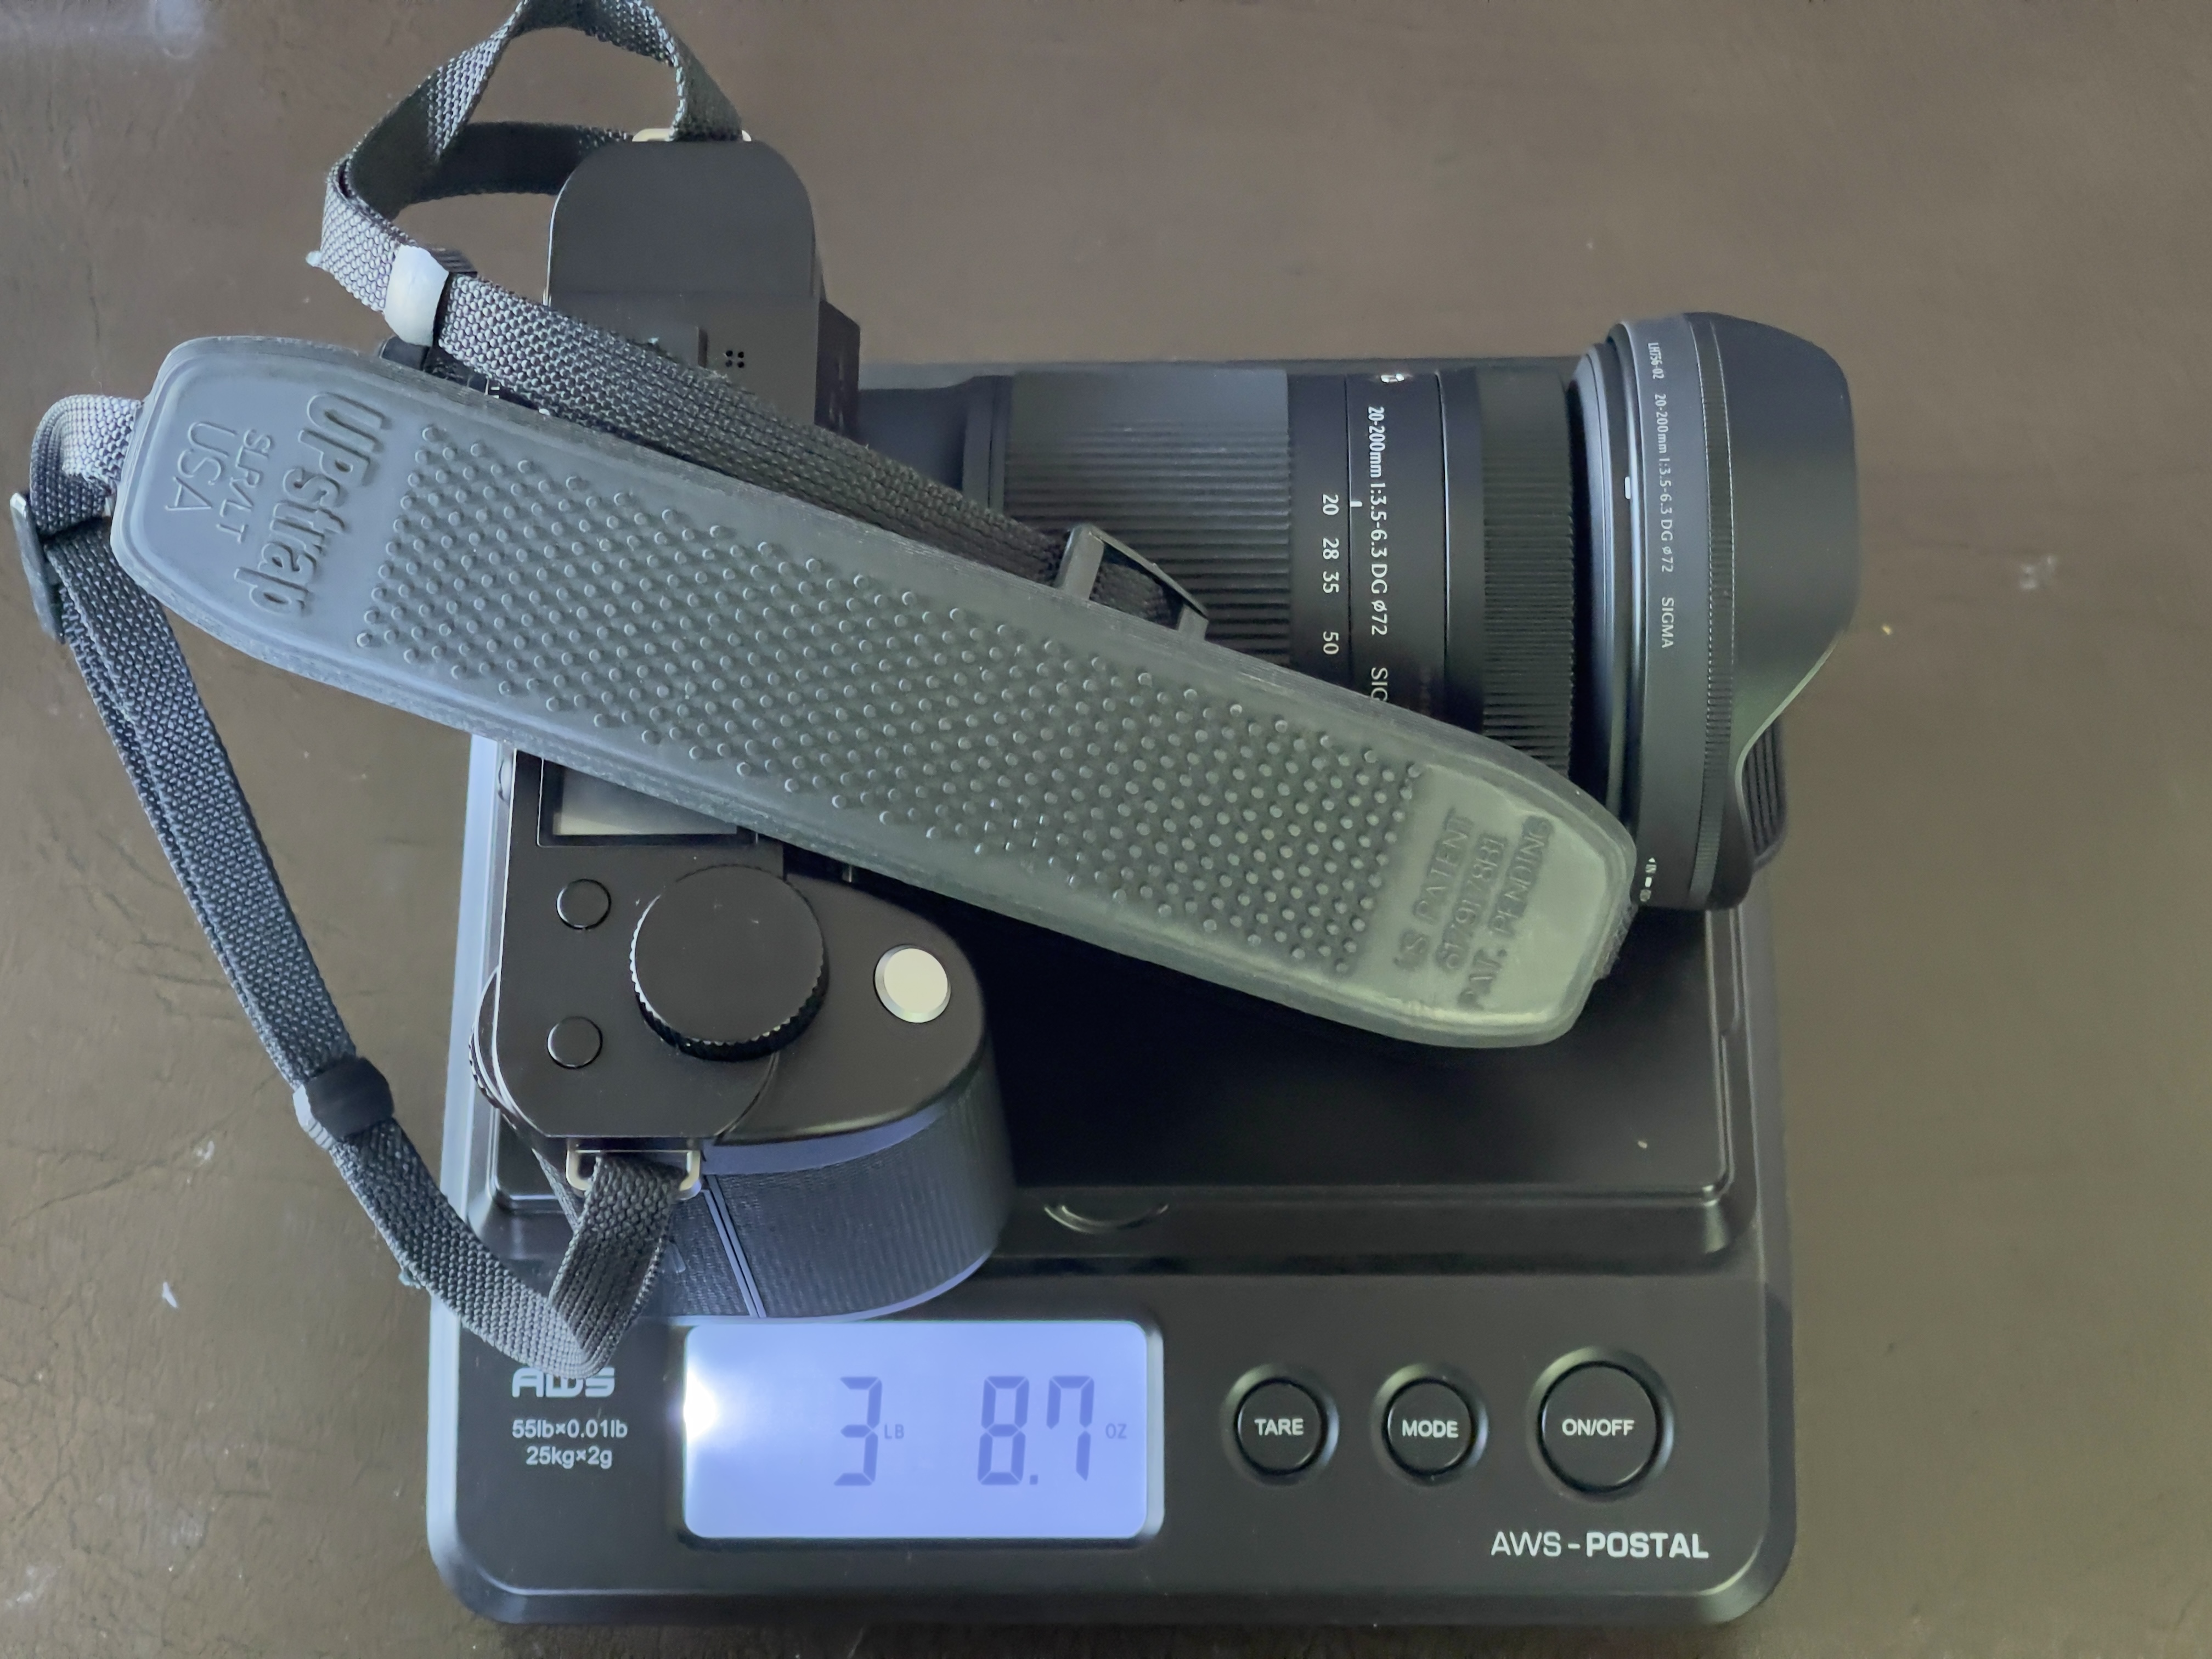
The Sigma on the Leica SL2-S.
While the Sigma lens weighs just over one pound the heavy weight of the mirrorless SL2-S rather offsets the weight savings compared with a conventional, flapping mirror DSLR.
Aperture control:
There is no aperture setting ring on the lens. Apertures are changed with the rear thumbwheel on the camera’s body.
Automatic distortion correction:
The Leica SL2-S automatically applies in camera distortion correction, and it is spectacularly good, especially when the peculiar waveform + pincushion distortion of the native lens is taken into account at the shorter focal lengths, not to mention the significant corner vignetting at those focal lengths. Look at the parallelism of the top of the bookcase with the edge of the frame, and note the absence of any vignetting:

At 20mm.

At 200mm.
Turn on ‘Enable Profile Corrections’ in LRc and the results are ghastly – this setting would only be used with cameras which do not provide automatic distortion correction. The reason they are so poor is that profile correction is being applied twice – once in the camera and then again in LRc. What these images disclose is just how severe the distortion and vignetting of the native lens really are, and how perfectly the Leica corrects them. LRc has the lens correction profile for the Sigma lens – I believe it would have to be used with certain Sony mirrorless bodies which do not apply in camera distortion and vignetting correction, for the Sony E-mount version of this lens.

At 20mm with LRC’s ‘Enable Profile Corrections’ enabled.

At 200mm with LRC’s ‘Enable Profile Corrections’ enabled
Definition at full aperture:
I’ll publish regular street snaps in a later post; meanwhile these are at full aperture at the extremes of the zoom range:
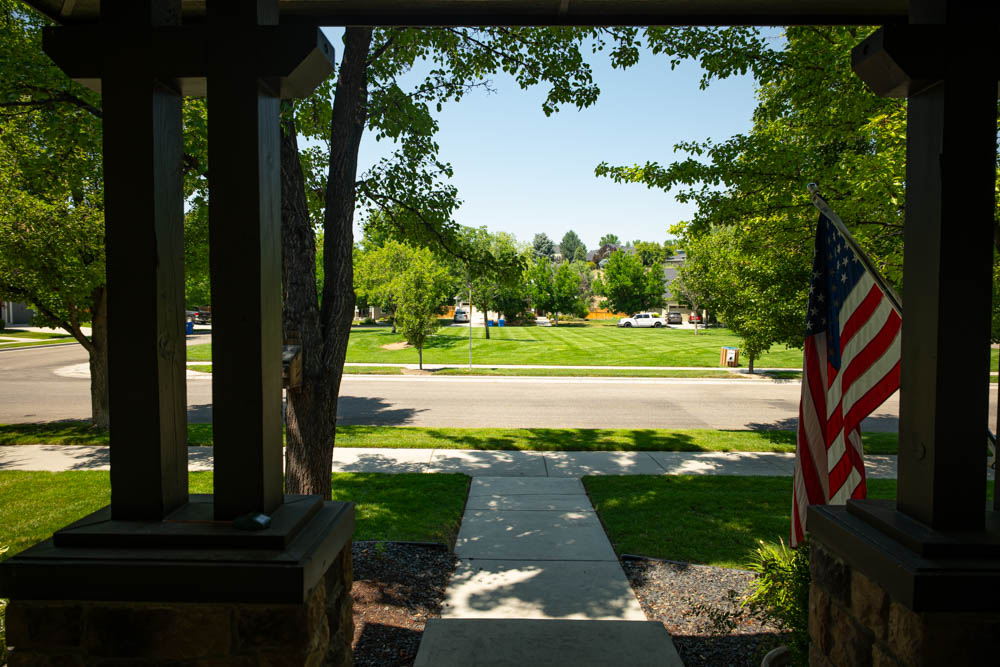
At 20mm, f/3.5.
Click the image for a larger version.
At 200mm, f/6.3.
Click the image for a larger version.
Best use:
This is a perfect travel lens. It’s also excellent for Macro – see below. One lens which does it all. If you want lightning fast AF for sports photography, or need large apertures for poor light or shallow depth-of-field look elsewhere.
A quick macro example:
Using the ‘slow focus’ function of the focus ring (see ‘Manual focus’, above) I exposed 36 images of the wild flower using MF:

Lesser Burdock. 50% crop of the original image.
Click the image for a larger version.
The ISO was set at 100, and the Sigma’s aperture at f/16. Focal length was 129mm. Lighting was from three strobes. The result is a focus stacked image using 36 differentially focused images, stacked using Helicon Focus. I think you may agree the definition is half decent.
More in Part II.