Category Archives: Motorcycles

About BMW Airhead motorcycles.

The Knipex SW40 adjustable wrench

Every motorcyclist should have one.


Click the image for a larger version.

Six things make this tool special:

  • The jaws stay parallel at all times – try that with the usual adjustable wrenches which are designed to round nuts and the heads of bolts, AKA The English Bodger Wrench or Crescent wrench.
  • It has a unique ratcheting design which allows the wrench to be used as a ratchet when turning nuts and bolts, torque forcing the jaws to firmly clamp the object. Try that with the EBW. As the ratcheting feature cannot be overridden, flip the wrench over (showing the inch markings) when unscrewing a nut or bolt.
  • The adjustment range is a large 0 to 40mm with 10-40mm clearly marked in the cut-out window. Set to 0mm they behave like pliers. The handle length is 180mm/7”.
  • The push button adjuster sets all the common metric sizes exactly – 6,7,8,10,12,13,16,19,22mm. Inches are marked on the other side.
  • It’s made in Germany, where you want your tools to come from.
  • It is a thing of beauty, an heirloom tool you will be passing down to your offspring.

I keep one in my motorcycle’s under-the-seat tool kit. You know, from the days when bikes and cars came with tools:


Everything you need in one kit.

Given my bike is now 51 years old – a 1975 900cc BMW Airhead Boxer Twin – I think you may forgive the stains on the tool pouch. Note the presence of a spoke wrench (real wheels wear spokes), a spare centerstand spring (just in case), feeler gauges for adjusting the valves with a set of carb needle reamers underneath, and a cheap stick-type tire pressure gauge which is dead accurate and requires no batteries … and little space.

You can find the Knipex at Amazon – other sizes are made but this 40mm one covers everything you need on a bicycle, motorcycle or car and fits neatly in the toolkit. (I get no financial gain if you click that link).

Cheap? Nah. You want cheap you get the English Bodger Wrench version. Every motorcyclist should have one of these in his toolkit, and if he rides an old British machine two would be in order ….

Konnwei battery tester

Handy and inexpensive.

I have hit a bad battery spell. The one in the two seater died, no start. The one in my 1975 BMW R90/6 died despite being just 14 months old. And the one in my scooter was beginning to sound weak. All batteries are maintained on a trickle charger in a heated garage.

Now I have been very lucky as all my recent battery failures have occurred at home, meaning I was not left stranded on the road. But this spate of failures left me determined to become more proactive about knowing the state of health of my vehicle batteries so I splashed out $23 on a Konnwei KW208 car battery tester. Maybe not the greatest choice of name, true, more like something you expect of the White House, but at that price hardly a great risk either.


First, the manual, in half decent English is printed in minuscule type. Click Konnwei instruction manual and you can enjoy a proper sized version.

The device can test batteries in or out of the vehicle, and this model is limited to 12 volt cells. If in the vehicle and still working you can also test the cold cranking amps (CCA) as a percentage of the rated value (it’s on the battery’s label under ‘CCA’). This is a key measure as CCA is the high current delivery required to activate the starter and turn the engine. Additionally you can test the alternator’s power delivery (the alternator keeps the battery charged when the vehicle is running) as well as the starter’s cranking efficiency. I tested all of these on a failing and then on a new motorcycle battery and the measurements accurately reported ‘Replace’ and ‘Good Battery’, respectively. For the good battery state of health (SoH) and state of charge (SoC) were both reported as high, as expected.

The cables are nice and long so there is no difficulty installing the clamps (remember to connect the red – positive – first and disconnect it last) and the clamps grip well. No battery is required as the tool uses the vehicle’s battery for power. The LCD screen is easy to read, unlike the instruction book.

As for getting stuck on the road with a dead battery, I carry one of these jump starters – it delivers the instantaneous high cranking current which a failing battery cannot deliver and, once the vehicle is running is disconnected as the alternator can pass sufficient current through the dying battery to keep the engine running.

I now feel better prepared for the inevitable battery failure(s) down the road …. or in the garage!

BMW R90/6 – 35 and 50 years on

Thirty five years of happy wrenching and riding.

I became the custodian of my 1975 BMW R90/6 ‘airhead’ motorcycle 35 years ago today, buying it for $2,000 in Los Angeles from the original owner with just 15,000 miles on the odometer. René, the wonderful Chilean seller, was returning to the country of his birth and assured me that riding a single track vehicle on local roads was not a prescription for a long life. He also informed me that he had turned down two earlier offers from ‘irresponsible kids’ who would not accord his machine the duty of care it was due. I do not think I have let him down.

This beautifully made machine, an exemplar of the best mid-twentieth century technology – and not all that much changed from the 1931 original design – is notable for its near total absence of electronic gizmos, a source of considerable joy for this mechanical engineer. Any self respecting mech eng will tell you that electricity is the work of the devil. And this is very much an engineer’s dream for the machine is easy to work on, most parts easily accessible with few special tools required. Best of all the machine’s enthusiastic following sees to it that most replacement parts remain available, 30 years after the last airhead left the German assembly line. Yes, there’s more maintenance than with a Honda but reliability is comparable to that of those fabulous Japanese designs.

What follows is a pictorial history of my time with the bike over the past 35 years. I continue to ride it regularly.


June 16, 1990. Accepting delivery in Encino, CA from
the first owner, René Francisco Lama.


At the fabled Rock Store in Malibu in 1990.


Ready for touring with bags and a small windshield.
The original café fairing broke when the bike fell over
in my Encino garage during the Northridge earthquake,
January 17, 1994, the only time it has been down.


Manufactured in October 1974, the bike was sold by
Bob Brown’s Motorworks in Pomona to the first owner in 1975.


The motor is a simple two valve pushrod design.


Engine maintenance is easy owing to the horizontally
mounted ‘boxer’ cylinders. The valve cover and valve
head have been removed here.


Resealing the cylinder with new gaskets is a simple task.


With the piston removed the con rod is held safely
in place with a cable tie. Nicks on the base gasket mounting
surface are not a good idea. The rubber pushrod seals
are replaced at the same time – they harden with
age and heat and leak.


Spaghetti junction. Not BMW’s proudest moment.
The wiring meets up with a small distribution board
in the head shell


The stock Bosch starter motor is awful, struggling to
turn a cold engine. After having it rebuilt twice over
the years I replaced it with a Toyota truck starter with
an adapted Bendix. Twice the power, half the weight and
current draw. The bike’s modular design means that the
starter can be removed in under 15 minutes.


Look hard enough and you can still find original German
Bosch copper spark plugs. That’s all the bike needs in
the ignition department. And ignition timing is 100%
mechanical, no electronics.


A collection of metric fasteners is essential.


Back in the day batteries came filled with liquid acid, which
would inevitably leak, corroding the battery tray.
The tray has been removed, wire brushed and repainted here.
Modern gel cell batteries do not leak, so this is a lifetime fix.


Well, I do have one electronic part in the bike. Here’s
the daylight sensor for the Kisan headlight modulator which
flashes the headlight in daytime riding, enhancing the rider’s
visibility to motorists focused on their cell phones. The
three position steering damper is below.


Over the years I have replaced most of the steel fasteners
with stainless ones.


A rare failure – the choke cable toothed follower snapped
rendering the choke inoperative on one side. A fellow airhead
kindly gave me the replacement part which is NLA from BMW.
Magura could learn from Rolex when it comes to engraving.


The bike came with the smaller 18 liter tank,
beautifully pinstriped by the ladies in Berlin.
The QD trunk is by Givi of Italy, and holds a full face helmet.


A few years ago I finally got my beaten up 22 liter larger
tank refurbished and the pin striping, done in
Scottsdale, is beyond perfect. I think it
looks far better than the small tank.


Way ahead of its time, the largely modular design makes
accessing most assemblies easy. Here the rear wheel,
driven by a shaft – no chains here – has been removed
for tire replacement. Sadly the wheels require
tubed tires, far less safe than modern tubeless ones.
The shocks are aftermarket Konis, superior to
the stock ones, and recently rebuilt.


The brake light sensor is a simple pressure switch.
Here I am replacing it as it failed after 30 years.


During baking Scottsdale summers I kept the bike indoors
to avoid premature rotting of rubber parts. Eventually
I insulated and air conditioned the garage to make for
better summer storage.


After 30 years the saddle foam was shot and the vinyl
seat cover was cracking. New foam from the Fatherland
on the left.


New seat cover installed over new foam
A very time consuming job, but very satisfying, and
easier on the bottom to boot!


While the stock tool kit is excellent the pliers
are poor quality. A superb pair of Knipex adjustable
pliers
does the trick far better. The cylinder on
a chain emulates TDC when adjusting the mechanical points
ignition when installed on the nose of the cam.


The twin FIAMM Italian horns are not only much louder
than the weak stock offering, they are also paired out of
tune, the resulting interference effect on the two sound waves
making the output truly obnoxious. You want that in
a world which often does not see or hear bikers,
especially those on quiet BMW airheads. As the horns
draw high current I added a relay to avoid frying
the relatively lightweight horn button circuitry.


The horizontally opposed boxer engine design lasted through
1995, but remains available in some of BMW’s latest
machines where it is now oil and air cooled. Here the
1975 valve cover compares with that on a 1994 R100RT
touring machine. No prizes for guessing which I prefer.


In Scottsdale, Arizona.


A happy owner, with the bike on an all American
Handy bike lift. The hair is greyer but the smile is
every bit as wide.

I wish I could tell you that I am looking forward to the next 35 years with this beautiful machine but statistics and anno domini suggest otherwise.

New lights for the Silverwing

Be seen, not hammered.


Running lights at work.

One of the great mysteries of the powered two wheel world is why manufacturers do not fit running lights. These are directional indicators which are kept on at all times, flashing when the directional button is activated.

Why do these matter?

The brains of car drivers are trained to look for two or three rear lights. Ride a motorcycle and all you have in the rear is a single license plate/red tail light and a stop light on braking. The triangulation effect is missing. That effect, as occupational psychologists will preach to you, means that two or three light sources are far more likely to garner attention than one, aiding in awareness and distance judgment. It’s why aircraft have three warning beacons – awareness and depth/distance perception.

And in the US red running lights are legal, yet motorcycle makers do not fit them. A bad decision by the accountants as a dead rider is not a repeat customer. Oh! well.

Yet running lights are easily added. You can have the kluge version of just adding LEDs, somehow powered from the chassis wiring. Or you can fit aftermarket sockets, as I have on my Airhead, to accept dual filament bulbs powering the second filament at all times to create running lights. However no such plug-and-play aftermarket sockets exist for Honda’s superb Silverwing maxi scooter and I do not like the thought of butchering the scoot’s bodywork.

But there’s a third elegant alternative and it requires that a ‘normally on’ relay is interposed between the electrical flasher feed and the single filament directional bulb. Appropriately wired, the relay will transmit full power to the directional bulb at all times, except when the directional switch is used, when the relay willl alternatively switch that bulb off and on. A single filament bulb now doubles as a running light and directional indicator.

The relays for my installation ran all of $15 and here is the schematic. This will work for all non-CANBUS circuits on any motorcycle, and is not nuclear physics to install:


Circuit layout.

I still need to change those amber bulbs for red ones, but I doubt that Constable Clod will care while he is deep in his donut and coffee. And here is that swap, with a low power use red LED replacing the hot incandescent bulb:


One side done. Constable Clod happy.

Getting the Silverwing right

A spot of wrenching.

One of the greatest joys of acquiring a new vehicle is the that of fixing the many things that need fixing. ‘New’ as in ‘new to me’ as I never buy new. I prefer to let someone else pay the 50-75% depreciation.

So when the Honda Silverwing maxi-scooter joined the stable recently, for the stunning sum of $3,250 with just 13,500 miles on the odometer, the first acquisition was the Factory Shop Manual, and I don’t mean some useless PDF version. Only paper manuals cut it for the serious mechanic and I was lucky to track down one of the few new ones left, the scooter last being imported to the US in 2013.


The Factory Shop Manual.

Hundreds of pages thick, the manual testifies to the complexity of a fuel injected, electronic ignition motor with linked ABS brakes and an automatic transmission. Mercifully the scooter is made in Japan, not Germany, with all that implies for the best design and quality control on the planet.

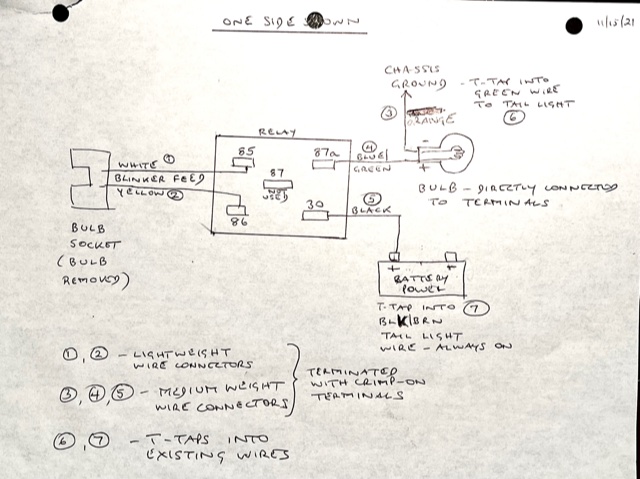
The only issue with this manual is with the circuit diagrams. While I have long known that electricity is the work of the devil, I also believe in ‘better the devil you know’, and that means having something I can read when messing with the circuitry. And the small print of the circuit diagram in the manual means it’s not useable.

However, it was a moment’s work to cut out the page from the manual, scan it and print it with SplitPrint which makes child’s play of printing something small over as many pages as you need – six in my case:


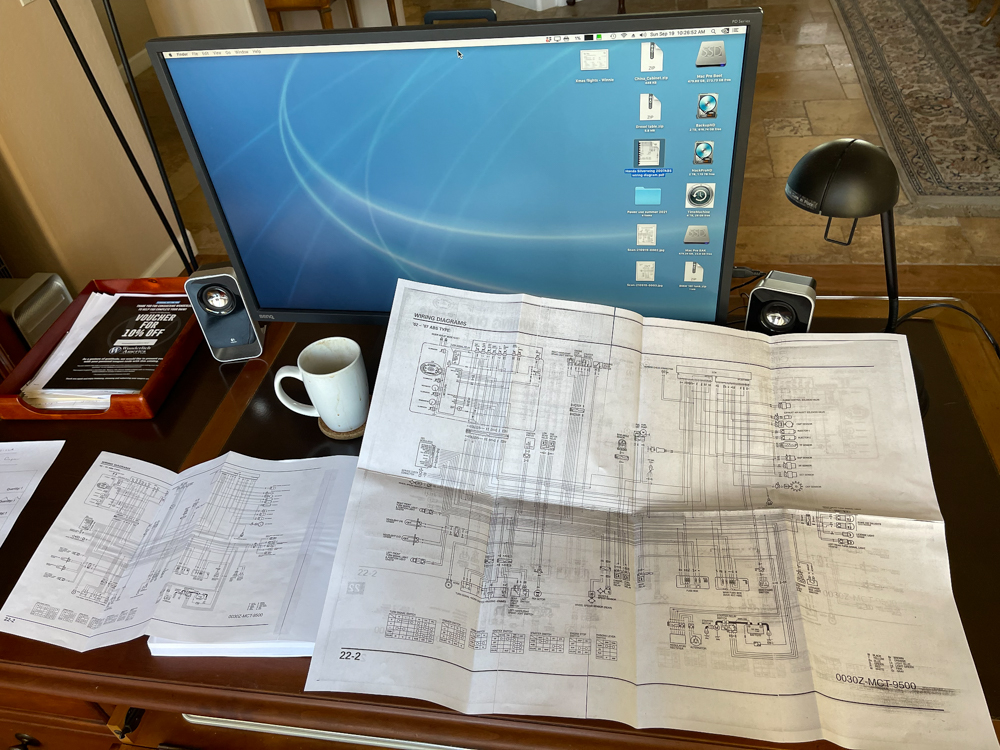
Making things readable with SplitPrint.

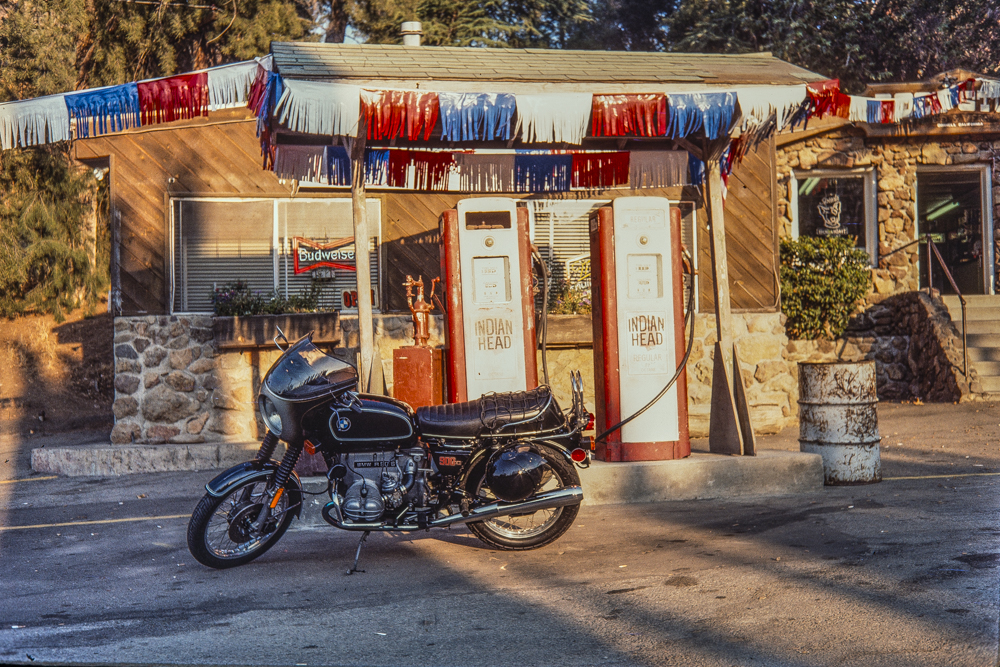
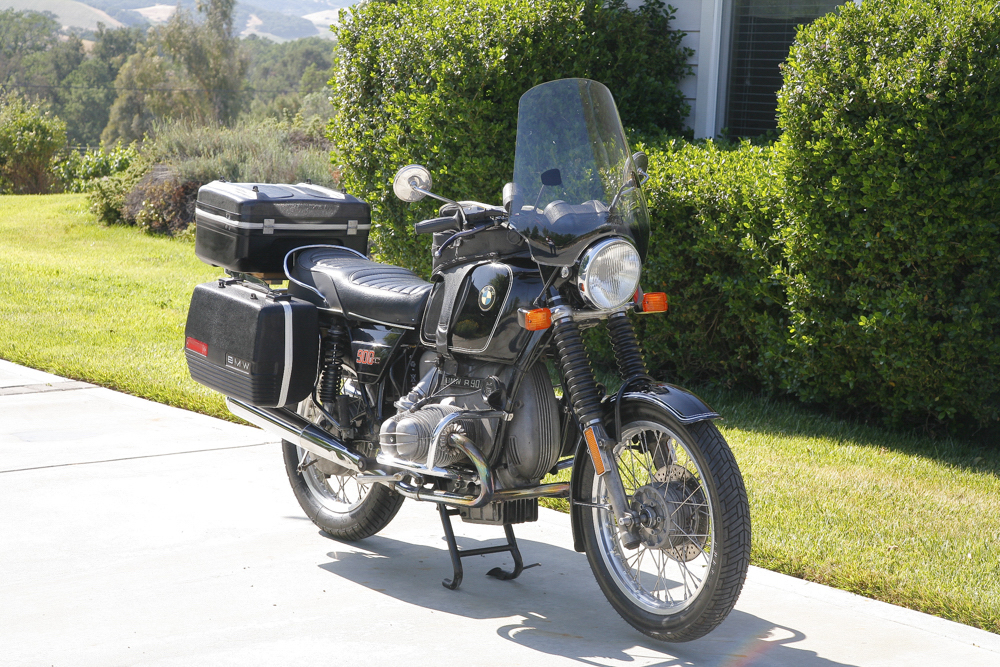
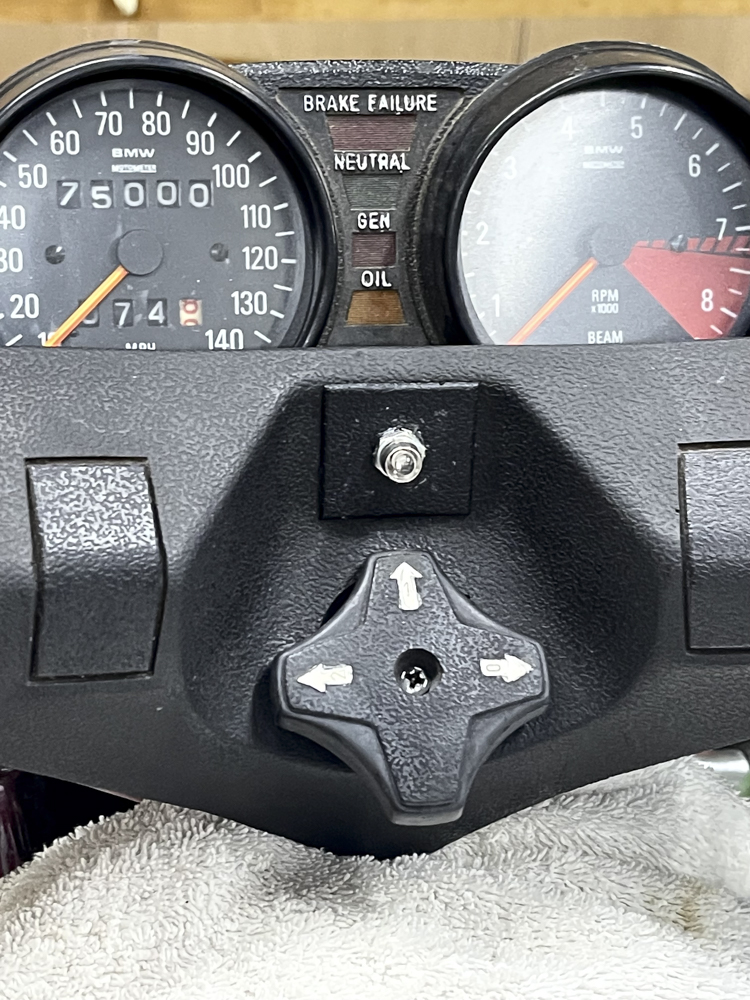
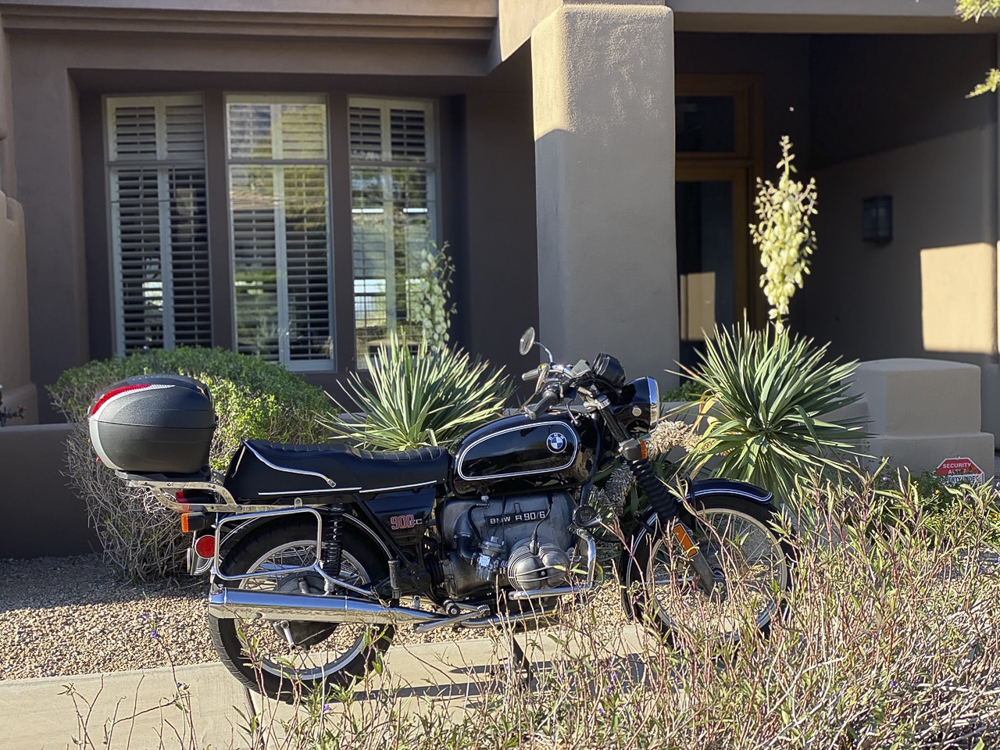
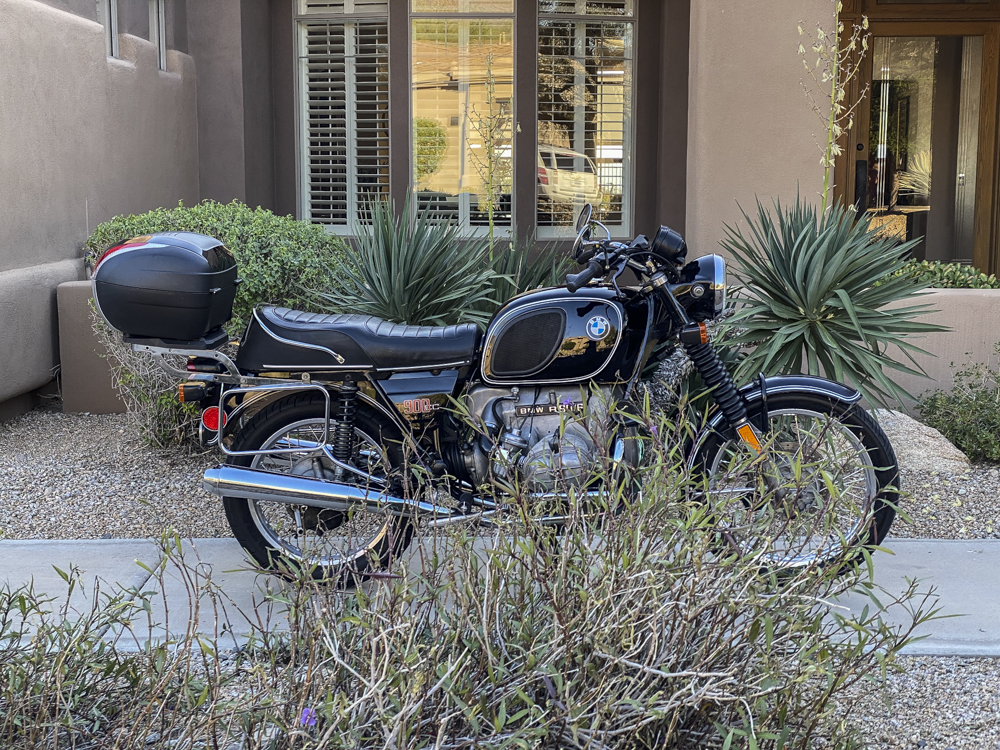
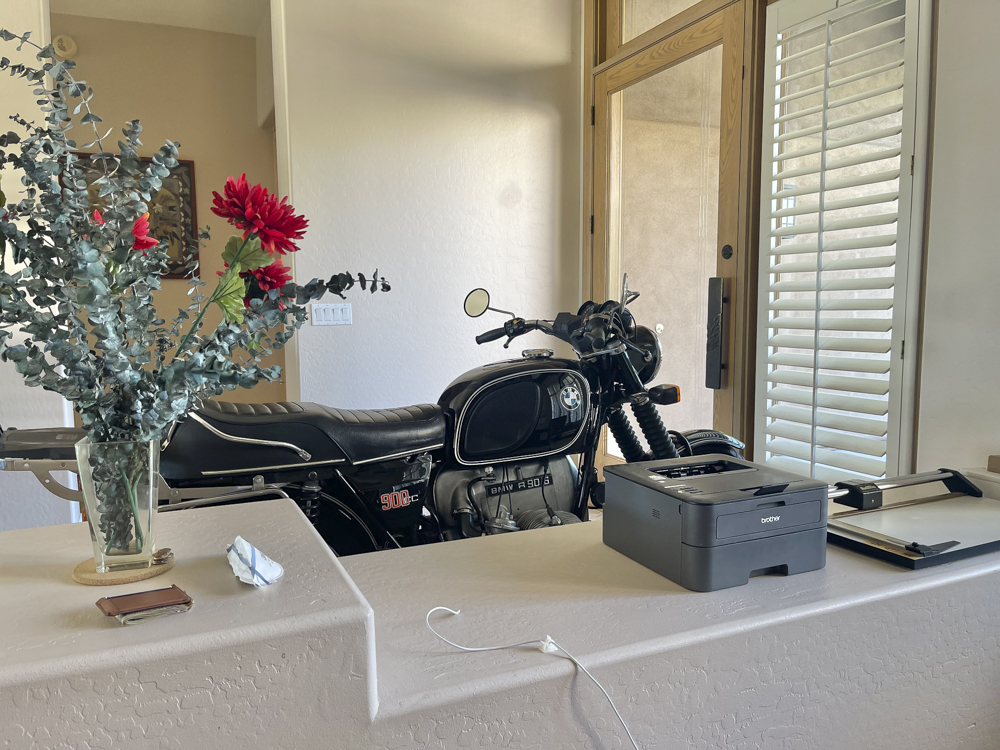
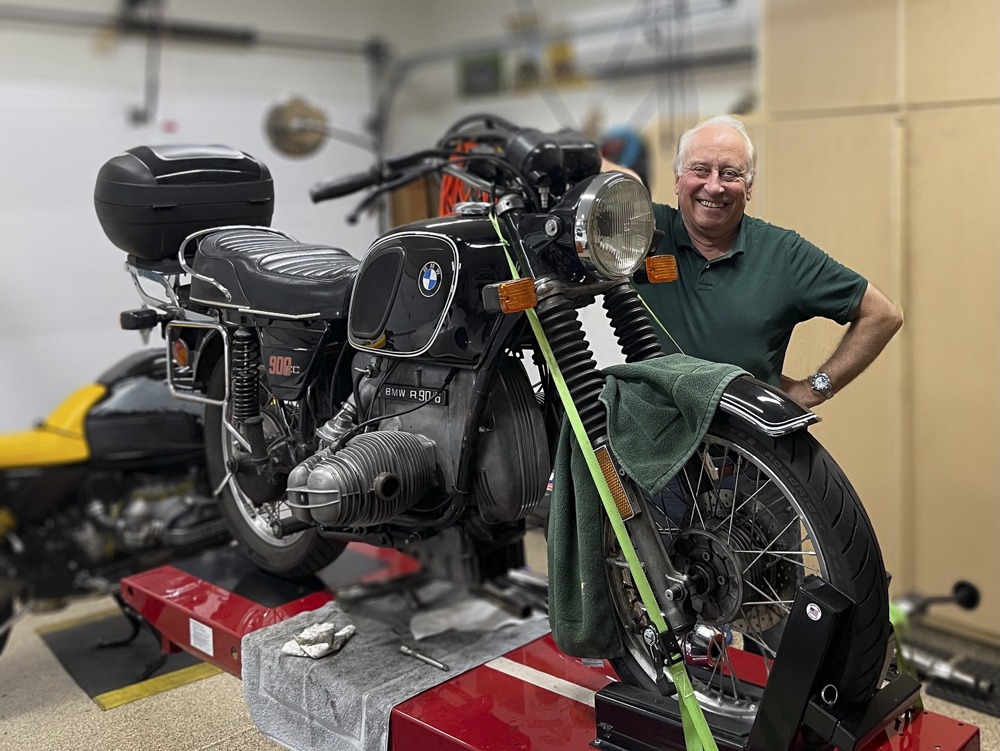
I needed a decipherable circuit diagram to permit installation of the greatest single motorcycle safety device on the planet – a headlight modulator. I have run one on my 1975 BMW Airhead for over two decades now and there is no better weapon to make SUV driving Psycho Mommy, with Little Johnny being rushed to his fifth activity of the day, sit up and take notice while fixing her hair and gossiping on the cell phone. Kisan tech has looked after me all these years and the device is 50 state legal. I keep a copy of the law in the glove compartment in case Officer Plod is on a sugar high from his third doughnut of the day and has forgotten the basics of the law.


The headlight modulator.

The device is inserted between the high beam bulb and its base. A separate daylight sensor is installed to ensure no modulation occurs at night, in compliance with the law. The flashing headlight may be a nuisance to car drivers, but being seen beats being dead.

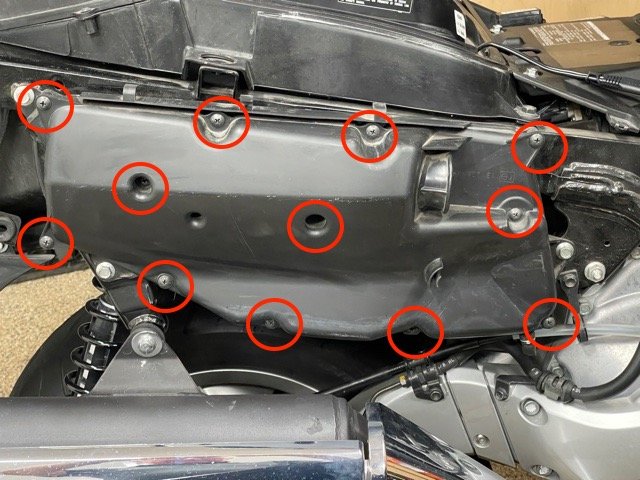
However, the opening for headlight replacement is designed strictly for ultra petite Asian hands so the whole front fairing had to come off to grant access:


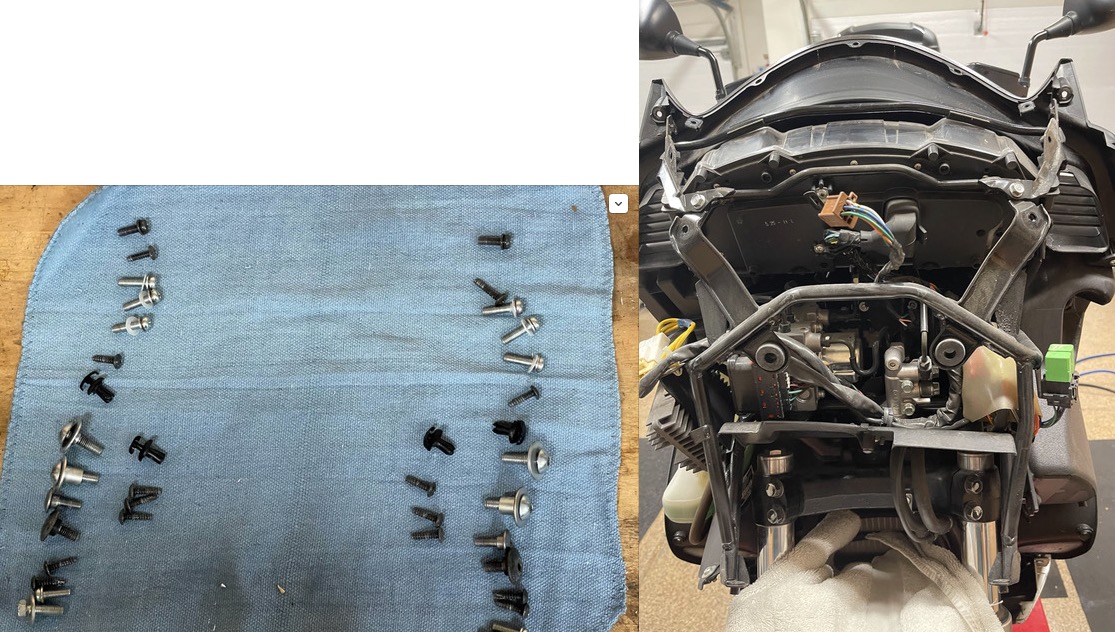
36 fasteners removed, and access to the bulbs is easy …..

Interposing the Kisan modulator in the headlight circuit is trivial. What actually dictated the need for the readable wiring diagram was the wiring in of a USB socket/voltmeter into the left glove compartment to provide power for an iPhone. I tapped into the circuit of the low beam bulb which is always on, switched with the ignition key. Here is the dual USB socket/voltmeter, neatly installed:


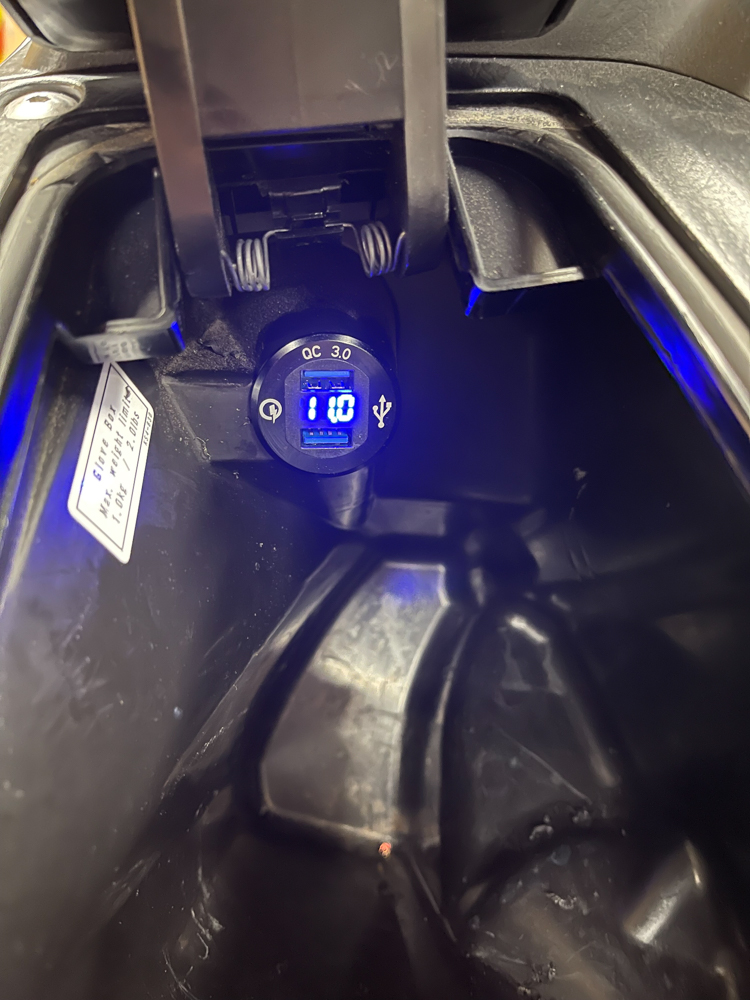
USB power for an iPhone.

The next task was to change the engine oil and filter (replacing the chintzy aftermarket one with OEM), the coolant (the scoot is liquid cooled), the brake fluid in both brake circuits and the all important drive belt:


Maintenance tasks.

The Silverwing uses a gearless Continuously Variable Transmission with a Kevlar drive belt riding on two pairs of conical pulleys. As the throttle is worked these expand or contract, changing the gear ratio between the motor and the rear wheel, a system invented in the 1960s by the Dutch for their Daffodil cars. Had they named these the Tiger or Lion they may have sold in the US. In the event, ‘daffodil’ was just too effete for the tattooed crowd. Honda made hay where the Dutch made failure. The belt has a life of 16,000 miles and while mine came with 14,000 on it, it was also 14 years old so common sense dictated replacement – see the lower right image above. It’s made by Mitsuboshi in Japan, Mitsubishi’s long lost brother with a spelling problem. It’s actually a very easy job, made easier with the use of an air wrench to remove that stubborn front pulley retaining nut. And while the belt is off, the rear drive oil is easily replaced along with the sponge final drive filter – both oft neglected tasks.

Tires were next. That small contact patch on a two wheeler is vital to safety and the date codes on the Bridgestone tires disclosed them to be eight years old, even though only 60% worn. I like to remove my wheels and take them to the tire place not so much for reasons of frugality but because I do not trust a guy who works on agricultural Harleys to have either the expertise or caring to do the job right on a sophisticated machine.


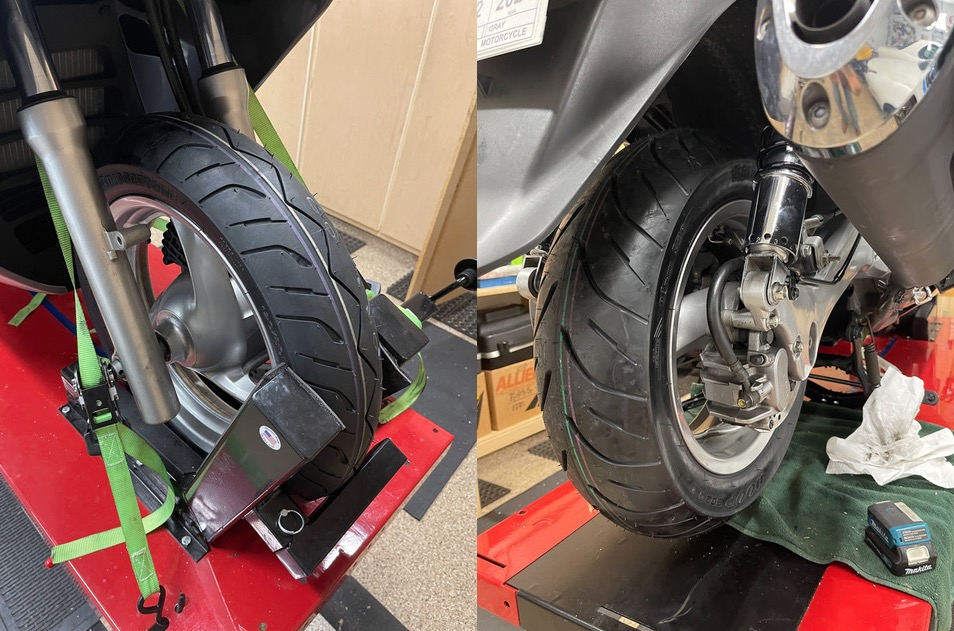
New front and rear OEM Bridgestones installed.
Serious rubber for an innocuous looking scooter.

Rear tire replacement is labor intensive, as a disk brake is used. This means the exhaust, rear brake caliper, parking brake caliper (yes, there’s a parking brake!) and swingarm all have to come off before the wheel can be pulled off. And when it came to removing the swingarm, corrosion had done its thing and the use of a three legged puller, straight out of the Spanish Inquisition, was called for:


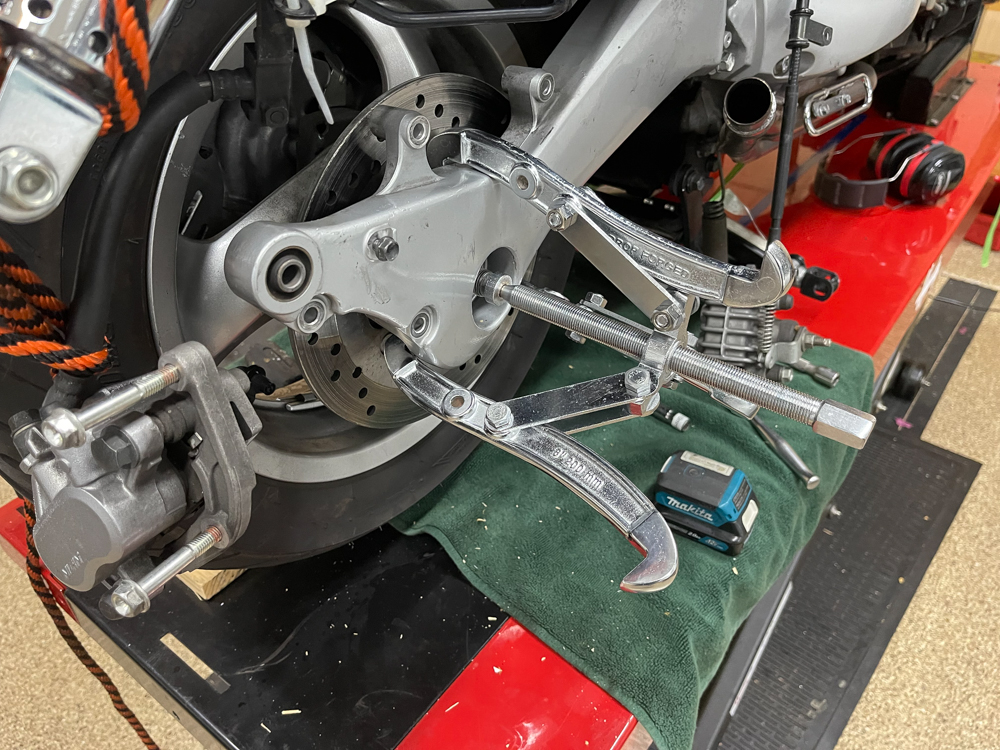
Extricating the swingarm. Note the two brake calipers at left and right.

It’s always something with old machines. Fortunately removal of the front wheel is easy, requiring removal of the axle – one nut – after freeing up the two pinch bolts.

Replacement of the air filter was next and boy, was the sake ever flowing when Honda’s design engineers came up with this design. It takes me 15 seconds to remove, clean and reinstall the air filter in the clothes dryer. The same task on the Silverwing takes an hour after you have removed the rear yoke (4 bolts), the rear decorative plate (2 screws), the right footpeg (2 bolts), and the right body panel (2 screws). Then you have this:


Not Honda’s proudest design moment.

Yup. Count ’em. One dozen screws to remove the cover.

Then one more screw and the filter is replaced:


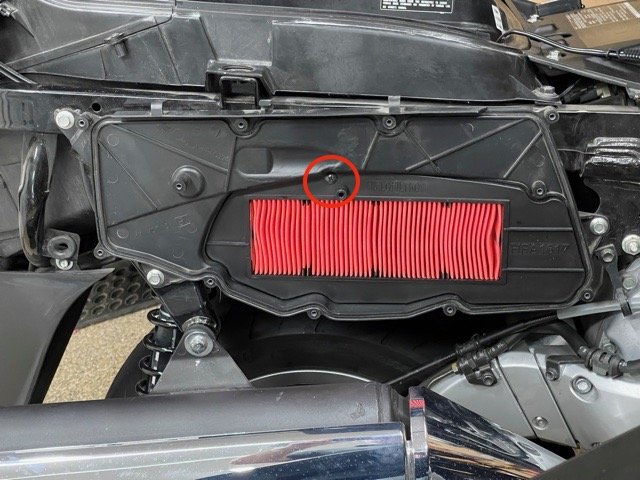
22 fasteners later and the air filter is disclosed.

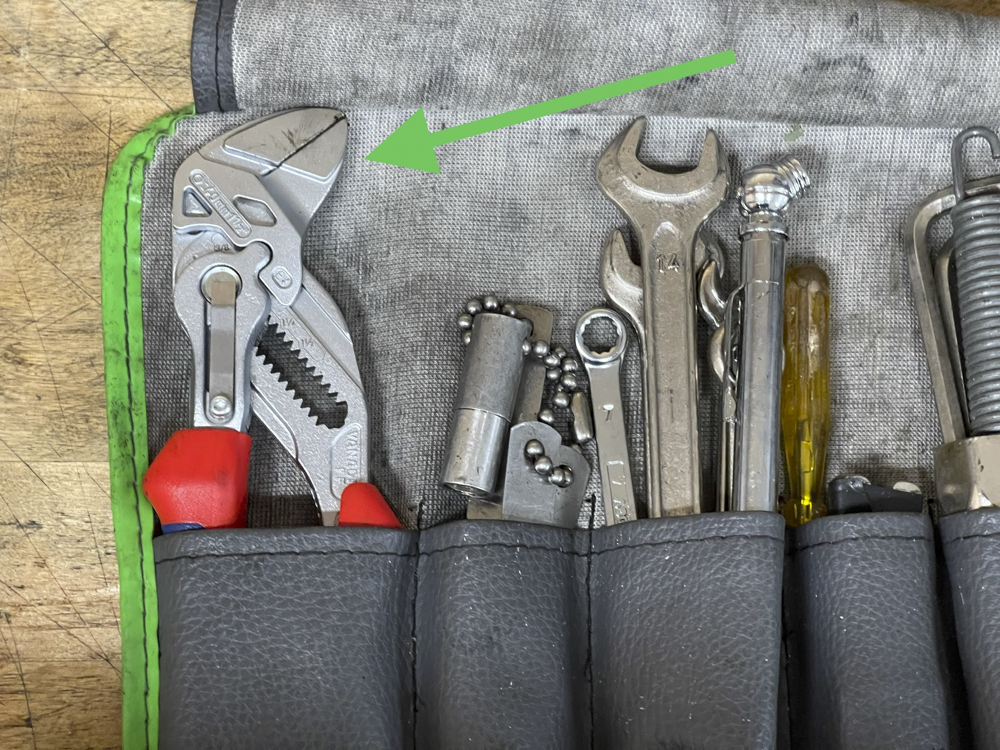
With USB power to hand for the iPhone, it was next necessary to craft a centrally mounted iPhone mount. Side mounted handlebar mounts do not cut it, so I procured a RAM mount and mounting ball, replacing the handlebar cover retaining bolts with a home made plate to mount ball and mount on:

RAM mounts have a great reputation and there is no way the iPhone is going to fall out. The red arrow denotes the sprung upper retainer, the green the fixed side motion limiters. This is the ‘large’ RAM mounting plate and easily accommodates my iPhone 12 Pro Max, even with a metal protective ‘bumper’ installed.


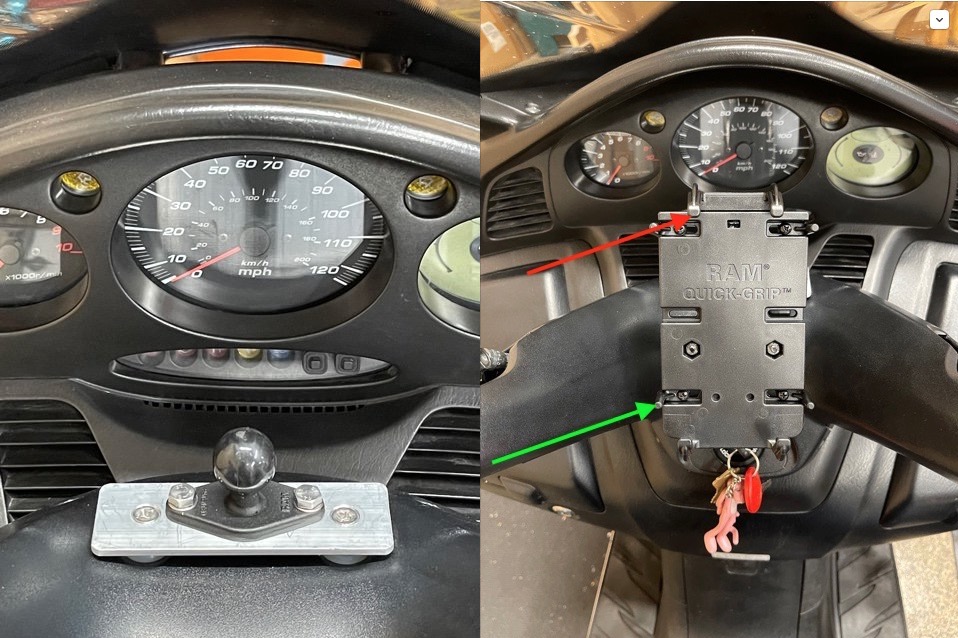
The RAM ball mount is attached to a home made plate at left.

That plate is mounted on neoprene bumpers, heeding Apple’s recent warning about excessive vibration destroying iPhone cameras, though I do believe their message was aimed at pigs on Harleys. The counterbalanced, parallel twin in the Silverwing is the smoothest motorcycle I have yet ridden.

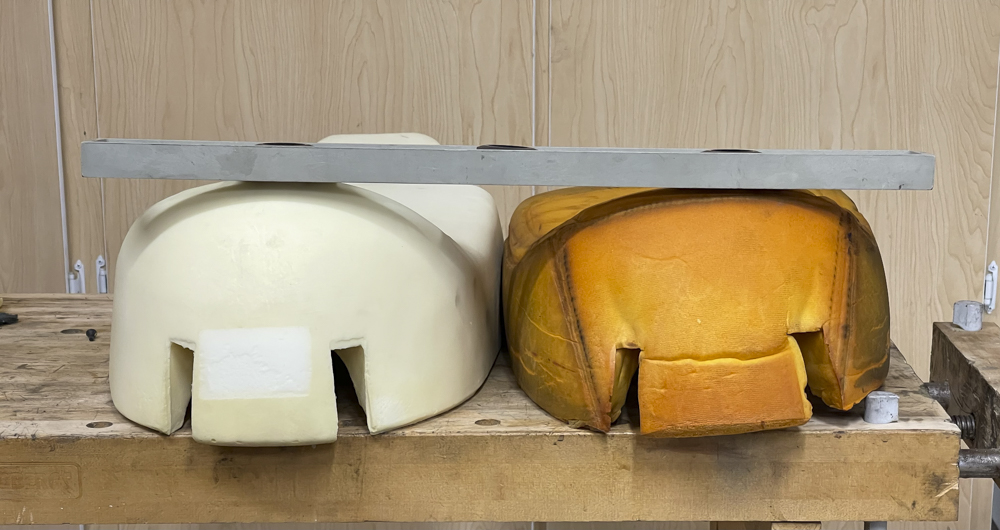
Ergonomics came next, the Silverwing’s low 29.1″ seat height meaning that my feet were far too high, causing back pain. As the floorboard height on a scooter is not adjustable this means that the seat had to be raised, which was accomplished with a water inflatable seat pad with a foam garage kneeler below, for a rise of some 3.5″. Now I could look over the tall windshield and the back pain was gone:


Seat modifications.

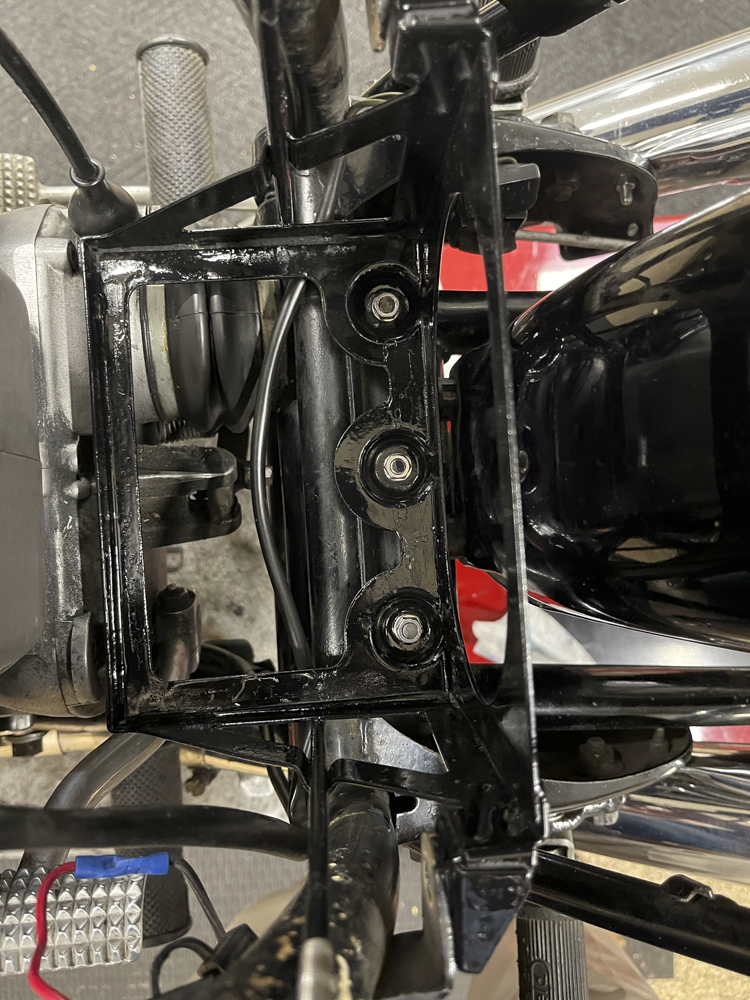
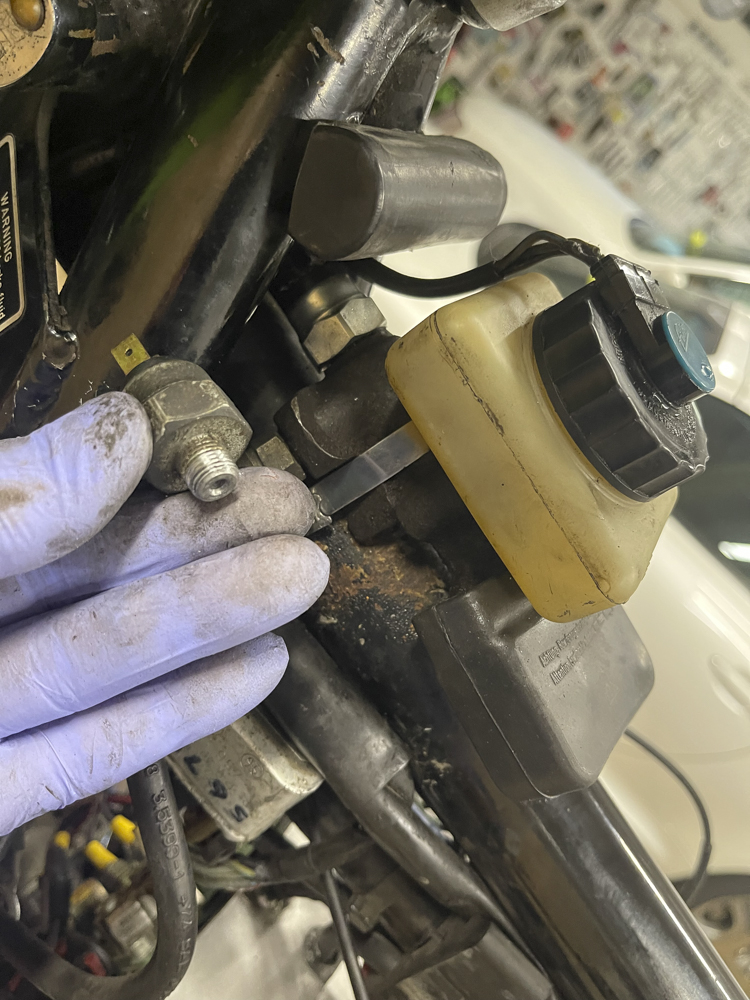
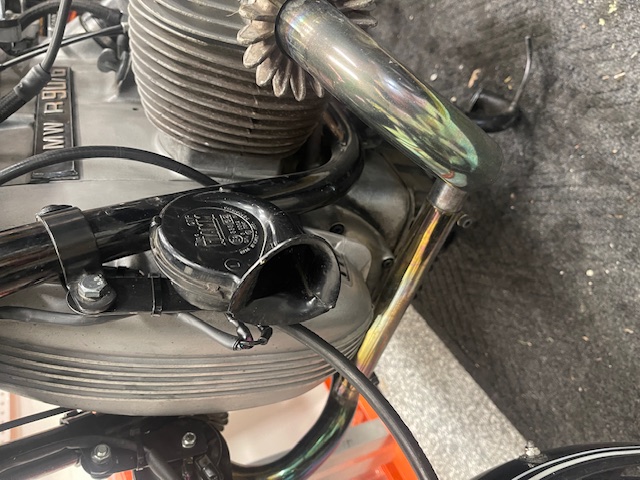
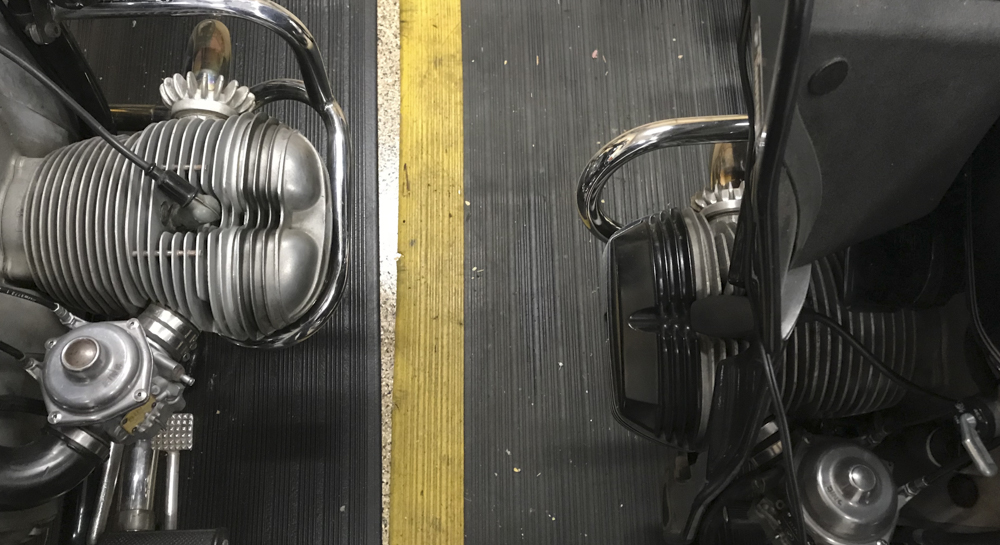
On cold days I ride with a heated vest, a lifesaver which requires a high current connection to the bike’s battery. If your kidneys are warm the rest of your torso will follow. There is no battery power take off on the Silverwing but after rooting about in the lower left of the bike I found a handy unused flange with two tailor made bolt holes. It was a matter of moments to craft an aluminum plate to attach to these, with a large hole at the other end for the robust Hella socket, wired directly to the adjacent battery:


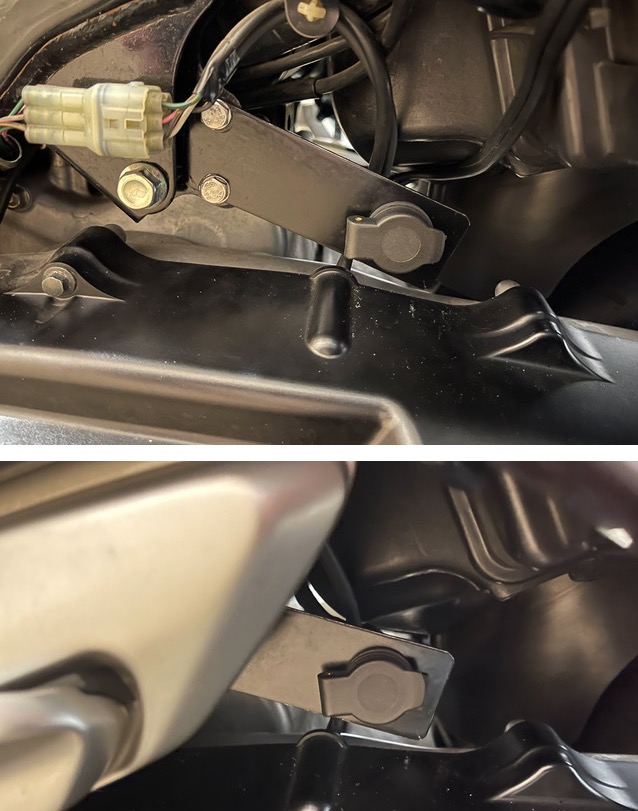
The home made plate holding the Hella socket – without and with bodywork attached.

Now the heated jacket can be plugged in to the conveniently located, unswitched socket behind the rider’s left leg.

Body damage? There were a couple of spots where the paint had been scratched, easily remedied with matching touch-up paint from Colorite. The lower left skirt was badly scratched and cracked in one place:


Damaged lower left skirt.

Outlay of the modest sum of $50 saw a new replacement; I have never found repairs to cracked plastic to last in the hostile setting of a motorcycle. Total overhaul costs – new tires, new drive belt and the body panel – ran under $600.

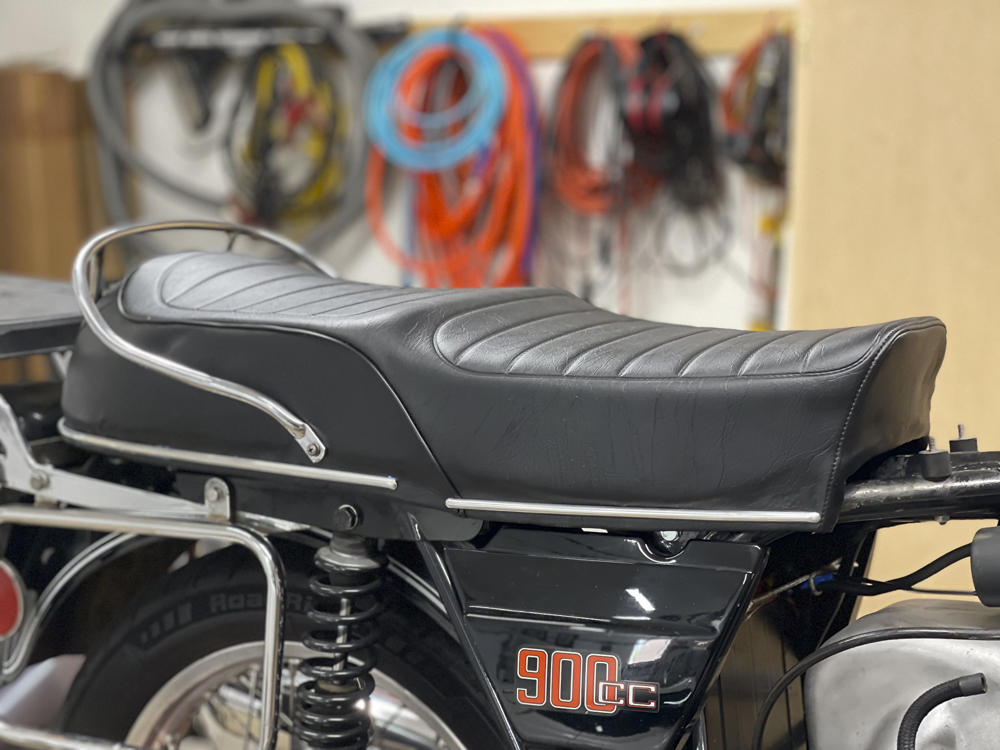
One final touch was called for, a riser for the seat back rest to position it strategically. Here is the result:


The back rest riser installed.

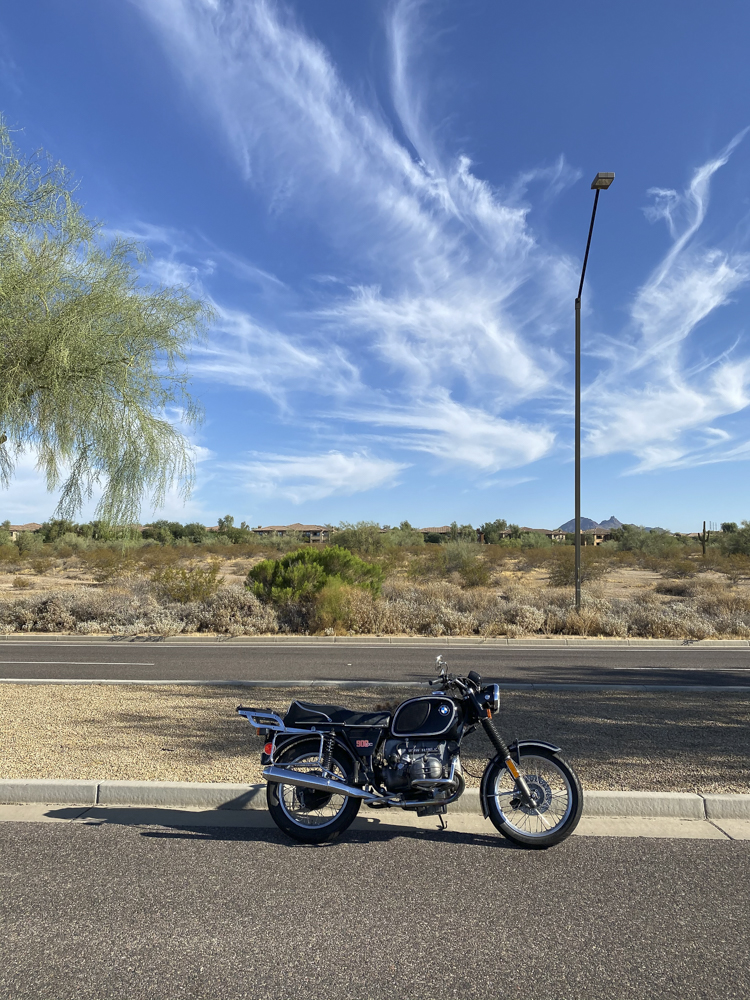
She’s now ready to ride!