Category Archives: Motorcycles

About BMW Airhead motorcycles.

Adding a/c to the garage

Not trivial, but maybe essential.


Scottsdale, AZ temperatures.

The problem with this graph is that it’s incorrect. The last three years’ summer highs have been 115-122F, and while we have negligible humidity, 115F without a/c would see Phoenix and Scottsdale at 1900 population levels.

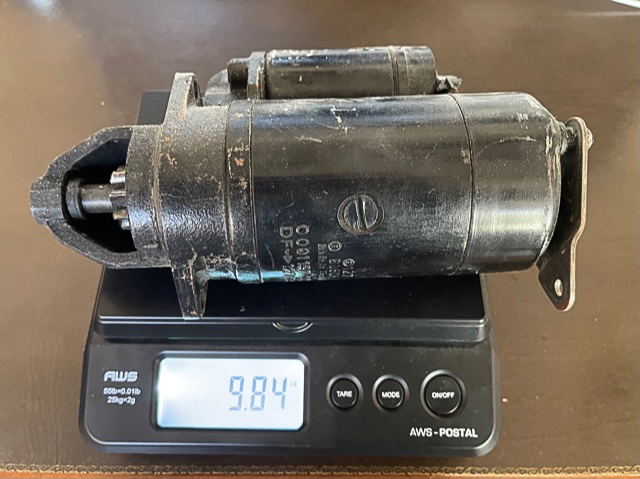
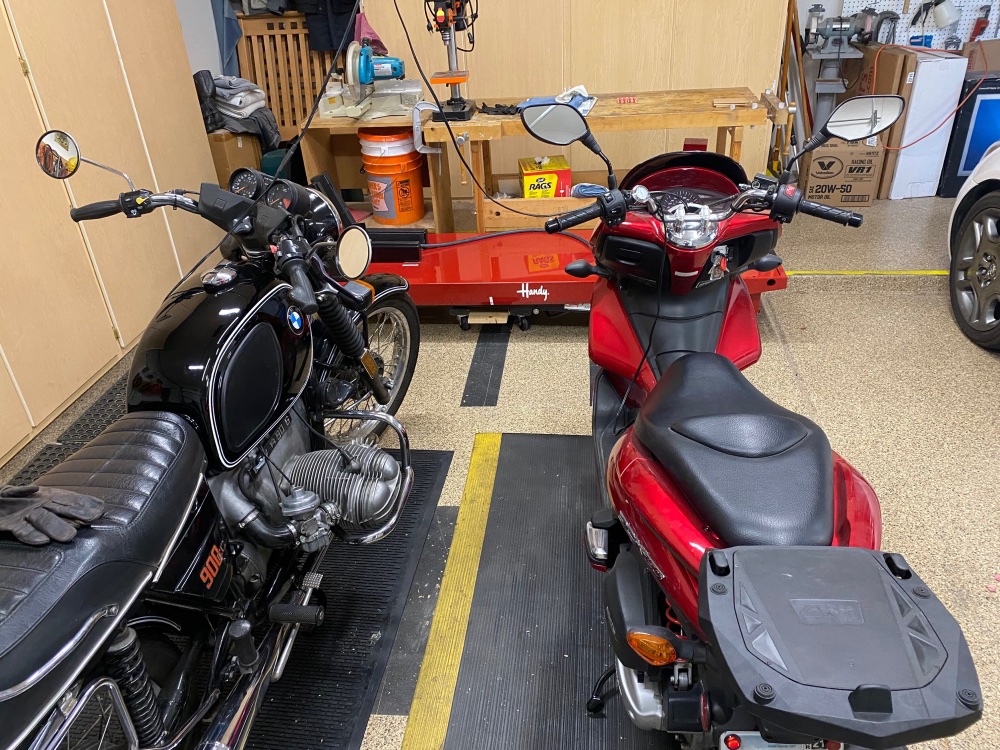
I have been grumbling about how unusable the garage is, for this committed mechanic, in the summer months. 5 years of complaining is enough. Temperatures soar up to 125F, rubber parts rot, batteries die (I wonder how many AZ Tesla buyers have contemplated replacement of their $10,000 batteries after 5 years?) and you enter the garage space at your peril.

There are two kinds of people in this world – those who only see problems and those who conjour solutions. My a/c maintenance guy belongs to the former population judging by his answer to my request for a quote to add a/c to the garage. A litany of “no can dos” only taught me two things. I need a new a/c guy and this is not nuclear physics.


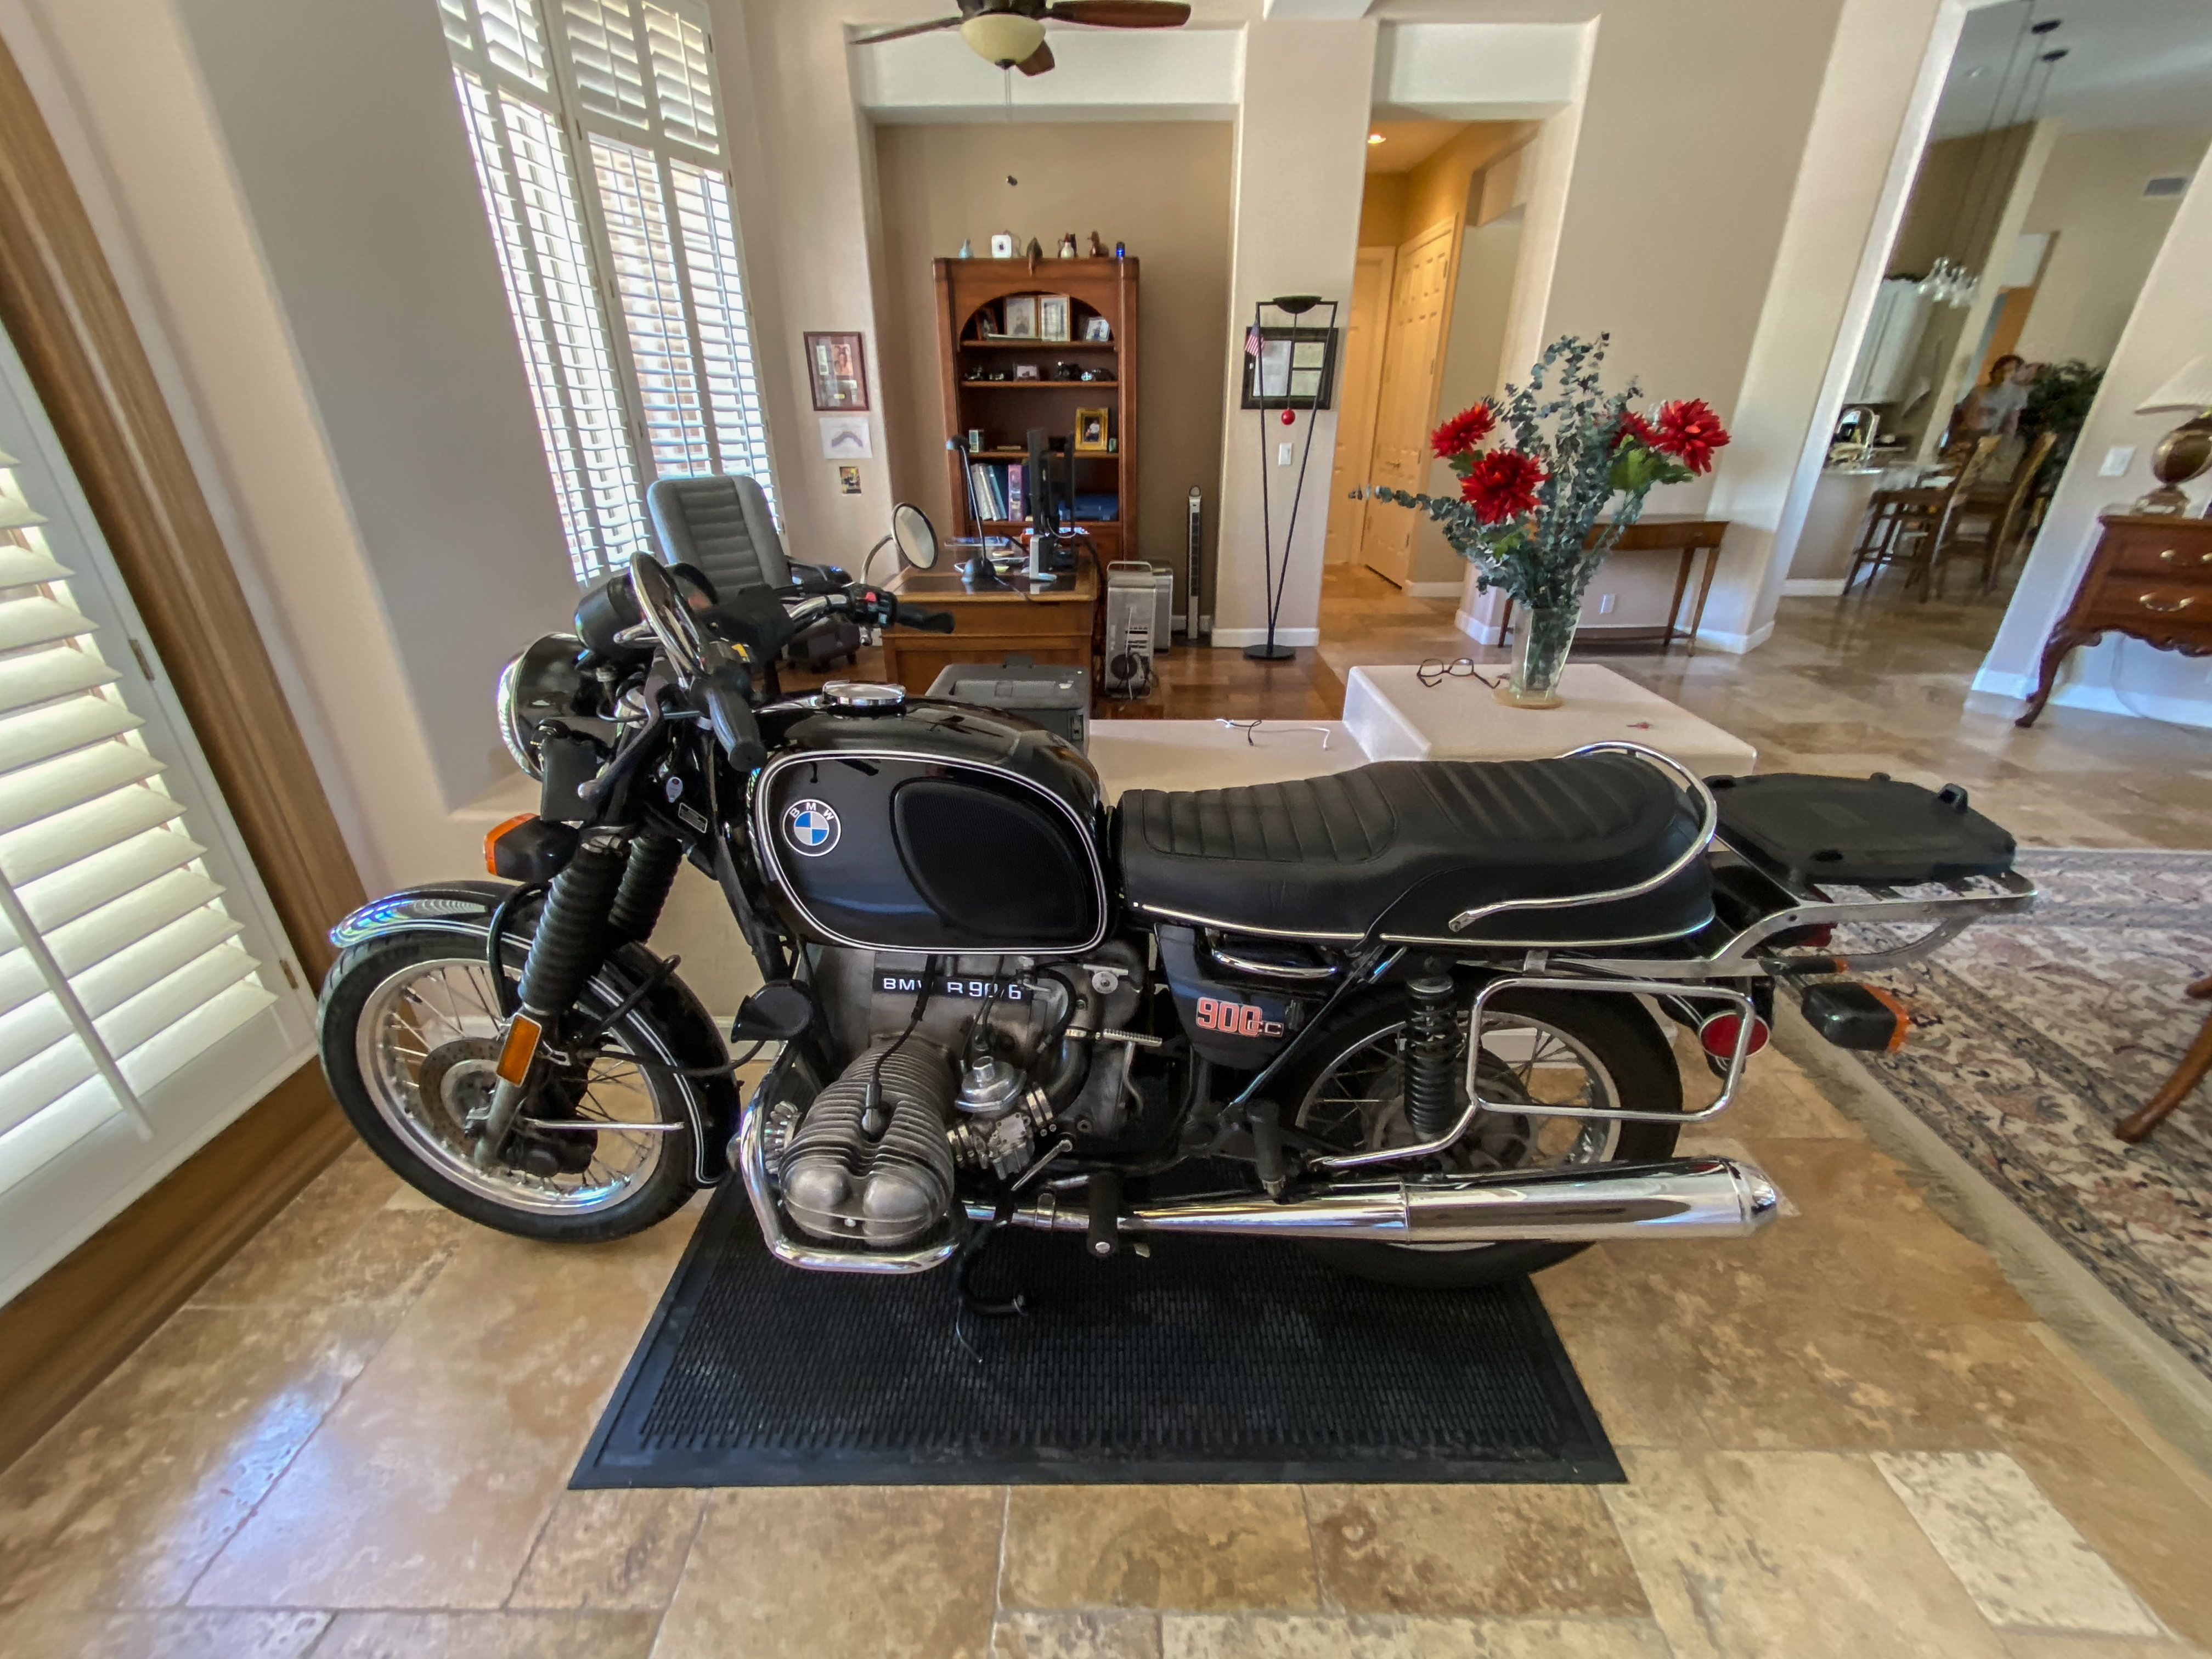
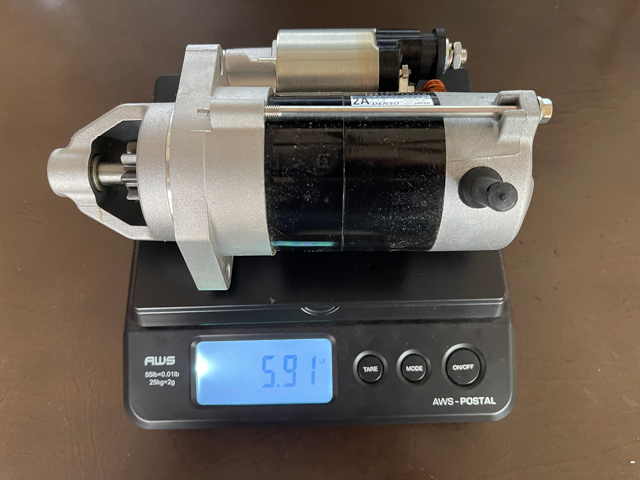
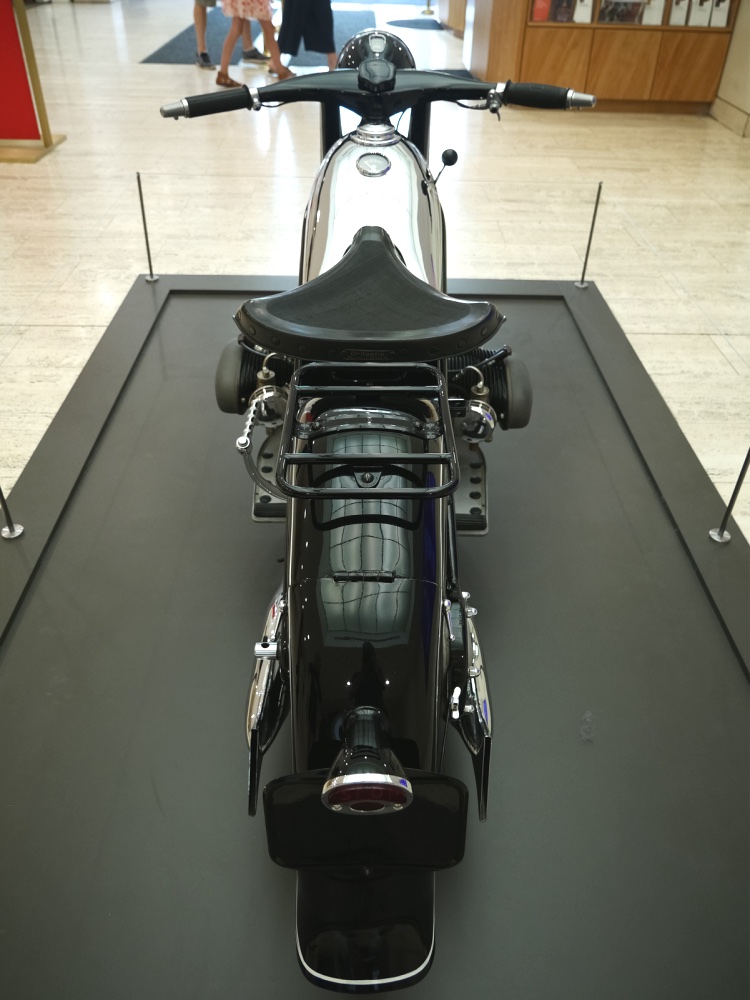
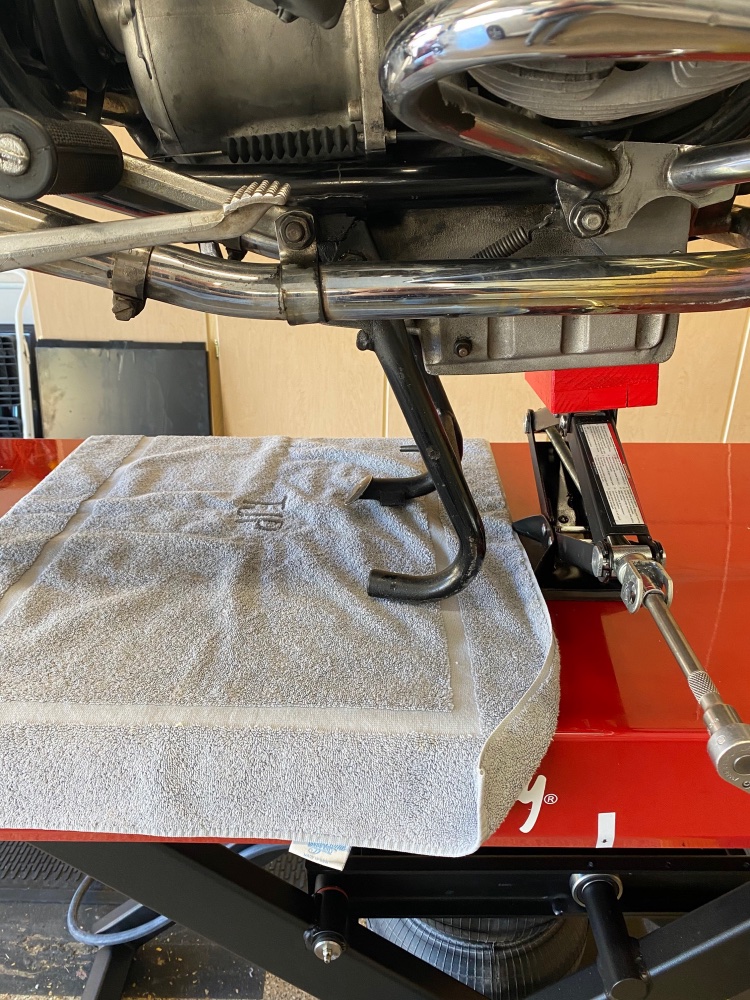
My 1975 BMW ‘Airhead’ was formerly stored in the home
to save it from premature heat death in the summer garage.

So I researched the matter the way any good, numerate, engineer would and identified the following issues:

  • Air conditioning hardware. A ducted system is a not an option. High cost, lots of messy construction work. A ductless one, which splits the compressor (outside) from the evaporator (inside) is the answer. Run power, freon and condensate drain hoses through a 3″ hole in the wall and construction is done. Integrated wall units and portable devices have insufficient cooling capacity for my setting.
  • Attic insulation. In the good ol’ American Way, meaning chintz on cost wherever you can in pursuit of the sacred God of profit, the attic was completely uninsulated. A major source of heat. This will have to be insulated.
  • Door insulation. There are two garage doors, a double and a single, aggregating some 216 sq. ft. of radiating area. While the doors face north, a good thing, the inside temperature of the un-insulated doors is equal to or greater than the ambient temperature outside, meaning 216 sq. ft. of heat radiator in the summer months. The doors require insulation.
  • Wall insulation. The south interior garage wall is part of the home so it is insulated, as code requires. But the east and west walls are un-insulated, hurting energy efficiency, but these are a relatively small part of the problem, so I am deferring insulation considerations until more data are to hand.

The air conditioner:

At the quality end of the spectrum three manufacturers dominate – Mitsubishi, Fujitsu and Daikin. All come with long warranties and all claim to be made in Japan …. which means they are probably made in China. They use R410a freon, the version which claims to slow global warming from emissions. Uh huh. And I also have a bridge in Brooklyn for sale, if you are interested.

My garage is 20′ x 36′ x 9′ high, and the typical recommendation is 0.0035 tons/sq.ft., meaning a 720 sq.ft. garage requires a 2.5 ton a/c unit. (2.5 tons = 30,000 BTU). Quite why square footage rather than volumetric data are used beats me, but that’s what everyone seems to do. For a small incremental cost of $700 I went with 3 tons (36,000 BTUs).

A ductless system keeps the compressor outside, with feed (liquid) and return (gas) rubber hoses to the internal evaporator unit, along with a 230v power cable and a drip tube to route the condensate to the outside. Scottsdale summers are fairly dry, but you still want any condensate outside, not on your garage floor.

I got a vast range of estimates on a 3 ton system, covering an installed price range of over 2:1. My final installed price, including the electrical work (230v 30 amps to the compressor, then 230v from compressor to evaporator) was $5,600 for a Daikin unit (RX36NMVJU/FTX36NVJU) which also includes a heater for the winter months. That includes 10 year parts and 10 year labor warranties, which may well be worth yesterday’s discarded cheese sandwich. I elected not to pay the $2,000 premium for a Mitsubishi unit, the claimed increase in efficiency taking some decades to recover in terms of energy costs. The Daikin can be purchased for $3,000 but you will lose the 10 year warranty which comes with installation by an authorized reseller. So that means I paid $2,600 for the 14 hours (2 men, 7hrs each) to install the unit and run 230v power. As the electrical work alone was separately quoted at $1,000 by another proponent, the labor rate for the a/c work comes to $114/hr, which includes the tools and expertise of the installers. I think that’s a decent price.

In addition to air conditioning the unit also includes 36,000 BTUs of heating, though that is not a major need in southern Arizona winters. We get snow twice a century here ….


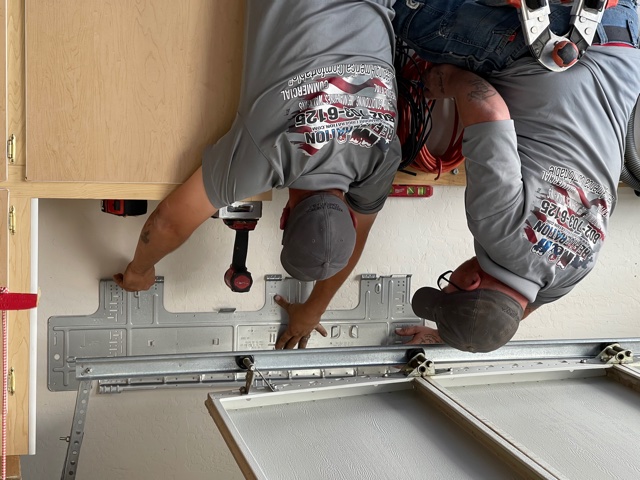
The retaining plate for the evaporator goes in.


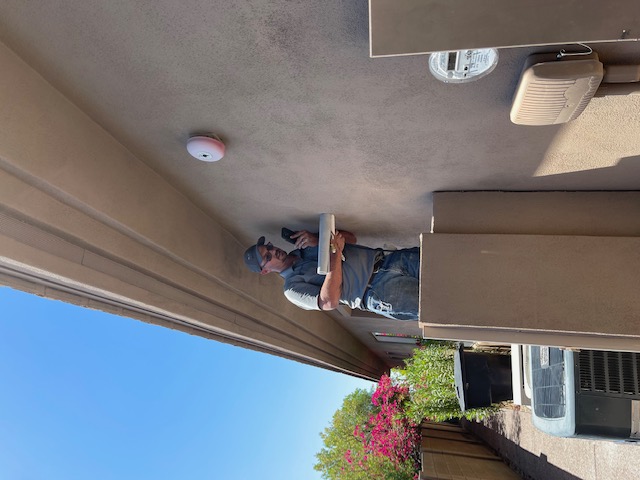
A 3″ hole is drilled though the wall for the freon hoses, the drip hose and the power supply.


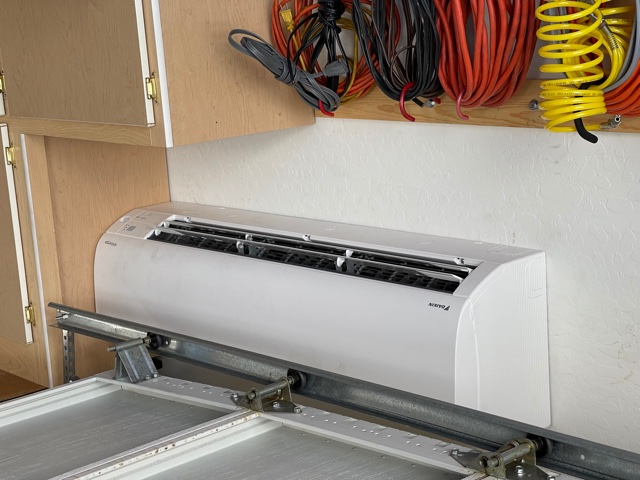
The installed evaporator/heater.


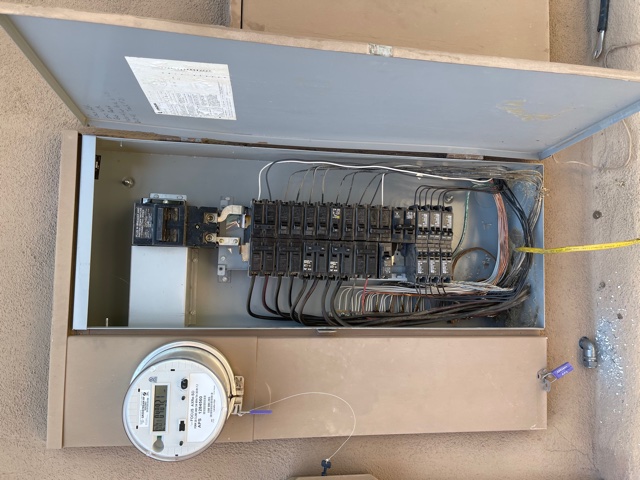
A 230 volt, 30 amp breaker is added to the breaker panel, the power
being routed in steel tube conduit as required by code.


The casing will hold the hoses, drip tube and power cable.
The slight slope of the upper casing is required by the drip tube.


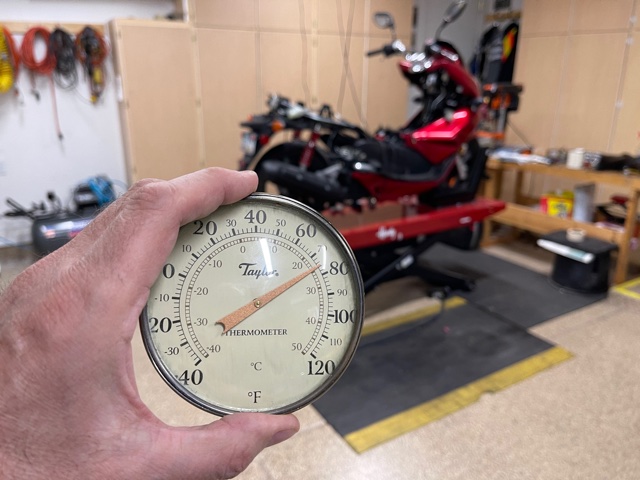
Even with uninsulated doors and attic, 91F outside is easily constrained to 76F inside.


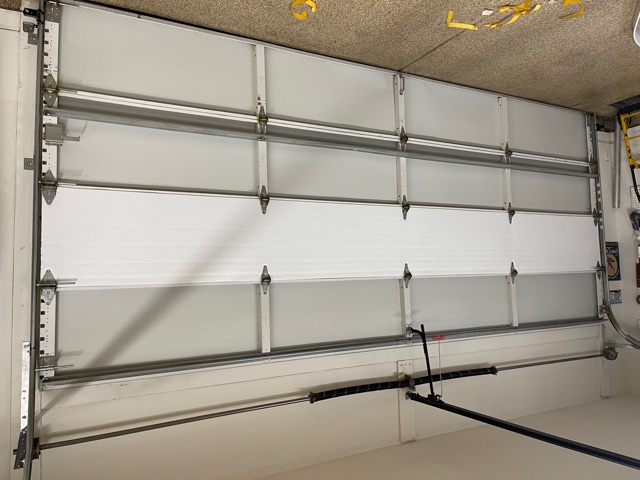
Garage door insulation commences. All hardware must be removed for a proper job.


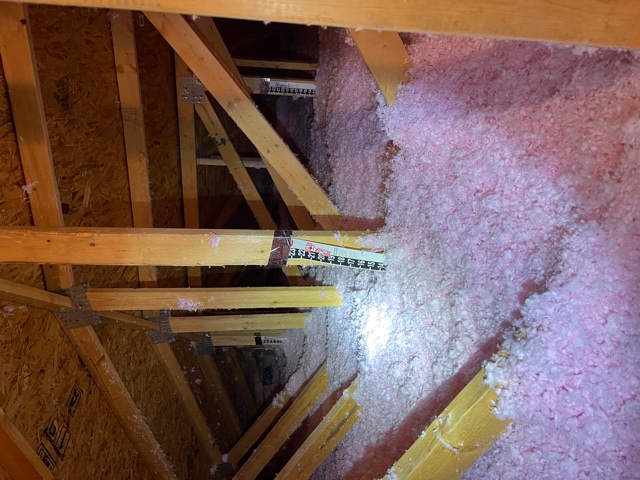
14.5″ of Owens-Corning fiberglass insulation is sprayed into the
uninsulated attic, for an R38 insulation rating. The installed cost was $1,167.
You can pay less to ‘mom and pop’ and get ripped off. If the installer
does not use rulers to confirm insulation depth, go elsewhere.


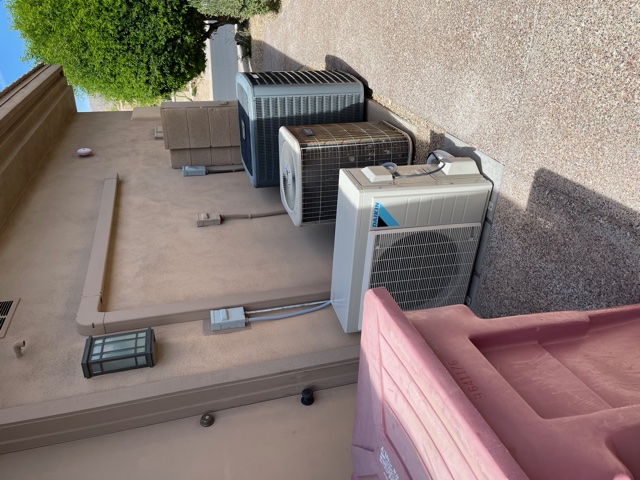
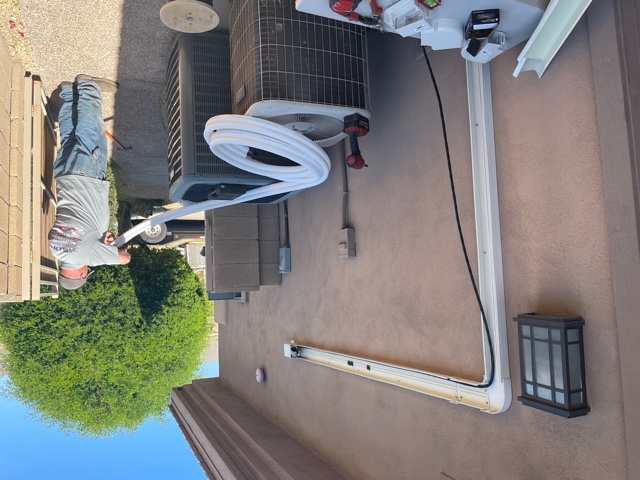
The finished outside installation. Two 4 ton ducted home units are in the back.
The new casing has been painted to match. The exhaust fan of the ductless compressor
is faced away from the center ducted unit. Blowing hot air into those fins
is not a good idea. The compressor sits on added cement plates. The
proximate on/off switch on the wall is required by AZ code.


Completed insulation on the double door. The single door gets like treatment.
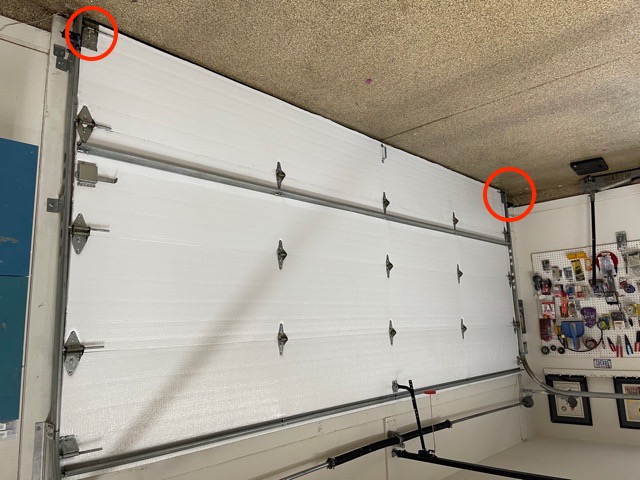
I used this product from Amazon. $200 for both doors. Never remove
the bottom plates, circled. These retain the tension cables for the lifting mechanism.
Reckon on 60-90 minutes to insulate each horizontal panel.

Some added thoughts.

The garage door insulation is attached to the ribs of the doors using double sided tape. Your ribs must be scrupulously cleaned first, for proper adhesion. I used isopropyl alcohol. Additional bonding is provided by removal of the hinges/locks/handles/drive attachments by removing these when installing the insulation. Once replaced these help keep it in place. The rear of the insulation is silvered and leaves an insulating air space to the inside of the door. That’s good for energy efficiency. The material adds little weight, though I had to tweak the ‘down’ torque limiter on the motor box a couple of turns to prevent the door reversing. The small incremental load was causing the logic mechanism to think it was encountering an obstacle, causing reversing at the limit of its travel.

My son helped me with this installation as removal and replacement of the long cross braces on the double door is a bear. As the locating holes for the screws can no longer be seen once the insulating material is in place, you need to do some careful measuring to know where they are.

Noise levels? Here are the manufacturer’s specifications:


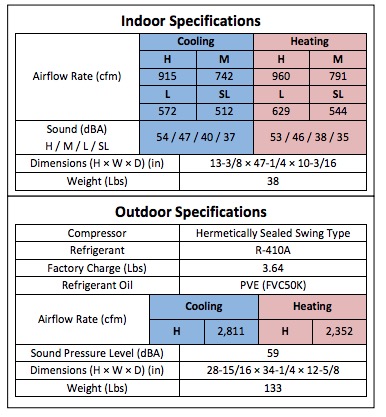
Noise levels are commendably low.

The electronics in the evaporator have an option to swing the baffles back and forth. I find that to be an irritant and have them set to stationary. There’s a button on the remote for a 15 minute ‘turbo boost’ of the a/c in the event a door is opened to move a car (or motorcycle!). Further, the electric eye on the evaporator senses motion, slightly accelerating the fan when you are working in the garage. All told, there is a good deal of programmability. Nice.

Theoretical incremental energy cost:

My electricity use for the home in the warmest summer months costs $480 per month. $360 of that is for a/c, comparing summer bills with winter bills. Winter electricity use is for the kitchen oven and lighting/appliances only. The home is heated by gas. These are AZ rates. If you are in TX, reckon one half of these amounts. If in MA, NY or CA, double them.

The volume of the garage is 32% of the home.

Therefore, I conclude that the incremental electricity cost for the garage air conditioning system will be:

$360 x 32% = $115, assuming the garage is maintained at 76F, the same as the home.

An alternative approach is to compare the tonnages of the garage a/c versus that of the home system. Those are 3 tons and 2 x 4 tons, respectively. Thus, you would expect the ductless system to consume 37.5% (3/8) of the energy used by the home system, which gives an incremental energy cost of $360 x 37.5%, or $135/month. A similar result.

Whatever it turns out to be, it’s going to be a whole lot cheaper than lying on the loony doctor’s couch. I find wrenching to be far more of a salve for what is between my ears.

Actual incremental energy cost – update August 29, 2021:

With four months’ bills on hand, the incremental average monthly cost has been $132. Daily highs have been in the range 90-117F. For the summer of 2022 I will program the unit to allow 90F overnight, which should see some modest savings.

The highest daytime temperature recorded so far this summer is 117F and the system had no issues with maintaining all areas of the garage at 80F.

Here’s the garage door outside (116F ambient) and inside:


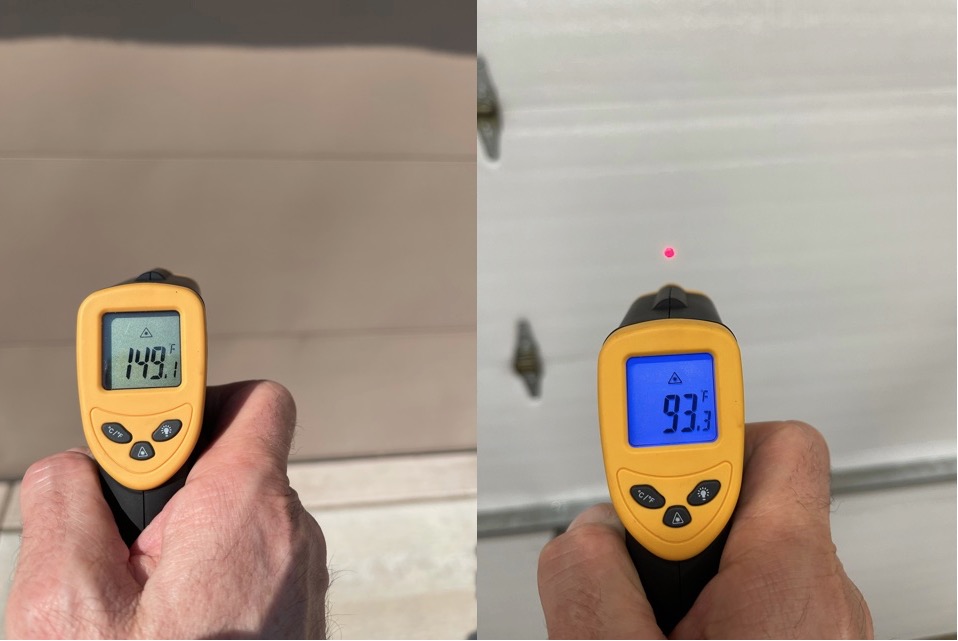
The inside door insulation, courtesy of NASA, is a winner.

The evaporator (the unit inside) has three removable air filters under the decorative flap. The maker says these should be removed and flushed with water monthly. My setting has very low airborne dust and I have found that a quarterly cleaning frequency is fine. It took me a couple of minutes to do. At the same time I also hosed the fins on the compressor (the outside unit) with a water to clear detritus and maintain optimal ‘breathing’ of the unit.


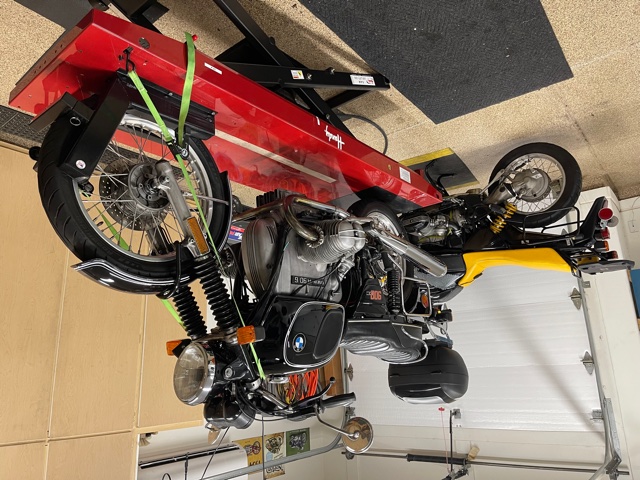
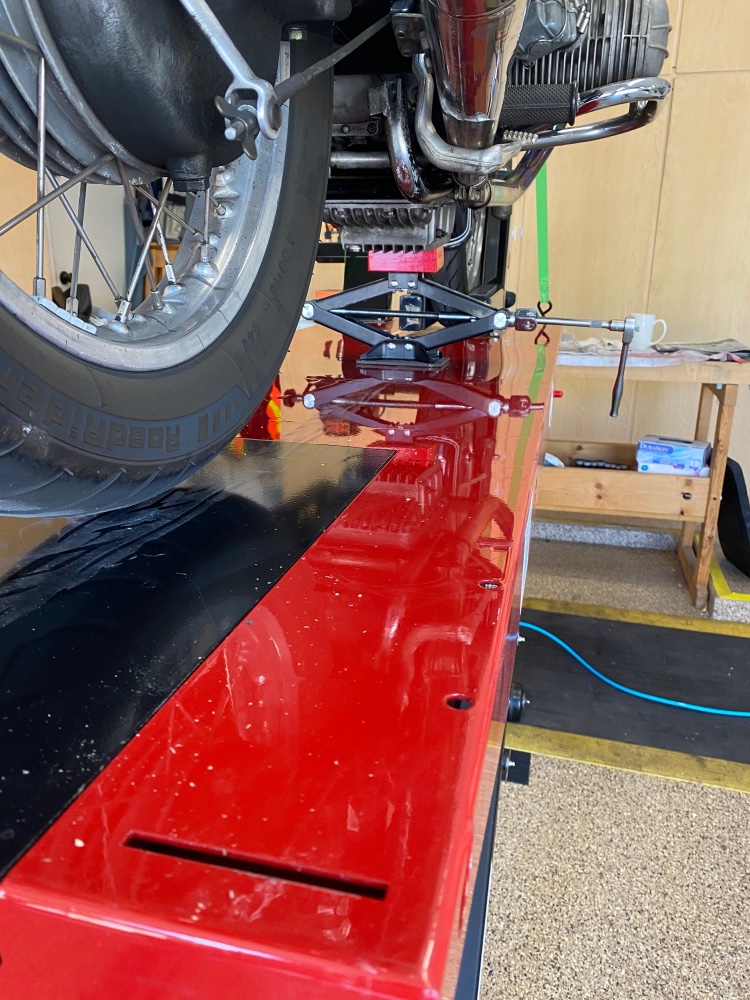
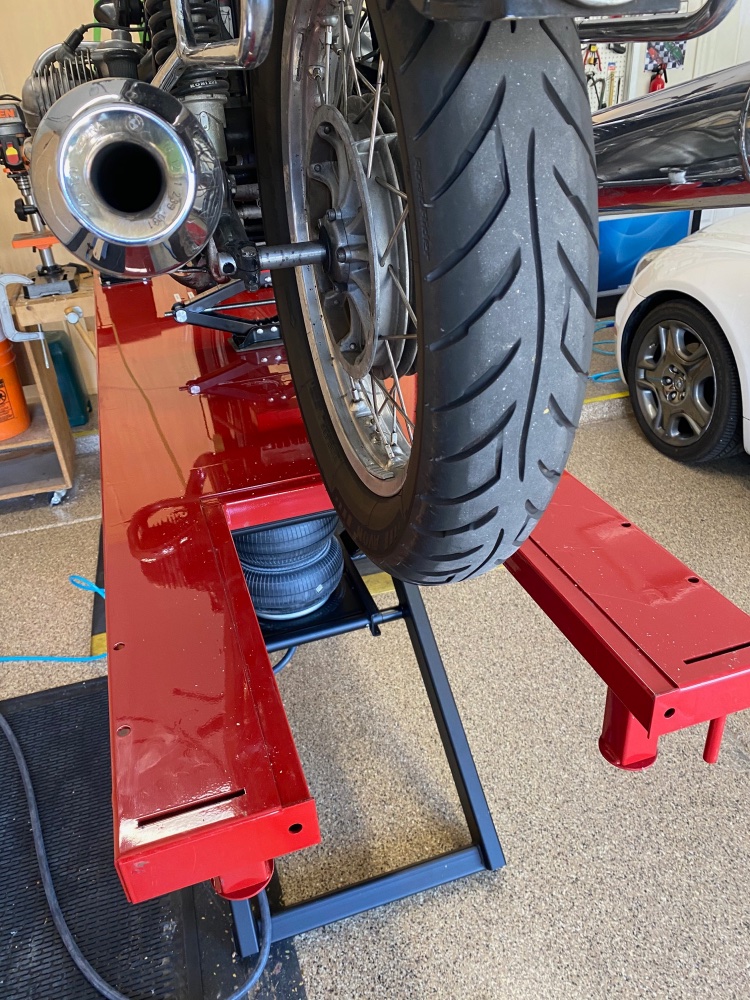
1975 BMW R90/6 on the lift and the 1992 R100GS PD in back.
It’s a toasty 117F outside, wrenching heaven inside.

iPhone 12 Pro Max images.

Fields of Wheat

An egregious marketing error repeated.

In the 1980s Toyota and Nissan decided that the last bastion of the car market – Germany’s luxury brands – was ready to be conquered. Both spent immense amounts of money developing and perfecting their 5 seater sedans with new V8 engines, a first for the Japanese. And both came out with magnificent vehicles of which a BMW engineer remarked “What are they trying to do? Kill us?”. And indeed the Japanese sedans, marketed under premium names, Lexus for the Toyota maker with the LS400 and Infinity’s Q45 for Nissan’s offering, were superior to the German high end offerings in every way. Performance was equal or better, the interiors were severe just like the Germans’ but, crucially, the Japanese vehicles were reliable, which could not be said for Mercedes’s S Class or BMW’s 7 series. They were also $10-20,000 cheaper.

Yet of these two great machines the more modestly spec’d LS400 wiped the salesroom floor with Infinity, and has maintained that lead since 1989 by a large margin. The cause was the now famous ‘Fields of Wheat’ advertising campaign waged by Infinity and its disastrous US marketing advisers. To emphasize the zen perfection of their car they showed waving fields of wheat with a pretentious voiceover, but omitted to show the vehicle. The LS 400 sold by the dozen as its prosaic ads actually deigned to show the rather staid looking vehicle. The Q45 was disregarded. No one knew what it looked like.

Now let’s jump forward 30 years and we see a variation of this marketing disaster rolled out by none other than Harley Davidson, one of the savviest marketers out there. After all when you saturate the US and much of the rest of the world where roads exists with antiquated, poorly engineered and premium priced motorcycles you must be doing something right and Harley has been doing that for a very long time. But some marketing whiz at HD decided that the time was ripe to introduce an electric Hog and here it is in all its glory:


Probably worth $5,000 or so.

What brought this to my attention was a recent reality TV show named ‘Wrong Way Up’ where two famous long distance riders decided to ride their electric Harleys from the southernmost point of South America to Los Angeles. Those riders – Ewan McGregor of Star Wars fame and Charley Boorman whose dad is a famous Hollywood director – are as likable as they get. Grown men who never outlived their boyhoods, they are fun to watch and are great motorcyclists. So they decided to ride their electric bikes, supported by a large staff driving Rivian electric trucks, seemingly amazed that in cold temperatures the Hog had a range of maybe 70 miles, provided you could even find a charging point with sufficient current to ‘fill up the tank’.

Now it is true there are many unfortunate souls reading this journal who have never thrown a leg over a motorcycle saddle and regard powered two wheels as the work of the devil. Their loss. But even these poor folk know that the one thing above all which Harley sells is noise. So much so that the company tried – and failed – to patent the noise of the Harley’s exhaust a few years ago, a noise which results from the uneven firing intervals of the two cylinders in the gas bikes. This approach to ‘engineering’ also ensures the bike vibrates as if infected with St. Vitus’s Dance. Next time you pull up to one idling at a red light check it out for yourself. A silent Harley is anathema to its white trash buyers and, boy, is the electric Harley silent or what? It does not rumble. It whines. All those jokes about aficionados of other brands riding washing machines will come back to haunt Harley as they look down the barrel of the worst marketing idea since that Infinity Q45 of yore. Comical. Then check the price ….

As for the LS400, mine is a 2000, last of breed before the engines started growing. At 140,000 miles it is like new and it’s some testament to its reliability if I disclose that failure of a stop bulb a couple of years ago saw me angered. But temperate mien returned quickly when I reminded myself that repairs on the predecessor Mercedes S Class were pretty much a monthly occurrence. Switch gear, gearboxes, motor mounts, disastrous air conditioning, awful radio, you name it. All failed regularly.

Got $30,000? Buy a nice BMW classic airhead and bank the $23,000 left over.

A new start(er)

Japan rules.

BMW airheads first saw the addition of electric starters in 1970, and still came fitted with kick starters as a back-up. These were deleted for the 1975 year but the original owner of my 1975 BMW R90/6 had one fitted at the factory before importing the machine. It’s pretty useless on a cold motor, but works OK with a warm one if the whole macho scene is your thing.

To say that the massive Bosch starter in my bike is an enthusiastic participant when it comes to getting sparks and explosions going would be an overstatement. It always struggled a bit getting over the compression hump with a cold engine and things deteriorated further in recent months, so much so that I would use the kicker to position the motor just past compression to give the ailing German starter a running start at things, so to speak. But clearly, a rebuild was indicated, reverting to a properly tuned but still weak willed Bosch original, for some $250.

Now engineers are always looking for something better though I do rather struggle with the idea of installing non-OEM parts in my classic machine. I corresponded with a riding friend explaining that there is a Japanese alternative but I felt rather uncomfortable mixing races, if you know what I mean. No problem with Japanese bikes; in fact they are the most reliable and well made machines out there. “Well”, he replied somewhat caustically, “they seem to have got on just fine in the last World War, so I wouldn’t worry about it”. OK!

Why Japanese? Well the Bosch starter in my bike is 1970’s technology – probably more like 1950’s, truth be told. And aftermarket places have been modifying a Nippondenso/Toyota starter with the right Bendix (the geared teeth which the solenoid advances into the flywheel when the starter button is depressed) along with the correct nose cone for aforesaid Bendix, which allow the whole thing to fit just so in the innards of the bike.

The Bosch unit was discontinued many years ago, replaced with a French Valeo which used to shed its magnets destroying the starter. That problem was fixed and manufacture moved to Poland, a nation not renowned for its engineering prowess, and a new one can be had for $300 with the correct 8-tooth Bendix. BMW later reduced gearing – acknowledgment of the marginal power of the Bosch – to 9 teeth but that would also dictate changing the flywheel, which is overkill for a little more turning force.

Over the years the Nippondenso variously used a Toyota truck starter, a forklift starter and a small car starter, and it’s the latter I decided to pony up $350 for after reading of some 20 years’ good experience with the Japanese part from any number of Airhead riders. Toyota trucks and cars routinely run the distance to the moon and back several times, so there’s reason to be confident here. I estimate that the Bosch starter had some 2,500 starts under its belt.

The Nippondenso is 1995 technology, this model being from a 1995-97 Toyota Corolla 1.6 liter four banger. If it can spin a four cylinder engine, I reckoned it should make mincemeat of the twin in my bike. Weight dropped significantly:


A porker at nearly 10 lbs.


Modern materials see a big drop in weight.

The lighter weight means that the alignment bracket on the Bosch starter can be dispensed with.


1995-97 1.6 liter Toyota Corollas come with these.

Installation is a breeze. After disconnecting both battery terminals the starter cover comes off in two minutes – two Allen bolts – the two starter retaining bolts are removed (wobbly extensions come in useful in the tight confines here), three electrical connections are disconnected and the new starter is installed. The Nippondenso used threaded eyelets and uses the stock 13mm metric bolts to hold it in place. Being a belt and suspenders type I also installed the washers and nuts which are used with the original.


Installed, a perfect fit.

All sorts of claims are made for the lower power draw and the superior cranking power of the Nippondenso. The only data I can find suggest that the 120 amp draw of the Bosch falls to 80 amps with the Nippondenso. In the absence of further data I can only report empirical findings. Simply stated, the compression hump hesitation is notable for its absence, and the new starter spins a cold motor faster than the former Third Lady can say “Leave the Money on the Dresser”.

Recommended.

Art Deco masterpiece

The most beautiful motorcycle made.

Designed in 1934, the BMW R7 was a ‘one off’ show bike. BMW decided not to manufacture it as the Great Depression was sweeping across Europe and it would have been unaffordable to most.

The very height of Art Deco design, the bike came with an 800cc horizontally opposed twin engine, the forerunner of the 900cc unit in my 1975 R90/6. BMW last sold Airheads – air cooled, horizontally opposed twins as they are commonly known – in 1995. A sad day.


The hand shift gear lever connects to the gearbox with rod linkages.
Control cables are mostly hidden.


The white pinstripe provides relief for the black and silver livery.


This is a ‘hardtail’ design, with rear suspension provided by the sprung seat.


The left panel opens providing access to the fuel petcock and the tool roll.
The air cleaner is in the chrome cylindrical housing. Cloisonné tank badge.


The kickstarter kick rod folds out for easy operation for a seated rider.
Note the locking lever on the rear fender to allow it to be raised for ease of wheel removal.

All the above images taken by my friend Jared RL on his visit to the ‘Shape of Speed‘ exhibit in the Portland, Oregon Art Museum in 2018 (slow link, be patient).


Plain, unadorned valve covers are in keeping with the overall design.

You do not have to love motorcycles to revel in the beauty of this design, nor to fight nausea when you look at the modern incarnation.

Handy SAM 1200 motorcycle lift – Part V

The scissor jack and related modifications were detailed in Part IV.

The primary use of the jack is to raise the motorcycle close to its fore and aft fulcrum, using the oil sump as the jacking point. This process is required when either wheel has to be removed with the bike on the lift. The front wheel cannot be removed without use of the jack as it is anchored in the vise on the lift’s table. The rear wheel cannot be removed without use of a jack as my BMW airhead favors the rear wheel at rest. And the center stand cannot be deployed safely on the table without considerable strength and a host of related issues. As the bike is pulled up and back onto the center stand it moves back several inches, which cannot be done if the front wheel is in the vise, though there is a way to do this. See below.


Using a socket drill adapter bit to get the jack into position.

A 3/8″ socket drill adapter is used in a hand drill to raise the jack’s platform close to the oil pan. The screw in the jack has a fine pitch to confer mechanical advantage (not much stress on the user) but the trade off is that a lot of cranking is required. The electric drill makes this a speedy process.


Using a ratchet to raise the bike using the oil sump..

The front part of the oil sump is just ahead of the bike’s center of gravity which resides an inch or two behind the center stand pivot. That’s a small distance so there is very little turning moment on the jack itself, and little risk that it will tip forward.

As the ratchet is cranked first the rear wheel will rise off the table, permitting removal of the drop-in rear panel, removal of the wheel’s axle (one pinch bolt and one axle nut). The wheel can then be dropped down through the open panel space.


Drop-in panel removed to allow removal of the rear wheel.
Note the pneumatic bellows which are the raising device.

As the ratchet is operated and the bike rises, the front wheel, still clamped in the vise, permits rotation of the machine about the front axle. I have tie down straps installed at the front and these tighten up slightly as the front shock compresses. I did not find any need to loosen the tie downs.


Center stand deployed. No stress, no risk, no scratches.

If you are really strong and a master mechanic like William Plam, you can slam the center stand forward with the front wheel locked in the vise using skill and strength, scratching up your table’s surface in the process. You can see William do this at 27:03 in this video. His large collection of professionally made videos is a joy to watch, full of his decades of expertise and containing lots of tips and techniques. Highly recommended.

I am neither strong, nor a master mechanic and do not like scratched up tools, so I keep cranking on that ratchet until the bike rises a couple more inches at which point the center stand can be deployed by hand, no strength involved. As you can see, I use a monogrammed towel to protect the surface of the table. You can use a plain one if that’s all you have.

At this point the jack can be dropped and removed. If you are pulling the rear wheel you must secure the cross rail of the center stand to the front wheel’s rim, or to the exhaust cross flow pipe, or to the vise on the table. This obviates the risk of the bike falling off the center stand which has no rear wheel to prevent it doing so in the event the front wheel is not locked tightly in the vise.


Wheel vise loosened, crossbar removed and front wheel ready for removal.
Tie downs have been moved to the rear.

I am working on replacing the taper roller bearings in the front wheel hub so have to remove the front wheel – two axle pinch bolts must be loosened and the axle nut must be removed, along with a washer and spacer, for the axle to be withdrawn and the wheel rolled forward and out onto the workbench. In the next image I have removed the cross brace on the vise and made it possible to remove the wheel forward.

So that inexpensive jack paid for itself very quickly.


Front wheel removed, ready for bearing replacement.


Rear wheel removed, ready for bearing replacement.

Storage of the lift is easy, with movement about the garage greatly facilitated by the furniture dolly:


The lift is rolled into its storage location.

While I find the smallish workbench adequate for my needs, if additional workspace is needed the lift can be raised to workbench height.

Click here for a brief video showing how to place the bike on the lift.