Category Archives: Lenses

90mm f/2.8 Leitz Tele-Elmarit resolution test

A handy telephoto lens.

For an index of all Leica-related articles click here.


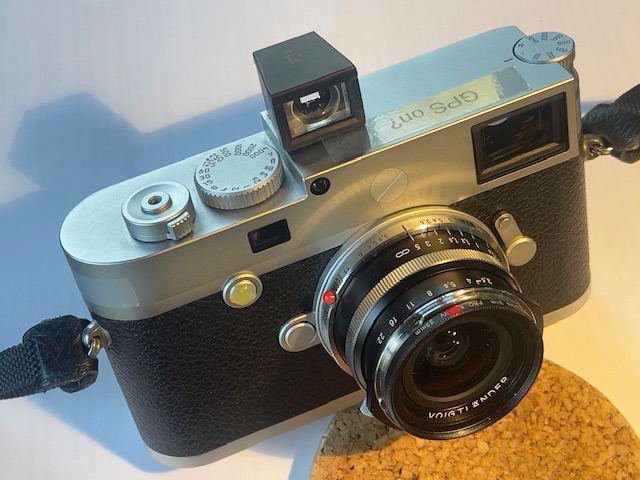
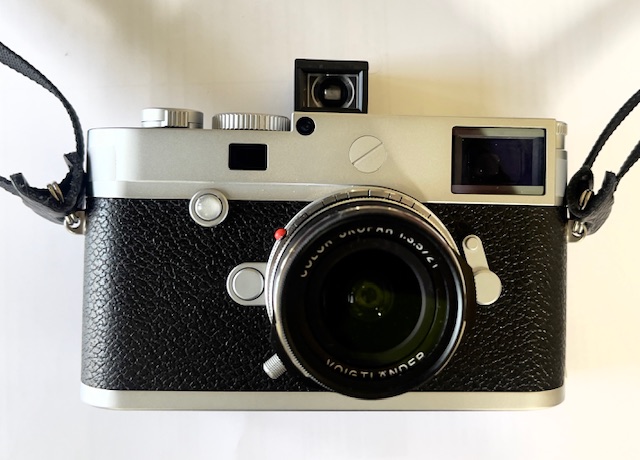
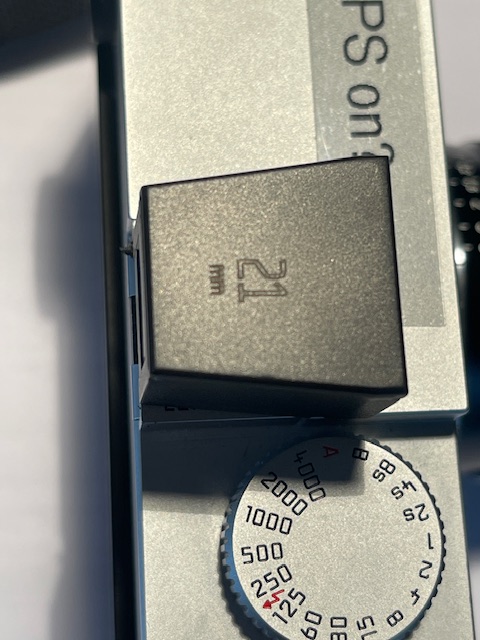
On the Leica M10. The 35mm f/2 Canon LTM is shown for size comparison.

When I first profiled the 90mm f/2.8 Leitz Tele-Elmarit lens I wrote: “But when it comes to size, one of the smallest and lightest 90mm lenses Leitz ever made was the second version of the Tele-Elmarit. The original ‘fat’ version weighed in at 335 grams (chromed brass mount) but when reissued in a ‘thin’ barrel (black anodized alloy and with 4 elements instead of the earlier 5) the weight dropped to 225 grams (8 ounces) and you gained a stop compared with all those Elmars as the lens, also made in Canada, is f/2.8. And the second, alloy barrel version is actually lighter than the 90mm f/4 Elmar-C, a lens intended for the Leitz/Minolta CL small body camera, which apparently works fine on regular M bodies. ”

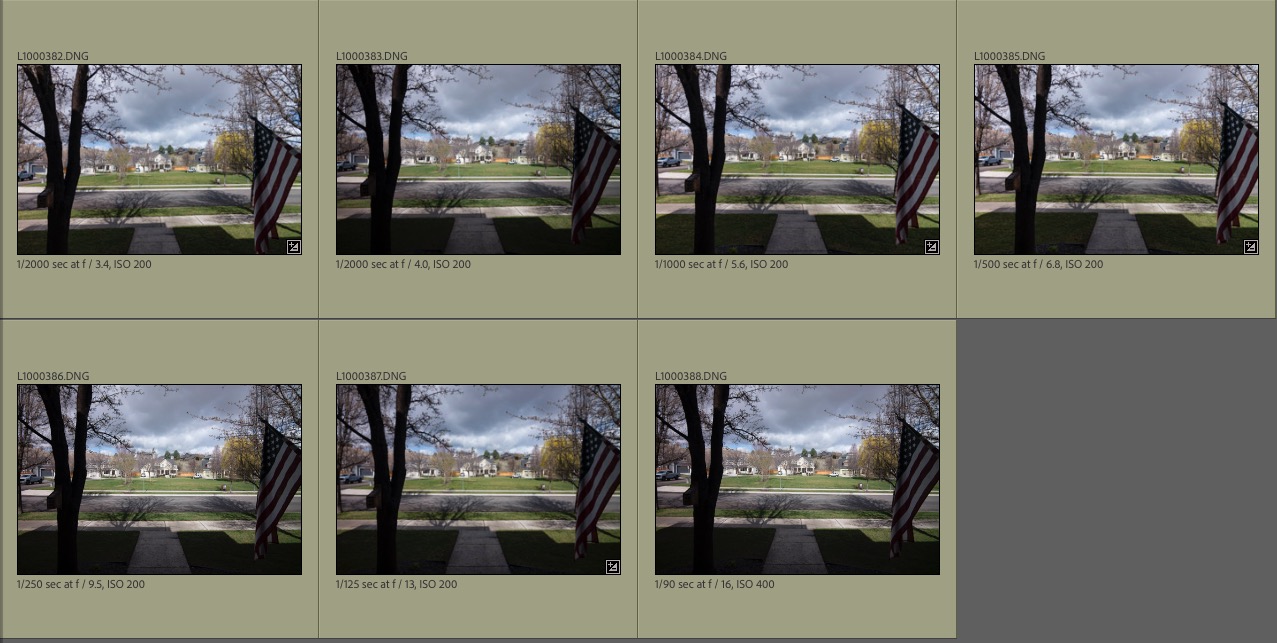
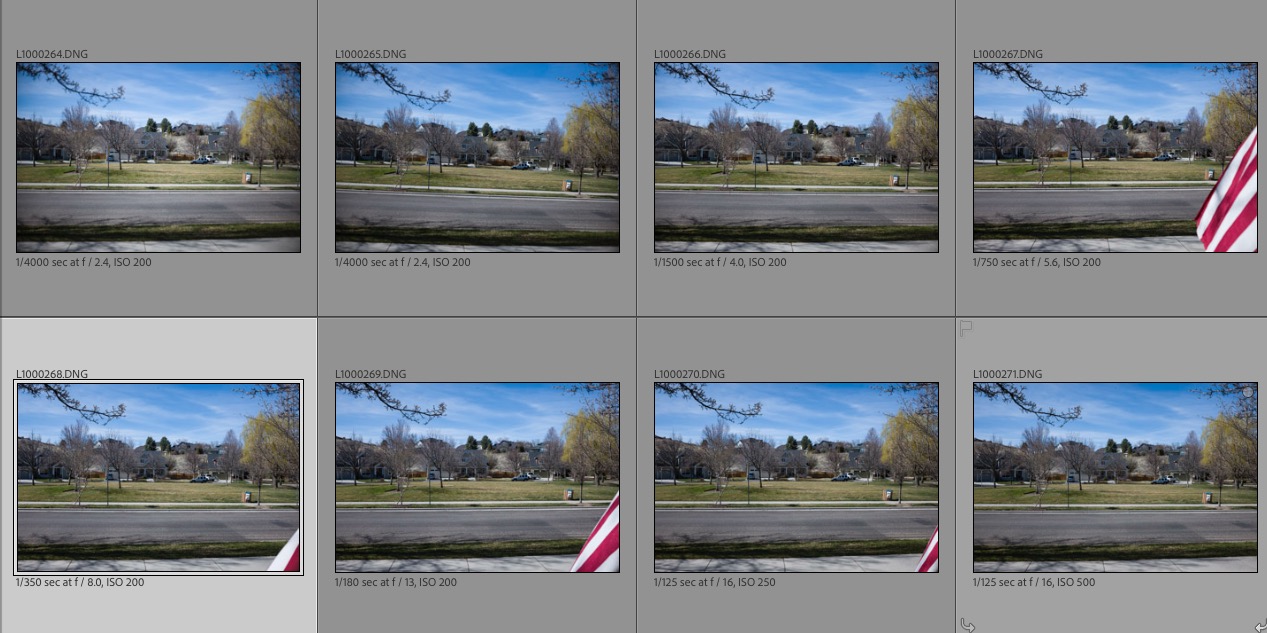
Here are the test images taken at all apertures from f/2.8 down to f/16 – the lens is coded ‘000100’, where ‘1’ denotes a black paint filled pit. The lens is so distortion and vignetting free that there is no need to use a lens correction profile in LRc when processing images. These images are SOOC, and I used a monopod to minimize camera shake.


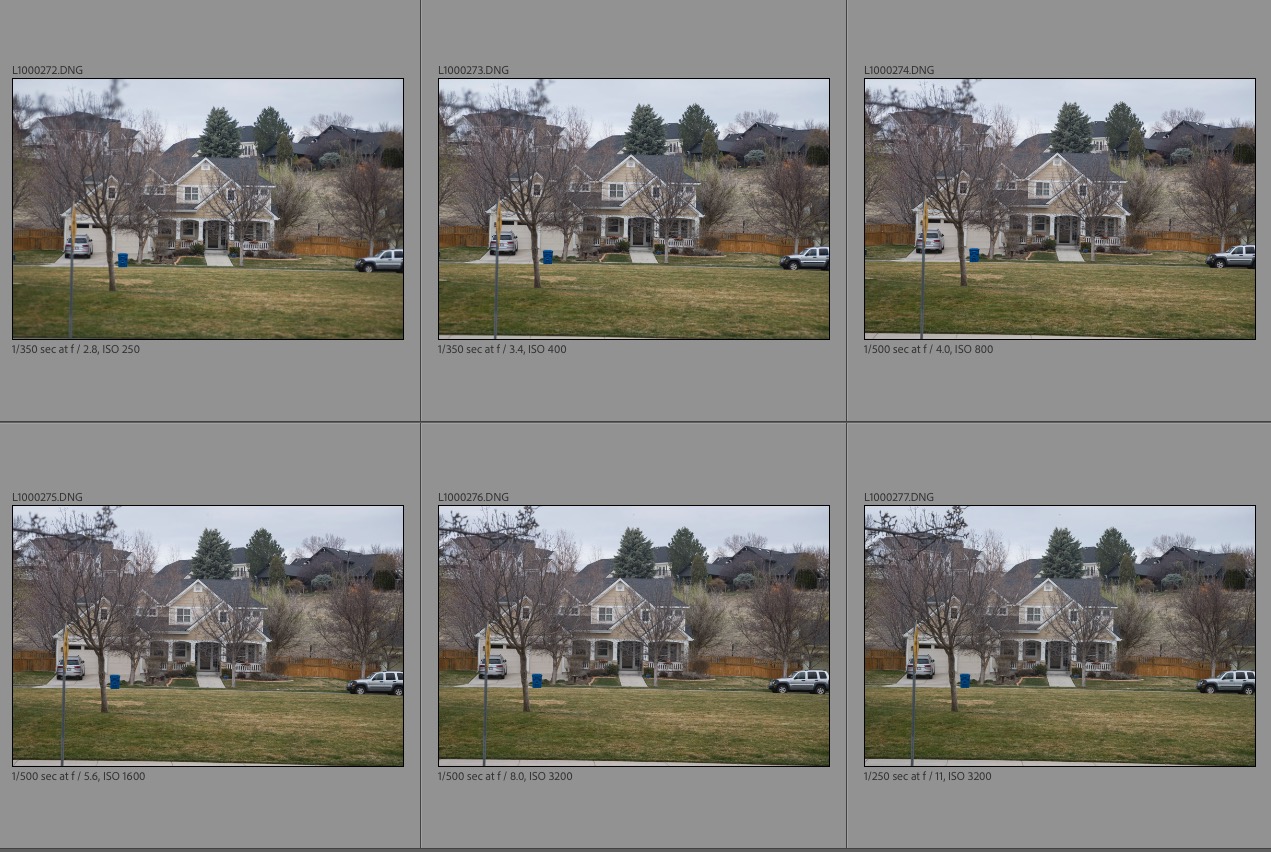
Test images from f/2.8 to f/16.

You can view all 8 images in medium size by clicking here.

To view full size 22mb originals click here. It’s a large file so be patient when downloading. You can zoom in on these to your heart’s content.

Conclusions?

  • Mild flare at f/2.8, disappears by f/4
  • At f/2.8 the whole frame is usable with a touch on the LRc ‘Dehaze’ slider and will easily make a large print with excellent resolution
  • At f/4 the resolution is high across the frame. Micro contrast is improved. Extreme corner details are well preserved.
  • Peak definition is reached at f/5.6 but there’s very little to choose between any aperture from f/4 to f/16
  • I can see no diffraction at any aperture
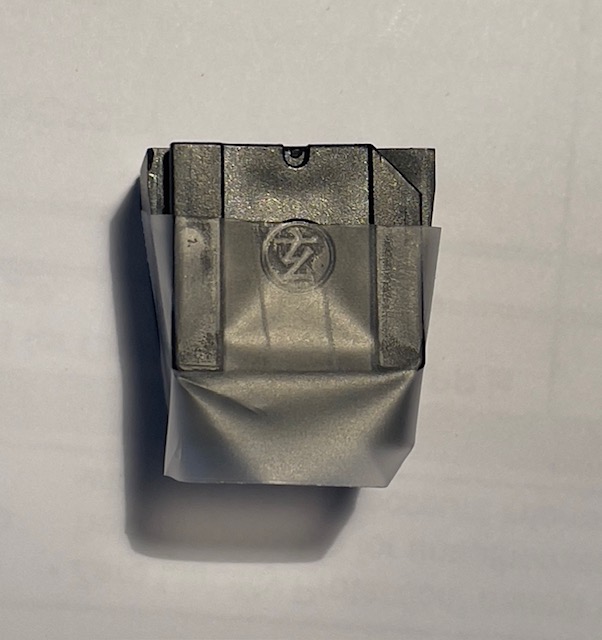
  • No meaningful color fringing at the edges of the frame at any aperture. The lens is 6-bit coded and replaceable rear flanges with coding pits can be found on eBay
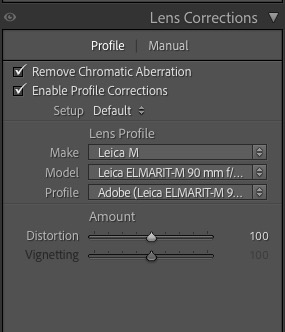
  • There is no LRc lens correction profile available so I use the one for the 90mm f/2.8 Elmarit, but it’s not really necessary

By the way, disregard the f-stop data in the EXIF information. The M10, even with 6-bit coding adapter does a poor job of estimating the aperture used. (There is no electrical or mechanical link between the lens’s aperture setting and the camera, so Leica estimates the aperture based on the shutter speed and ISO used). Go by the file names, moving the decimal point in the last three digits one place to the left to see the aperture used. So, for example ‘110’ means f/11.

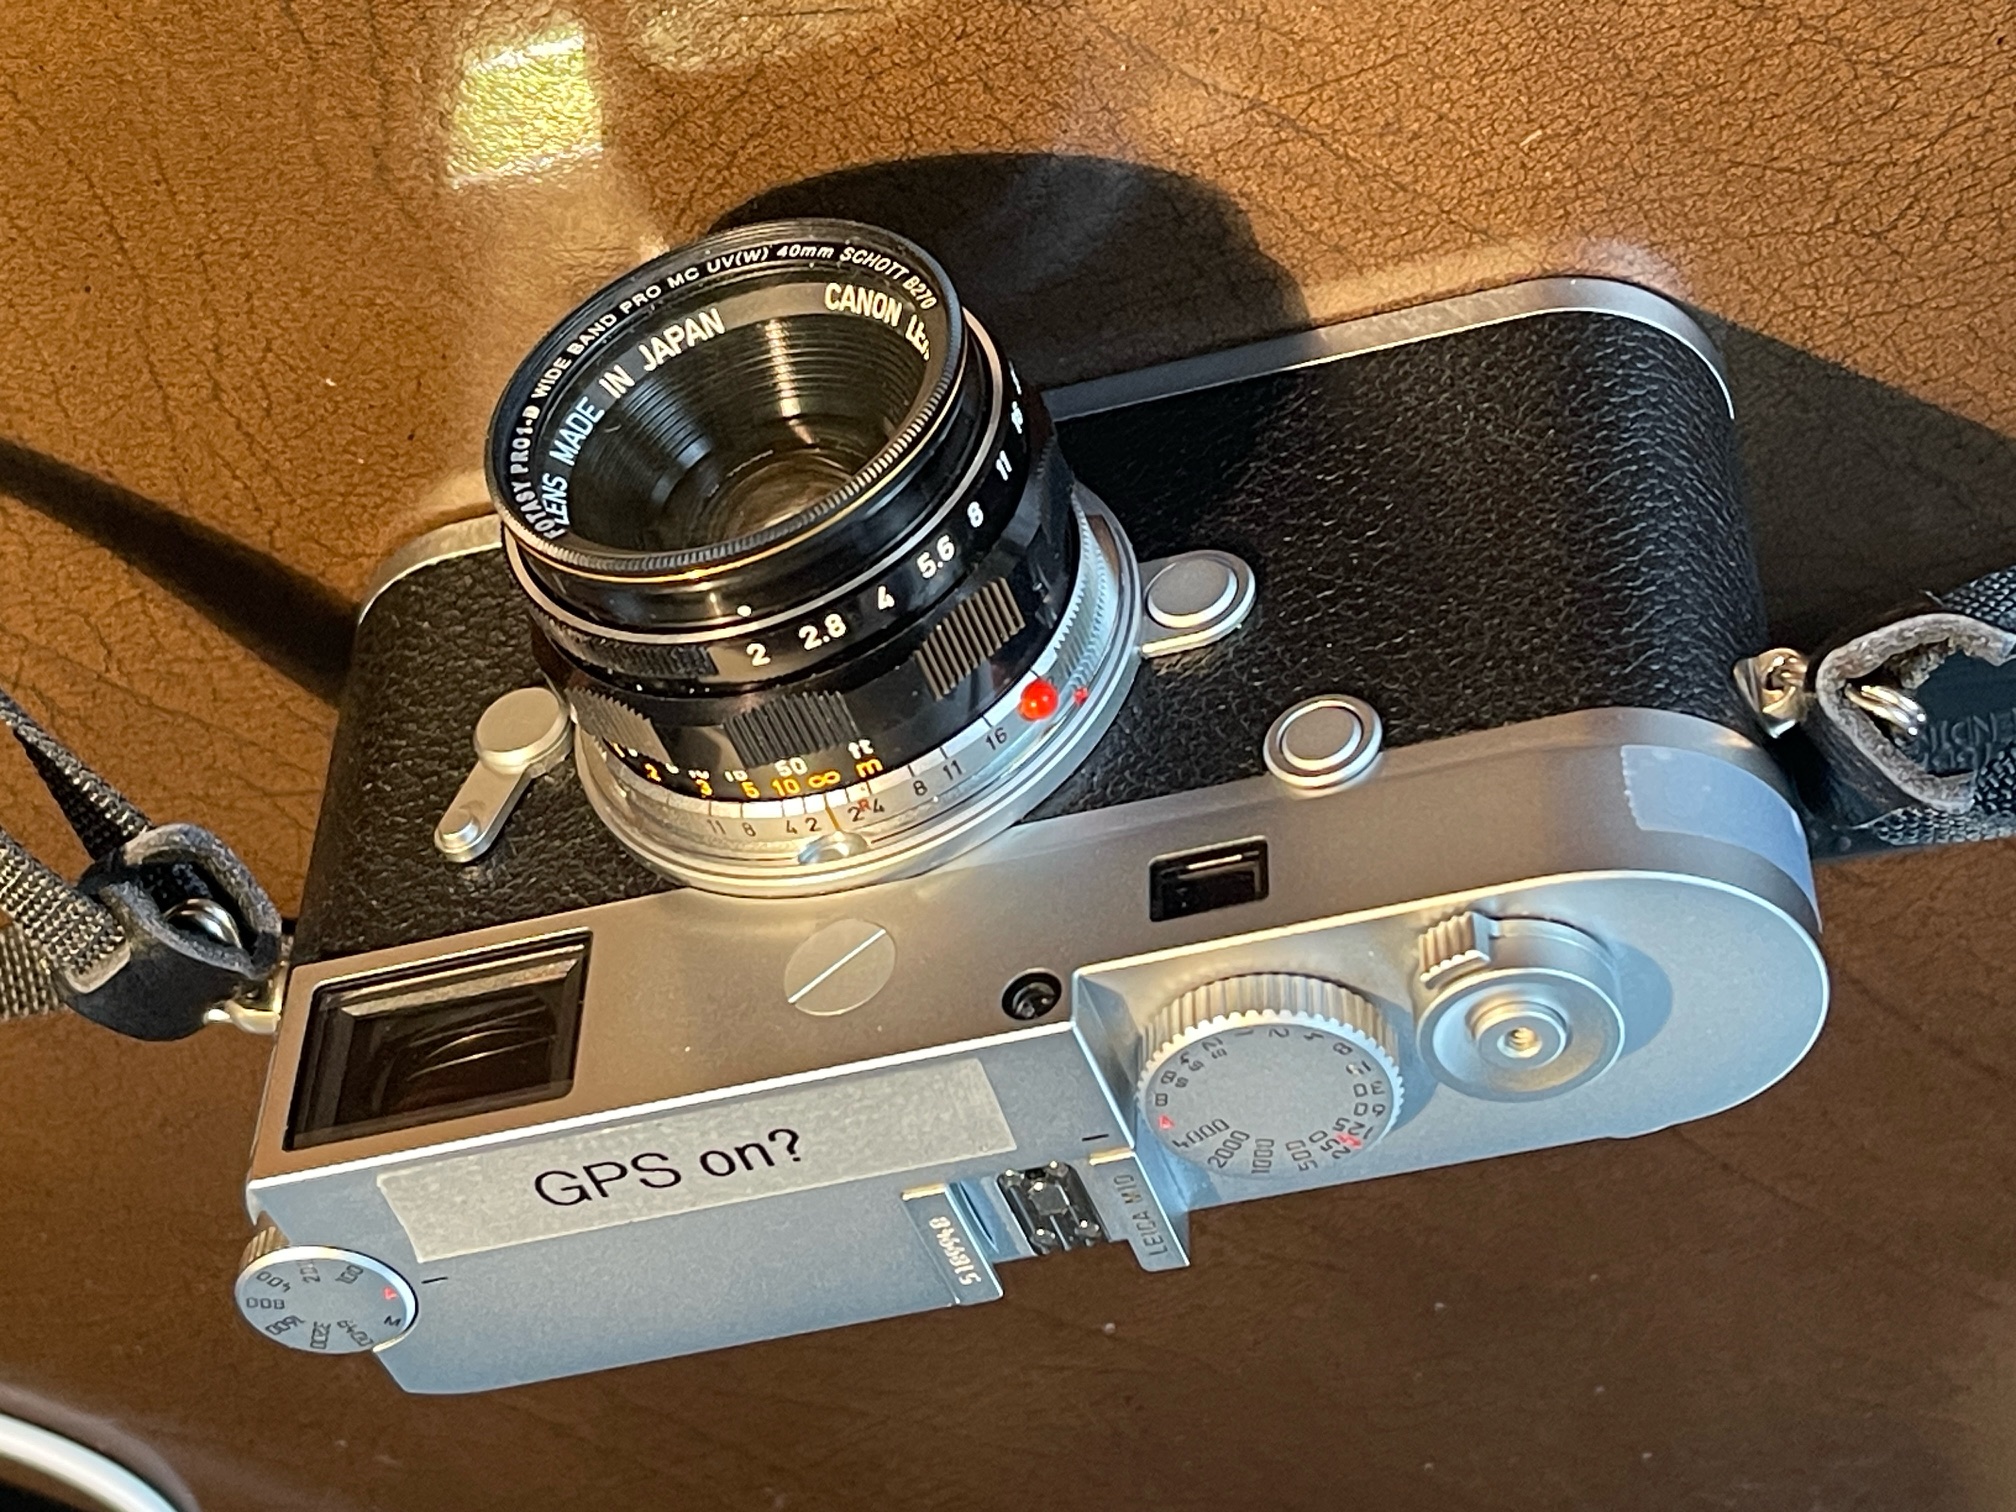
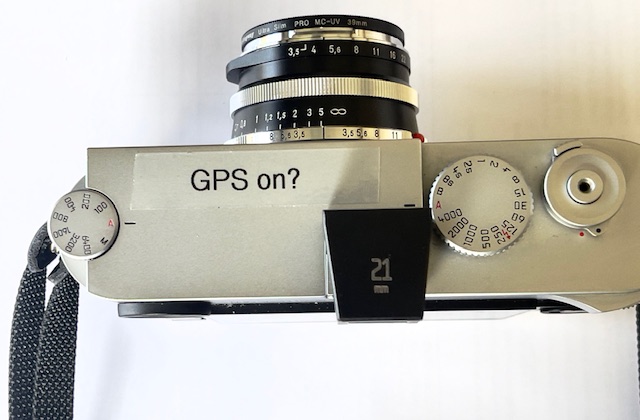
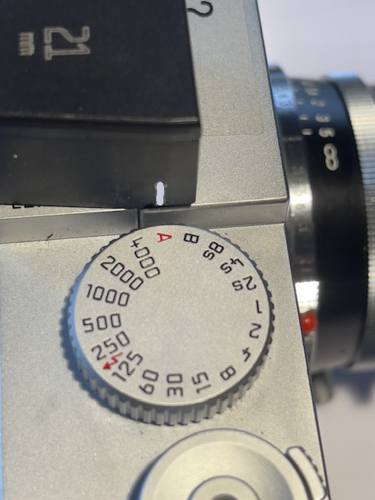
Any modern era Leitz or Leica lens for under $500 is something of a miracle, and I paid $454 for mine, shipped. The only sign of wear is some brassing (‘alloying’?) in one or two places on the mounting ring and focus collar which is as smooth as they come, and there’s some dust inside. While it’s not a lens I use often, and you have to concentrate on getting focus right at closer distances/wider apertures, it’s so small and light that taking it along ‘just in case’ is never an imposition. With the high resolution sensor in the M10 I instruct the camera to use a shutter speed of 1/4f, meaning 1/360th second, or faster, to preserve definition at its best. The engraved aperture markings on mine were rather faded on receipt – check the first image for ‘after’ – so I refilled them using a white Lacquer-Stik.

It’s a fine optic for picking out architectural details and the like and is recommended.

21mm f/3.5 Voigtländer VM Color-Skopar Aspherical resolution test

An outstanding ultra-wide angle lens.

For an index of all Leica-related articles click here.


On the Leica M10. I added the red indexing dome and the
aperture index, the factory ones being useless.
The cheap 21mm finder is fitted.

When I first profiled the 21mm f/3.5 Voigtländer VM Color-Skopar Aspherical lens I wrote: “The lens is tiny and with a slim UV filter fitted weighs just 185 grams/6.5 ozs. For comparison the 35mm f/2 Canon LTM with bayonet adapter and UV filter comes in at 139 grams/4.9 ozs. Fit and finish are all metal and Leica quality, the focus collar resistance is just so and the apertures are in half click-stops through f/22. Small protuberances on the aperture ring make it easy to grasp. The black rimmed UV filter not only serves to protect the front element, it also masks off the poorly thought out chrome bayonet front ring which can only be a source of reflections and flare in bright lighting. The distance scale is marked in meters only and the depth of field scale is very hard to read, and only extends to f/11. The 50+ year-old Canon’s DoF scale is far superior in this regard. Not that big a deal as with a 21mm focal length lens almost everything is sharp near to far. ”

Here are the test images taken at all apertures from f/2 down to f/22 – I coded the lens to be the 21mm f/2.8 Elmarit-M. The code is ‘000001’, where ‘1’ denotes a black paint filled pit. I strongly advocate use of the excellent lens correction profile in LRc when processing images as it removes any trace of vignetting which is otherwise noticeable. Other than that the following images are SOOC.


Test images from f/3.5 to f/22.

You can view all 8 images in medium size by clicking here.

To view full size 22mb originals click here. It’s a large file so be patient when downloading. You can zoom in on these to your heart’s content.

Conclusions?

  • No flare at any aperture
  • At f/3.5 the whole frame is usable and will easily make a large print with excellent resolution
  • At f/4 the resolution is high across the frame. Micro contrast is improved. Extreme corner details are well preserved.
  • Peak definition is reached at f/8 but there’s very little to choose between f/4, f/5.6 and f/8
  • Modest diffraction sets in at the f/16 and f/22, but large prints are still OK
  • No meaningful color fringing at the edges of the frame at any aperture – that’s the 6-bit coding doing its magic
  • Vignetting and minor barrel distortion are perfectly corrected by the LRc lens correction profile

By the way, disregard the f-stop data in the EXIF information. The M10, even with 6-bit coding adapter does a poor job of estimating the aperture used. (There is no electrical or mechanical link between the lens’s aperture setting and the camera, so Leica estimates the aperture based on the shutter speed and ISO used). Go by the file names, moving the decimal point in the last three digits one place to the left to see the aperture used. So, for example ‘220’ means f/22.

A special lens that I bought on eBay in mint condition for a bargain price of just $400 with the lens hood. I’m selling the latter so my net cost will be just $340. Unless you get lucky expect to pay $450-500 used or $650 new without hood. The hood is a quite ridiculous $100. The crappy 21mm viewfinder added $26 and a 39mm UV filter was $10. Even at the new price the lens is a bargain. Avoid the older and cheaper f/4 version which is poorly suited to digital sensors. If you have more money than sense Leica will be pleased to empty your wallet with its offerings.

Canon 35mm f/2 resolution test

An excellent wide angle lens.

For an index of all Leica-related articles click here.


On the Leica M10. I added the red indexing dome.
The top plate label reminds me to turn on GPS on the iPhone!

When I first profiled the Canon 35mm f/2 LTM lens attached to my Leica M3 film camera I wrote: “After running a roll of Kodak Ektar 100 through it I can confirm that the lens is sharp and a delight to use. The only thing I miss is an infinity lock which would make it easier to mount and remove the small optic. The only modifications I made were the addition of the requisite LTM-to-M bayonet adapter, a protective, multicoated UV filter and a red indexing dome (extremely useful).”

Here are the test images taken at all apertures from f/2 down to f/22 – I used a 6-bit coded LTM-to-M adapter for in camera correction of color aberration, coded to be the 35mm Summicron-M pre-ASPH. The code is ‘000110’, where ‘1’ denotes a black paint filled pit:


Test images from f/2 to f/22.

These are SOOC.

You can view all 8 images in medium size by clicking here.

To view full size 22mb originals click here. It’s a large file so be patient when downloading. You can zoom in on these to your heart’s content.

Conclusions?

  • No flare at any aperture
  • At f/2 the whole frame is usable and will easily make a large print with excellent resolution, with micro contrast from the center to half way out
  • At f/4 the resolution is high across the frame
  • Peak definition is reached at f/8 but there’s very little to choose between f/2.8, f/4, f/5.6 and f/8
  • I can see no diffraction at the smallest apertures
  • No meaningful color fringing at any aperture – that’s the 6-bit coding doing its magic
  • Amazingly, LRc includes a lens correction profile for this optic. It corrects very minor barrel distortion. I expect that you would only want to use it in architectural photos and the like.

By the way, disregard the f-stop data in the EXIF information. The M10, even with a 6-bit coded adapter does a very poor job of estimating the aperture used. (There is no electrical or mechanical link between the lens’s aperture setting and the camera, so Leica estimates the aperture based on the shutter speed and ISO used). Go by the file names, moving the decimal point in the last three digits one place to the left to see the aperture used. So, for example ‘220’ means f/22.

A special lens with the caveat being that you will likely have to buy from Japan on eBay, the source of most listings, and you have to disregard all the nonsense about ‘Ex+++’ and ‘Mint’ sellers there seem to revel in. Any mention of ‘tiny fungus’, ‘minor balsam separation’ or ‘cleaning scratches’ means you should move on. These are 50 years old lenses so it takes diligence to find a clean one. ‘Tiny dusts’ (sic) are usually OK but you want a smoothly rotating focus collar and well defined click stops. Ask before paying to get the seller on the record with eBay. Don’t worry if the listing states ‘No returns’. If you have the seller’s responses on the record and they are clearly fraudulent, eBay will refund you. I know, having been there. I paid $331 for mine with tax and shipping, plus $16 for the correct Fotodiox Pro 6-bit adapter. I explain how to fill in the coding pits for best results here. Add a few pennies for the red indexing dome and $8 for a multi-coated 40mm UV filter (strange size) and my total outlay was $365.

If you can get a good one and do not fancy paying Leica’s ridiculous prices, new or used, the 35mm f/2 Canon LTM, which is very compact on the Leica M body, is recommended. For many, the author included, 35mm is the ‘standard’ lens on the Leica M body for street snappers.

A cheap 21mm finder for the Leica

Cheap and cheerful, it does the job.

For an index of all Leica-related articles click here.

Back in the day when I owned a 21mm f/2.8 Elmarit ASPH (they were affordable three decades ago) I used the genuine Leica 21mm finder. That ran some $250 back then and it was pretty awful, with heavy barrel distortion. Today you can spend $1000 on a new one or $400 on the Zeiss (Cosina) version. Reviews suggest that the Zeiss is every bit as awful but you leave with $600 in your pocketbook.

Used beater Leica finders can be found for $300. Voigtländer used to make a couple of versions – a clunky and ugly plastic one (also sold under the Ricoh label) and a rather elegant metal torpedo type which included frames for a 25mm lens and came with a satin chrome or black finish. It’s so-so by all accounts and used ones crop up occasionally for $150 or so.

Why am I writing this? Well, when I reviewed my recently acquired 21mm f/3.5 Voigtländer VM Color-Skopar lens I suggested I would use live view to chimp the rear LCD screen as a composition aid. Well, forget that. It’s a poor experience. You hold the Leica like an iPhone, looking like a real twit, and the display is seldom bright enough to see much in bright light even when set to maximum brightness. So I shopped around and came across this dirt cheap plastic finder which ran me $26.40 shipped from a US seller on eBay:


At that price it’s not a great risk to try.

It’s not going to win any prizes for looks but, amazingly, despite the high barrel distortion (what else is new?) it delineates the field of view of the 21mm lens accurately side to side and top to bottom. It’s also very bright, has no frame lines, defeated all my efforts to photograph an image through it and weighs just 5 grams/0.2 ounces. And it’s a nice tight fit in the M10’s accessory shoe and will not fall out even if nudged. There is no lock on the foot and none is needed. It’s also tiny and fits nicely in my shoulder bag. Sharpness drops off to the sides of the view but not enough to make composition difficult. It’s also set back too far in the accessory shoe meaning that you get a part of the camera’s top plate in the view, but it’s nothing you cannot work around. See below. And it beats chimping.


Tiny.

The finder protrudes slightly behind the top plate but that’s not an issue in use. Below I take a cutting tool to the foot to mount it further forward, to see less of the top plate of the camera in the view than anything else. Plus the protrusion offends my aesthetic senses.

I have no difficulty using it with eyeglasses and the plastic should preclude scratches to my eyewear.

Try it. You might like it.

Making a better fit:

The stock finder protrudes 1/4″ behind the top plate of the camera:


Stock fitting – 1/4 rear protrusion.


A piece of Scotch tape defines where to cut the base of the mounting shoe.


Diamond tipped cutting wheel on the Dremel tool.


Cut carefully, a bit at a time, from the base and the front,
alternating cuts until the two cuts meet. A small Nicholson file is
used to clean things up.


The improved fit. The finder fits tightly enough that the
1/4″ of the foot which has been removed is not missed.
You still see the camera’s top plate at the bottom of
the view, but less of it.


It’s always something. The devil is in the details.
A small white index line is added to show the shutter speed
selected. The finder obscures the stock index on the top plate.

Automated file import in Lightroom

6-bit coding comes into its own.

For an index of all Leica-related articles click here.

My earlier piece on 6-bit coding of Leica M-mount lenses concluded with the following codes for my four lenses:


Lightroom stores lens correction profiles, which correct for vignetting and distortion, for the first three. Strangely the Tele-Elmarit is missing.

While 6-bit coding corrects for edge color effects in-camera, there is still a need to apply lens corrections in LR or LRc for the best results. Ordinarily this is done manually, frame by frame, a very laborious approach. You have to check the lens maker and then choose the correction profile from a very long list, one frame at a time. Not good.

Here is how to have Lightroom do that automatically when the files are imported. Even if the imported files were made with more than one lens, the correct profile will be applied to each, along with chromatic aberration correction. Here’s the process.

Take a picture with each of your 6-bit coded lenses and import those into LR or LRc. Go into the Develop module on the first image and scroll down to the ‘Lens Corrections’ pane at right. Check the first two boxes as shown below. My examples are specific to the lenses I own. Choose as appropriate for yours.

21mm f/3.5 Voigtländer Color-Skopar Aspherical VM:


  • Click on ‘Make’ and choose ‘Voigtländer’
  • Click on ‘Model’ and choose ‘Voigtländer VM 21mm f/3.5 Color-Skopar Aspherical’ from the long list
  • The correct Adobe profile will appear in the box ‘Profile’
  • Click on the drop-down ‘Default’ above under Setup
  • Click on ‘Save New Lens Profile Defaults’
  • My 21mm Color-Skopar is 6-bit coded as a Leica 21mm f/2.8 Elmarit pre-ASPH, which is what Lightroom sees in the imported file
  • You have now instructed LR that every time it’s importing a file with the 6-bit code for the 21mm f/2.8 Elmarit-M to apply the profile for the 21mm f/3.5 Voigtländer VM Color-Skopar Aspherical lens.

The next time you import a file taken with the Voigtländer lens, the correct correction profile will be applied along with correction of chromatic aberrations.

Now repeat this process for files taken with your other lenses, selecting the appropriate Make and Model each time, then saving the result. Here are my settings for the other three lenses I own with 6-bit coding. Amazingly LRc has corrections for the two Canon lenses, each over 50 years old:

35mm f/2 Canon LTM:


50mm f/1.4 Canon LTM:


90mm f/2.8 Leitz Tele-Elmarit:


In the case of the Tele-Elmarit there is no lens profile stored in LRc so I chose the one for the 90mm f/2.8 Elmarit-M which is very similar. Both lenses are almost distortion free so you really do not have to check the ‘Enable Profile Corrections’ box, but you still want to correct for chromatic aberrations.

Now on your next import these profiles will be applied automatically. The next step is to correct the lens’ names in EXIF data using the tool I describe here which takes little time and allows the serious business of post-processing to commence.

A note on changing lens names:. For my three non-Leitz lenses I like to change the names from the Leica 6-bit coded names to the correct ones – 21mm Voigtländer and 35/50mm Canons. If I apply the EXIF tool to do this any Lens Correction changes made using the above method are erased, and the lens corrections have to be applied anew after the lens name change. To avoid this, instead of using the above method to apply lens corrections, create Develop presets for each lens with the appropriate corrections profile selected, saving them in the Develop modules Preset pane (click the ‘+’ sign’) thus:


Develop presets in LRc’s Develop module

Import the images in the usual way, run the EXIF tool to change lens’ names as required then in the Library module of LRc select the images to which you wish to apply Lens corrections using the Quick Develop panel at the right, thus:


Applying Lens Corrections using Quick Develop

For 100 images this takes a mere 2-3 seconds.

So the order of events is:

  • Import images from the SD/SDHC/SDXC card
  • For non-Leica lenses use the EXIF tool to change lens’ names
  • For non-Leica lenses apply the lens correction profile using the Quick Develop panel in the Library module of LRc after selecting images from each lens in turn using the Metadata panel in the Library module
  • You cannot select multiple images in LRc’s Develop module to apply lens corrections. This workaround lets you do so.
  • You are done