Category Archives: Mac Pro

Mac Pro 2019

Function over form returns.

For an index of all my Mac Pro articles, click here.


Meet the new Mac Pro, same as the old Mac Pro.

Solidly aiming at their right foot, Apple managed to disenfranchise a huge chunk of its professional user base with the idiotic ‘form over function’ Mac Pro 2013 which looked like a trash can. Designed to show off your fingerprints and collect dust and detritus in its open cylindrical center, the ads showed this wonder unconnected to any peripherals, devoid of the clutter of wires that so spoils the work aesthetic of the modern hipster. Of course once you added the required external storage and so on, the thing started looking like the mess it was:


2012 vs. 2013.

The result of this design disaster saw two results. AV and music pros started abandoning the Mac Pro for competent HP workstations running newly reliable versions of Windows. Those trying to stick with the Mac Pro applied a variety of upgrades to this wonderful modular chassis. These included faster CPUs, more and faster memory, fast SSD boot and system drives, and tons of storage, the latter easily accommodated inside the Mac Pro’s big box. The truly masochistic even upgraded wi-fi from 802.11b to 802.11n, masochism being the required mindset in securing those minuscule antenna wires. I have done many and the 50th is no easier than the first. The results were fine, the machine newly speedy and every bit as bog reliable. And in the event something failed, a rare occurrence, the bad part was easily replaced in minutes. The massive 980 watt power supply saw to it that there was always ample current available for all those internals and the truly enormous CPU heatsinks made for the most reliable computing platform ever.

So Apple determined they should throw away their base and the attendant goodwill in place of the joke that is the Trash Can Mac Pro. Of course there was always the overpriced MacBook Pro for ‘power users’, the only problem being that when real computing power was required the notebook would throttle back its CPUs lest they melt under the strain. The MacBook’s cooling was never its forte compared with the myriad fans in the big Mac Pro.

Now, after a 6 year hiatus with an offering that was never updated and had already obsolete graphics when it came to market, Apple has realized the error of its ways and introduced a large, modular Mac Pro chassis. Or is that ‘reintroduced’, for sticking with the original box with later CPUs and memory would have been trivial to do, and that large base of power user advocates would not have been largely lost?

You get faster CPUs with more cores and lots of options, faster memory and vast capacity, and a bill for some $10,000 if you max it out.

But, for heaven’s sake, why did they make that grate so ugly?

Big small storage

2.5″ spinning hard drives.


Dual 2.5″ drive enclosure compared to 4 bay 3.5″ behemoths. As the yellow label discloses, this Mac Pro runs a speedy 3.33GHz CPU.

As my movie collection grows, not helped by the 25GB size of ripped BluRay discs (compared with but 4GB for regular DVDs), so does the need for storage space.

Heretofore I have used Mediasonic 4-bay 3.5″ drive enclosures at $100 for the 4-bay version, and they have performed flawlessly for over 5 years now, loaded with Western Digital Red 4TB hard drives. The drives now retail for $135, which is a lot more than I paid years ago. The blue tape on these which you can just make out in the picture is to blank off the obnoxiously bright flashing LEDs on the fascia.

With traditional spinning disk technology refusing to die, and SSD prices still far too high for bulk storage, the much more compact 2.5″ hard drives have made huge leaps. 4TB capacities are now readily available in the smaller drive size. Seagate makes 4TB 15mm thick drives for $130 and two of these fit an inexpensive $40 enclosure. There are many versions available; just make sure the one you order will accommodate 15mm drives, which are a good deal thicker than the typical notebook drive. So the cost per 4TB of 2.5″ storage figures to $150, compared with $160 for the older tech 3.5″ drives, with great savings in space and, as importantly, far lower power draw. The enclosure of choice used here supports USB3 (though USB2 is perfectly adequate for movies) and comes with both USB2 and USB3 cables, as well as a power supply. I have added USB3 – having run out of USB2 sockets – using an Inateck USB3 PCIe card; the Mac Pro comes with USB2 native ports only and I happened to have a spare card lying around. USB3 is not a requirement here. The price of this card appears to have more than doubled since I bought mine.

A 4TB drive (the second drive is a back-up clone) will store some 160 BluRay disks, so this big little addition should see me happy for another year or two. The cost of storage per movie, along with the backup clone, figures at just $1.88.

Windows on the Mac Pro

Hold your nose.

For an index of all my Mac Pro articles, click here.

I have long used a single CPU 2009 Mac Pro – upgraded by me to a 3.46GHz Xeon 6-core CPU for speed – as a machine for delivering streaming quotes and financial news. It uses Mavericks, OS 10.9 and is reliable as a hammer. However, my application of choice is poorly supported on the OS X side and after many frustrations I decided to install Windows under Bootcamp to allow the better supported Windows variant of the software to be installed and used.

I opted for the 64-bit version of Windows 64 Professional Service Pack 1 as it’s well regarded and stable. Win XP is 32-bit, ancient and buggy, Win Vista is a disaster of epic proportions (can you say El Capitan?) as is Win 8/8.1. Win 10 is too new to trust and appears to add useless interface gloss on a Windows 7 base much as the asinine LaunchPad does nothing for OS X.

I paid all of $58 at Amazon for a plain wrapper version which comes with this dire warning:

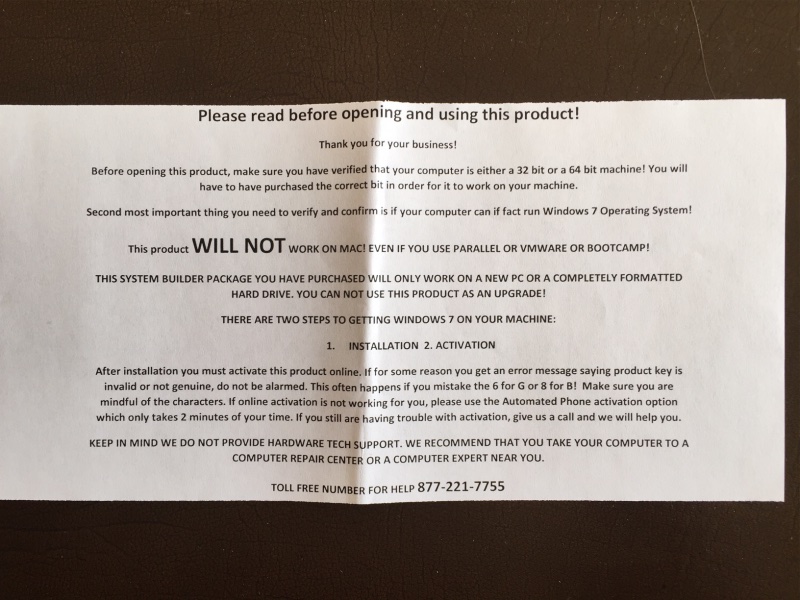
Follow my instructions below and you can disregard the above, saving $50-100 over the fancy box version, and there are no issues with activation, provided you enter the 25 digit activation code correctly.

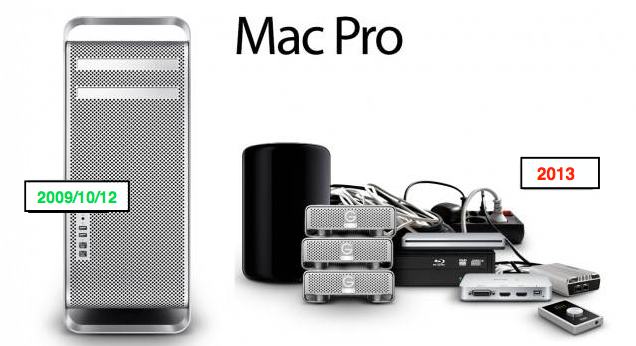
Users of the new Mac Pro (‘trash can’) cannot install Windows 7 using Bootcamp as Apple dropped support for anything earlier than Windows 8. Yet another reason to stick with a well upgraded classic Mac Pro.

I opted for a Bootcamp installation as that allows the OS to run at maximum speed. Bootcamp does not use OS X, addressing Windows 7 natively, much as a PC does. I have no need of the added expense or performance hits from virtualization technology (Parallels, VMWare or VirtualBox). But it’s important to use the right version of BootCamp and this advisory from Apple will allow you to download the right drivers for your Mac which will enable your keyboard, USB devices, wifi, display (if you are lucky), you name it.

You will need either a 16GB USB flash drive or an external USB SSD/HDD. These must be formatted as FAT32 drives using OS X’s Disk Utility; the drivers are copied by Bootcamp to this drive for subsequent installation to your Windows partition on your OS X drive.

Installation:

  • Start up Bootcamp (in the Applications->Utilities folder in OS X) with your USB drive connected to the Mac Pro.
  • Insert the Win7 disk in the Superdrive.
  • Check the Custom Installation (not Win7 Upgrade) box in Bootcamp and tell it to assign 60GB to the Bootcamp/Windows partition.
  • If the installation fails, click the small ‘Format’ icon with the Bootcamp partition highlighted in the scrolling list of drives/partitions. This reformats the selected partition from FAT32 to NTFS (you cannot use OS X’s Disk Utility to do this), which is what Windows needs to permit installation. It takes a second or two to execute.
  • Let the installation proceed – it takes for ever to get off the 0% reading and there is no progress report other than a few blinking dots. Microsoft at its best.

Now here’s the secret sauce.

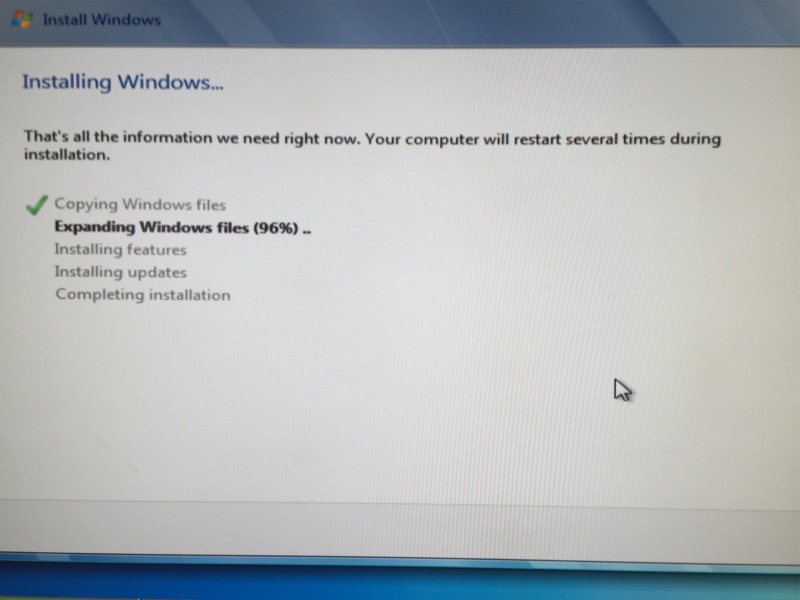
As each step completes a green check mark will appear to its left. When the last row is checked, pump the Eject button on your keyboard and prepare to grab the Win7 disc from the DVD drive before the drawer shuts again. Fail to do this and the automatic restart will leave your machine with a black screen and a blinking white cursor.

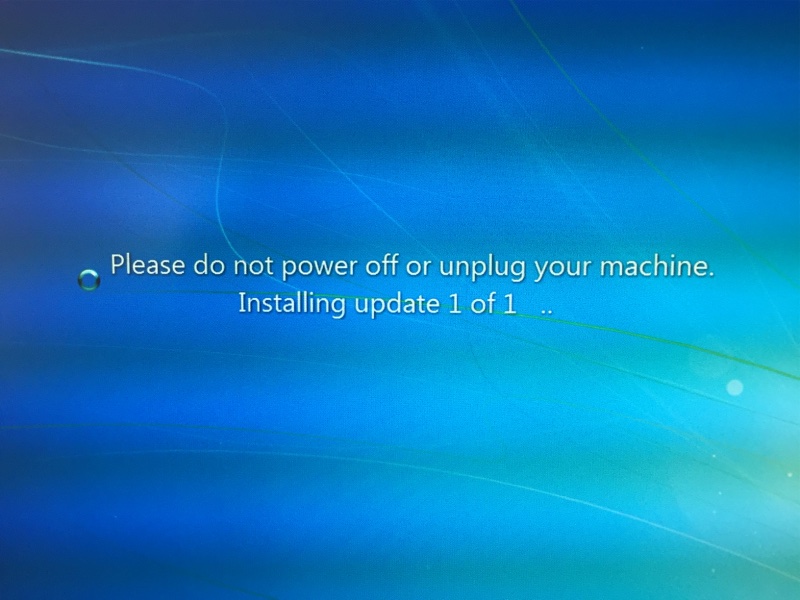
Installation will now proceed and you will see lots of these:

When you are done you will be asked to activate Win7; I had to use a magnifying glass to make out the tiny serial number on the product label. Then it’s likely you may still need to install the proper display driver. The generic one in Win7 was useless for my 30″ Apple Cinema Display so I downloaded the right driver for my EVGA Nvidia GTX680 GPU here. The installation took at least a couple of hours – just leave your machine alone and do something else. There is very little indication of any progress in the Nvidia installer’s progress bar for much of the time.

To enable the numeric keypad on extended keyboards, hit the NumLock key. It works obverse to the way in OS X.

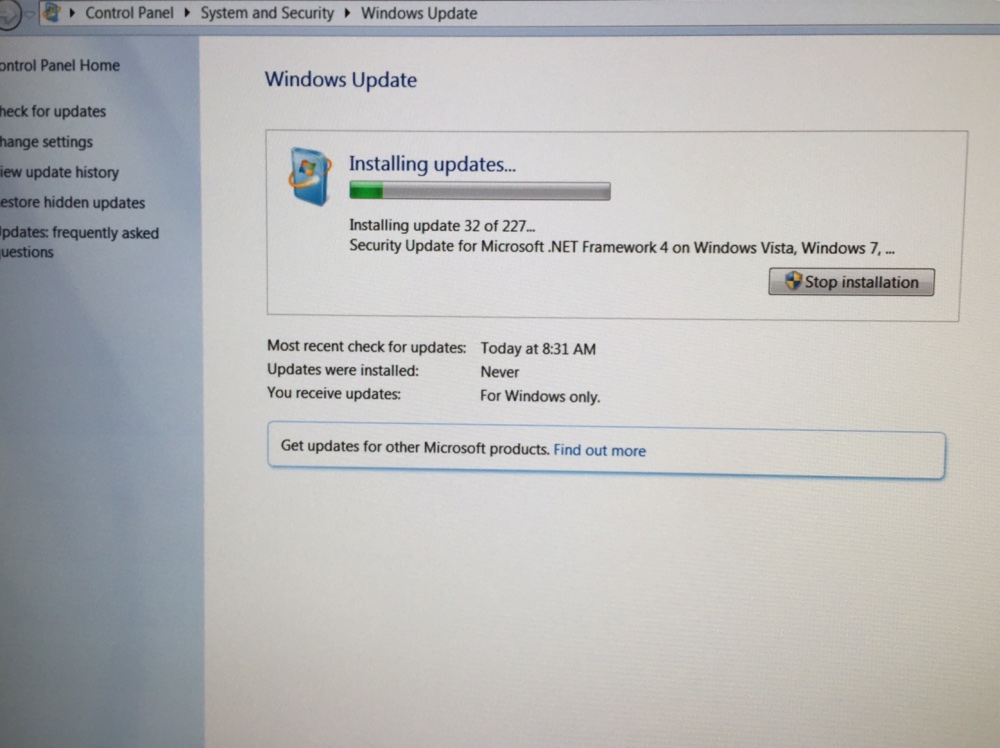
Now install the endless Win7 updates (definitely an overnight task) – as you can see there are many:

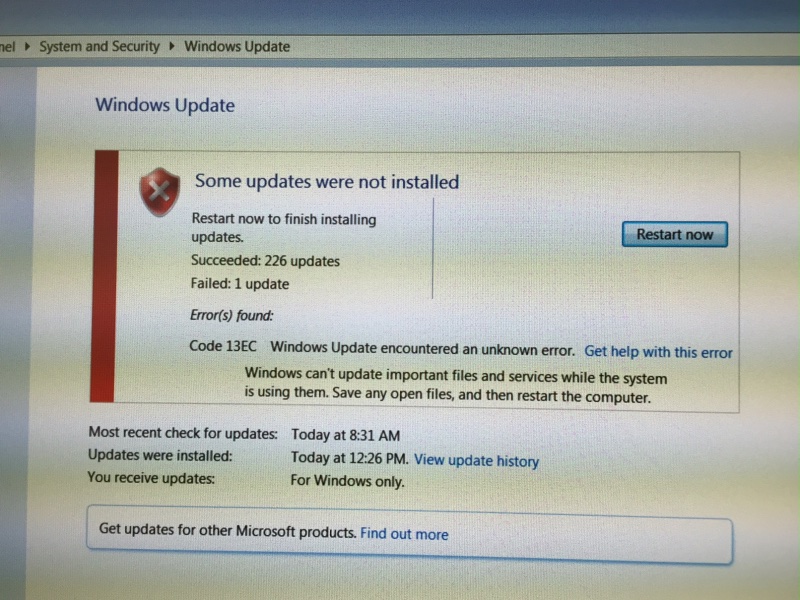
This is Microsoft so some will not take on the first try – try again:

Finally, be sure to install the free Avast virus/security software, the same you are already using on your Mac, right?

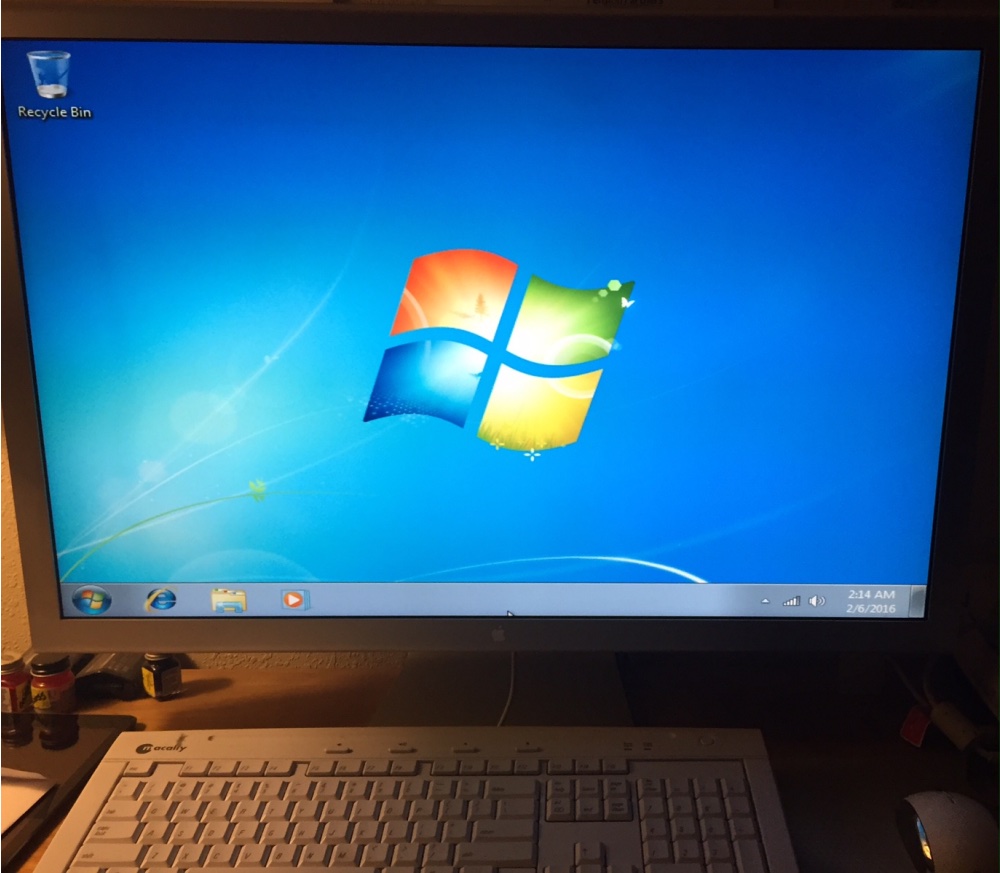
Now you should be happily (?) starting up in Windows – OS X restarts from the last partition it started from; if you want to revert to OS X hold the Option key through the chime and you will be able to elect the startup disk of choice.

Before installing my investment apps I noted that only 2GB of the 60GB I had set aside in the Bootcamp partition remained available. After downloading the free WinDirStat the app disclosed that two huge files existed on the Windows partition – hiberfil.sys and pagefile.sys at 20+GB each. Pagefile.sys is virtual memory swapping which is unnecessary unless you have less than 4GB of RAM, so I turned down the 16GB default to 6GB – right click on Computer in the Start menu->Properties->Advanced system settings->Advanced->Performance Settings->Advanced->Virtual Memory Change->5000-6000MB. Phew! That recovered over 10GB. The other file stores the Sleep image and is best left alone – it means that any mouse movement after sleep returns you to your previous place.


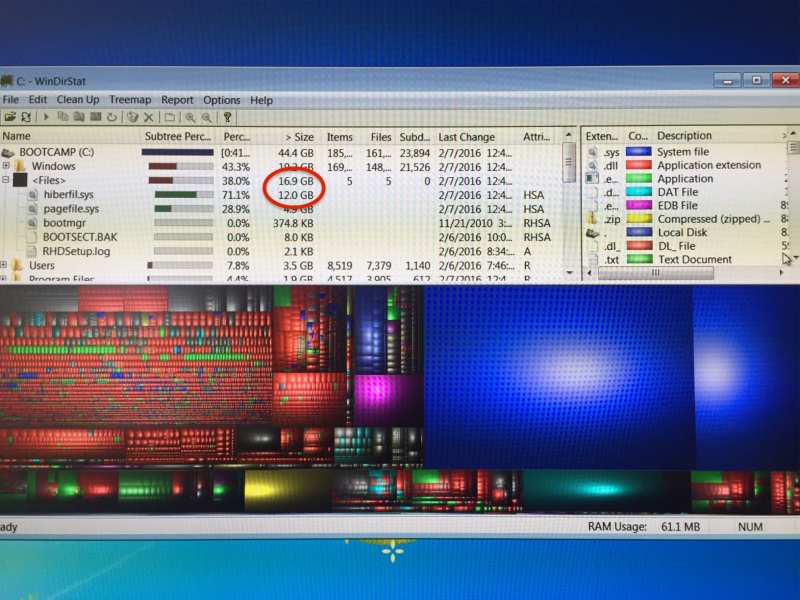
WinDirStat shows a tamed pagefile.sys, freeing up disk space.

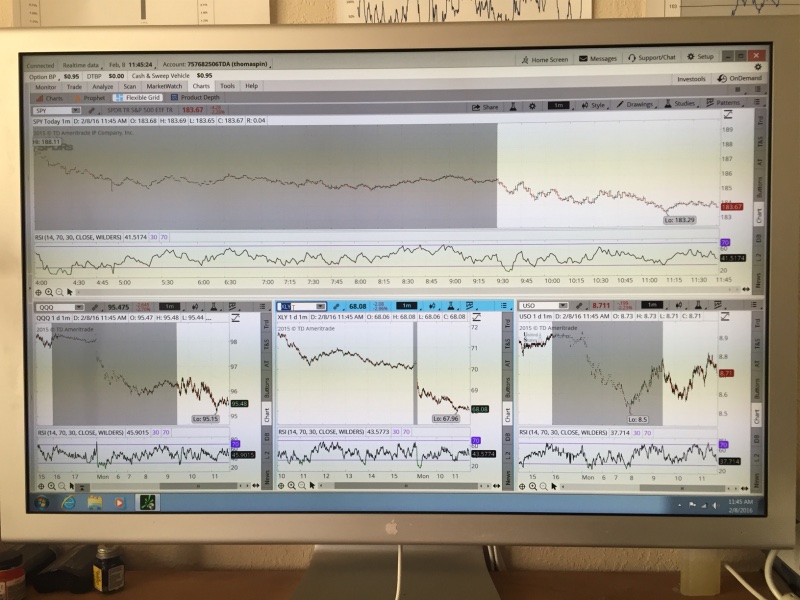
Now I could install my investment app, and all looks well:

Time to do all of this? Maybe 2 hours at the keyboard and 5-6 hours of the Mac Pro grinding away while files were downloaded.

As for the user interface, everything Steve said here about MSFT 20 years ago remains true. A tasteless product for a tasteless consumer. “Microsoft is McDonalds”. Too bad I had to install it.

Recent Nvidia cards in the Mac Pro

Catch 22 lives.

For an index of all my Mac Pro articles, click here.

To apply for a job, you need to have a few years of experience. But in order to gain experience, you need to get a job first.

Like logic applies to the dilemma of installing the latest Nvidia GPU drivers in your Mac Pro.

Here’s the background. The GTX680 GPU came from EVGA and was made for the PC, along with like GPUs from many makers including Nvidia, Zotac, PNY, Gigabyte – they all worked well. Typical port configuration was one DVI-D, one DVI-I, (both DVI ports limited to 2560 x 1200), one DisplayPort (4k and down) and one HDMI 1.2 (limited to 1080p).

The last Nvidia card sold as ‘Mac compatible’ was the EVGA special version of the GTX680. That one showed the full Apple boot screen on cold start.

Thus you had three choices when buying a GTX680:

  • Buy the EVGA Apple certified one and pay through the nose
  • Buy a PC version, save $150, and get no splash screen during a cold start
  • Flash the card’s ROM or have it done for you to restore the boot screen

Who needs a boot screen? Only those poor unfortunates who insist on running Windows under BootCamp. You install OS X on one volume of a drive, Windows on another then when cold starting, hold the Option key on the keyboard and the spinning cog (through OS Mountain Lion) or progress bar (Mavericks and later) changes to a display of all bootable drives. You elect the BootCamp drive and proceed in your misery. Want to revert to sanity? Reboot holding the Option key and select an OS X volume as the one to start from.

Users who merely need to choose between different OS X boot volumes or drives can do so in System Preferences->Startup Drive. Rebooting will make the volume or drive chosen the new boot drive.

The snag is that if you boot into the Windows volume, you must have a working boot screen to see other volumes if wanting to revert to OS X (or Linux or Ubuntu or whatever). If you can’t see the boot screen because your GTX680 is an unflashed PC variant you cannot get back into the OS X volume.

Things get worse. After the GTX680 was discontinued Apple ceased marketing ‘Apple certified’ Nvidia cards as they stopped making the classic Mac Pro at the same time, so there was no need in their cynical eyes to allow classic Mac Pro users to stay current with the rapidly evolving field of ever faster and more capable GPUs.

With the Nvidia GTX7xx generation you could still use the native drivers which came with OS X but you could not get a boot screen unless the card was flashed.

Then, with the current, and exceptionally capable GTX9xx generation of GPUs, not only did you lose the boot screen, you also needed to use Nvidia’s own drivers to make the card work as the GTX6xx/7xx ones were no longer compatible. To get there, while still using an older card, you would download the Nvidia drivers, which install as a preference pane, and then go into System Preferences->Nvidia and choose the Nvidia driver in preference to the OS X one. Reboot and your old card would continue working fine. Now power down, swap to the latest and greatest GTX960/970/980 and all was well.

Here’s where the Catch 22 comes in. Apple decides to release an ‘improved’ OS X – minor or major release. Chances are it breaks the driver so after a few days, Nvidia releases the upgraded driver. They are very good about this as it means continued sales of their latest cards to the Mac Pro set. But you cannot wait or, worse, have set your Mac Pro for automatic updates of software. You come in in the morning , OS X El Crapitan has been installed unknown to you overnight and you are welcomed with a black screen, as the OS is no longer compatible with the previous generation Nvidia driver on your boot drive.

There are several ways to exit this dilemma:

  • Keep an old Nvidia GT120 card installed if you can spare a PCIe slot – any slot. They can be found for $50-75, typically come with one DVI and one mDP port, include a boot screen and 512MB of vRAM, and will even drive the excellent 30″, 2560 x 1200 Apple Cinema Display. Mine does. Not much use for video but it fixes the problem. It’s single width, needs no auxiliary power cable and uses very little power. It’s also dead silent. You transplant your DVI or mDP monitor cable to the GT120, the display comes to life, you update to the latest Nvidia driver, switch the data cable once more and all is well.
  • Unplug your GTX9xx card and replace it with an older card which delivers a boot screen and allows you to update drivers. A real pain but it gets you there if you kept that old card handy.
  • Boot from a backup drive which has the older working OS on it, update drivers and clone over to the regular boot drive. This will leave you on the older OS but at least you will be functional.
  • Do it the smart way. Get hold of a Mac laptop, and set up your Mac Pro for Screen Sharing in System Preferences->Screen sharing thus:


    This is how you want your Mac Pro – not your laptop – to look.

  • Now go into your Mac laptop’s Finder and you will see your Mac Pro listed in the left hand column – red oval (don’t ask me why it has that cryptic description):

  • Click on ‘Share Screen’ – green oval. You will have to login using your Mac Pro’s username and password. Now you can see the Mac Pro’s display feed regardless of whether the Mac Pro’s screen is black or working properly. Download the latest Nvidia driver, install it, turn off Screen Sharing on the laptop, reboot the Mac Pro and you are up and running again.

OS X – the new Windows

QC out the window.

For an index of all my Mac Pro articles, click here.

There was only one reason I dumped Windows in 2002 for OS X (10.2 – Jaguar, but not like the car at all as regards reliability). The value of my time. The instability of Windows and the constant blue screens had long ceased being a joke, becoming a massive time sink, and I moved on.

And this proved a sage move all the way through Snow Leopard – 10.6 in 2009 – which was the last version to include Apple’s superb Rosetta emulator. Apple had switched from power hungry IBM G3/4/5 PPC CPUs to Intel’s more capable hardware in the interim and had crafted Rosetta before the switch, to permit seamless use of PPC apps with the Intel CPUs. Rosetta was a masterpiece of coding, completely invisible to the user and never failed me, remaining essential to this day if you want to use the online printer management utility for the no less superb HP 90/130 wide carriage dye printers, as HP never upgraded that utility to work with Intel CPUs.

Then things started going off the rails. Sheer inanities like Launchpad (added in Lion – 10.7) and extremely buggy iMessage support (10.8 – Mountain Lion) only detracted from the user experience. Library directories started disappearing unless you knew where to look and ‘Save As’ in common applications had disappeared from the drop-down menus and required you to remember to hit the Option key to enable these. What was Apple thinking?

Mavericks (10.9) added little, mercifully, other than bug clean up but with Yosemite the ADD-afflicted programming team in Cupertino was back at it, adopting Jony Ive’s truly awful ‘flat’ icons for everything and adding Handoff so that you could take phone calls on your computer – one of the most irritating intrusions in any professional’s work day. Steve must be spinning in his grave. But Yosemite added one more borderline criminal ‘feature’, a switch in fan management from keeping it cool to keeping it quiet and hang longevity. You can see my test data here. Suffice it say that if you are involved in heavy duty audio or video processing that an aftermarket fan management utility is de riguer if you use Yosemite.

Then along came El Capitan. Clearly the OS X crew is under daily threat of unemployment if they do not come up with something new weekly, and they managed to make El Capitan (10.11) the worst OS X release ever in the process.


El Crapitan. Pull the other leg – it has bells on for the festive season.

Most of my professional customers use RAID – generally RAID0 – which allows two HDDs or two SSDs to be paired, doubling the i/o channel width and thus doubling speed. The result is near-Thunderbolt speeds at non-Thunderbolt prices, all effortlessly achieved though a few keystrokes in Disk Utility. Only there’s one snag in El Capitan – Disk Utility no longer supports this feature. So you have to go into Terminal with its unintelligible ‘language’ and try things there. Good luck with that.


Utter mendacity from Apple – and it’s ‘free’ only if your time is worthless.

Want to repair System Permissions in Disk Utility? No chance. It’s been deleted. Again, what is Apple thinking of, dumbing down the OS in this manner?

But there’s another great new ‘feature’ in El Capitan which, three months after introduction, Apple seems unwilling/uncaring/unable to fix. Ask any user and you will hear that he only needs three things from an OS – stable Mail, robust internet access and support for his aftermarket apps which does not break with every iteration of the OS. Well, Apple has managed to impugn all three principles. I’ll dwell on Mail.

I had stupidly set System Preferences in my 2015 MacBook Air to automatically update the OS, having become sick and tired of the constant nagging from the OS to do so. The other day my MBA was running red hot at the pace of an Irishman at closing time leaving his local boozer. Hopping into Activity Monitor I saw that Mail was using 222% of the CPU. Yup, the ADD set at Apple cannot even compute percentages, let alone make a stable OS. As a result Mail, which has become more problematic with every OS X release, was slowing to a crawl, reboots fixed nothing, old deleted drafts and messages constantly reappeared and the whole thing was unusable. I installed a fresh El Capitan which proved as effective as rearranging the deck chairs on the Titanic and finally resorted to erasing the Mail setup for iCloud completely and resetting it up. A two hour process with scant feedback other than that a barely readable message that Mail was recovering “30,947 emails”, which gave me lots of confidence. Check the chat boards and you will see this is a common problem.


User feedback, the Apple way.

I confess that for the first time since 2002 I have started thinking of switching back to Windows, which I thought I would never write. Meanwhile I will revert my MBA to Yosemite (sadly, I cannot go to Mavericks – or better still Snow Leopard – as Apple’s mendacity prevents that) and suggest you do too.

I realize that the money is in mobile, Apple, but lots of your mobile users – maybe a majority? – use Mac hardware. Enough already with the OS – just leave it alone.

My Mac Pros remain happy and as reliable as a hammer on Mavericks and Yosemite (with the requisite fan management utility for the latter) and that is not likely to change any time soon as they will never see El Capitan.

Update 24 hours later:

See what I mean? This after doing the reinstall and finding my reproductive organs were being yet again fricassée‘d by the OS X team at Apple:

It’s Yosemite for me. The instructions appear here. You cannot just connect an external drive with a version of Yosemite and clone it over – Apple in its infinite arrogance really does not want you reverting to an earlier OS. Follow the instructions in the link and your MBA (or whatever) will revert to the OS it shipped with, Yosemite in my case. Sadly I cannot go back any earlier, but anything beats El Crap.


Sanity restored with Mail activity back to zero again, and everything cool once more.

Stop the nagging:

To turn off Apple’s thoroughly obnoxious, disruptive and dangerous (you click ‘Upgrade’ by accident) periodic nagging to ‘upgrade’ to Yosemite, go to the AppStore app, click on ‘Upgrades’ at the top of the screen, select Yosemite upgrade, then right click the circled icon below:


Right-click the circled icon for peace.