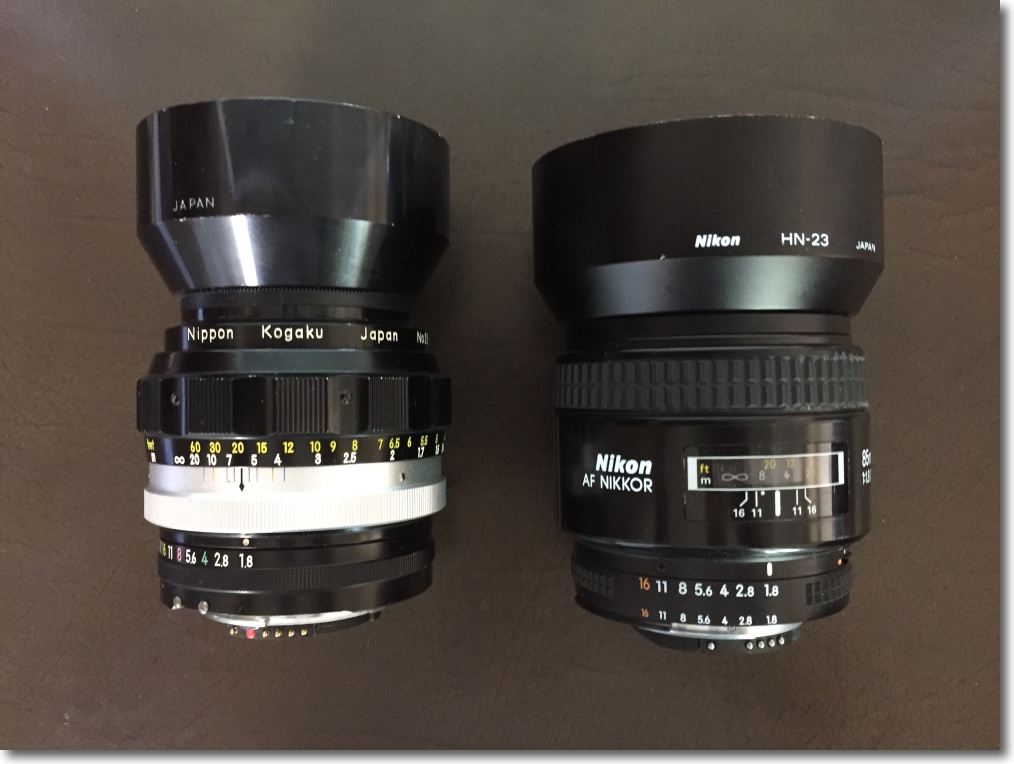
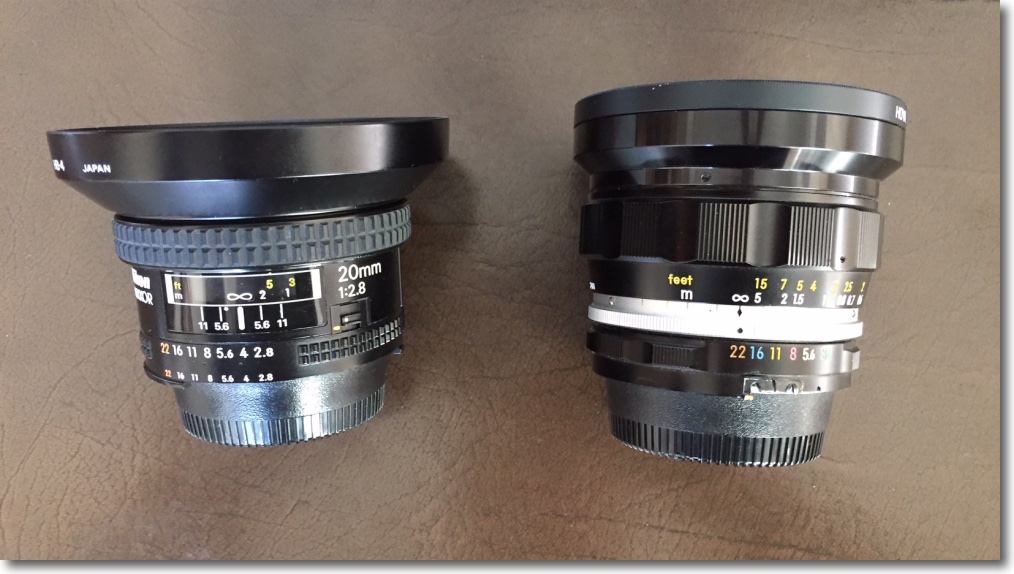
Old and recent.
Nikon has been making 80-200 zooms for the F mount camera bodies since 1969. Indeed, my mint example of the 80-200 f/4.5 Ai manual focus, single ring (meaning trombone zooming) lens is oft credited with putting this focal length on the map, for its performance is outstanding.
I like separate aperture rings on my lenses, because I grew up supporting the lens with my left hand and holding the camera body in the right. Once the latest G Zooms with silent internal focus motors came along, this opportunity was lost for such optics have no aperture ring. Apertures are changed with a thumbwheel on the camera’s body. Not for me.
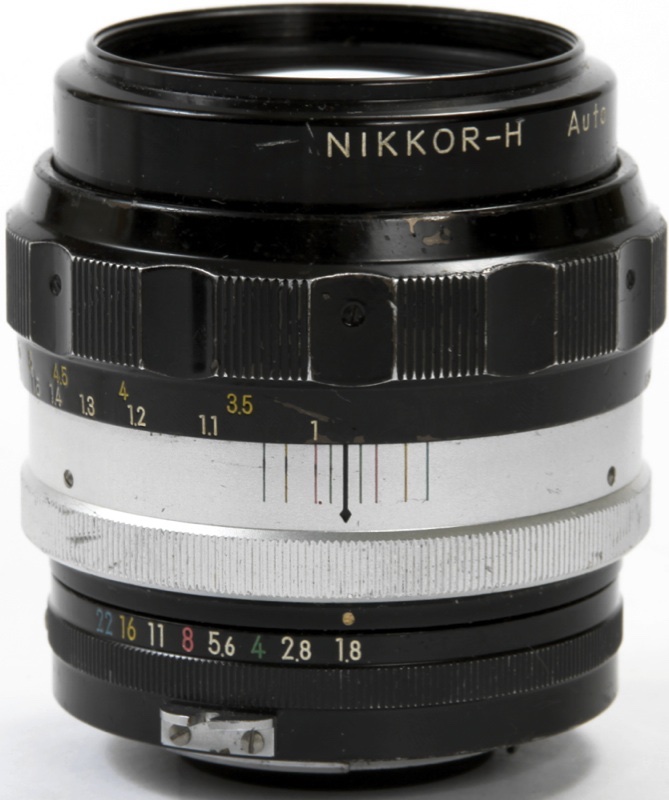
With long zooms autofocus is nice to have and the penultimate version of the 80-200 Nikon Zoom, which has an f/2.8 maximum aperture, has its own aperture ring and uses the ‘screwdriver’ type focus mechanism found on the non-amateur grade bodies. A small drive in the bayonet mount (a Bowden cable, for techies) engages a like receptacle in the lens to confer AF. As with the f/4.5 MF version, focusing is internal and the length of the lens remains unchanged as it is zoomed. In the AF lens two rings are used – one for focus, the other for zooming. I’m happy with either engineering approach, though it has to be said that the trombone zooms tend to get sloppy with age, although optical quality remains unaffected.
Having recently acquired the AF version I though it would be interesting to compare the two.
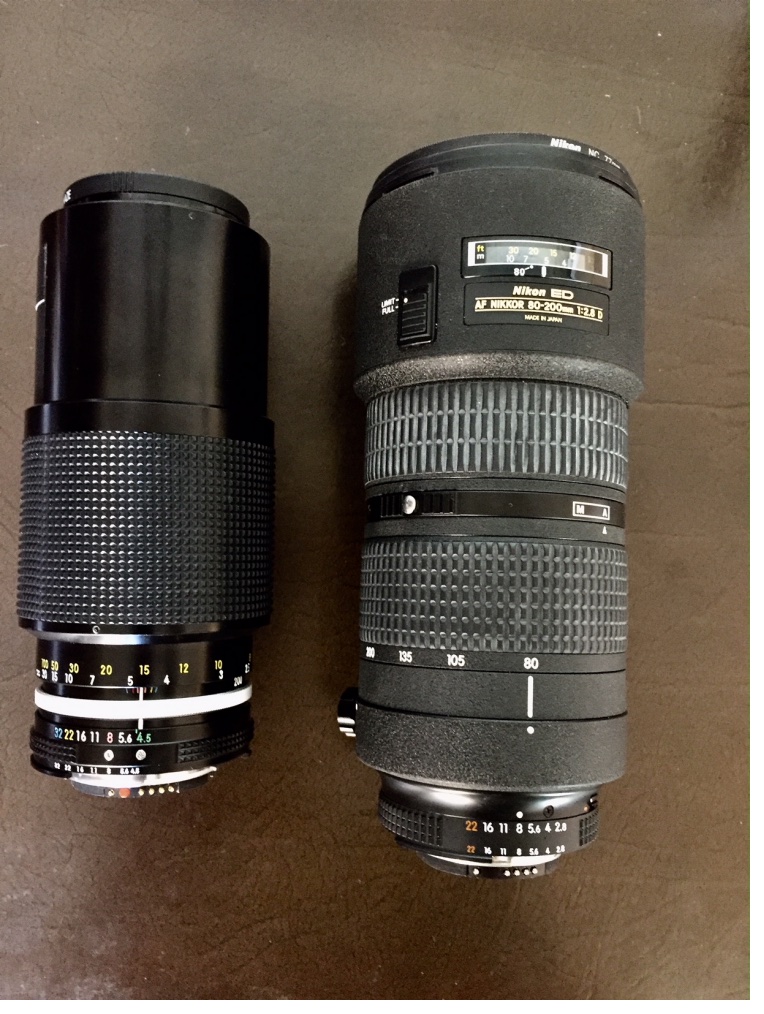
The AF lens is larger and heavier – 46 vs. 27 ounces. It is also twice as fast.
Here you can see the mechanical AF coupling in the newer lens:

Male end on camera bayonet, female on the lens.
The AF speed is decent, not blistering. Fine for my purposes but if live action is your thing you may want to spend (a lot) more on a current G series 70-200mm Zoom which also adds Vibration Reduction and will run you $2-3,000 new, depending on the VR version. Alternatively, if you like aperture rings, seek out the AF-S version of the 80-200mm for more than the AF-D, which uses an internal silent motor and is hard to find on the used market. This was the last version of the 80-200 Nikon made, which is why I referred to the screwdriver versions as ‘penultimate’ above. However, the only version of the AF 80-200 which remains available new is the f/2.8 ED IF screwdriver version illustrated here, and it retails for a hefty $1,100. Mine, made in November 2015 cost me $476 in absolutely mint condition with original hood, UV filter and caps. A tremendous bargain for an optic built to incredibly high standards with an all metal, tough, crinkle finish barrel and wonderfully smooth controls. The two switches on the lens control AF or MF, as well as the focus limit when you want to reduce AF ‘hunting’ and know that you will be focusing within a narrow range of distances.
Why does Nikon continue marketing this lens? It has the slower screwdriver focus than the AF-S which replaced it, yet that replacement is discontinued. I would like to tell myself that too many photographers insisted Nikon keep this one in the line but suspect that the reality is that they simply made too many and are selling off new old stock.
Whatever the reasons, poor performance is not amongst them for the lens is an optical stunner.
My MF f/4.5 lens invokes my related lens correction profile as I have fitted the lens with a CPU, so LR knows which profile to use. You can download it from that link and I recently re-generated it, making for even better results. The profile for the much newer AF lens comes bundled with LR and is also automatically invoked in you turn lens corrections ‘on’ in the Develop module. Both profiles correct for mild vignetting at the two largest apertures and for modest barrel distortion.
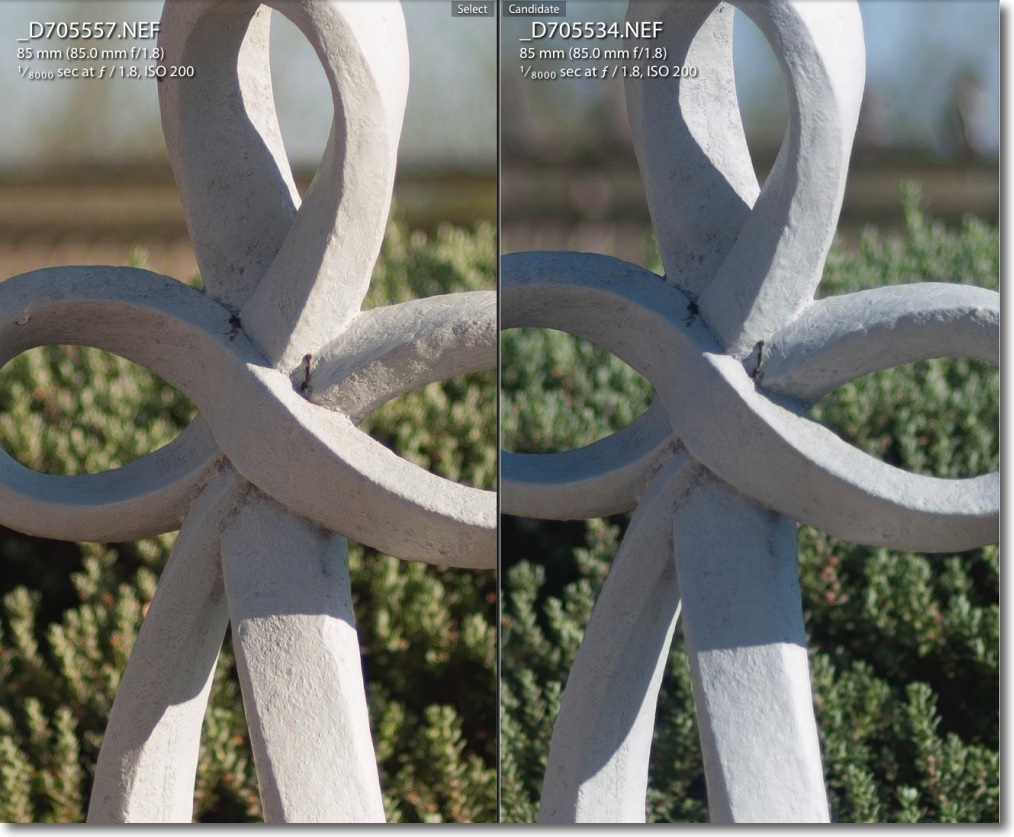
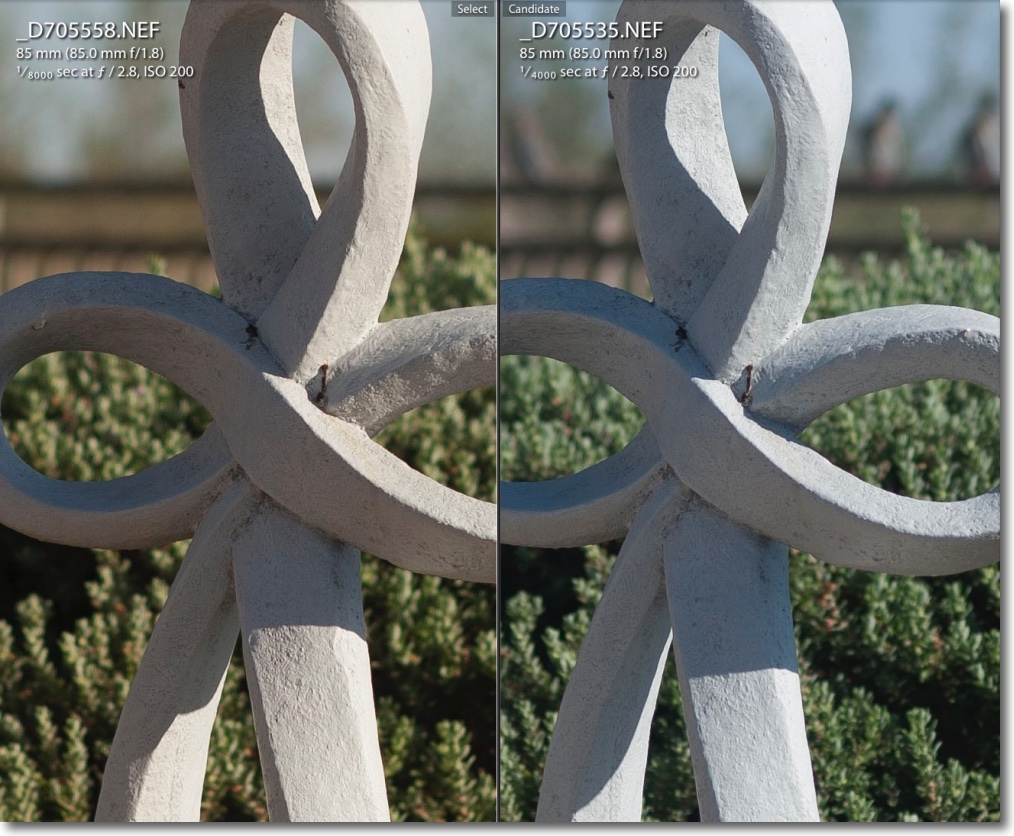
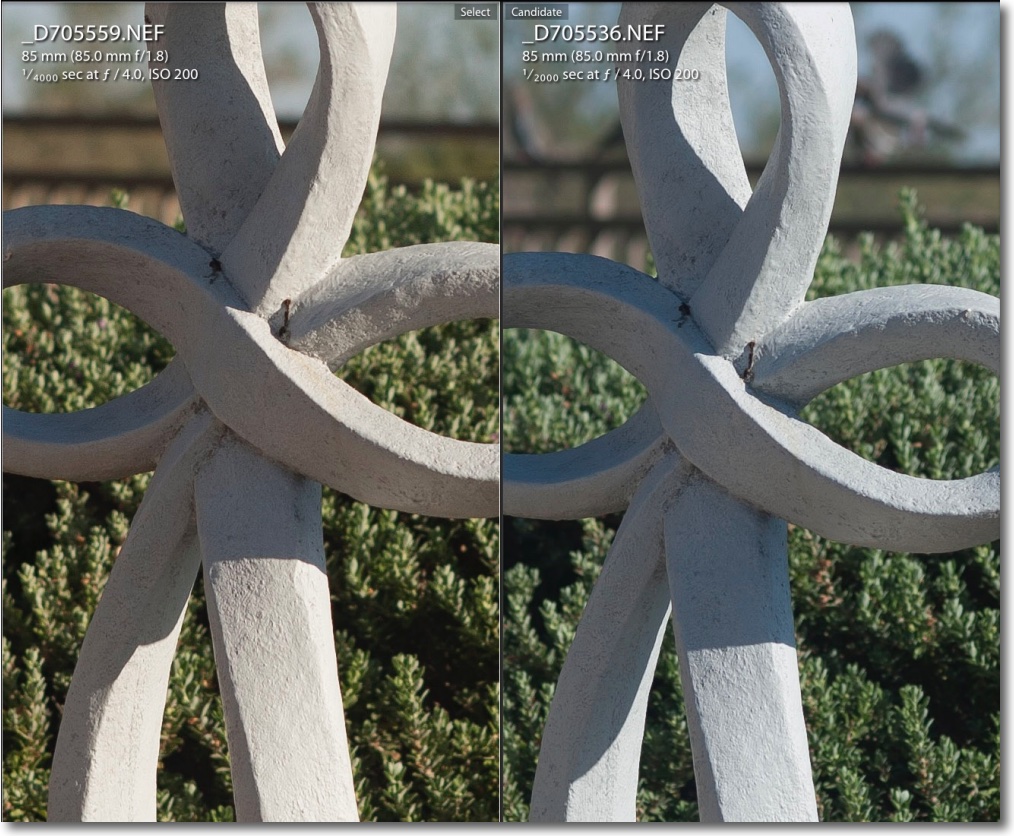
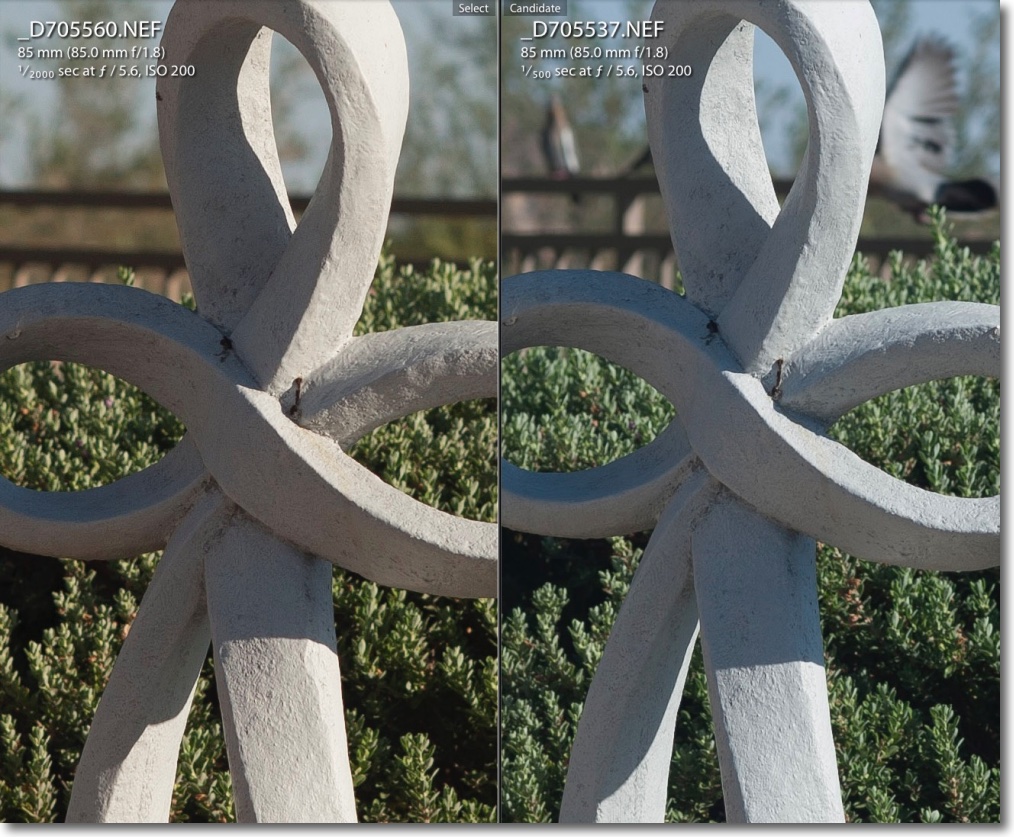
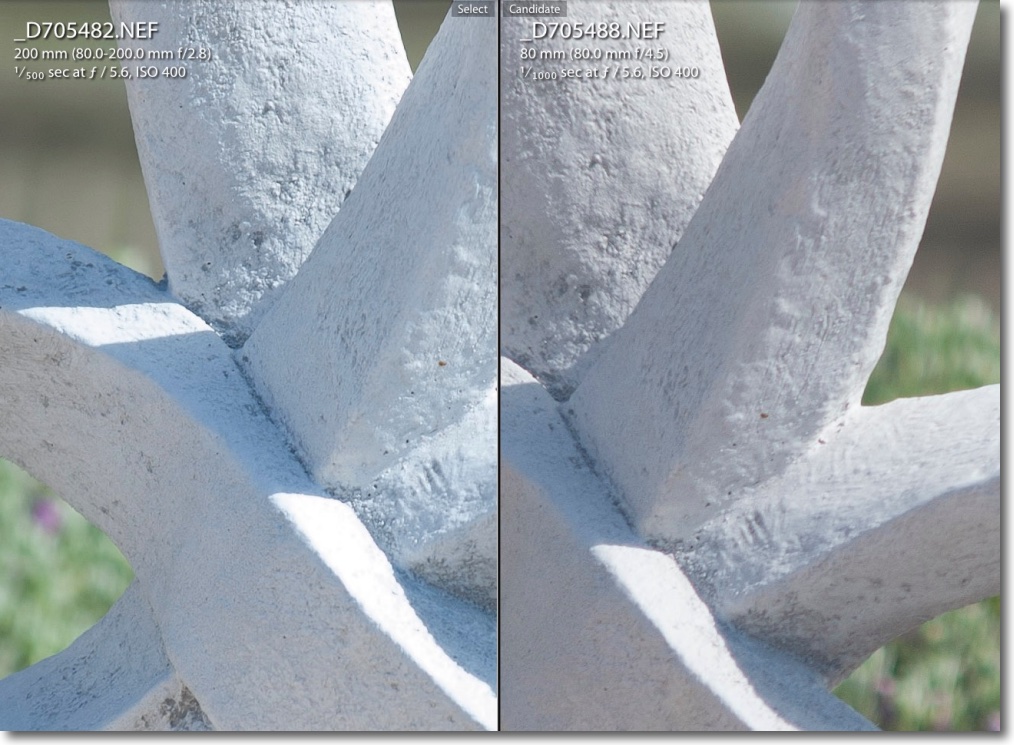
I illustrate 40x enlargements (Nikon D700) at the common apertures of the f/2.8 AF. The f/4.5 MF (labeled ’80mm’, on the right), and the new lens is better – meaning better resolution and contrast – in each case, though the differences are small by f/8, which is another way of saying that the MF lens, which can be had for very little, is very good indeed.
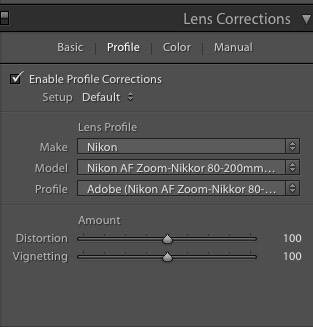
Adobe lens correction profile in LR for the f/2.8 ED IF lens.
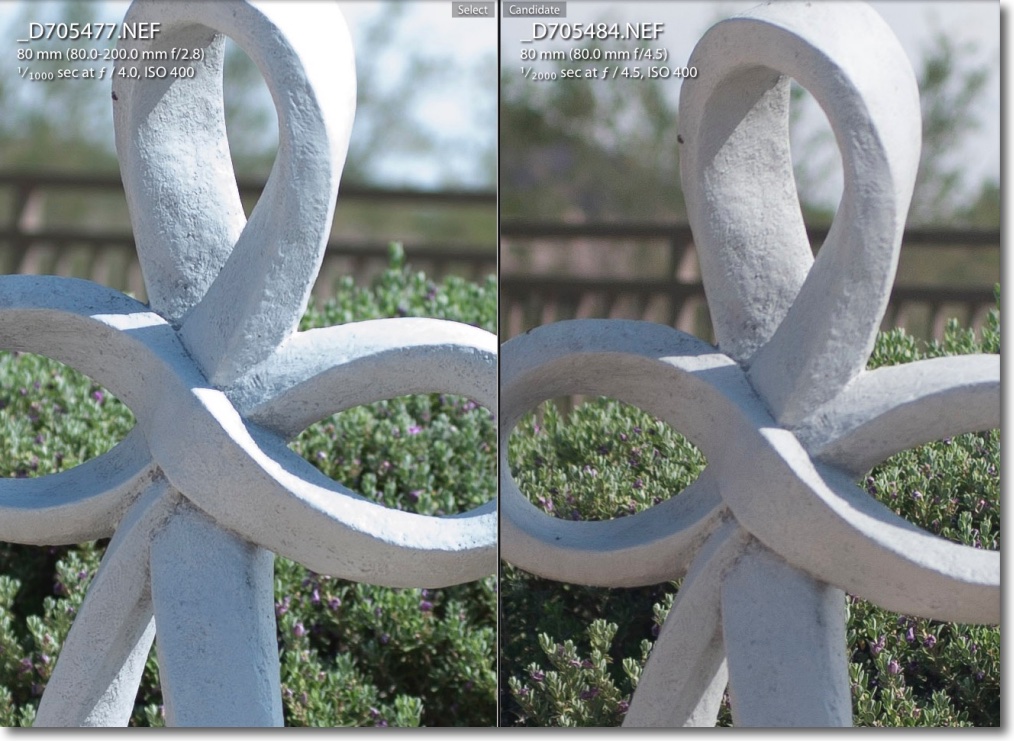
At 80mm f/4 and f/4.5
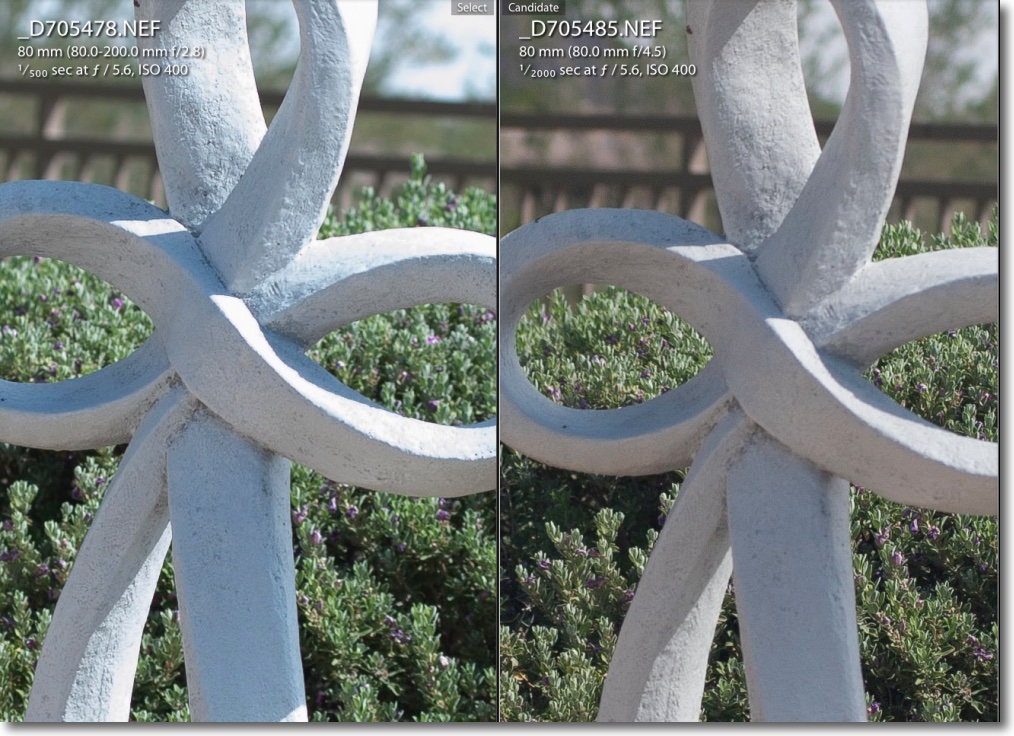
At 80mm f/5.6.
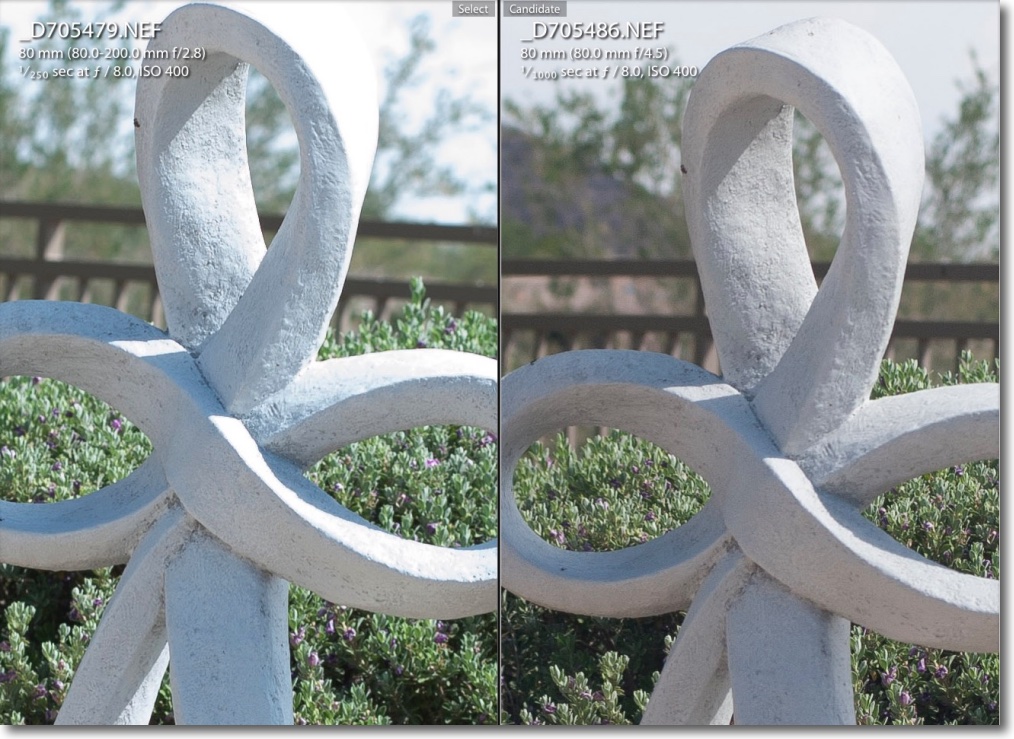
At 80mm f/8.
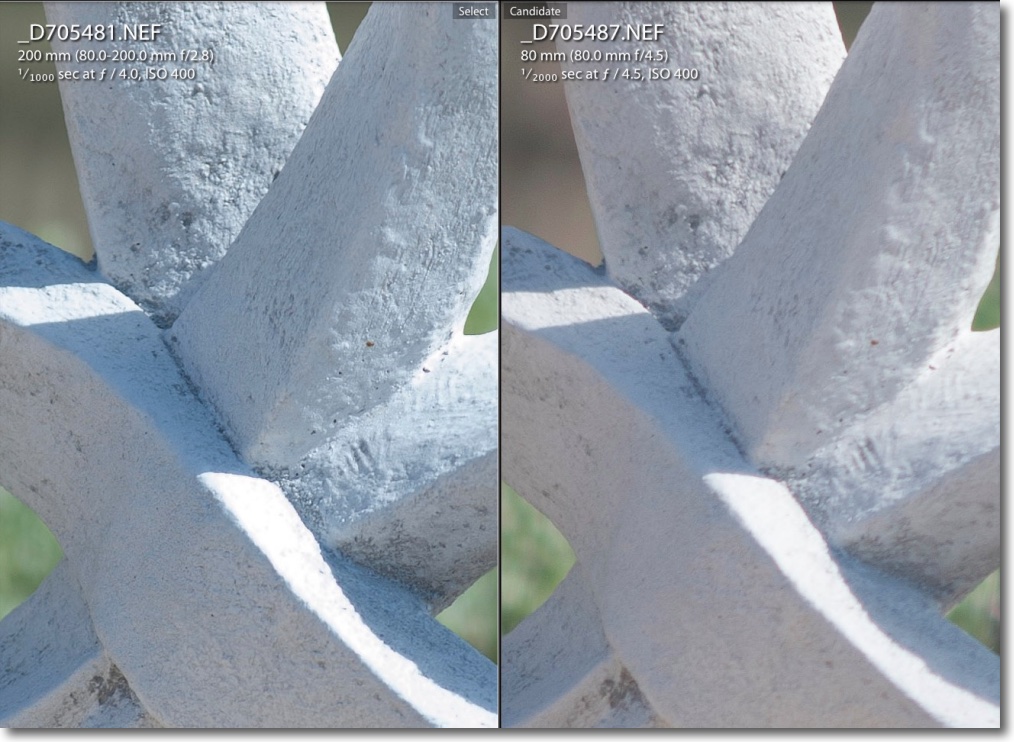
At 200mm f/4 and f/4.5.
At 200mm f/5.6.
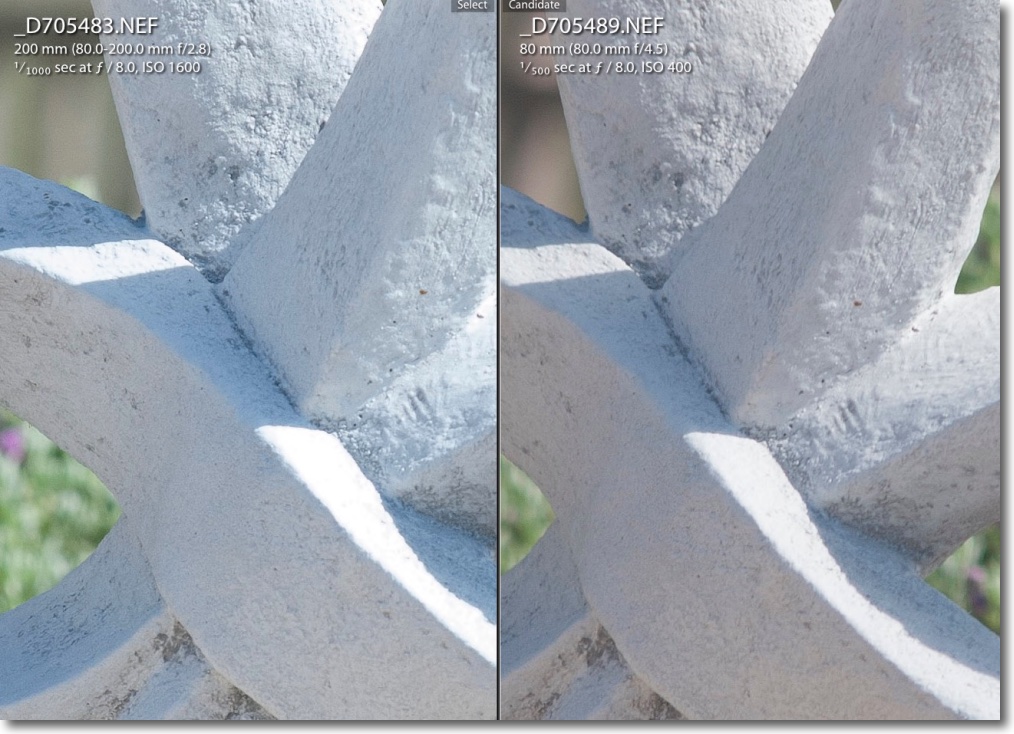
At 200mm f/8.
How much better is the AF lens in the center? 1-2 stops better and ultimately it resolves finer detail than the MF lens at any aperture. The older MF lens is also a tad warmer when it comes to color rendering, and of lower contrast, clearly visible above.
The story with corner and edge performance is similar and I have not included test images here for the sake of brevity. The issue with the older lens is that it has far greater curvature of field, so objects behind the point of focus in the corner are rendered very sharp, but that’s of little use in practice.
The AF lens goes 1.5 stops faster fully open, so here are images at f/2.8 at 80 and 200mm:
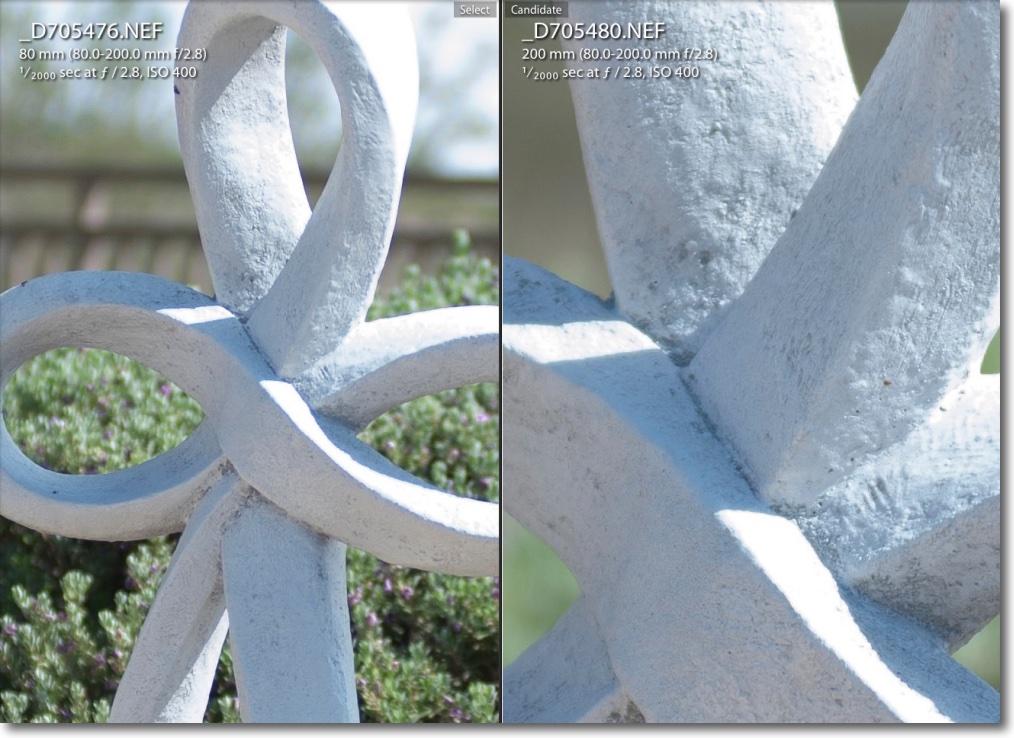
AF lens at f/2.8 at 80mm and 200mm.
Bearing in mind that these are 40x enlargements, the results are perfectly usable at full aperture, though it’s clear the lens is resolving less detail than at f/4 and smaller.
And if you think 46 ounces is heavy, check out these data:
- 80-200 f/2.8 AF ED IF with screwdriver focus motor and aperture ring – 46 ounces – the lens profiled here, and still available. Rotating, non-removable tripod foot.
- 80-200 f/2.8 AF-S ED IF with internal focus motor and aperture ring – 56 ounces – discontinued. Rotating, removable tripod foot.
- 70-200 F/2.8 G ED IF VR with internal focus motor, no aperture ring and Vibration Reduction – 52 ounces – discontinued.
- 70-200 F/2.8 G ED IF VR II with internal focus motor, no aperture ring and improved Vibration Reduction – 54 ounces – current, $2,300.
- 70-200 F/2.8 E FL ED VR with internal focus motor, no aperture ring, VR, improved optics sandlots of buttons – 50 ounces – current, $2,800.
- 70-200 f/4 G ED IF VR with internal focus motor, no aperture ring and Vibration Reduction – 30 ounces, one stop slower – current, $1,400.
Looking at the results above and at the prices it’s clear that a good, used 80-200 f/2.8 AF ED IF Zoom Nikkor with screwdriver focus motor and aperture ring is an outstanding lens optically and a bargain financially. It lacks VR but its weight will conquer all but the worst cases of the DTs.
And if that’s outside your budget and MF works for you, the older f/4.5 MF lens is highly recommended for both your pocket book and less back pain! Just be sure to get the last version, distinguished by the rectangular rear baffle.