Category Archives: Hardware

Stuff

TuneIn Radio

A superb app.

This piece has nothing to do with photography but when something as well engineered and executed as the TuneIn Radio app for iPad/iPod/iPhone comes along, it’s hard to resist writing about it.

To those despairing of the culturally arid desert that is American Radio, this app is a must. And it says something about globalization when I tell you that a British Americanophile photographer friend recommended it to this Francophile California UK expatriate!

TuneIn Radio allows you to dial in seemingly any Internet Radio station on the planet (I have yet to check for Pyongyang Hits, and don’t hold your breath on that one) using point and touch maps, and your choices are easily saved as bookmarks. If you get stuttering then it’s a second’s work to switch to a lower bit rate stream using the app’s controls. The app is iOS 4 capable, meaning you can continue to listen while doing other things on your iDevice.

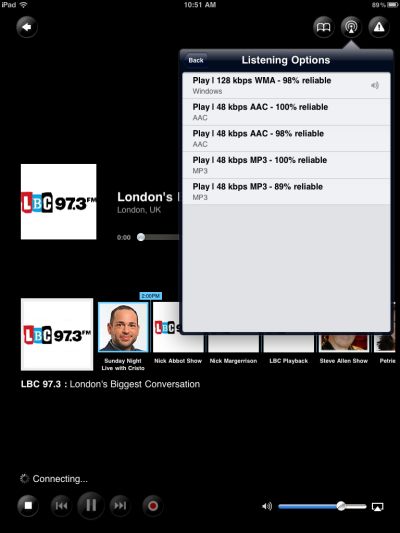
Typical streaming options for a radio station.

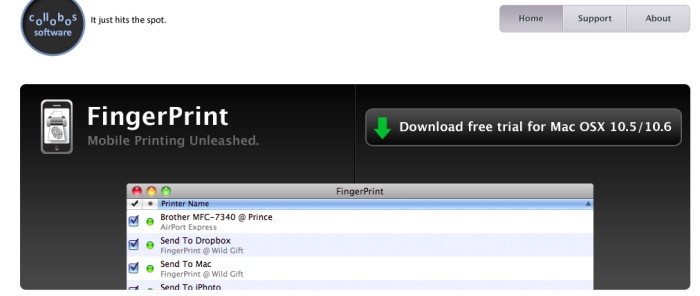
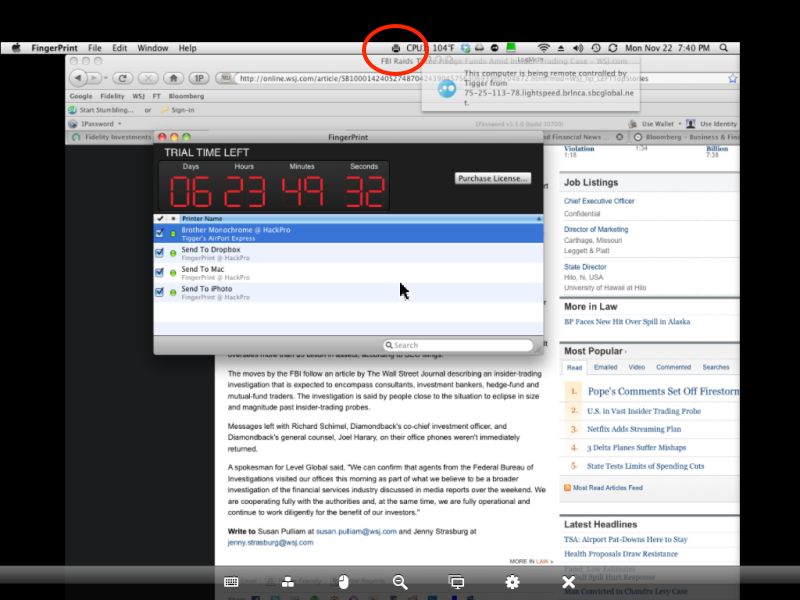
I decided to go one step further in distributing the iPad’s (and TuneIn’s) sound output around the home. With yesterday being the annual orgy of shopping which kicks off America’s season of gluttony, I did my bit for the side, got on the old push bike (a British Raleigh, of course) and toddled off to the local Apple Store, sadly far too close for fiscal comfort. They had the Airport Express for sale for $88 and moments later I was home installing it, my second. The first acts as a wifi extender in my office, sourcing its signal from the Airport Extreme router in another room. It also allows me to connect my Brother 2170W printer as a Bonjour printer for use as a wireless printer for any number of computers and iDevices, the latter using FingerPrint which does for iDevices what iOS4 has yet to provide – printing. The 2170W does have built-in native wifi but it stoutly refuses to work with OS Snow Leopard, so the AEX does the trick.

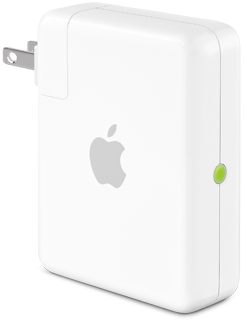
The AEX. The teal light is not that easy to get to ….

For reasons probably only known to Steve Jobs, every Airport Express (AEX) I have owned has been an absolute pig to set up. It must be made by Microsoft. Whereas the Airport Extreme is pretty much plug and play, the AEX is a horror story. You fire up the Airport Utility and hope and pray the new device shows up. Then you hope its configuration will be recognized. Then you learn there are no fewer than three reset modes on the gadget (that should tell you something) and next thing you know you are unbending a paperclip to activate the recessed reset microswitch. After four or five goes the thing comes around and eventually changes its amber trouble light to a teal ‘all is good’ one. At that point I plugged the AEX into the dining room wall socket and using a short mini-coax cable, connected the AEX to my old Logitech MM50 iPod powered speakers. If you buy this cable from the Apple Store then you have more money than sense.

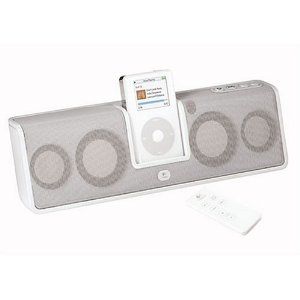
The Logitech MM50 powered iPod speakers.

While the MM50 is long discontinued, and the rechargeable battery in mine died years ago, there are dozens of choices on the market. Just make sure there’s a loudspeaker input socket on the one you buy. That accepts the other end of the cable from the AEX. The MM50 is well made with an Apple-like attention to aesthetics. Unlike most Apple products it actually lasts longer than the warranty period.

The rest is child’s play. Fire up your source app on the iPod/iPhone/iPad of your choice and touch the AirPlay symbol to see a list of output devices.

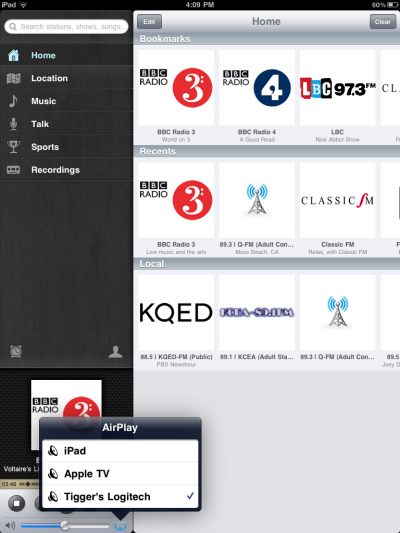
AirPlay output options in the TuneIn Radio app.

‘Tigger’s Logitech’ routes the sound to my MM50 and each output device remembers its volume setting, so you don’t blow the roof off owing to output level mismatching. I complained to TuneIn’s maker that I couldn’t see the other AEX in the home and they blamed Apple. Wrong. The fault was mine. The list of AirPlay devices scrolls with the swipe of a finger and the other AEX, hidden in the above screenshot, is there when needed. The absence of a scroll bar had me fooled!

Best as I can tell you can only route AirPlay output to one device at a time, but this remains a very cost effective way of outputting sound to any one of multiple locations in the home, controlled with a portable iDevice. Cost per location is as much as you want to spend on powered speakers, but $100 buys you a decent pair and another $100 or so gets you an AEX, so call it $200 per location. Expensive? Have you priced running wires through walls recently? And if you want really good sound with a dedicated DAC, the English gentlemen at Bowers and Wilkins will be glad to relieve you of $600 for their oddly named (if appropriately shaped) Zeppelin which is as good as it gets. You would think the English would be tired of reminders of German aerial bombardment after two wars. Anyway, I’m going to resurrect those old B&W DM5 bookshelf monitors from the basement and maybe spring for a nice tube amp for my next AEX installation …. the output level from the AEX is like that from a preamp, so all you need is a power amplifier and regular unpowered speakers with this approach.

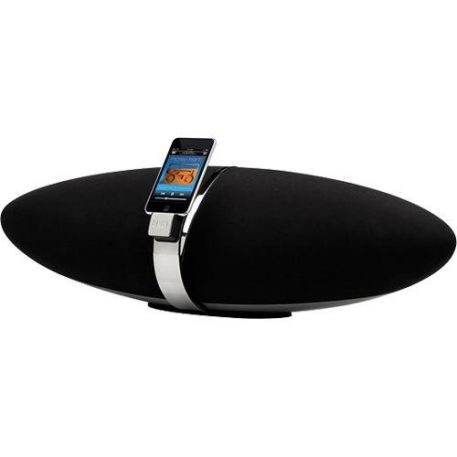
State of the art – the Bowers & Wilkins Zeppelin.

State of stupidity – the $26,000 Challenger01 – you will need two.

When you ripped all those old DVDs to your iPod you did use lossless not MP3, right?

Christmas gifts

Well, duh!

If you are a parent with young children, do yourself a huge favor and read my earlier piece The Unfair Advantage.

Then look at this chart from America’s taste-takers:

Sure, those kids want bragging rights and video games, but, properly policed, technology confers an unfair advantage and you owe it to your kids.

Disclosure: I have significant AAPL exposure today (but maybe not tomorrow) but if each of the several thousand daily readers of this journal rushes out and buys 5 iPads, the impact on AAPL’s bottom line and stock price will be precisely zero. Further, if you are coming here for stock advice you need to get a life, and a brain. Long AAPL stock and call options.

The AppleTV with the iPad and iOS 4

A dream combination.

Having just installed iOS 4.2.1 on my iPad I can scarce contain my excitement as to how it collaborates with a big screen TV and an iPad for a photographer.

It’s still a work in progress but this combination begins to finally show a meaningful, realistic step in the direction of coordinating disparate devices and making them work together painlessly.

Let me jump to the bottom line. I’m reviewing a photo album in my iPad on the AppleTV to the accompaniment of classical music, relayed by Pandora Radio. The source pictures and music are coming from my iPad. I flick the pictures on the iPad and the 42″ TV faithfully reproduces them. The colors are true also as I have profiled the TV with my EyeOne colorimeter.

For the amateur this is magic; for the pro, showing his pictures to the magazine editor, it’s essential. All that’s needed in addition to the iPad is a TV and the $99 AppleTV device, which I have reviewed at length here a few days ago.

So while much of what we are hearing about the latest iOS for the iPad is about multitasking, the real magic sauce for photographers is in AirPlay, the technology which makes what I describe above possible.

Setup is child’s play; after installing the new OS on the iPad, all you do is go to the Photos app on the iPad, select an album, turn on the TV, touch the AirPlay button on the iPad and you are off. Music? Add it in background mode from your iPad and route it likewise to your TV. The TV, of course, has two things the iPad does not – a huge screen and decent speakers.

Snags?

The iPad still needs a decent touchscreen photo processing app so that you can make changes and see them on the big screen, rather than round-tripping to your desktop. You still cannot turn pictures on the iPad through ninety or one hundred and eighty degrees.

And, worst fo all, you cannot print from the iPad. Mr. Jobs, please. All that hype about the new iOS 4 and we learn that the only way the iPad can print natively is through one of the latest AirPrint-enabled printers? What a crock! You expect me to buy a new printer? Well, BS says I.

Click the picture below and you can download an $8 app to your desktop Mac, check off your Bonjour enabled printer, and the iPad will print to it (or to DropBox, etc.) just fine. It works fine with my Brother 2170W monochrome laser, and I have yet to try it with the HP DJ90 wide carriage color printer. What have you got to lose? The app comes with a 7 day free trial period.

Click to see more.

Here’s FingerPrint being installed on my HackPro – note that I have checked off my Brother printer:

That’s a screen shot of the HackPro taken remotely using LogMeIn on the iPad to remotely access the HackPro – another piece of magic which I wrote about here. Note the FingerPrint icon in the menu bar (circled), and be sure to add FingerPrint to the login items on your desktop to make sure it’s automatically loaded after a reboot.

So now you can display your pictures on the big screen from a 24 oz portable device and print them to your device of choice. I’ll let your imagination do the rest.

Installing iOS 4 on the iPad:

If you have tons of data on your iPad the process of upgrading from iOS 3 to iOS4 could scarcely be worse. Mine took 9 hours. There’s a fault in the code and iOS4 will not load until the 9 hour backup (a mere 40gB of data in my case) is done through iTunes. Ridiculous. And please don’t tell me Apple is ignorant of this error. Look at the hits regarding this issue on their discussion board:

Only after I did the long backup to allow the installation of iOS4 did I learn of a free utility named BackOff which aborts the backing up of data and permits the iOS upgrade to proceed apace. Guess what I’ll be doing next time ….

BackOff comes in first world (Mac) and third world (PC) versions

We are at the cusp of a revolution in the ease with which devices can be connected in the home or business.

You need and AppleTV to go with your iPad.

Disclosure: I own tons of AAPL stock and call options. Your buying an AppleTV is hardly going to make me rich.

Three displays at work

Not a glossy screen in sight.

In the previous column I rambled on about using a USB-powered gadget to drive a third display connected to the HackPro, as I did not want to have to install a second video card with all the related complexities that would entail. That worked out well and today I received my third Dell 2209WA display as you can see below:

A nice place to work – three Dell 2209WA displays running under Snow Leopard.

Installation could hardly be simpler. After connecting the third display to the open DVI-D connector on the HackPro I fired up System Preferences->Displays, setting things thus:

Display settings for three displays.

The white bar, draggable at will, denoted the display which will display the menu bar; the display screens’ are simply dragged into place so that cursor movement across them is continuous.

In the next picture I have Lightroom 3 running on the two left hand most displays and Photoshop on the right. Thus you can easily round trip a file from LR to PS, working the PS adjustments on the third screen,

Note the high tech reams of paper raising each display so that my eyes are level with a point a couple of inches below the top; even at maximum height I cannot get them high enough without this kludge.

I’m surprised how easy all this was to do and am now out of desk space for any more – maybe I need to go to two tiers?

Nah! – here’s my next version:

Houston – we have lift off.

Temperature monitor reports no detectible heat rise for any component. The HackPro can take it!

A few words on the latest Dell 22″ display:

The current 22″ Dell display (it’s 21.5″ just like my 2209WA) is the E2210H and at $200 is significantly cheaper than the 2209WA which remains available at $319. There are, however, three other key differences, over and above rthe price, which are significant:

  • The 2210 is 1920 x 1080 compared to 1680 x 1050 pixels, so more pixels
  • The 2210 does not use an IPS panel
  • The 2210 is the far narrower 16:9 width:height aspect ratio compared to 16:10 for the 2209

Why would I prefer the 2209?

First, because IPS panels have far less color change off axis than regular ones; try it in a store and see for yourself. For photo processing that’s a key difference. Second 1920 x 1080 is too many pixels for text – for my mediocre eyes the default font is too small at this pixel density and while I can increase it using System Preferences, why have it in the first place? Finally, while 16:9 is great for watching widescreen movies on your computer screen (you want to watch movies on a computer?) as the picture fills the screen, for work use it’s simply to narrow, wasting space at the sides.

Here’s a comparison of the aspect ratios from the Dell site (not to scale) which clearly shows how much wider the 2210 (on the right) is:

Dell 2209WA and Dell E2210H

Don’t believe me. Check the current iMacs in your local Apple Store. The 21.5″ one is 1920 x 1080 (like the Dell 2210) and the 27″ is 2560 x 1440 pixels. In practice this results in near identical font sizes on both and that font is small.

I thought long and hard about this and checked out the 27″ screens extensively – the choice was two 27″ screens or three 21.5″ones. Well, despite the better apparent specs of the 27″ screen. I came down squarely in the 21.5″ camp, and added a third. You should do like comparisons to see what works best for you. The screen real estate between the two alternatives is roughly similar. By the way, 27″ Dell matte screens, made by LG Electronics just like the ones in the iMacs, are $1,000 each, whereas the three Dells I use cost me under $1,000 in total. Not a trivial difference and one which, intriguingly, highlights what a good value the 27″ iMac is, if you can live with a glossy screen, small fonts and historically execrable reliability for these prone-to-overheat machines, as my personal experiences illustrates.

Adding a third monitor

Are you nuts?

It seems like just the other day that I added a Dell 2209WA 21.5″ IPS monitor to what was then my work computer, the 24″ white iMac. That machine overheated and died so I had a HackPro built and added a second Dell. This works beautifully with Lightroom 3 and is also invaluable in my day job where I manage money for a living.

At the time I questioned who needs two displays, yet now I find I cannot live without them!

The Dell is 1680 x 1050 pixels, a pixel size which works nicely with my mediocre eyesight, delivering larger fonts than the default in most 24″ monitors which is 1920 x 1200. Sure, the font size can be increased with the latter in the Mac’s System Preferences->Displays panel but then why pay up for the higher pixel density in the first place? Or so I tell myself.

I thought long and hard about migrating to two 27″ widescreen monitors, similar to those used in the current 27″ iMac (though I would use matte screens in preference to the iMac’s ghastly glossy displays) but after several trips to the Apple Store I concluded that the even smaller font sizes on those 2560 x 1440 pixel displays were not what my eyes needed.

Meanwhile, my growing data hunger meant that I was getting frustrated with too much moving about of windows on the two Dells in my day job, so I resolved to add a third display. Mercifully Dell still sells the 2209WA and it’s still around $300, compared with nearly $1,000 for one 27″ Ultrasharp model, but the question remained how best to drive that third monitor from the HackPro. The Hackster runs a superb EVGA Nvidia 9800GTX+ 512mB display card which has two outlets. If you use a Dual-link DVI cable with these (the cable is a single one despite the name) you can power two 30″ monsters or two 27″ ones, for that matter.

So I asked HackPro’s builder to sniff around the Hackintosh chat boards and found there’s not much out there regarding three or more monitor use. It seems that the HackPro could be hacked (!) to accept a second display card as the hardware slot is there on the motherboard, but while the software part was not impossible, I couldn’t afford to lose the use of the HackPro for an extended period of time. Man’s gotta eat …. When I built the HackPro the 24″ iMac was still struggling along so downtime was not an issue. As that dog iMac is now in silicon heaven I no longer have a full sized desktop backup.

So I put the idea of adding a second video card aside and continued to grumble about my lack of screen space.

Then, out of the blue, I came across the Newer Technology USB to DVI/HDMI/VGA adapter, marketed by MacSales for under $70. Less than the price of another display card, in other words. For that sum I thought there was little to lose and just received mine. I decided to try it with one of the Dells to evaluate whether it made sense to buy a third monitor.

The Newer Technology USB to DVI adapter, with VGA and mini-DVI adapters.

Installation requires download of a driver from the DVD which comes with the gadget and a reboot. Thereafter, I simply unplugged one of the Dells from the HackPro’s video card, plugged it into the adapter and the adapter into one of the many free USB sockets on the computer.

No problemo!

The USB connected monitor came to life immediately and after a few minutes spent profiling the setup (the colors were way bluer than with the monitor driven from the computer’s video card, requiring Blue to be reduced from 97 to 85 for a perfect color match across the two monitors) I was up and running.

The most critical test I could think of was to run a movie DVD in the HackPro’s DVD player, stretch the picture across the two adjacent Dells and observe. The USB connected monitor displays the slightest jerkiness compared to smooth scrolling on the other monitor which is connected to the Nvidia 9800GTX+ card. Would you want to watch movies on it all day? No. Is it adequate for my purposes, mostly the display of streaming stock quotes, occasional moving charts, You Tube videos and the like? Yes, more than adequate.

I noted no untoward changes in the operating temperature of any component, using Temperature Monitor as always; the Newer Technology adapter gets noticeably warm but as it resides outside the HackPro box I am not concerned. It is USB powered and there is no external power supply to worry about. The adapter comes with Mini-DVI and VGA adapters if that’s what you use. I simply used direct DVI. Drivers for Mac OS X Tiger, Leopard and Snow Leopard are included (I use the latter) and the instructions also say that it will work in third world countries where PCs are still in use.

A three screen setup could be of great use to the Lightroom user who frequently finds he has to round trip images through Photoshop, PS being displayed on the third monitor.

Bottom line? I just placed an order for a third Dell 2209WA display and will report back when I have it up and running.

The manufacturers claims that up to four USB powered monitors can be connected to a Mac in this way, one adapter per monitor. Ovbviously, I hope never to have to check this out.

MacSales markets any number of useful Mac add-ons and I have many of their drive enclosures, hard drives, etc. around the home. Check them out – a lot of useful things to be found on their web site.

Anomalies: In addition to the slight jerkiness noted above, I am aware of one other anomaly with regard to the display driven through the USB port using this gadget. Screenshots of that display fail to record, but continue to work fine for the other which is attached to the regular graphics card. So if you take a lot of screen shots, relegate the USB-driven display to more static data where screenshots are not required.

You can read about the final installation here.