Successful completion.
This concludes the piece on the HackPro built by a friend of the blog, the pseudonymous FU Steve. Part I appears here.
TP: FU, when we last spoke you were just embarking on assembly of your HackPro, whose goal is to perform like a MacPro with none of the reliability and repair issues common to poorly cooled iMacs, while offering substantial upgrade capabilities at modest cost. How did the assembly go?
FU: Please, ‘build’ not ‘assembly’. If you are into hacking, that’s the teenage vernacular, you know! It was just as I expected – easier than a Lego kit. The only tricky part was plugging in the four small front panel connectors to the mobo (that’s hacker talk for ‘motherboard’ if you must know). The space on the mobo for these is crowded out by the graphics card, so it’s easier to connect them before installing the graphics card. These connectors are for on/off, reset, and the power and HDD activity LEDs. They are the only connectors which are not keyed, meaning they can be inserted over the wrong mobo pins, meaning your computer will not work, so it’s an area repaying attention to detail. And those pins are delicate – the heavy handed have no place here.
TP: Any other hardware issues?
FU: One big snag – the first mobo shipped by Amazon was faulty – the CPU temperature sensor would report 99C when cold and would shut the machine down. I noticed one of the CPU fan pins was bent on receipt and suspect Amazon may have sent me a used board. The board is made by Foxconn in Taiwan and there’s no way they would allow bent pins to ship. (Foxconn, surprise, makes most of Apple’s boards). Anyway, I can’t grumble as Amazon had the replacement in my hands before the original was even shipped back.
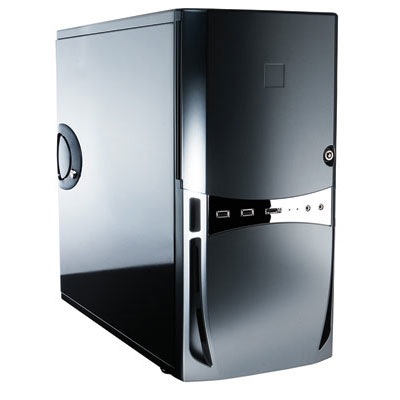
It is striking to see how beautifully made all the components are. Toyota not GM, with none of the cost cutting, design compromise and overcrowding you get in the iMac. The Antec case is superb. Properly finished, and I have not one cut on my hands. I expected assembly to take 2 hours but had to add 30 minutes for the insanely poor instructions Intel provides for the correct installation of its CPU fan. Amazing, really. The only part made in the US – figures. I finally found Intel’s own video on YouTube and it can be seen here, and does what the miserable instruction book fails to do, which is to show how to properly clip the cooler to the CPU. Surely, proper CPU cooling is one of the most important aspects of any computer design?
The only tools I used were a Philips screwdriver and a pair of cutters to remove excess length from cable ties used to keep the wires away from fans inside the case.
I originally expected to defer installation of the DVD burner (I installed Snow Leopard from a small USB drive) and a Sony card reader (CF, SD, SDHC, you name it) until later, but Antec does such a fine job to make this simple that I installed both in the first pass. You screw small rails to the reader (which occupies one of the 3.5″ drive slots in the front behind the door) and the DVD burner, connect power and data cables then slide both in until they click. The internal HDDs are mounted similarly except that they are screwed to a plate using soft silicone bumpers for isolation of vibration. The Antec Sonata III case can accommodate up to four 3.5″ SATA drives. As I will be running two 1 tB Samsung drives, I spent an additional $15 on a second Antec TriCool case fan – the case comes with one installed – to cool the HDDs. After my iMac started to fry, just like yours, it seemed like a modest additional cost.
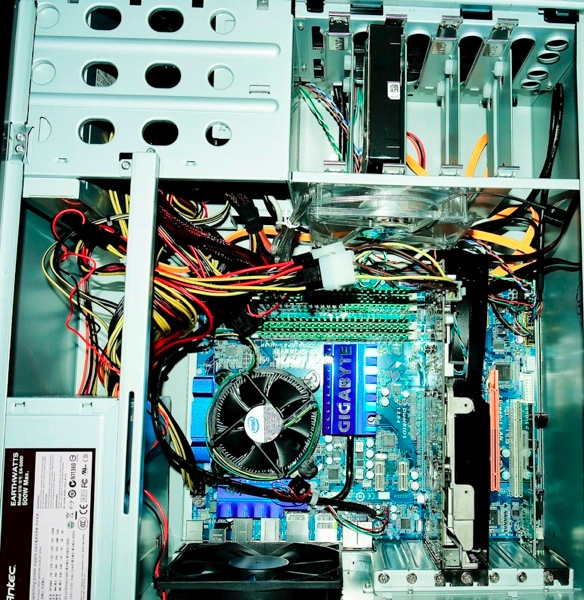
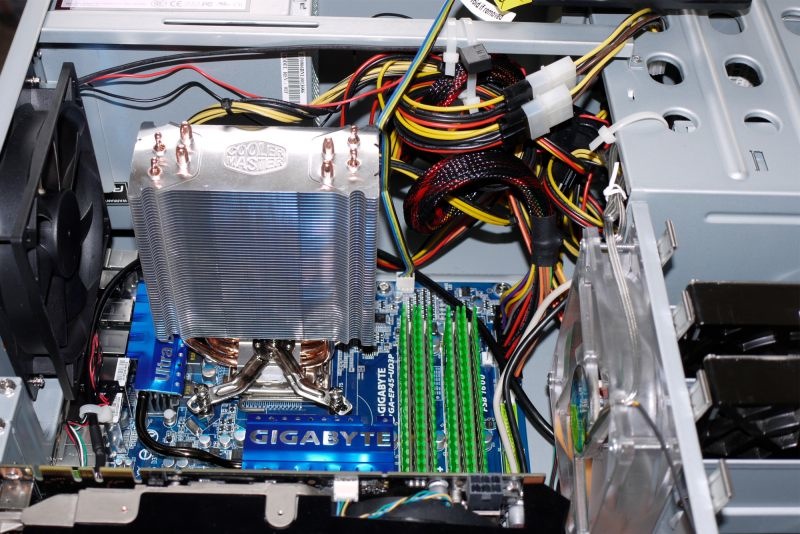
Interior of the HackPro
TP: You are running no fewer than five large fans? Is it noisy?
FU: Five, yes. CPU, GPU, power supply and two case monsters – 120mm in diameter (4.7″). Those things can move some air. I have the two case fans on the middle setting and, with the case closed and underneath my desk, the box is silent. Much quieter than the iMac with the fans turned up.
Now while my experience with computer gamers is that most couldn’t give a gnat much competition in the intelligence stakes, the one thing I have learned from that community is its focus on cooling. Many gamers over-clock their CPUs to make games run better and apply exotic cooling solutions.
For example, there is a large aftermarket in enhanced CPU coolers to fit the Intel 775 socket used by the Core2 Quad, and many are a drop-in replacement for the stock Intel cooler/fan, offering 10-20C more cooling for $20-50. I’m not over-clocking but it’s nice to know that should I ever get the urge, enhanced cooling is a simple upgrade.
It’s common to read of gamers running the 2.83gHz CPU (Intel model Q9550) I am using at 4.0 gHz without damage, owing to enhanced cooling solutions. That is a significant speed increase which may make sense for video processing, and it’s much cheaper than buying a natively faster CPU.
TP: How warm does it run?
FU: Once warmed up the CPU never exceeds 120F (49C) no matter what I am doing. For reference, the service limit of the Core2 Quad CPU is 160.5F (71.4C) so you have lots of headroom. I noted with alarm that my iMac’s CPU reported 163F when I was using Migration Utility to move all my applications and data over – I could smell the difference ….. Mercifully, it survived long enough to move everything over. As for the HDDs, they run close to room temperature, in no small part thanks to the huge adjacent fan drawing air over them. Best $15 I have ever spent – I would rather lose the CPU than my data!
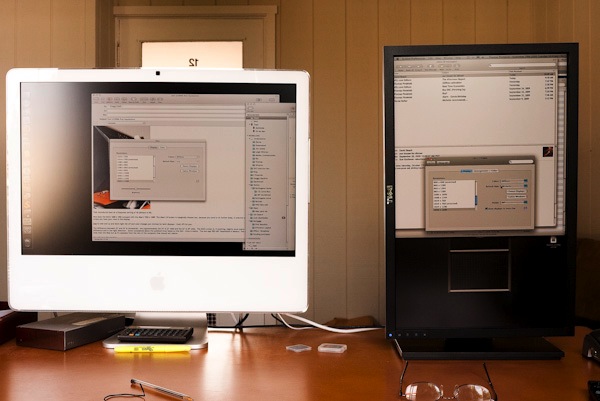
TP: How was the software install?
FU: Piece of cake. Rather than using an SDHC card as all the web sites suggest, I loaded Snow Leopard and the requisite boot loader (SL is not tampered with in any way) on a self-powered USB drive. Much faster – SDHC is a very slow medium compared to a small hard disk. The boot loader takes the place of code on a chip in Macs and bypasses the traditional BIOS used by Windows when loading. On your first boot you still need to enter the BIOS to set it up and dictate the boot order of the various devices, all of which is explained on hacking sites via Google. On this first trip to the BIOS (by holding the ‘Delete-to-the-right’ key depressed during start-up until you see ‘Prepare to enter Setup…’ at the base of the display) you are telling the computer to boot from your external drive on which the OS resides.
I found that the easiest solution was to delete all boot drives in the BIOS (‘Advanced BIOS Features’ screen) and simply tell the system to boot from an attached USB drive first (my OS and boot loader source), and then from the internal drive.
Thereafter you never need to look at the BIOS screens again which is just as well, given how ugly they are.
TP: How did you get your applicatons and data over to the HackPro?
FU: Once I had SL running I migrated all the apps and data from my failing iMac using Apple’s Migration Utility. You can do this by connecting your Mac to the HackPro using an ethernet cable or by simply connecting your bootable back-up drive to the HackPro using Firewire – USB will not work. Migration Utility will ‘see’ another Mac in both instances and you just need to tell it to move all your user settings, applications and data over. There’s no need to reload applications or to reinput serial numbers using this approach. In a couple of days I’ll remove the HDD from my iMac and install it in the Antec case where it will become a back-up drive.
If all you have is USB use Time Machine to create a backup then restore from it.
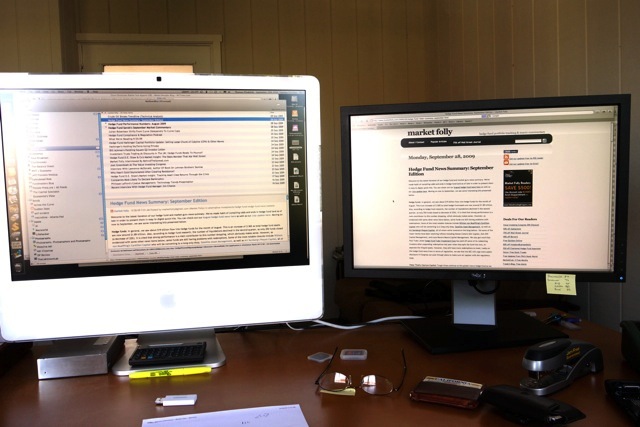
TP: OK, so this is where the rubber meets the road. Tell us about comparative performance.
FU: Easy. The best approach is with objective measurements. I always suspect the subjective approach in these things – when I read it ‘…. feels faster ….’ I ask myself what part of himself the fool writing this was feeling and turn the page. Remember, buyers tend to defend what they bought. It’s human nature.
I ran two sets of tests to get objective data. Geekbench, which focuses on the CPU and Xbench which looks at GPU-intensive tasks. These metrics give you a rough idea of relative speed between computers. Of course neither addresses broadband speed which is increasingly the slowest part.
For purposes of comparison, my iMac has a 2.16gHz C2D CPU, the nVidia 7600 GPU with 256mB of RAM, and 3gB of 667 mHz DDR RAM and is running Leopard 10.5.7.
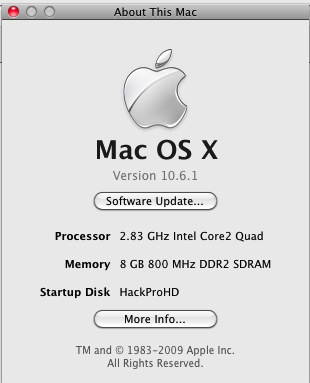
The HackPro has a 2.83gHz Core2 Quad CPU, the nVidia 9800GTX+ GPU with 512mB of RAM, and 4 or 8gB of 800 mHz DDR2 RAM and is running Snow Leopard 10.6.1. (I ran the tests with first 4gB then 8gB of RAM in the HackPro to see if the added RAM made any difference). These are all in 32-bit mode as I do not have 64-bit versions of the applications plus 32-bit under Snow Leopard is a fair comparison to 32-bit with the iMac’s Leopard OS. Expect 64-bit to be even better on the HackPro.
Geekbench (CPU):
HackPro – 4gB RAM: 6119 (215% of iMac)
HackPro – 8gB RAM: 6250 (219%)
iMac – 3gB max. usable RAM: 2848
Xbench – Quartz graphics:
HackPro – 4gB RAM: 254 (172%)
HackPro – 8gB RAM: 261 (176%)
iMac – 3gB max. usable RAM: 148
These readings were made with the motherboard RAM voltage set to the default of 1.8v. Adjusting it to 2.1v, the manufacturer’s recommended setting, with 8gB returns Geekbench of 6211 and xBench of 259 – both worse – so it makes sense to stay with the lower, conservative, default setting.
If you want to see the readings from Geekbench for the current most comparable MacPro, the four core 2.66gHz, they can be found here. As you can see, the HackPro is some 12% faster!
Finally, for the jerk who wrote you (Jerk’s comment not published. Ed.) that this machine is seriously dated, here are video processing scores generated using Cinebench. These compare an 8-core 2008 MacPro with the 4-core HackPro, and test how long it takes to render a graphic image in various circumstances:
Single CPU core:
MacPro: 3233
HackPro: 3229 (3281 with 10.6.4)
Multi CPU core:
MacPro: 18811
HackPro: 10568 (10728 with 10.6.4)
Open GL rendering:
MacPro: 5995
HackPro: 6184 (6428 with 10.6.4)
Seriously dated, my rear. But like you said when you called me with that comment, Thomas, for every person who gets off his duff and does something, there are a hundred jerks more than happy to sit on their ample behinds. We call them losers, where I come from.
(To see the full reports which FU Steve made available to me, click the links above. Ed.)
The data speak louder than words while also suggesting that much over 4gB of RAM does’t improve theoretical performance. (In practice, more RAM does allow more applications to be open simultaneously without slowing down performance). The real world feel (ooops!) is that of a snappier machine – not dramatically faster but noticeably so. As for legacy G3/4/5 PPC applications like Photoshop CS2, they run fine so long as you remember to click the ‘Customize’ button when installing and checking the ‘Rosetta’ box – why Apple left this unchecked by default beats me. It will be the cause of endless frustration for many users unaware of it.
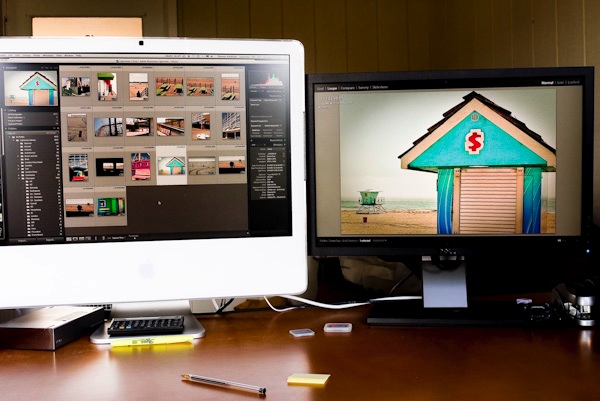
TP: How about performance with Lightroom, an issue of particular interest to my readers?
FU: I’m using LR 2.5 and the default installation is 32-bit. There didn’t appear to be that much difference, frankly. Even though I generate 1:1 previews when importing the RAW files form my Pentax DSLRs I would still get the “Generating larger preview” message for a second or two on many images (it’s not consistent) when going from thumbnail to loupe mode. Then I closed LR, highlighted it in Finder, hit Command-I (the letter after H, not the number 1), clicked on ‘Get Info’ and unchecked the ‘Open in 32-bit mode’ box.
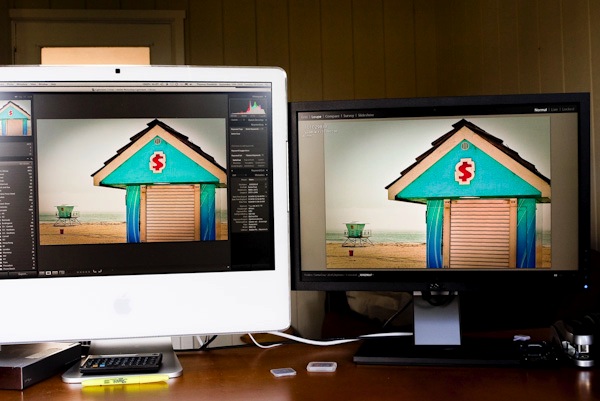
Restarting LR I could briefly see the words ’64-bit’ on the splash screen at start-up and the difference was night-and-day compared to 32-bit. No matter how fast I page through my images in full screen loupe mode I never get any delay message. That’s the awesome nVidia 9800GTX+ video card doing its magic, compared to the dated (and overheated) nVidia 7600 card in my iMac. Right there I knew I had made the right decision in building the HackPro. The difference is far more striking than suggested by the statistics, above.
For the more technical among your readers, the HackPro fully implements Apple’s Quartz Extreme hardware acceleration technology to render images faster. To confirm you are running an application in 64-bit mode just fire up Utilities->Application Monitor and you can find out.
TP: How about sound?
FU: As configured the HackPro has none, but the motherboard has all the outlets you need. I bought a pair of Logitech LS-11 powered speakers for all of $20 and they have excellent sound, far superior to the dorky downward facing ones in the iMac. You connect the power and plug in the speaker cord to the green receptacle on the mobo. If you listen to music in iTunes, you can tailor the speakers’ response using Window->Equalizer in iTunes and get a nice smooth response with these. Just don’t expect massive bass with small speakers. And do avoid USB-powered speakers – USB cannot provide much current so your sound output will be limited.
TP: So what’s the real price comparison?
FU: It’s pretty shocking really. Here’s the current 4-core MacPro:

It’s a very close feature comparison to the HackPro. Both have two 1tB drives, the MacPro has a slower clock speed but superior performance quad core CPU for no net difference, and the ghastly 24″ Mac glossy screen. As the base nVidia GT120 (a rebranded 9500 to catch the suckers) is significantly inferior to the 9800GTX+ in the HackPro, I have priced the MacPro with the comparable ATI Radeon 4870. Further, the MacPro needs the AppleCare rip-off warranty to get insurance coverage, whereas all the HackPro’s parts, have warranties of 3-5 years or more at no extra cost. Apple charges you another $249 for that – greedy, greedy, greedy.
The comparable price for the HackPro with the marginally smaller – but matte – Dell 2209WA 22″ IPS display – is $1,368. That’s $3,129, or 70%, less. Buy AAPL stock with that sort of margin, not their compromised hardware.
TP: Any final thoughts?
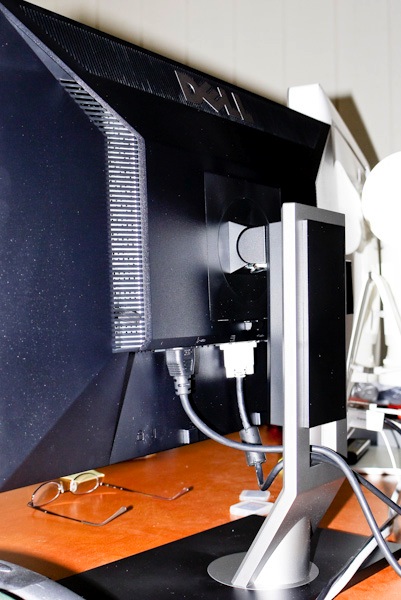
FU: I recommend this to anyone with a bit of patience looking to create a state-of-the-art Lightroom (or Aperture) machine – anything more exotic is a waste of money for still photographers, though it may make sense for video processing. The result is easily upgraded as technologies improve (meaning as software gets ever more bloated), will run as cool as you want and divorces the monitor from the computer’s circuitry, meaning less heat in the box and a far cheaper repair or upgrade cycle – no need to throw out the display like you do with a fried iMac. Heat and life are inversely proportional to one another which, Thomas, I know will be hard for you to accept given your English upbringing.
About FU’s HackPro
Most importantly, you are removed from the tyranny of the ‘closed box’ philosophy adopted by Apple, a cleverly contrived approach intended to keep you buying overpriced, mediocre performing hardware every two years or so. Even if your iMac survives heat issues, it cannot be upgraded absent the most complex and extraordinary efforts. For all of Apple’s spin about how ‘green’ it is, the iMac is an environmental abomination – when it goes wrong, you have to throw out the whole thing. When your PC or HackPro blows, you replace a faulty card.
Best of all, when something does fail, the most expensive part in the box costs $220 (the CPU) with nothing else over $125 or so, and a replacement can be had at your doorstep in a day or two rather than having your Mac moldering at the local Apple store. And if you read of all the botched repairs of iMacs which have fried, well, life’s just too short to have to put up with Apple’s poor hardware and service. DIY is so fast and simple, there’s no rational alternative.
And it bears repeating that assembly of your own computer is substantially easier than making a Lego toy** or connecting the parts in a piece of home exercise gear, not to mention a lot more fun. Plus, unlike in either of those two fields of endeavor, you are left with $2,000 or more burning a hole in your pocket – had you elected a similarly capable MacPro.
TP: Reality check time, FU. You know, you could have bought a 2.93 gHz iMac with a 24″ screen for $1,600 – just a little more than you paid.
FU: True. And I would be replacing it two years hence when it was dead.
The iMac Just Fries. The HackPro Just Flies.

“Thou shalt not run Apple’s OS on non-Apple branded hardware”. Easily fixed.
** Postscript: “…. easier than a Lego toy”? FU Steve has kindly provided me with a slide show for readers showing the whole process and you can view it by clicking here. Thank you, FU Steve.
Cooling update – November, 2009:
FU Steve sent along some details of an update he made to CPU cooling in his HackPro. Dissatisfied with the cooling from the stock Intel cooler which simply clips into the motherboard from above, offering a mediocre contact force between cooler and CPU case, he removed the motherboard (!) and fitted a Coolermaster 212 Plus bolt-through design. This allows for proper clamping force between the cooler and case and the whole thing comes with a 120mm fan (a 4 pin variable speed like the Intel one, so that fan speed varies with CPU case temperature) for the princely sum of $30, including thermal paste.
Coolermaster 212 Plus in place, fan not yet fitted. Note the huge cooling area. The top of the fins just clears the Antec Sonata III case used.
FU told me the fan is sheer hell to install and can only be installed once the cooling fin tower is in place, as the clamping screws are not accessible with the fan in place.
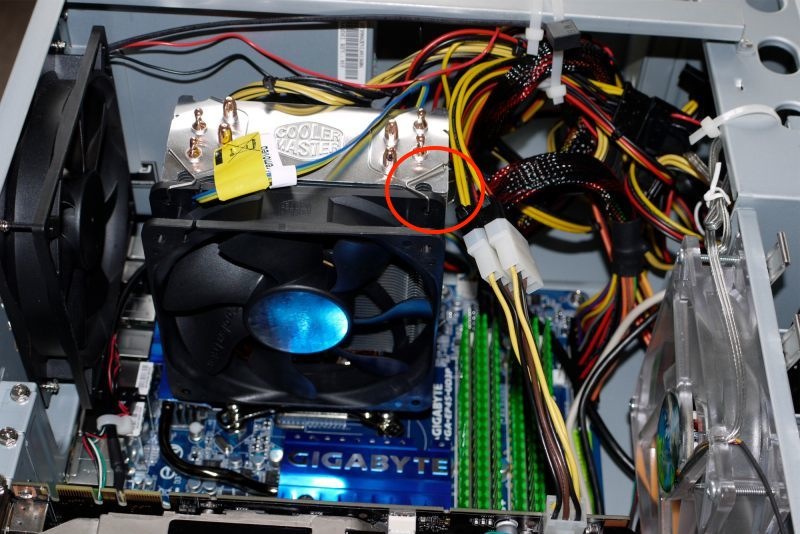
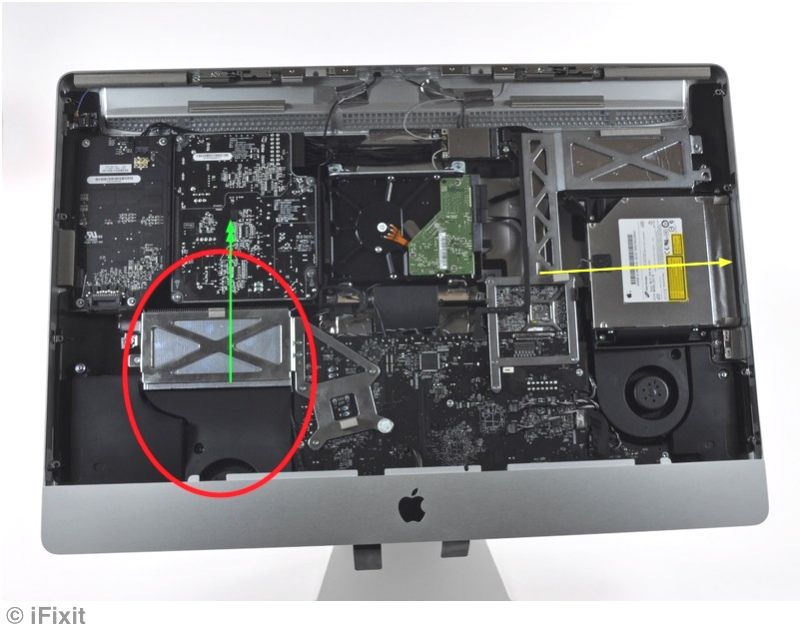
Coolermaster 120mm variable speed fan in place. The red circle denotes the proper installation point for the fan clips.
Talk is cheap. Data tell the story. Take a look at the large and instantaneous drop in CPU temperatures once the fan is up an running:
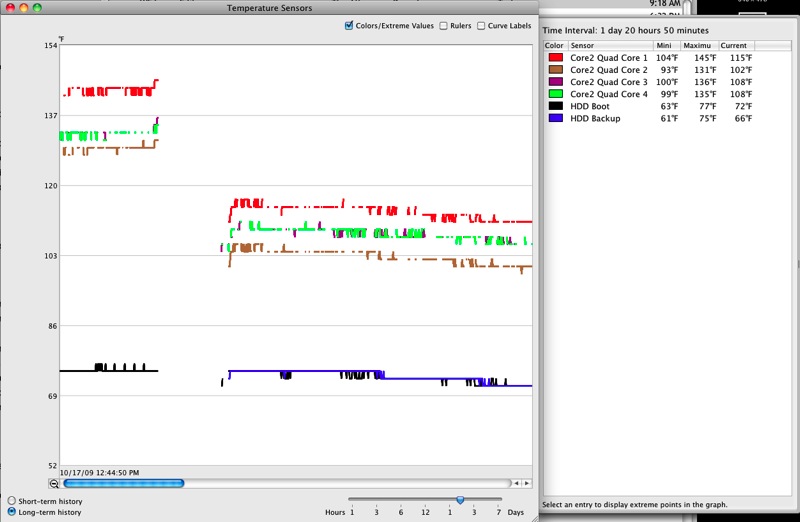
Before and after. A 27-30F temperature drop for the CPU internals.
The case temperature is 25F lower than the internal temperatures shown in the graph, meaning that the warmest core – #1 – is actually running at a case temperature of 90F (32C), compared with the 160.5F (71.4C) maximum case temperature specified by Intel. Now that’s headroom!
Thanks, FU. That is very cool! Nice to see how flexible the HackPro is when it comes to enhancements.