Coming real soon.
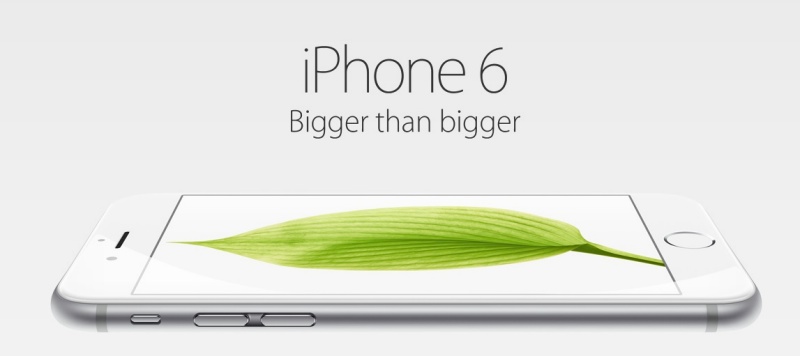
Surely the dumbest advertising byline of 2014?
US supplies of the iPhone 6 Plus, the 5.5″ monster, are already backordered 4 weeks but I snagged my 4.7″ (38% more screen area than the iPhone 5) online yesterday and will pick it up at the local Apple Store next Friday, 9/19. I also checked the local Verizon store but the sales ‘help’ there was so hard sell and oily I felt more like a shower than a new phone after leaving in disgust. Suffice it to say that my 2 year contract on the iPhone 5 just expired, so the new one at $200 + tax will be paid for by the proceeds of sale of the old on eBayski, doubtless selling to Ivan Bollockoffski and his oligarch friends as has every previous one I have recycled there. Good luck with the embargo, comrade, and thanks for the $275. I’m sticking with Verizon as the 4G coverage on the west coast is good and as there is no price competition among US carriers. Do the math on Sprint’s lying ‘ownership’ offers and you will come to the same conclusion, not to mention the worst coverage of any of the major carriers. The only compelling reason I can see to choose AT&T over Verizon – coverage is comparable – is if you want to use voice and web browsing simultaneously. Verizon’s CDMA cellular technology prohibits that whereas AT&T’s works fine.

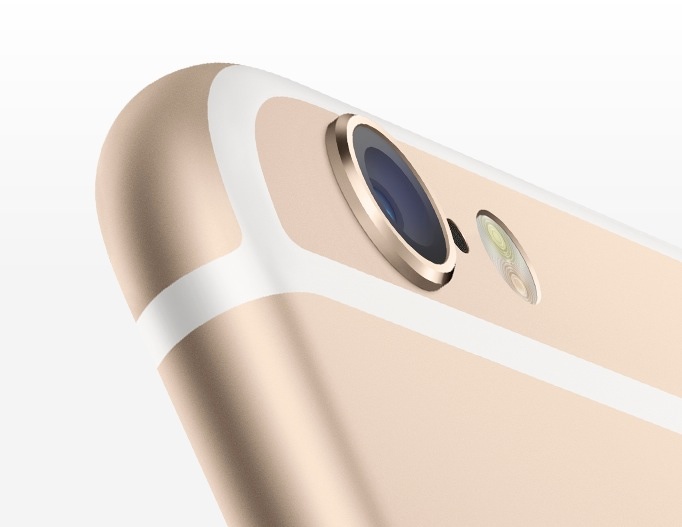
Ummm, (2.4/2.2)^2 is + 19%, Cupertino.
The camera lens in iPhone 6 is f/2.2, which makes it an immaterial 19% faster than the F/2.4 in iPhone 5, despite Apple’s hype to the contrary. Disappointingly, still picture OIS is only available on the 5.5″ iPhone6 (both models carry over movie stabilization from iPhone 5) but the addition of the thumbprint scanner, first seen in the iPhone 5S, is welcome for this user. You can’t forget to take your thumb with you and if the iPhone is stolen, the new Apple Pay credit card information can be disabled from any iOS (or Windows, for the clueless) device using Find My iPhone, without disabling the credit cards themselves. Apple Pay will so obviously take the world of retail by storm that I find it amusing to read pundits saying otherwise. The fact that Google’s earlier attempt failed miserably is irrelevant.
The still camera in iPhone 5 was excellent and the one in iPhone 6 promises further improvements. Suffice it to say that I have made many 13″ x 19″ prints from the iPhone 5 with ease, if not impunity, and if ever you needed confirmation that the point-and-shoot was dead, this fact will testify to that in spades. Further, given that no more than 0.001% of iPhone users make 13″ x 19″ prints, it’s not like image quality is lacking for the remaining 99.999%, prints being far more demanding than any other display medium.
What were they thinking?
Confirming that the Shadow of Steve has long faded, Apple has managed to make an ugly protruding bezel for the lens in iPhone 6; the sounds you hear are those of El Jobso spinning in his grave. That said, some serious kaizen-like effort has gone into incremental improvements and the addition of time-lapse, better exposure control and a host of other features shows just how seriously Apple is taking the photography aspect of the iPhone. And with just cause. There’s a huge retention aspect to making users happy with their camera …. err, phone.
Wi-fi in the iPhone 6 now boasts 802.11ac technology and the result is strictly limited to boasting. My tests with the latest Apple wi-fi router and the 2014 MacBook Air, which share this technology, show that data throughput is unchanged compared with 802.11n. Oh! well.
Some snaps from the iPhone 6 once I have my hands on one next week. Best of all, the larger screen should see no more squinting at the oft used one in my iPhone 5 while retaining the ability of using a small belt holster, not a realistic choice for the 5.5″ model.
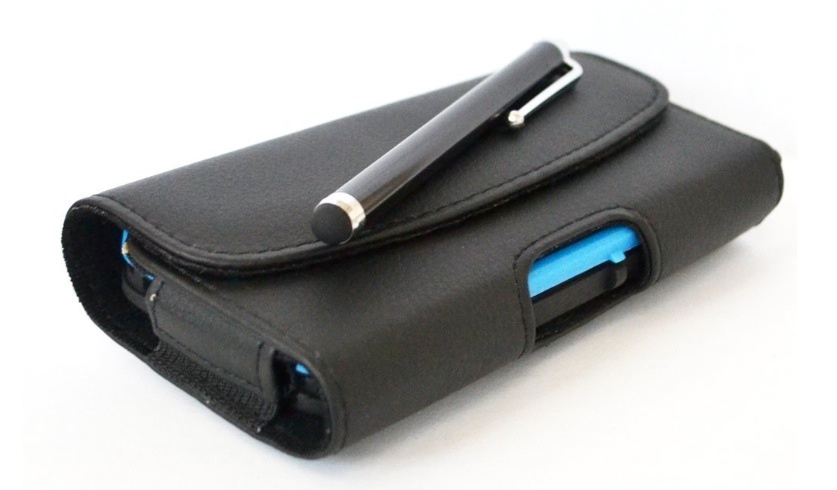
iPhone 6 belt holster – click the image to go to Amazon.
As before, I have opted for the 16GB model, the bottom-of-the-line; with iCloud Drive recently announced (cloud storage for all your files, not just music and videos) and with iTunes increasingly residing in the cloud, there seems little reason to buy an iPhone with more, costly, internal storage.
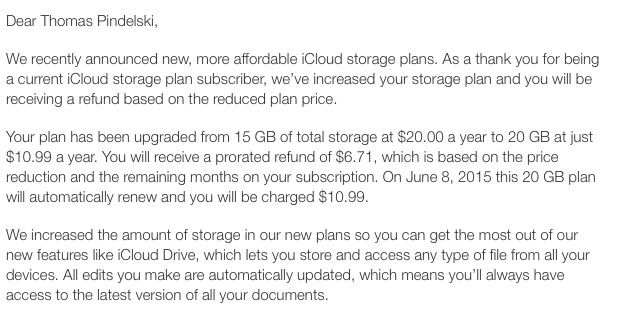
iCloud changes and iCloud Drive.
Now all I have to do is wait.

Disclosure: Long AAPL stock.