I have been putting this off for too long.
I have been putting off adding keywords to the pictures in my Lightroom database in much the same way as stock market investors prefer denial to fact. Open that statement in the mailbox and, yes, you too will be apprised of this year’s 40% drop in value. That’s the result of the foolish “stay fully invested” mantra of the past two bull decades which has been brainwashed into your psyche by amoral advisers seeking only to maximize their fees. This is by no stretch of the imagination a financial blog – though I do like to point out photography equipment bargains when I see them – but suffice it to say that after the 1929 crash the Dow index did not return to pre-1929 levels until …. 1954. So the ‘fully invested’ bunch, or what was left of it, had to wait out a war and 25 years later they had devalued dollars equal in amount to their 1929 investment.
But, like that reluctant letter opener, I have preferred to fool myself that my Lightroom cataloging system, which heretofore has avoided the use of keywords, would serve me well, added by a solid dose of good memory to help find things in a trice.
Wrong.
I am now finding that it’s getting increasingly difficult to locate a treasured snap in short order. Was that picture of my sweet little boy, Winston, under ‘Playground’ or ‘Winston’ or ‘Birthdays’?
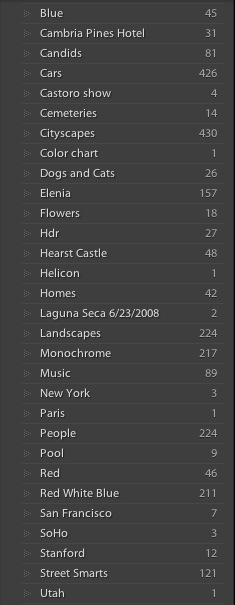
Here’s how I have ordered my folders:
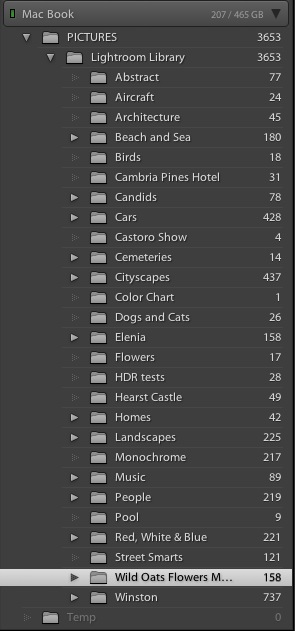
In LR2, the green light refers to the active drive. The numbers indicate that I have 207gB left on a 465gB drive
Click on, say, the ‘Beach and Sea’ containing folder and you get:

Well, you get the idea. As long as you remember that the snap you want is in ‘Beach and Sea’ the rest is plain sailing. Snag is, sometimes it’s simply not where you would logically place it today and memory tends to fade.
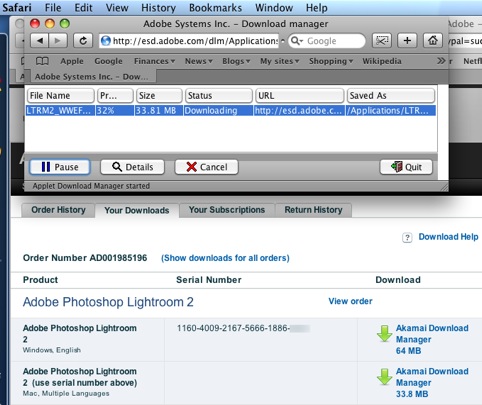
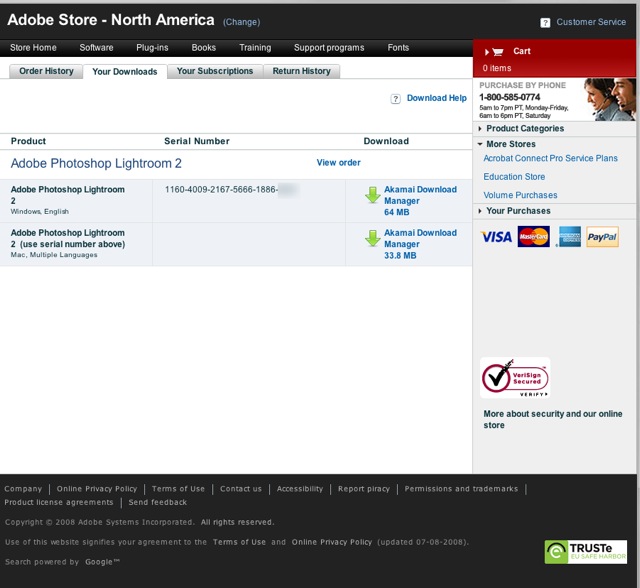
Now that Lightroom 2 has made key wording easier and faster, if no less tedious, I have resolved to add keywords to as many of my pictures as makes sense and I am disciplining myself to do a hundred or so a day. Rather than doing this one by one, I assemble those that need generic keywords – ‘monochrome’ or ‘grain effect’ for example – and do a batch add of the relevant words. In a final pass I will add image specific keywords where warranted, the goal being that a keyword search renders a handful of results.
A related motivating factor is that my catalog of images (the keepers, that is) is growing faster than in days past, owing to the higher success rate of digital technology and greater availability of time for my hobby compared with those days when I was putting in 60+ hour weeks on Wall Street.
Here are some of the keywords I have added – note that I have replicated the folder names in case I ever decide to scrap or revise the folder structure. I have then started adding new keywords like ‘Red’ which identify pictures with strong red content:
LR2 allows you to drag and drop keywords onto image(s) so the process is fairly fast. The tricky bit is coming up with image specific words that make sense. “How would I think of this image were I looking for it?” is the recurring question.
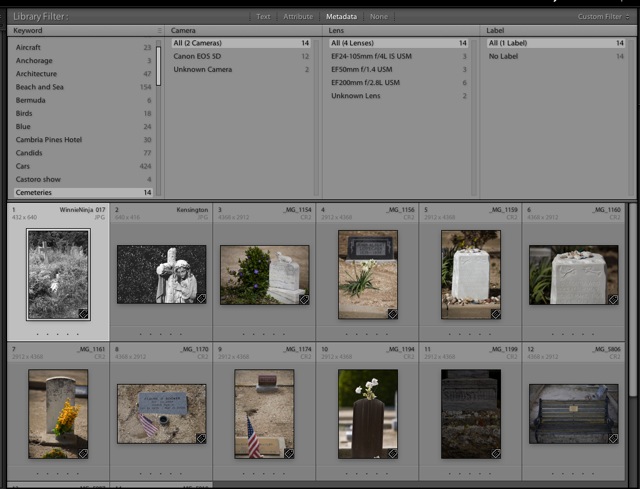
Now when I wish to locate all files matching a specific keyword, I go to the right hand panel of LR2, highlight the word and click the arrow to the right – here’s the result of clicking on ‘Cemeteries’:
Keywords can be stacked for compound searches, though the technology in LR2 still trails Aperture’s where you can select a filter with boolean keyword input, using ‘if’, ‘and’ and ‘or’ logic. I have no doubt that this will eventually come to Lightroom.
So far I have encountered one snag. If you stack images of like kind (I stack composite HDR images for example as all go towards one result once merged) and leave the stack closed when keywording, only the top picture in the stack will be keyworded. If you subsequently change the top picture in the stack you will not be able to find the new one if you forgot to keyword it. To work around this I simply open all the stacks in the Library before keywording, so that all pictures in a stack have the keyword applied.
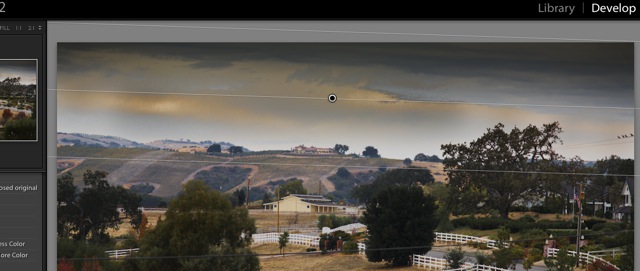
I have been banging away at LR2, moving files and folders, stacking, copying, processing, exporting and adding keywords for a while now and have had no lock-ups. The only time the application really bogged down was when I tried using the adjustment brush with auto-masking switched on to paint in a large, irregular sky area. I got the spinning beach ball while the overtaxed, modest GPU (Intel GMA 3100) in my MacBook did the data crunching. Mercifully, this is not something I expect to do often. At 4 megabytes of RAM it’s not like I’m hurting for CPU memory so I’m blaming the graphics processor for this one!
If I decide to upgrade to LR2 (I’m using the 30 day free trial which comes fully featured) I’ll give it a run on our old iMac G4 ‘screen on a stick’ which continues to soldier away as a great Internet browser. That will answer the question of how well LR2 runs on older PPC CPU Macs. I can confirm that LR 1.4.1 runs well on this computer if nowhere as fast as on the MacBook. It remains more than useable for those looking for a low entry price to the world of Lightroom processing. The latest version of Aperture does not run at acceptable speeds on older machines like this one, whose G4 CPU runs at 1.25gHz and has just one core compared to the Intel’s two. One of the most distinguishing features of LR 1.4.1 is its speed on these old but still useful machines. Let’s hope that has been retained in LR2.
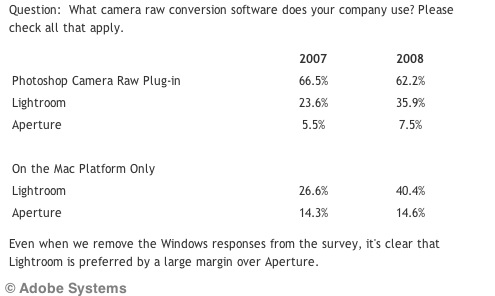
By the way, for those readers into this sort of thing, here are some interesting statistics on LR vs Aperture users from the Adobe blog. Probably self-serving given that this is Adobe’s data, but interesting all the same. Sample sizes are not stated in this survey:
I have questioned Apple’s commitment to Aperture before (no critical mass, no significant profit) and have little reason to change that opinion. And as I can testify, the conversion process from Aperture to Lightroom is not pretty. So the sooner you switch, the better. Adobe does this for a living; to Apple it’s a rounding error.
Enough talk. Here’s a snap from the beach, a composite of four images combined using Helicon Focus:
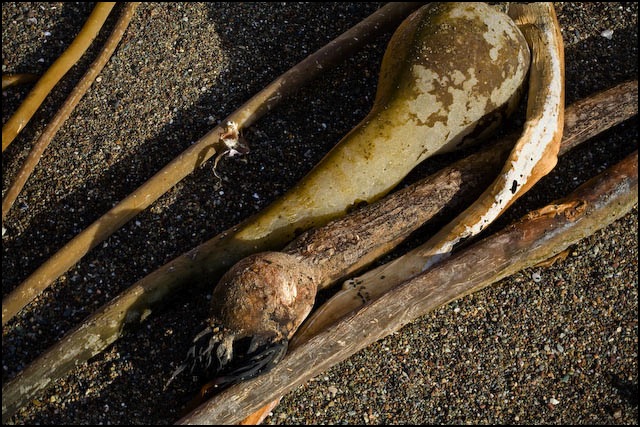
Kelp. 5D, 100mm macro and ring flash, 1/100, f/22, ISO400. Composite of four images using Helicon Focus.