More from the Magic Hour.

Click the image for a larger version.
Leica M10, Light Lens Lab 50mm S-P II at f/2, 8x ND filter.
More from the Magic Hour.
Click the image for a larger version.
Leica M10, Light Lens Lab 50mm S-P II at f/2, 8x ND filter.
The Magic Hour.

Leica M10, Light Lens Lab 50mm S-P II at f/2.
Leica Summicron ‘glow’.
For an index of all Leica-related articles click here.

The standout characteristic of the LLL 35mm ‘Summicron’ 8 element and the LLL 50mm Cook ‘Speed-Panchro’ S-P II clone lenses is the glow they produce around strong highlights at full aperture. Want the best definition? Stop down to f/2.8 or smaller and the glow is gone. In a sense you get two lenses in one, with each variant.
This was snapped at f/2 in the local Episcopal cathedral. Click for a larger image, click again and you will see what I’m going on about. Cutting edge sharpness at full aperture? Nope. But a charming rendering unlike that of modern optics.
Leica M10, LLL 35mm 8 element at f/2, ISO 1600.
Very handy in the field.
For an index of all Leica-related articles click here.
The Leica part number is 14838. Look around on eBay and they can be found for under $10.
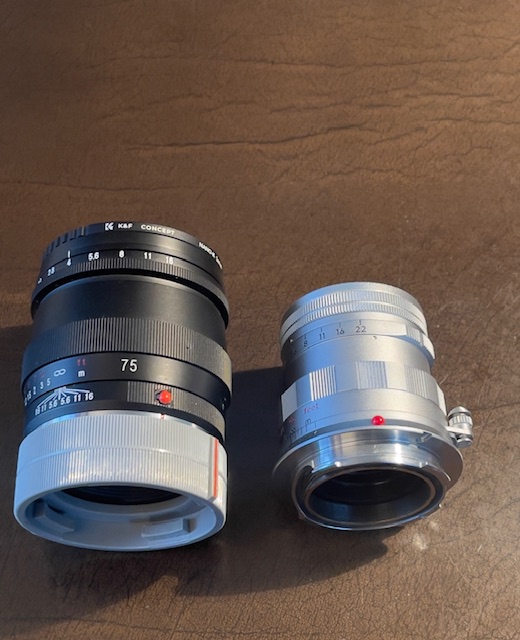
When street snapping I typically go with something short on the camera and another lens a little longer in my pocket for picking out details. To protect the rear element of the latter I use this Leica lens coupling ring which allows two lenses to be attached back-to-back. The secret is to use it with only one lens at a time so, when it comes time to swap lenses, I extract this from my pocket, remove the lens from the camera, attach it to the other side of the ring then simply pop the other optic off for attachment to the Leica M body. If you use it with two lenses attached and a third on the camera you risk engaging in a dangerous juggling act as you try to replace one lens with the one just removed from the camera, risking dropping one or more lenses. Not a prescription for success.
The red line (there are two, 180 degrees apart) provides a handy index for insertion of lenses.
The ring is sufficiently deep to allow all but the earliest ultra-wides to be fitted without the risk of interference from deeply protruding rear elements (21mm Super Angulons would be an example) while affording good protection for the rear element. By the way, these old ultra-wides are a poor match with digital sensors owing to the very oblique angle at which peripheral rays strike the sensor, often resulting in ‘rainbow’ aberrations on the image periphery in color images. Modern ultra-wides adopt a retrofocus optical design which avoids the deeply protruding rear elements.

Rough part of town.

Leica M10, 35mm LLL 8 element, B&W conversion in Lightroom Classic.