Category Archives: Hardware

Stuff

4K displays

High definition at a bargain price.

These are the most exciting times for photographers, with 4K displays coming to market in the guise of LED TVs.

I wrote the other day of the $220 32″ Seiki TV I bought to replace two 21.5″ displays for my day job. Easily wall mounted it is working splendidly, delivering 1920 x 1080 (1080p) resolution, driven by my back-up economy Hackintosh using an ancient nVidia 9800GTX+ graphics card. The all in cost, with display, is some $1,000 and any failed part is replaceable same day – it’s called a short drive to Fry’s Electronics in Silicon Valley – with the costliest part being the $220 display. Try that with your iMac.

For comparison, the Retina Display in the MacBook Pro is 2560 x 1600. You can expect to see these on most laptops in the new future, as well as on the iPad mini.

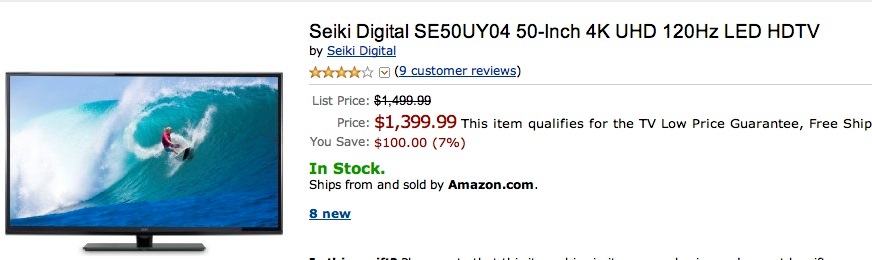
Now a new breed of LED display panel is coming to market, generally referred to as ‘4K’, meaning 3840 x 2160 pixels, or four times as many as the current HD TV spec of 1920 x 1080. Sony will sell you 55″/65″ ones for $5-7,000 or an 84″ version for $25,000. But there’s no need to pay those silly prices when you can get the newly released 50″ Seiki – the same as the maker of my modest 32″ 1080P set – for much less:


50″ Seiki 4K TV.

Weighing but 49lbs, it comes with three HDMI inputs and offers far higher resolution than the overpriced displays from the likes of NEC (whose 27″ 2560 x 1440 sells for $930) or the Dell’s like-resolution 30″ U3014 which is $1250. The Seiki offers almost 3 times the display area at 50% higher resolution for $150 more. Optimal photographic use would be to tile the display into two or four tiles to allow, say, Lightroom Loupe/Develop views, as well as Photoshop, all running simultaneously on the one big screen.

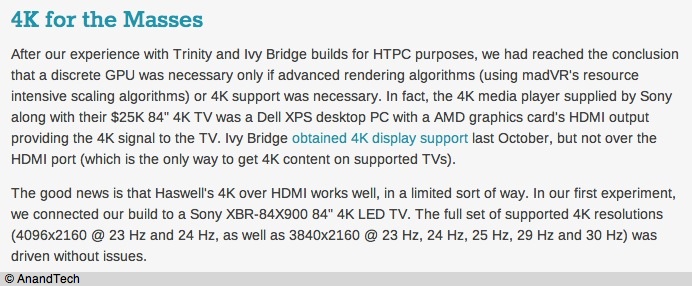
Now I very much doubt whether current PC hardware (by which I mean Hackintosh boxes, as Windows is anathema here, though feel free to check back when hell has frozen over) can deliver the 4K resolution of which the Seiki is capable, but there’s good news. Just yesterday, Anandtech ran an article profiling the first Gigabyte motherboards which will run the forthcoming Intel Haswell CPU ($300 for the i7), and we can expect to see these at Amazon within a couple of weeks, probably priced around $100-200, depending on the external connections provided. A related article discusses Haswell and its 4K capabilities, specifically focusing on Home Theater PCs. Their test saw them using the integrated HD4600 GPU which comes with the CPU, but I imagine that an nVidia GTX660 ($200) would provide abundant power to drive the 4K display with no issues. Indeed, they used the same Seiki mentioned above to prove this. Anand specifically state:

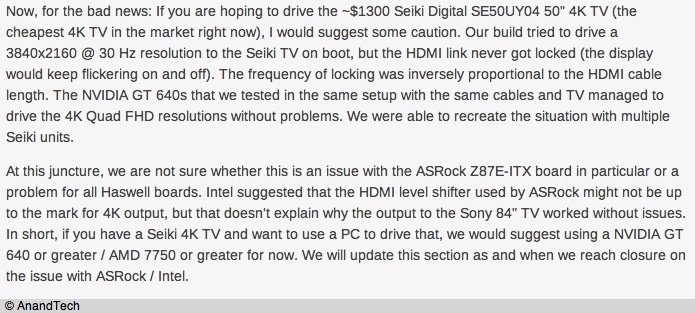
They mention some connectivity issues with the Seiki, but I’m confident it’s not something that will remain unsolved for long. Further, they go on to say:

How does all this work for the Mac OS X devotee and Hackintosh builder? I believe we will see a new version of OS X, 10.9, at WWDC in a week’s time or maybe shortly thereafter, which will support Haswell. As for Gigabyte – the preferred motherboard maker for Hackintosh builders, those should be out by the end of this month and you can bet that the excellent software hackers at Tonymacx86.com will be all over the project in no time. These guys live for change! So things look promising, and the appeal of a 4K 50″ display for processing photographs is great indeed. Exciting times.

Will we see a >50″ 4K LED set from Apple in the near future? Who cares? I, for one, do not have the required $7,000 to blow on jewelry, especially when I can build something better for $2,300. Gizmodo has a review of the Seiki, but it’s written by 16 year olds for 14 year olds. You are better off with the comments at Amazon US.

4K on Blu-Ray?

Sure.

Ripping Blu-Ray DVDs

Easy.

When I added Blu-Ray capability to the HackMini, it was solely with the intention of using the enhanced reader/burner to play back a handful of Blu-Ray discs. However, the convenience of rapid access to discs stored on hard disk drives nagged at me so I though I would do some testing to see what is involved in ripping Blu-Ray DVDs and storing the results on HDDs.

Most Blu-Ray discs are encrypted so a competent and current ripping application is called for. After wading through the usual collection of suspects – all seemingly from the same maker with just the names changed, and with questionable output quality – I settled on MakeMKV. OK, not the greatest product name in the history of technology, but it works well.
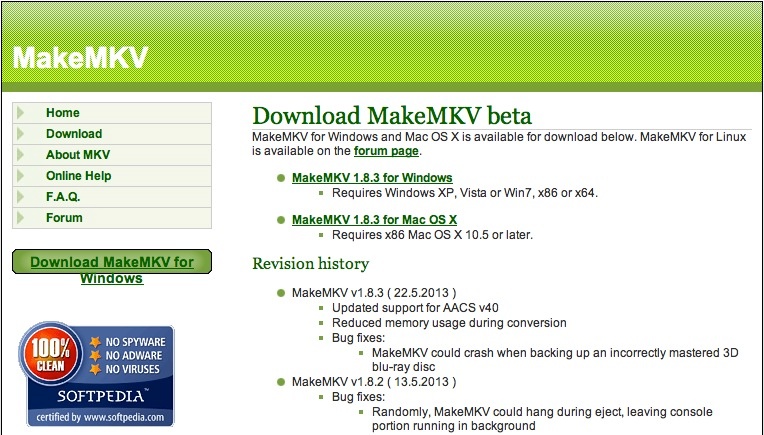

Click the image to go to the download page.

The author appears to keep the product current and there’s a useful Forum where issues are discussed. There’s even a Windows version for true masochists. Windows 8 appears not to be supported, but I can only think that is a feature rather than a limitation. The application expires after 60 days but a fresh download renews it. The purchase price is $50 and it’s worth every penny and is just reward for the developer’s sterling work.

The process is very simple. Insert the Blu-Ray DVD, fire up MakeMKV and direct the output to a destination of your choice. My first rip took 51 minutes and delivered some 46GB of output spread over many files and directories. Most of this is junk which can be discarded – extras, advertisements, menus, etc. All that needs be done is for the one big file to be retained. After a few rips I have found that file – it resides in the ‘BDMV/STREAM’ sub-directory – is typically some 28GB in size. (See ‘Selective Ripping’, below). The file is renamed, moved to the destination of choice and all the remaining 18GB of junk can be erased. Remember to go to Finder->Delete Trash to free up the related disk space. For comparison, a regular DVD delivers a file of 4-7GB and takes 10-14 minutes to rip. For reference, the HackMini uses a Gigabyte H67M-D2-B3 motherboard, an Intel i3 SandyBridge CPU and a modest nVidia GT430 graphics card. RAM is a slim 8GB of 1333MHz speed.

The ripping process creates little thermal stress for the HackMini. The usual CPU temperature of 88F rises to 104F during a rip, and the CPU cooler is the stock (and not very good – though it is very quiet) one which ships with Intel’s CPUs. With a service limit of 176F it’s not like anything untoward is about to happen to the CPU here.
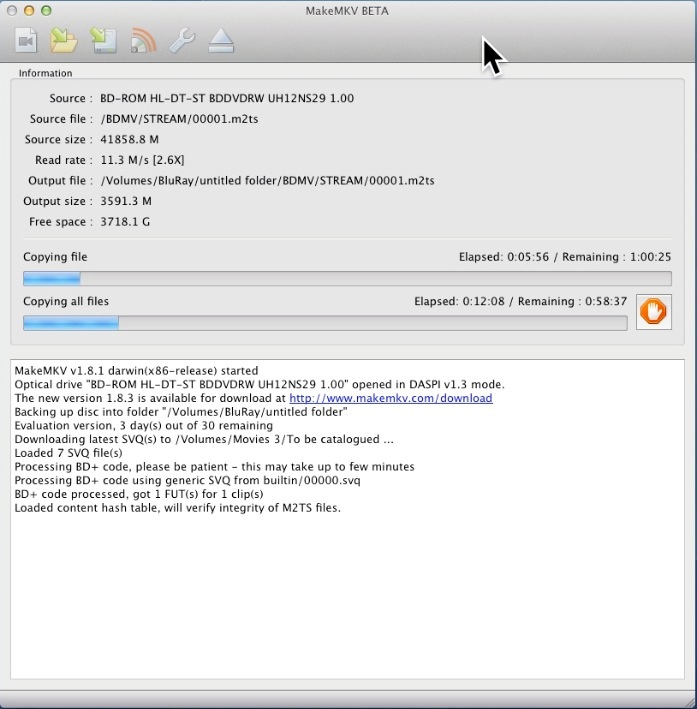

MakeMKV at work, ripping the key file from a Blu-Ray DVD. The total download
time is overstated here, typically falling to ~51 minutes through conclusion.

The ripped file needs no further conversion if played using the applications mentioned below on a Mac. If the destination is an iPad or iPhone, then Handbrake can be used to convert the file but why anyone would waste their time ripping Blu-Ray movies for viewing on those small displays is beyond me.

On my first attempt I placed that file on my external Mediasonic box which is connected to the HackMini using an USB2 cable. There are at least two players which can play the ripped file – the latest version of VLC (free) and the inexpensive Mac Blu-Ray Player which currently sells for $40. Unfortunately, playback was not good, with some stuttering using VLC and heavy stuttering with Mac Blu-Ray Player. I guessed the issue lay with the slow data transfer speed over USB2, and relocated the file to one of the internal drives in the HackMini, a small 2.5″ spinning disc, 5400rpm SATA 2 3GB/s notebook drive. Perfect. The movie played back without hesitation and the sound was excellent. All the various language sound tracks, together with the director’s voice over track were available, as were all the various subtitle features, all seeming embedded in this one file. Nice.

However, the boot and backup drives in the HackMini are very small so this is not a long-term solution. Accordingly, I zipped over to Amazon and bought one 4TB 7200rpm, SATA3 6GB/s HDD, for all of $175. Whether you buy 2TB, 3TB or 4TB, storage cost is the same at approximately $45/TB.
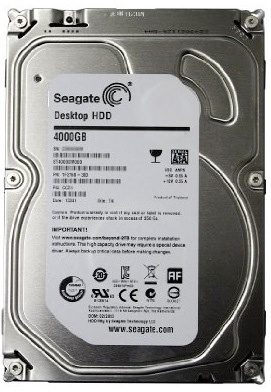

Seagate 4TB HDD.

The HackMini uses a largish SilverStone enclosure which has capacity for two internal full-sized HDDs (four will fit at a push) in addition to the two notebook drives for OS X and OS X backup. It was a moment’s work to install the 4TB whopper which, at say 30GB per Blu-Ray movie, will store some 130 movies at a storage cost of $1.35 per movie. Given that I only buy Blu-Ray movies of all time classics, such as those mentioned here, meaning very few, the ability to store 130 movies on the internal drive should last for ages. By the time that HDD is full I suppose we will have 8TB HDDs available for under $100!
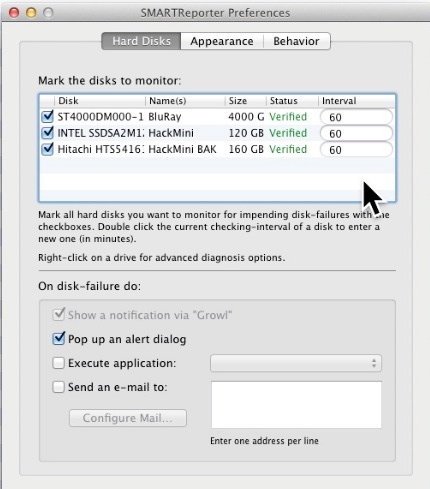

SMARTReporter confirms that all is well with the Seagate 4TB Internal HDD.

For reference, I did test the 4TB Seagate drive in the external Mediasonic box and it was both recognized and quickly formatted using Mac OS X’s Disk Utility. Currently my Mediasonic boxes use 3TB HDDs, so it’s nice to know that they will work fine with larger sizes. Each holds four drives.

Back-up? No biggie. I’ll just keep the Blu-Ray original DVDs in the cardboard box in the corner of the garage which the black beetles call home.

Video and audio quality? Identical in every way to the original Blu-Ray DVDs viewed on my 1080p 55″ LCD TV.

If you are not a Hackintosh user, preferring to use something like a MacMini, I would expect that an external HDD enclosure connected to the MacMini using USB3 should provide adequate data feed rates to avoid stuttering, but I have not tested this. Mac users will also have to add an external Blu-Ray reader as no Mac ever made comes with one. For those few very special movies – the newly remastered The Godfather I/II/III and Lawrence of Arabia are stunning showpieces for this technology – it’s worth it. Those movies may be 40-50 years old but they don’t make them like that any more.

Meanwhile, the HackMini has gradually grown to become a powerful home theater PC. Having started life with the sole purpose of routing ripped DVD content from hard drives to the TV, it now rips and stores Blu-Ray DVDs, and acts as a conduit for some 24TB of movies with one mouse click via the splendid DVDpedia application, relays streaming Netflix and Amazon VOD, fronts for the BBC’s no less splendid iPlayer, plays iTunes music and, why, it can even purchase ridiculously overpriced movies from Apple, all controlled with an RF Microsoft mouse, which is superior in every way to any Bluetooth device. Best of all, it comes with faultless voice control whereby I simply turn to my son: “Winston, fire up ‘Lawrence of Arabia’, the Blu-Ray version if you don’t mind”. By comparison ask Siri to do that and you will likely get driving instructions to Bangladesh. If you want the optimal price/performance configuration for a modern build (the HackMini has some now discontinued components) drop me a line and I will be pleased to help. If you are a movie buff, I strongly encourage you to build one. Assembly borders on the trivial and the software hacking is now very easy with the latest free tools available from the Hackintosh community. Today’s construction cost for a HackMini with a single SSD boot/OS drive is little over $500 and no separate graphics card is needed, owing to the excellent HD4000 integrated GPU which comes with the current IvyBridge i3 CPU, more than capable for the intended use.

Waiting for Haswell: I asked ace Hack builder, the pseudonymous FU Steve, to add a few words on Intel’s upcoming Haswell line of CPUs. What follows was written by him.

“Intel’s current IvyBridge CPUs (i3/i5/i7) are about to be replaced with the 2013 Haswell variants. The significant changes are lower power consumption, good for mobile users, and the integrated HD4600 GPU which updates the already pretty competent HD4000 in the IvyBridge line. The i5 ($195) and i7 (starts at $300) Haswell CPUs will be out first with the i3 ($130?) to follow in the summer. While the performance of the existing integrated HD4000 GPU in IvyBridge is more than adequate for a home theater PC (and for Photoshop/Lightroom use) like the HackMini, it makes sense to wait for the Haswell i3 version. Unlike IvyBridge, which uses the same LGA1155 CPU motherboard socket as its SandyBridge predecessor, Haswell has yet again changed to a new socket (LGA1150) dictating a new motherboard, so it makes sense to wait for both if you can. The bottom line is that no longer will Hack builders have to spend money on a separate GPU card, thus saving $100-250. Only hard core gamers will need to make the additional outlay, where premium graphics performance is required for the most demanding games.”

Thank you, FU.

Update: Selective Ripping

After posting a question on the MakeMKV forum an expert replied that clicking the disk icon in MKV would make selective ripping available – someting unclear from the instructions:
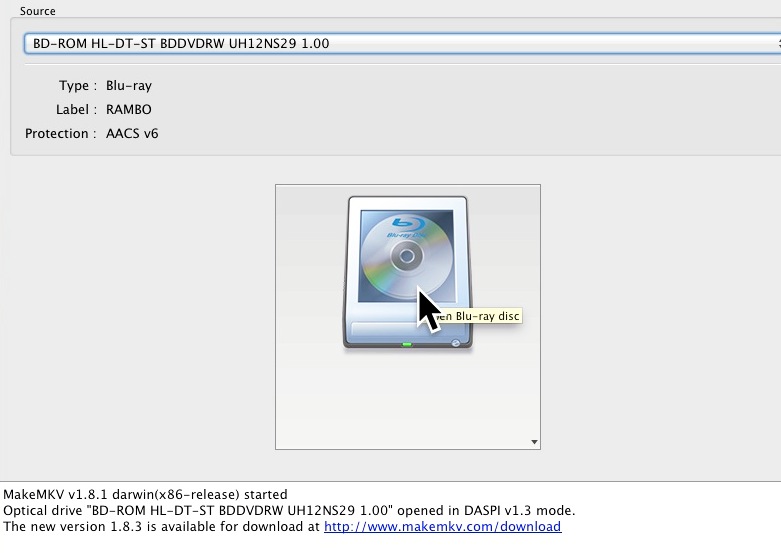

Click the disc icon.

On doing so you are presented with selections, one of which is the equivalent of ‘rip main movie only’ common in other ripping apps.

Select the main movie (if there are two, the larger is likely the one with the director’s commentary, as here – avoid):
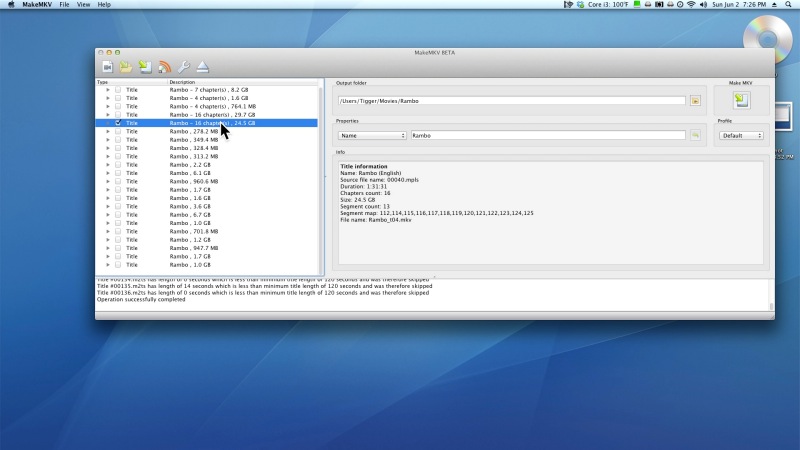
And off you go – saving 7 minutes per rip and having all chapters arranged into one file for you in those few cases where the DVD maker has tried to obfuscate issues by spreading the big movie file over several smaller non-contiguous ones. Not that uncommon.

If MakeMKV cannot decide which files to join for the main feature, read the above linked post, go to AVSforum for the file names to join, rip the full DVD then join those files into one using Mkvtoolnix.
A cheap, huge monitor

All of 32″!

When I asked ace computer builder and Hackmeister FU Steve to put together an economy Hackintosh for me some 18 months ago, the uses and design dictates were simple. The prime use for the machine would be to provide streaming stock quotes and related data feeds on two 21.5″ displays as well as acting as a backup in the event something went wrong with my main desktop machine, the nuclear powered, state-of-the-art HP100+. Accordingly the economy HP10 sports a Sandy Bridge i3 CPU, a second-hand nVidia 9800GTX+ GPU and a couple of regular spinning disk hard drives, each a modest 500GB.

The machine has proved excellent and is running OS Mountain Lion 10.8.3, the current version of the best OS on the planet.

The other day, when upgrading the living room TV from 42″ to 55″, I remarked how inexpensive large CD displays were becoming, and that triggered the idea to swap the HP10’s two smallish monitors for one big one. The cheapest 32″ LCD (actually 31.5″) I could find at Amazon was the Seiki LC-32G82 for $220, delivered from Adorama in NYC. Since then I have discovered that Kmart in the Bay Area peninsula stocks the same set for the same price, and I would counsel buying locally as QC with these cheap Chinese sets seems iffy. A local purchase makes exchange easier.

The screen area of a 31.5″ set is 215% that of one 21.5″ display, so the total screen space is largely unchanged, but in a much more elegant setup. Proceeds of sale of the old displays will pay for the new.

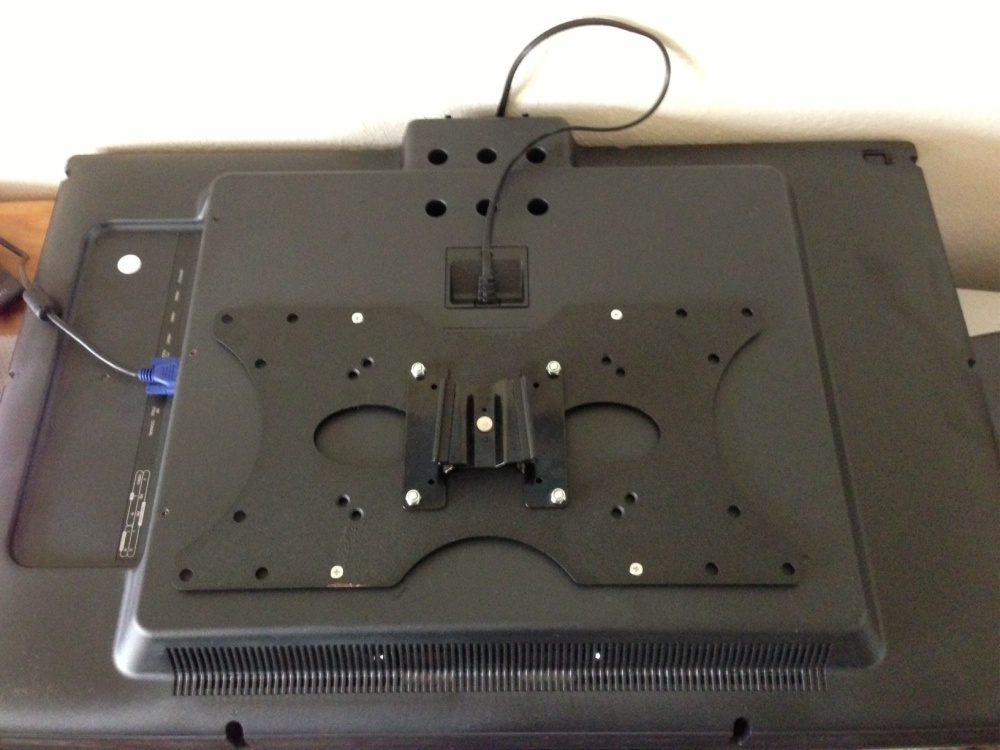
I wall mounted the set – it only weighs 29 lbs, using one of the original 100mm VESA mounts bolted to a $10 adaptor plate, the mount attached to the wall via a batten which is bolted with lug bolts to the studs in the wall. The distance from screen to wall is a total of 7 inches, and the surface is semi-matt, posing no issues with reflections.


Adapter plate for original VESA mount installed. Pillar for supporting plate has been removed, top.


On the wall. Pillar for supporting plate visible underneath, not yet removed.

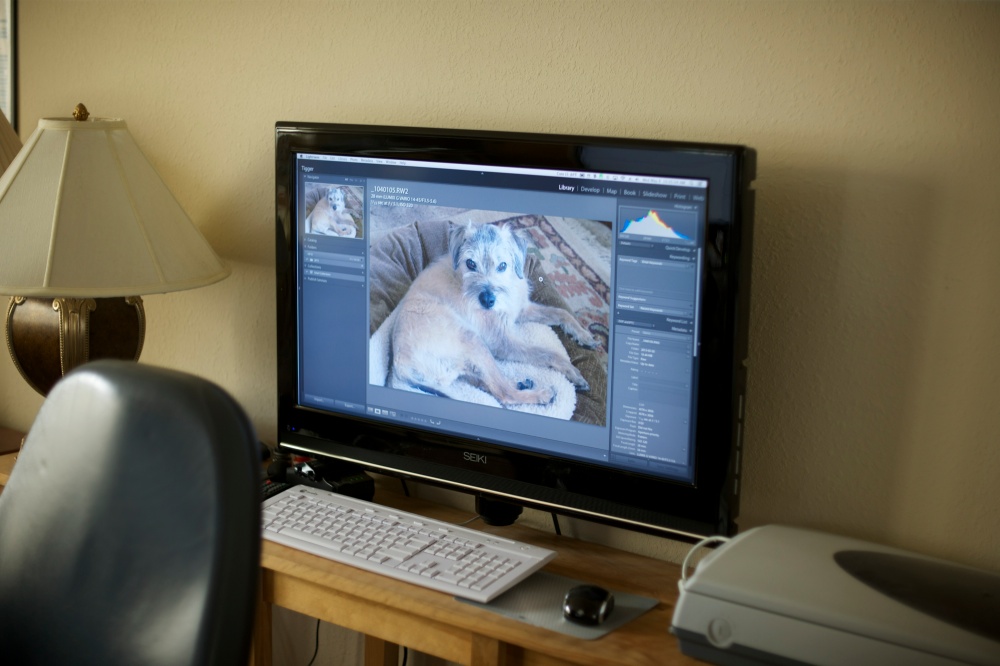
While the display will be used exclusively for my day job, I took a moment to test it with Lightroom to determine whether it could be used for photo processing. First I tried a Mini DisplayPort to HDMI connector then a DVI-A to VGA one. Surprisingly, the VGA connector rendered considerably higher resolution so that’s what I am using. VGA, an analog feed, is not supported by EyeOne’s Display One software and colorimeter, so I profiled the display using Apple’s excellent utility (in Expert mode) found in Sys Prefs->Displays->Color, with final fine tuning done by eye against one of my calibrated Dell 2209WA monitors attached to the HP100+.

The results are really excellent and I illustrate this below, first with a JPG exported from LR on the HP100+:

Next is a screenshot of the same image on the calibrated Seiki:

Judge for yourself.

So the Seiki is more than usable as a very cost-effective large display for processing images. 32″ for photo processing is really large so your workspace really needs a decent setback so that your nose is not in the display, but after a few minutes use there’s no going back.

What are the drawbacks?

Well, it’s not as elegant as a big Dell Ultrasharp, sporting a relatively broad, glossy bezel. Though it’s only 60HZ that is fine for watching fast moving sports like Formula One through BBC’s iPlayer. By contrast, the same sport viewed on any of my three Dell 2209WA displays is poorly rendered, with much smearing/doubling in full screen mode. At this point I’m beginning to wonder why I spent $1,000 on the three Dell monitors …. The Seiki is 1920 x 1080 (16:9 widescreen), not the higher resolution 2560 x 1600 (16:10 – much nicer) sported by the Dell. And the warranty is one year compared to three. Wake from sleep is some 20 seconds, compared to 1 second for my Dells if that’s of concern.

On the other hand, the current Dell 3014 runs $1,300, so you could get almost six of the Seikis for one Dell. And you can dispense with separate computer speakers or a sound bar as if you are using VGA with a green motherboard socket, a separate 3.5mm coax cable delivers sound through the Seiki’s built in speakers which are quite decent sounding.

It’s an enticing proposition for photographers on a budget. If you decide on one, be sure not to get the $20 cheaper 720p version. That’s false economy. The correct model designation is LC32G82. While you can pay many times the amount asked for slimmer, more chic-looking sets, the finish of the Seiki is first class with tight seams and no blemishes on my example. The stand is very sturdy and the massive support pillar easily removed (six screws), replaced by a supplied blanking plate for wall mounting.


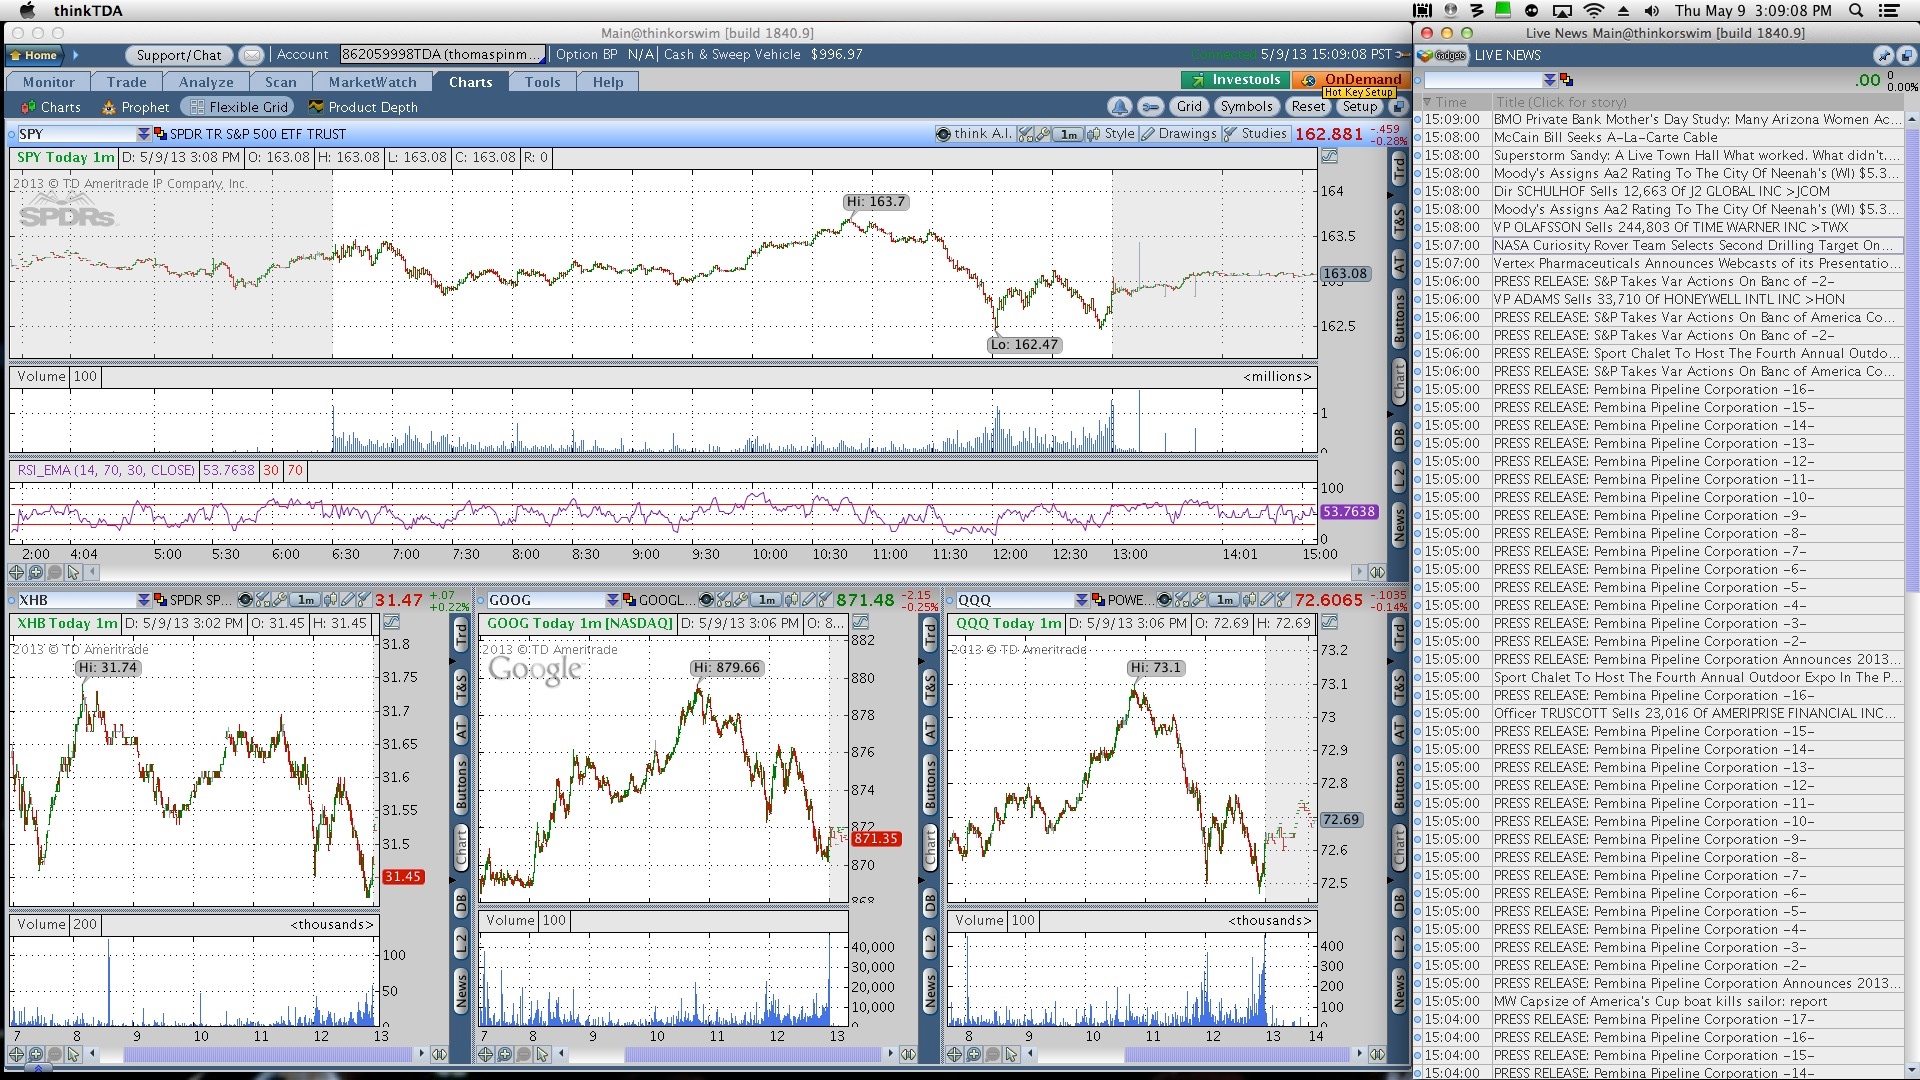
Easily read on a 32″ display. Click the image for a larger version of this Seiki screenshot.

Oh! and one other thing. You can always watch the TV on this display!

The Hackintosh and Blu-Ray

Another step forward.

It’s no great secret that Apple has never included a Blu-Ray reader/burner in its computers. Maybe they are right. With the increasing availability of HD streaming video they have concluded that BR makes no sense. Maybe their greedy profit margins on their mostly mediocre hardware couldn’t survive the markup? Who knows?

A related problem is the dishonesty of the movie studios. Ever interested in hosing the consumer down for something claimed to be newer and better, a lot of classic movies have been cynically copied to BR discs with no effort made to go back to the original film stock, no enhancing of signal-to-noise ratios, no scanning of the original images and no great sound. That’s a lot of no. So you often get a poor transfer whose major distinguishing feature from the SD DVD is the price.

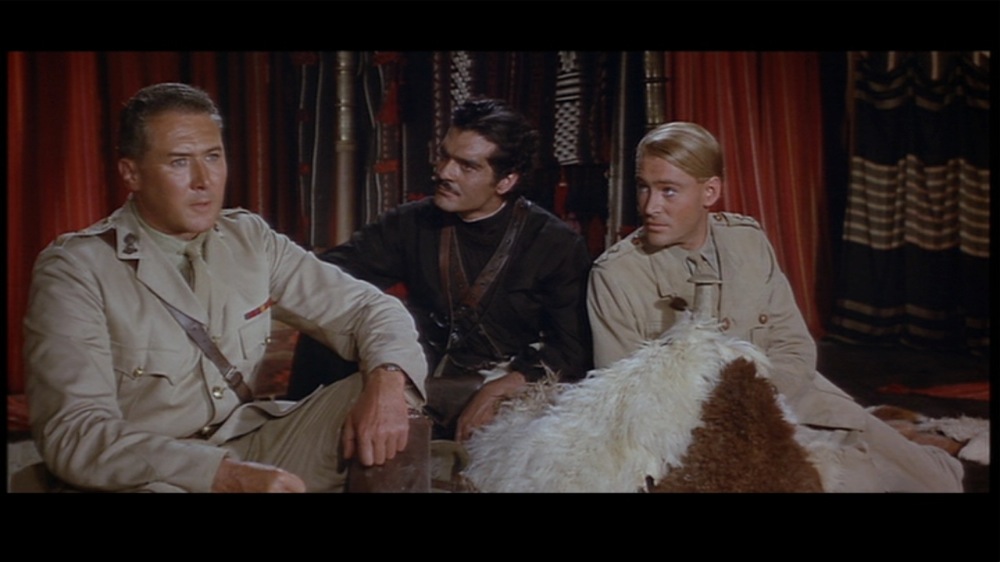
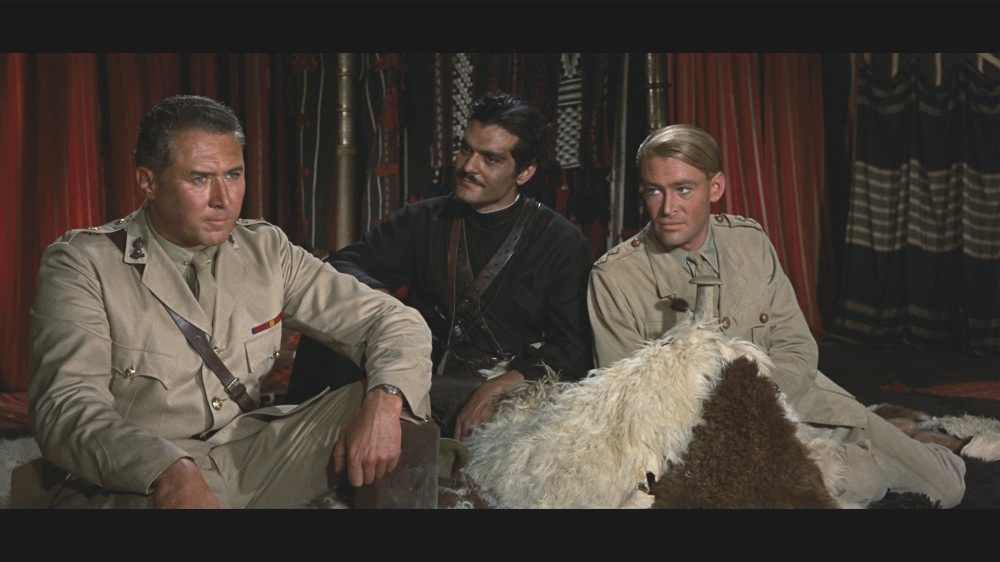
My choice for my inaugural Blu-Ray movie is Lawrence of Arabia. Robert Harris is recognized as one of the most adept restorers of old movies, and every frame of the original 65mm film has been scanned, retouched, color corrected and so on. A true labor of love. So I started with a Blu-Ray disc created from his restoration.


El Orance at the Red Sea, Aqaba.

But first the technical details.

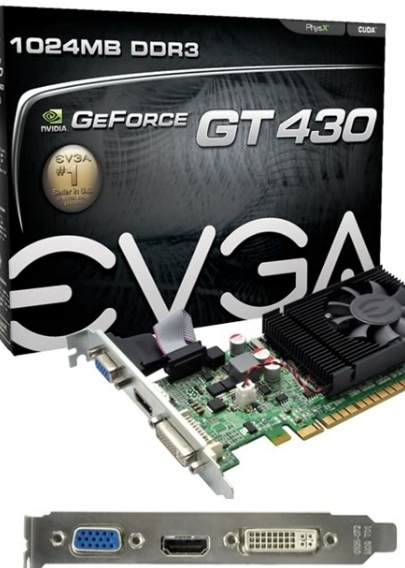
The HackMini, my TV Hackster, uses a modest Gigabyte H67M-D2-B3 motherboard and an equally modest EVGA GT430 graphics card, the last sporting VGA, HDI and DVI outputs. It runs OS X Lion 10.7.4 because there’s no earthly reason to upgrade. I have long used it with VGA connected to the TV set with a separate 3.5mm coaxial cable for sound. It has worked really well. An expert Hackintosh friend (thank you, PB!) had alerted me that getting the HDMI port (it conveys digital video and audio) working is quite a challenge. For those into Hack matters, the DSDT.aml file has to be edited extensively and depending on your hardware, additional drivers (‘kexts’) may have to be installed. It all looked a bit forbidding, and my ace hacker and Hackintosh guru FU Steve was out of town, so I got down to the hardware part first.


The inexpensive nVidia GT430 – this is the VGA/HDMI/DVI version in the HackMini.

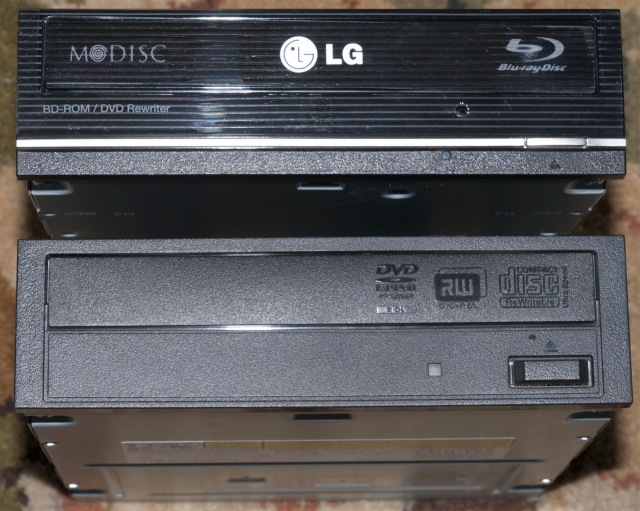
The cheapest Blu-Ray reader/burner I could find was an LG for all of $44 – prices seem to fluctuate daily:

As you can see, the size is the same as that of its predecessor, and replacing the original Sony drive was a matter of a few minutes, helped by the ample space in the HackMini’s enclosure. MacMini owners need not apply ….

Next I connected the drive to the TV using an HDMI cable and rebooted. Naïvely thinking that I could use the latest version of the VLC video payer with Blu-Ray enhancements added, I fired up the app and got an error message. The Lawrence of Arabia BR DVD is encrypted and will not play through VLC.

So I hunted around a bit and came up with BluRayDVDPlayer and had a perfect picture first time but …. no sound over HDMI. You can try this app free, the $40 price registration removing the obtrusive watermark. Sure enough, looking in OS X’s System Preferences->Sound disclosed no HDMI output. I checked out the hacking instruction at Tonymacx86 and was less than enthralled, so I reconnected the drive to the TV using a VGA cable and separate sound cable. Ha! BluRayDVDPlayer takes the digital sound feed and makes it available to the analog VGA feed. Wonderful. Video and audio was now working. So the all in cost was $44 for the hardware and $40 for the application. But nothing is every clean in Hackintosh land. For once, those unfortunates who do not get it, AKA Windows users, can click right through.

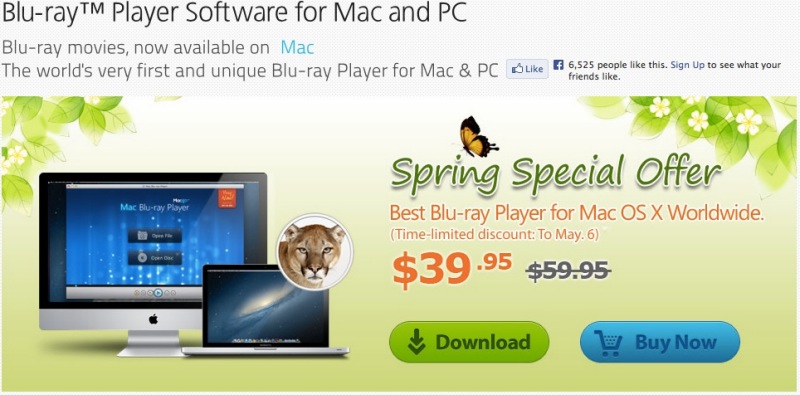
But try and buy the Mac app from the BluRayDVDPlayer site and nothing happens when you click the ‘Buy Now’ icon.


Click the image.

However, right click or ‘control-click’ on ‘Buy Now’ and ‘Open in a new tab’ and you are up and running. A code is immediately emailed to you, easily input, and the watermark is gone. The interface is exquisite, the tuning Preferences engineered by users – lean and mean, fast, unobtrusive – and the app appears to be regularly updated for the latest nefarious copy protection schemes of the fools in Hollywood who earnestly believe that buyers will make 35GB copies for distribution to their friends. Right.

Update September 24, 2013:

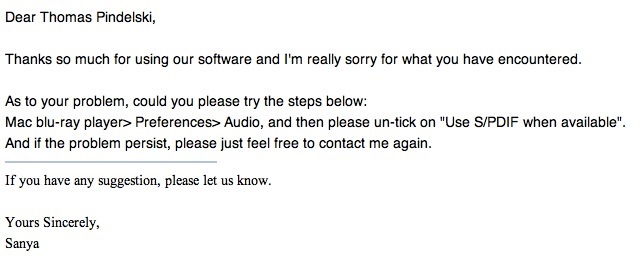
Since updating my TV media PC to a Mac Pro using the same excellent nVidia GT430 card, I have had great success using the HDMI connection from the Mac Pro to the TV using this HDMI hack referenced here with BluRayDVDPlayer. A fine product. The only anomaly was that on occasion a Blu-Ray movie ripped using MakeMKV would not reproduce sound, somwething that could be remedied by going to Audio->Audio Device->HDMI (Encoded Output) and switching to Audio->Audio Device->HDMI. I dropped the developers a line asking how to make the latter the default audio setting, as it works with all movies (and also respects the scroll wheel on my BT mouse for volume control) and immediately received the following response:

This works perfectly. Try getting this sort of service from the big boys in Cupertino or Redmond ….

Update ends.

So what about the experience?

Lawrence of Arabia in Blu-Ray is truly starting at the top. A photographer’s dream. As I wrote in the introduction of this piece, it is overwhelming, one of the greatest movies made, its great length but a flash as you sit, enthralled. I once saw it at the Carnegie Theater on 7th Avenue in NYC in 1985 on a large screen and really that is the way it should be seen. But a decent sized home TV and this splendidly remastered Blu-Ray DVD come pretty close. I’ll leave you with two images, a mere 1000 pixels wide – no prizes for guessing which is which.


Subjectively? Blue-Ray leaves HD streaming content in the dust. Regular DVDs? Not a chance. Netflix will happily rent you Blu-Ray DVDs for a monthly premium of $4. Their catalog now numbers some 3,300. Just make sure the ones you rent have really been remastered (Amazon reviews are good for this) not some slimy hack copy of a low quality DVD file.


The home screen on the HackMini.

The best computer ever

Flashback to 1981.


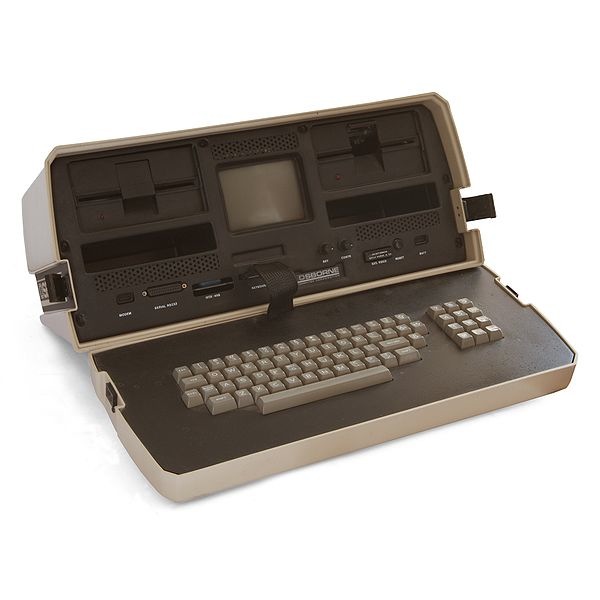
The Osborne 1.

That’s a big claim, so let me step back a moment. The first personal computer which was actually usable by regular people was the Apple II, introduced in 1977. It cost some $2,500 plus lots more for a disk drive and software, appealed to a small cadre of visionaries – rich visionaries – and was out of my price range. When the Osborne I came along, it was some 100% cheaper than a loaded Mac and was quite perfectly ugly by comparison. Ostensibly portable, it would take a Schwarzenegger to justify that claim, for the Ozzy weighed in at 25lbs. Worse, it came with an awful 52 column by 25 row grey-on-black CRT display, quite unreadable to all but F15 pilots with 20-20 vision. So another $100 procured a 12″ green CRT display which was actually usable. The two disk drives were inept beyond belief, two single-sided 5 1/4″ floppy drives, each floppy storing but 360k of data. A few months later a 300 baud modem was made which slotted neatly into the fascia and provided dial-up access to …. well, not very much. I used The Source, a dial-up bulletin board which was great for exchanging use tips. The case, in cream plastic, was poorly made, the seams awful, and closing the box up was not a pretty matter. There was no battery – how much did you want to carry? – and the keyboard/cover was connected to the body with a broad and fragile ribbon cable.

Yet it was fabulous.

You what?

Simply stated, it came with the greatest package of software on earth. And that software was to be inextricably linked with my Unfair Advantage. Where others blew their coin on wine, women and song, I blew mine on what Steve Jobs famously called ‘A Bicycle for the Mind’. Man is a tool using beast, the feature which distinguishes him from other primates (OK, otters are pretty cool), and the Ozzy’s software cornucopia provided more leverage for the mind than Archimedes ever dreamt about.

The Ozzy sported a grand 16k of memory, a good chunk of which was taken up by the CP/M operating system, which had to be loaded from a floppy every time the machine was fired up. Hence the two floppy drives – one for the OS, the other for data. You would fire up the OS, then insert one of the software floppies to invoke the application of your choice. The bicycling mind still thought this was a great return on time invested.

And here’s the magic sauce. The software the Osborne came with still constitutes the bulk of my computer knowledge. It was outstanding in every regard.

The CP/M OS was superb – small, lean, fast, easy to learn as long as you were prepared to type commands on the one line command-line interface, confronted with a small flashing cursor which left everything to the imagination. When Microsoft’s DOS was introduced later, with the IBM PC, it was very much like using CP/M. I do not recall a lockup with either.

Once the OS was up and running, a minute or two of grinding from the left-hand floppy, you pulled the disc and installed one of Basic, Supercalc, Wordstar or dBaseII. What a thrill!

The obviousness of Supercalc, the second spreadsheet app after Apple’s Visicalc, was true magic once you got it. Learn how to input numbers and letters (‘strings’ in the Osborne’s arcane manual), input your first 2+2 calculation then change one of the cells to 3 and …. magic! 5 appeared on the screen. And while the spreadsheet has created more wealth destruction through its undisciplined interface, lacking all control and intellectual rigor, it was a ‘light bulb’ moment. Since then the spreadsheet has been the cause of insane, the tool for massive fraud by investment bankers back-solving for the desired input and continental depression, yet that ‘magic 5’ remains a moment I will never forget.

Continental depression? Why, yes. Just last week it was disclosed that two ‘esteemed’ economists – a contradiction in terms if there ever was one – funded by knuckle-dragging conservatives, had made fundamental formula errors in solving for their desired result. The conclusion from their spreadsheet? That Debt:GDP ratios exceeding 90% meant the end of the world. These ‘distinguished’ economists – two frauds named Reinhart and Rogoff – convinced western Europe that austerity was the only way out of the global recession. The only snag is, had they got their formulas right, they would have come up with a different answer and austerity would never have raised its ugly head, instead of ruining the economies of Great Britain, France, Portugal, Spain, Greece, Italy and so on. So yes, while the magic of the spreadsheet was immediately obvious, it was every bit as obvious that you could work that magic to get to any answer you wanted (investment bankers) or screw up royally and procure additional funding from your masters at the right-wing think tank (R & R).

The Basic app was outstanding. After mugging up on the language it was a simple matter to write your own routines to perform recurring calculations. Sort of a one cell spreadsheet. When the IBM PC came along a couple of years later the only software it shipped with was DOS and ROM Basic, the latter written by none other than Bill Gates himself, and it was what I used to codify bond math to a point where all the user had to do was input a variable and have the result appear instantly. A one cell spreadsheet calculator, if you like. The error, if any, was made at the coding stage, not at the calculation step.

Wordstar was a blast. For the first time I could write – and write copiously – and print the result to a 9 x 9 pin Okidata dot matrix printer. Trust me, that was a whole lot better than my handwriting. The wonderful Toshiba 24-pin variant came along two years later and suddenly dot matrix approximated the one-use carbon ribbon in the IBM ‘golf ball’ Selectric typewriter. Best of all, you could hack the source code with ease, though I still recall one evening when I was adding my own tailored commands to the menu only to come across the programmer’s invocation “You should not be looking here!” buried in the source code. Computing on the frontier was an absolute blast back then. And because you only had some 6k of memory left after the OS and Wordstar were loaded, Wordstar would permit near-infinite length documents by simply paging through them by swapping the contents of memory to that other floppy. Brilliant. Photoshop uses that technique to this day. And you could spread your magnum opus over as many floppy disks as your wallet could afford. Tolstoy would have loved Wordstar.

But all of those pale when it comes to applied rigor and discipline, and the name of this unforgiving teacher was dBaseII. dBase was originally written by Ashton Tate for the CP/M OS and it taught programming discipline like nothing else. Sure, you could carve out ‘if-this-then-that’ rules for special cases, but large populations of data hew to the rules of large numbers, with 80/20 rule sets very much at their core. You did not have to carve out too many exceptions when sorting through large data sets. I taught myself database programming using a book which profiled Fred’s Fish Shop, taking you thorough sales, inventory, receivables, payables and so on, all absorbed on daily commutes on the M104 bus in Mahattan on the way to work. Sure, the bus took longer to get to Wall Street than the RR subway from my Westside place, but it was air conditioned and the extra time was welcomed, dictating only that the alarm clock be set some 30 minutes earlier. When philosophical reflection on the plight of man was called for, all it took was a glance out of the window as the bus labored down Broadway, the passengers alternating between white, brown, yellow and black, then white again. The availability of a superbly powerful database management system for the price of the Ozzy was so overwhelming an economic proposition that I went out and bought Ashton Tate stock without a second thought. The return on that investment yielded my next computer, the first IBM PC.

The rest is history but the Ozzy can fairly be said to have been my greatest teacher ever.

Graphics User Interfaces? That was all much later. 1984 to be exact when the Macintosh arrived. And photo processing on a computer was a dream which did not see reality until 1990 with the introduction of Photoshop, only on the Mac! The first Nikon (not so) affordable scanners came along a few years later and suddenly all your images could be made digital and easily manipulated, be it Mac or PC. But that Ozzy, or more correctly, its software bundle, paved the way for this computer ingénu and all that followed.


The view east toward the MONY building, winter 1981,
as I learned dBase II on the Ozzy from my apartment
at 310 W 56th Street, New York City.
Leica M3, 50mm Summicron, Kodachrome 64.

The Ozzy passed to my niece at Champaign-Urbana, University of Illinois, upon which she wrote her dissertation which got her a first in brain studies. Or something. Way over my, err… head.