Sometimes black and white works.
I was much taken with this peculiar security door in the Mission District of San Francisco, but the color original was surpassingly bland. More punch was called for.
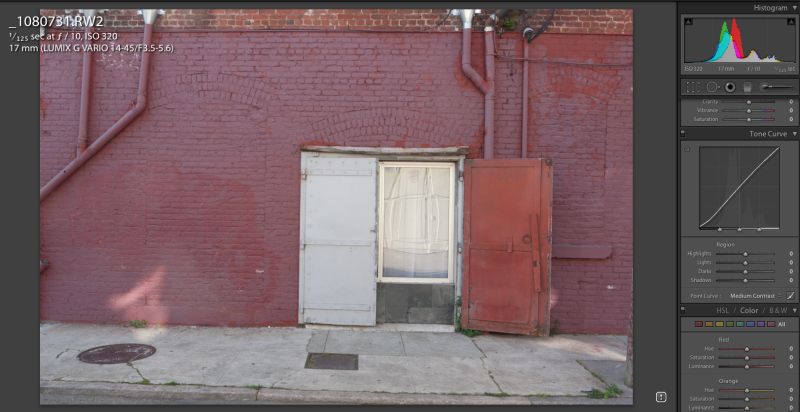
Original snap.
Long time readers of this blog will know that, despite growing up with TriX film, I generally consider contemporary use of black and white so much of an excuse for trying to make a lousy picture half decent. Sometimes, however, a subject really does scream ‘monochrome’ at you, and this is one of those times. (Mantra? “Black and white sucks, except when it doesn’t”)
After a quick round trip to Photoshop to correct leaning verticals, (read the Comments below to see why PS is superior to LR for perspective correction) I clicked on the B&W panel in LR3 then proceeded to mess with the Tone Curve and associated sliders. By clicking the triangle at top right of the histogram (circled), I could work the ‘Highlights’ slider to the point where clipping just occurs (see the arrowed red line in the snap), thus preserving highlight details.
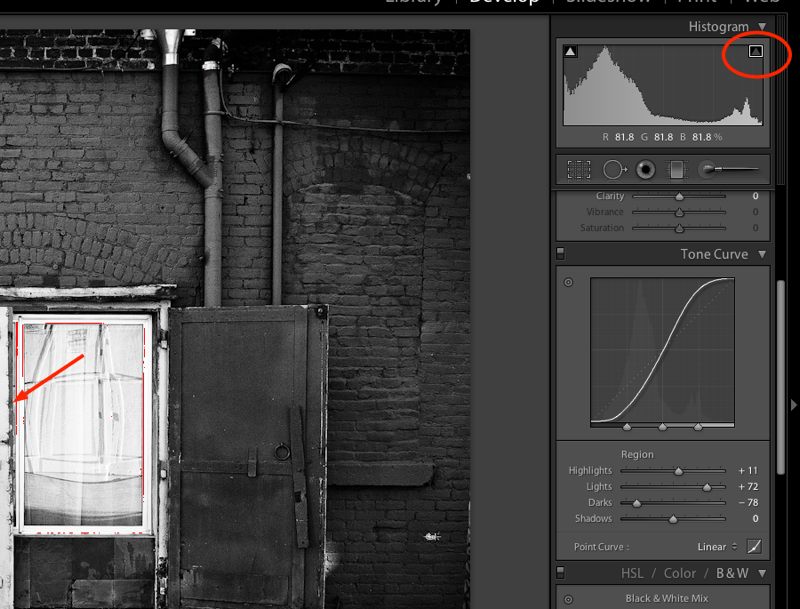
The tone curve has been modified into an ‘S’ shape from the linear original, thus heightening contrast while preserving shadow details.
And here is the finished result after applying a touch of post-crop vignetting to heighten the focus on the main subject:
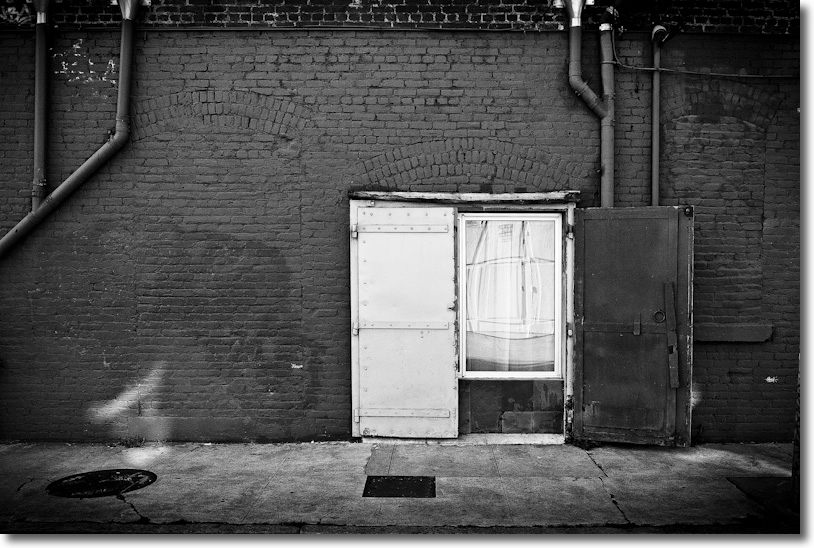
Security door, Mission District, San Francisco. Panasonic G1, 14-45mm kit lens at 17mm, 1/125, f/10, ISO320.
On rare occasions black and white does work, though in this case I confess I was thinking in color, as I usually do, when pressing the button.
Why not correct verticals in lightroom?
Chris – The LR vertical correction is rudimentary. What it does is pivot the picture centered on a horizontal axis drawn through the middle of the image. This means a lot of the image is cut off at the top or bottom. By contrast the ‘Edit->Transform->Distort’ control in Photoshop permits stretching of the image in any direction at any edge or center, thus allowing for non-symmetrical distortion correction and preservation of much more of the original.
I illustrate this below where the original has had -18 Vertical perspective correction applied in LR3 – look at the amount of blank space at the base which will have to be cropped, using the ‘Constrain Crop’ checkbox in LR. See also how much of the brickwork at the top has been lost. By contrast, the PS approach allows the user to stretch the top corners of the image outward without creating any need for cropping at the base. You can also stretch the image vertically (or horizontally) to correct for foreshortening caused by the distortion controls.
Vertical perspective correction using LR3.