Moving to strength.
For an index of all my Mac Pro articles, click here.
Today’s Mac Pro enhancements have been ones of gradual improvement at no cost, using parts transplanted from the Hackintosh.
Enhancing memory:
First the Corsair Vengeance RAM, 4 x 4GB, 1600 MHz DDR3, was removed from the Hackintosh, the 6 x 1GB Mac RAM removed from the Mac Pro and the four Corsair sticks placed in slots 1, 2, 5 and 6, the way Apple dictates. While not ‘Apple approved RAM’, I was confident they would work, and work they did.
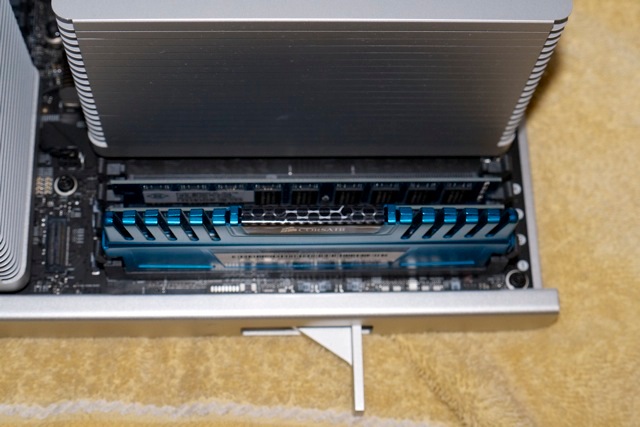
Corsair RAM in the Mac Pro. Original ‘Apple’ RAM in the rear.
Here is how Apple says you should install RAM:
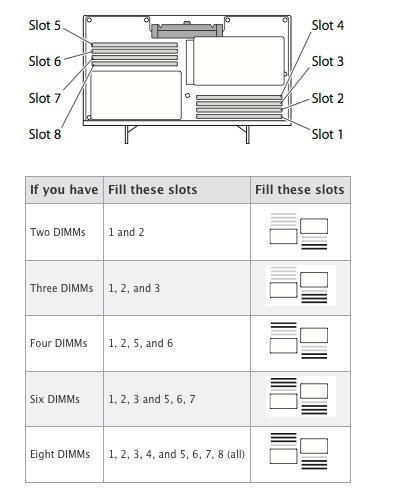
Correct placement of RAM.
Do it right and you get this message on powering up:
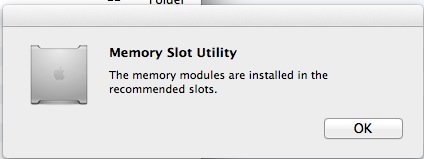
There was more than enough room that there was no need to remove the blue heat sinks. This is the happy result:
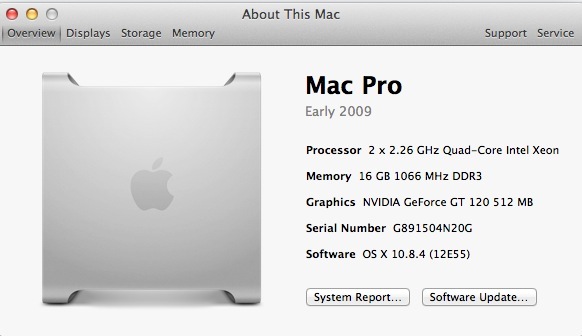
So that’s $132 saved on 16GB of Genuine Apple Ram (made by Samsung). There’s a nice bump in CPU performance, too:
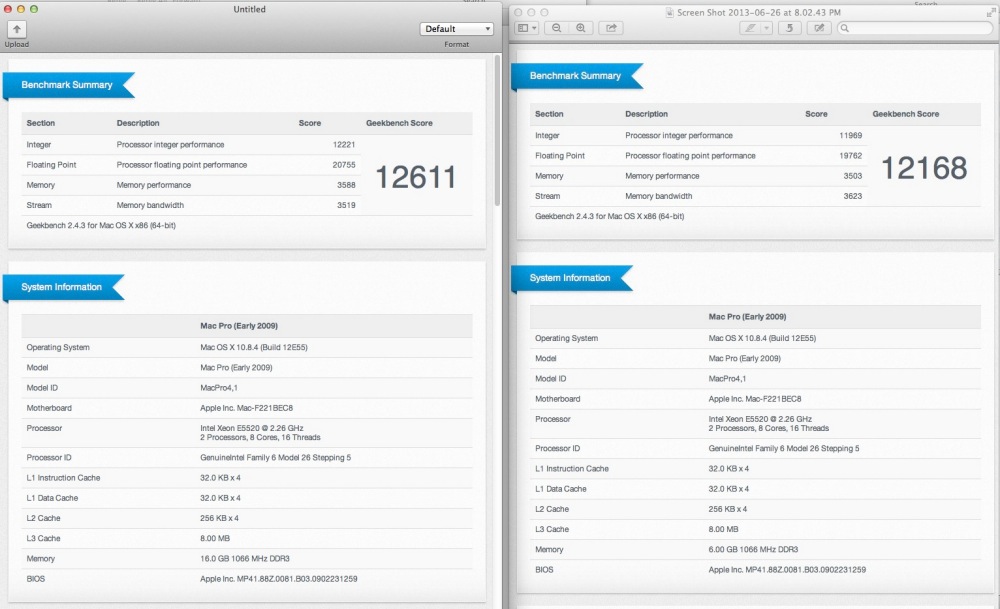
Geekbench with 16GB vs. 6GB.
The Corsair Vengeance Blue RAM I am using is known as non-ECC RAM, whereas Apple recommends and uses ECC RAM. This is the difference:
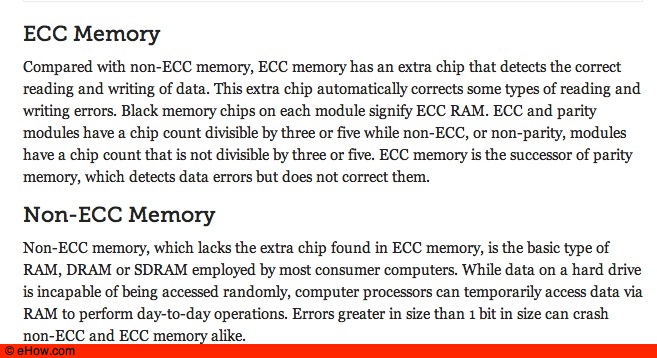
While mine works fine, a friend with another type of Corsair 1600MHz RAM reported instability and had to switch to costlier MacSales ECC RAM. So if you run into kernel panics or instability on Stress Tests, then a change in memory might be called for. I was lucky, as mine transplanted perfectly from the Hackintosh. Indeed, I added another 8GB for six 4GB sticks in total, six sticks being the optimal configuration. I have also read that mixing ECC and non-ECC RAM is a non-starter, but have not tested that.
There are still four RAM slots open to accommodate up to another 32GB of RAM.
Enhancing wi-fi:
Next up was Airport. Few 2009 Mac Pros shipped with Airport wi-fi cards and up to now the Mac Pro has been using a PCIe wi-fi card. In fact this is a Broadcom PCMCIA wi-fi card, identical to the one used by Apple, piggybacked on a PCIe card with three ugly and fragile antennae sticking out of the back of the Mac Pro. Not very elegant. Plus by relocating it internally you free up a precious PCIe slot – after installing the GPU the Mac Pro has only three slots open. I therefore resolved to remove the PCMCIA card from the PCIe card and installed it properly on the Mac Pro’s backplaneboard (‘motherboard’ in PC parlance).
To access the slot and antennae you have to remove the processor unit (two latches) and the slot becomes visible on the lower left:
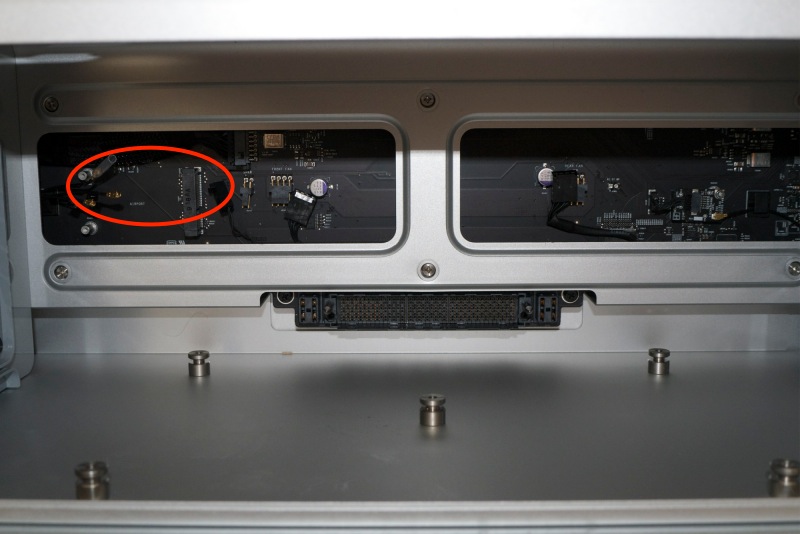
Airport socket and three antennae on the backplane board.
The snag is that access is very difficult and the two antennae which need to be connected to the Airport card have the worst connectors ever – very stiff and very small and very easily crushed. So rather than fight them I resolved to remove the processor cage to gain unrestricted access to the backplane board, lots of working room and more heart cycles.
You can download Apple’s instructions for this procedure by clicking below.
Click to download processor cage removal instructions.
This is not for the faint of heart – I would say 7 out of 10 on the difficulty scale. Two things not mentioned in the instructions – the three backplane board clips which have to be removed from the backplane board have retaining clips atop. These must be gently pried up while the plugs are pulled. Second, be sure to press down on the processor cage area nearest to you when freeing up the fans – they have to be moved in toward the center of the cage, maybe 1/2″, to clear the sides of the chassis so that the processor cage can be removed. You will need a 2.5mm hex wrench, a Philips screwdriver, a flat bladed tool and plenty of patience. But she will yield:
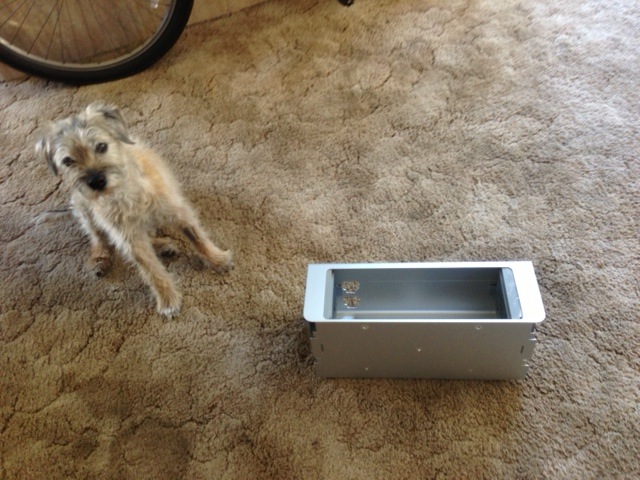
The ever diligent hound guards the processor cage.
Note how the fans have been moved in 1/2″ toward the center of the cage.
The antenna wires and the Airport socket are now easily accessed. The wires are numbered 1, 2 and 3. Any two are attached to the two sockets on the Airport card (either way around) which is then inserted, angled slightly up, into the socket.
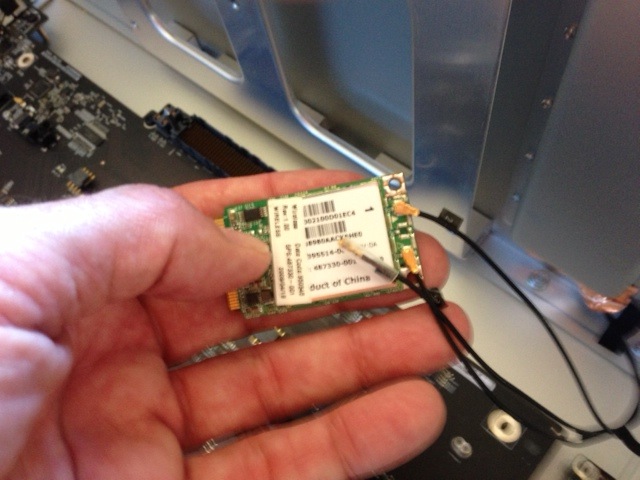
Antennae attached to the Broadcom Airport card.
You must then fasten the base of the Airport card to the provided threaded posts, so be prepared to hunt around for the right sized screws. I found one in my screw (loose) collection. The right size is M2 x 3mm and the Apple part number is 922-7734. Google that and you can buy a pair for $10-30 if you are stupid. Or go to a better hardware store and get them for a few cents each. It’s your money.
Reassembly is easy and here is the result:
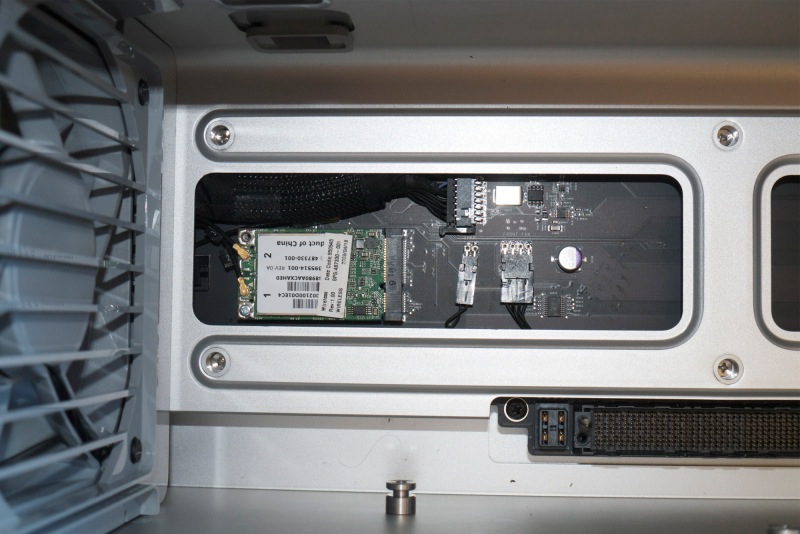
Processor cage replaced, Airport card in place.
And it works really well too. Disregard those who claim that the Mac Pro’s metal case precludes a good wi-fi signal – this is as good as I have received:

Native Airport in Speedtest. Maximum possible is 18 mb/s with my service.
Disassembly took me 2 hours (mostly puzzling over how to dislodge the fans for clearance and playing with Bert the Border Terrier), whereas reassembly was a scant 10 minutes.
If your speeds are mediocre, then one or both of the antenna connectors is incorrectly inserted. If you do not hear a ‘click when you insert these you have it wrong.
Wi-fi for the brave:
Have a steady hand, a long magnetized screwdriver and a chopstick? You can avoid all the dismantling illustrated above:
- Pull the processor cage
- Fasten the Airport card with two screws using a long handled magnetized screwdriver
- Hold the connecting sockets/wires exactly in place over the male connectors on the wi-fi card (this is the trickiest part – get it wrong and you will crush the fragile connector)
- Bear down on the head of the female connector with the flat end of …. a chopstick. (I use a flat head extension on my jeweler’s screwdriver).
I have done many like this and revel in the ‘click’ as the connector meets its mate. But you have to be steady, courageous, accurate and resolute to adopt this short cut, and to succeed at it. Proficient? Call it 5 minutes total while you futz with the correct orientation and placement of the connectors and wish you had a third (very small) hand.
Enhancing graphics:
Graphics next. The stock GT120 card the Mac Pros shipped with is poor by modern standards, returning 13 fps in Cinebench. Pending determination of how to provide auxiliary power to the excellent GTX660 from the Hackintosh, I replaced the GT120 with an old 9800GT which has two DVI sockets and is a known decent performer. It needs no auxiliary power supply. Here is the result – 50% faster than the GT120 and about as fast as the 2013 MacBook Air:
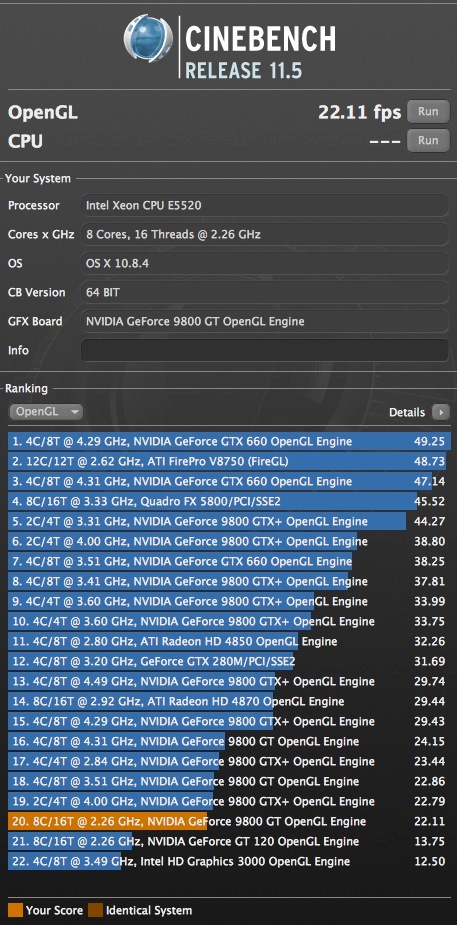
The nVidia 9800GT in Cinebench.
The card drives two of my three Dell monitors fine over DVI. Once the GTX660 is installed I expect a further doubling of speed and all three monitors driven from the same card – one by DisplayPort and 2 using DVI.
Next:
Power consumption tests and GTX660 installation will follow soon, along with details of how to upgrade the Mac Pro’s firmware to increase the RAM speed from 1066 MHz to 1333 MHz and allow the computer to recognise not just 8-core but also the very latest 12-core Intel Xeon CPUs. That’s what ‘future proofing’ is all about. It also gets you Mac Pro 2012 (or even 2013 ‘garbage can’) performance for 33 cents on the dollar of a new machine, and should easily last you the next 5 years.
Goodbye Hackintosh:
The Hackintosh is no more, but it was pretty reliable at EOL:
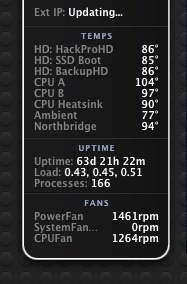
Hackintosh up time.
Hack Hangover:
That’s not to say your Hack will not haunt you. I had done a clean Mountain Lion install on my MacPro then used Migration Assistant to bring over Users and Applications, yet despite that precaution the Mac was refusing to switch off its fans or front panel LED on Shut Down. After forcing a shutdown (10 seconds hold on the front panel switch – also know as an ‘SMC reset’ – System Management Controller) a restart would result in a ‘bad shutdown’ error report when the displays first came to life after login. Further, the start-up chime was gone. Looking at that report I notice a reference to ‘FakeSMC.kext’ – a driver used in my Hack and in many others. It looks like Migration Assistant must have imported this as part of my user settings. I erased the kext, repaired permissions (Disk Utility) and restarted twice. All was sweetness and light – the chime was back and no errors were reported. Shutdowns properly shut off all fans.
So if you are migrating from a Hack, check System/Library Extensions for any of the following often used Hack kexts and erase them and repair permissions: FakeSMC, hacked NullCPUPowerManagement, RealtekRTL81xx, any Voodoos (HDMI, sound), HDA rollbacks and Atherosfix (Wifi). Get rid of all.