Monthly Archives: May 2007

Google goes QTVR

Now you can see your home – and so can everyone else

It may be invasive and doubtless the scum class (aka tort lawyers) will have a field day, but it sure is fun.

Check this link to see NY’s Metropolitan Museum in scrollable panoramic format with the newly enhanced Google Maps. It may not be QTVR quality but it certainly is clever.

The company doing all the pictures, or snooping if you are a tort lawyer, is Immersive Media.

Publishing with Blurb – Part I

A service with the requisite Gen Y silly name – is it any good?

That exemplar of street photographers, Juan Buhler mentioned in an email that his latest book of snaps was published using a web publisher named Blurb. He finds the quality superior to Lulu, which I used for my first book which was all monochrome. With the first book I uploaded a PDF file, created in MS Word (the bad old days before Apple’s Pages came along), to Lulu, and sure enough, what you see is what you get with this approach.

Blurb, by contrast, delivers an application named BookSmart to you by download and you use it to compose your book. There’s a broad selection of handy templates and while the whole thing is not especially fast, it more than suffices for composing a picture book. As my second book will be all color, I was intrigued to see what Blurb had to offer. Best of all, Blurb offers the option of a hardcover – the only way to go if you value longevity.

First, the software requires that files uploaded be 3000 x 2400 pixels, or thereabouts, to preserve quality. Make them smaller and your picture will show a large exclamation mark indicating the quality is insufficient for reproduction on paper. Given that all my high quality original pictures reside in the Aperture database, I wasn’t about to export them one by one (I’m aiming for 50 or so in the new book), as Aperture is as slow exporting pictures as it is in preparing them for printing – meaning dead slow. So instead I created a custom export profile for my pictures of choice which I highlighted in Aperture using Command-Click, thus allowing selection of non-contiguous originals. Here’s how the export preset screen looks in Aperture:

Note that I have set the Image Quality slider to maximum – twelve on the scale. DPI is set to 300 (not the more common 72 which is fine for screen display, inadequate for printing), as this is the density at which Blurb prints. Hence the large file sizes.

Here’s the export about to commence – the destination folder shows ‘Desktop’ but in practice I make a new folder and export there, to keep clutter down.

Thirty minutes later and there are 50 pictures in my book folder on the iMac (I cannot advise on PC use as I refuse to have a Microsoft paperweight in our home), with sizes ranging from 3-11 mB; some are from film, some from RAW files, so the file sizes are all over the place. These picture files are then imported into Blurb – another ten minutes or so, and after a bit of experimentation with the cover design, here’s what you see:
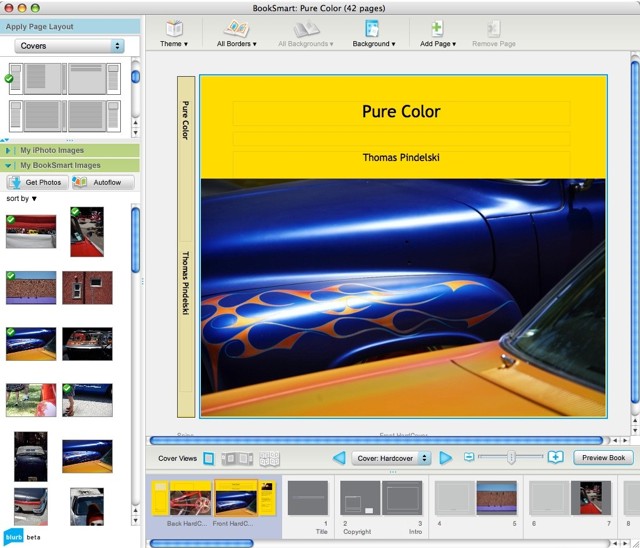
Pictures marked with a green check mark in the inventory tray at left are those which have been dragged and dropped into the book itself. Rearranging the pictures is a drag-and-drop affair and you can print one or two sided. I’m going to try both and will report back on how things look – I found with my first book that a draft print makes a lot of sense as it’s really the only way to determine if the book feels right from a layout and content point of view. I’m settling on an 11″ x 8.5″ landscape format with hard covers.

Narrative is easily added, but I keep it to a minimum. After all, this is a picture book, not a novel.

Time to do all this from start of export from Aperture to completion of upload to Blurb followed by the related formatting? 5 hours. This would be less on a second attempt, as there should be no learning curve. Blurb saves your uploaded pictures on the fly so if you lock up (I did, once) nothing is lost. Nice.

When composition is complete, the product must be uploaded using a broadband connection to Blurb. Here’s the Blurb upload in progress – it took 18 minutes on my so-so cable broadband connection. Not bad.
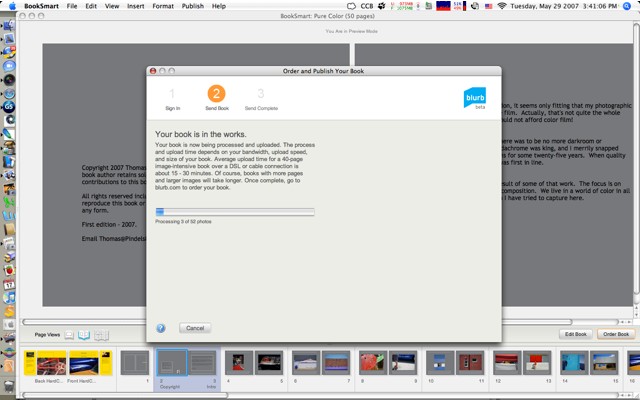
Overall I have found the BookSmart application provided by Blurb to be easy to use and reasonably flexible, providing many useful templates (techies can upload their own designs). The program slows down from time to time but simply exiting and restarting the application seems to solve the problem on my G5 iMac.

More when I get the first draft back. Meanwhile you can see the book at Blurb, together with a Book Preview, by clicking here. Don’t order it, please, as this is a draft proof to permit review and editing. Blurb automatically creates a Book Preview – click to see the first fifteen pages.

Update: You can read my comments on the first draft here.

Canon 5D – can you say speed?

The fastest camera I have ever used

For over thirty years my camera of choice for street snaps was a Leica M2 or M3, typically with a 35mm or 50mm lens. This was the street snapper’s outfit par excellence.

Leica, of course is clueless about how to make a digital camera – they either badge engineer Panasonic’s and increase the price or make an overpriced, dated version of the fabulous M2 in the crippled-sensor M8.

In my experience, after using the 5D for some 15 months now, the 5D with the 24-105mm L zoom is faster in every respect. True, it’s a good deal bulkier than an M2 and not a bit noisier, but the automatic exposure and mind-numbingly fast and superbly accurate autofocus blows away the excellent Leica rangefinder in every way. We are talking operating speed here. Not high speed motor drives which are of little use in these situations. No I mean the speed of execution from seeing the picture to its recording.

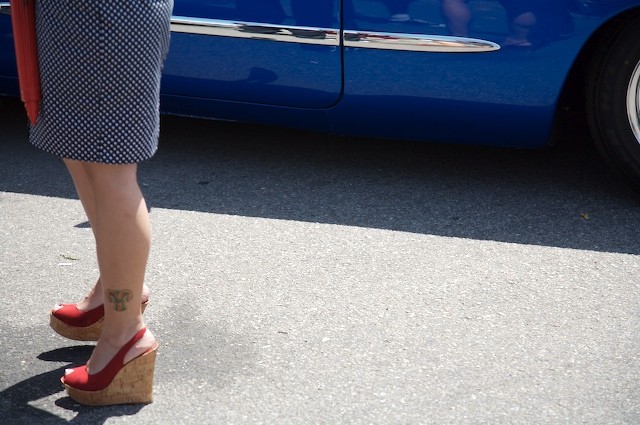
Case in point. In continuing pursuit of pure color, and the hell with form and traditional composition, here’s the sort of thing which is second nature to this powerful lens/camera team (not to mention the operator):


Tattoo You. 5D, 24-105mm at 93mm, ISO 125, 1/350, f/4.5

It is hard to describe just how fast I had to be to snap this; the whole raising the camera/zooming/composing/snap cycle is just a blur in my memory. Exposure? Automatic. Focus? Automatic. Zoom? Manual – forget motorized zooms. Result? You be the judge.

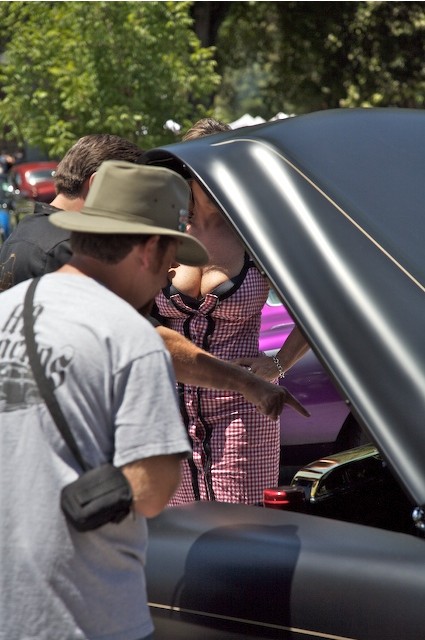
And, while we’re at it, here’s another pair:


Twin Carb. 5D, 24-105mm at 105mm, ISO 250, 1/1500, f/5.6

Beating the burn

In overexposed highlights, that is

I have written before of the tendency of digital sensors to burn out highlight details. While highlights can be recovered using the Highlights slider in the Aperture Adjustments HUD, this is limited to one stop using RAW, in my experience. Thereafter, not all highlight details can be recovered.

Accordingly, in high contrast situations like outdoor sun, it’s far better to underexpose and use the Shadows slider to bring up shadow detail, rather than trying to recover highlights. The technique is illustrated here. A low noise sensor, like in the 5D, can sustain a lot of shadow enhancement before noise rears its ugly head.

Strangely, I find the large sensor in the Canon 5D more susceptible to highlight burn than the miniscule one in the Lumix LX1. Tfhe 5D’s sensor is some 1/2 stop more sensitive than the indicated ISO, compared with the Lumix. Given that HDR cannot be used with dynamic subjects (the three or five images required dictate the use of a tripod on a stationary subject) I simply underexpose by 1-2 stops in high contrast situations. Single image tone mapping can help, but it adds maybe half a stop at best; any more and the effect is garish. Canon provides exposure compensation on the 5D but is is horribly documented in the miserable book with a miniscule typeface that passes for instructions that comes with this camera. For $3,000 for a body only, this has to be the height of cynicism. Canon, please exclude accountants from the design of your machines and instruction books.

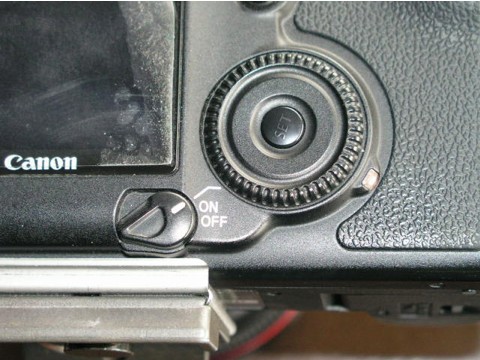
The 5D has a two position power switch, illustrated above. (The peeling on the screen is my stick on protector, not delamination of the LCD!). Normally, the switch is clicked up one notch to ‘On’ when using aperture priority – Av on the top left dial. Click it up one more notch to the line and the rear wheel activates exposure compensation, visible on the bottom of the viewfinder. It’s also displayed on the top LCD screen which is much easier to see than the viewfinder readout. By the way, a Manfrotto QR tripod plate is visible in this snap, permanently attached to the 5D’s base. Highly recommended – this is the ‘Architectural’ version with an alignment lip to preserve its position on the relatively heavy 5D body.

Click the on-off switch to the line, take a first pressure on the shutter release button, and rotate the wheel while looking though the viewfinder or at the top LCD screen. You can elect 1/2 or 1/3 stop intervals using the custom functions in the camera’s software. 1/3 is confusing precision with accuracy in my book, so I have it set to 1/2 stop intervals. I dial in the camera to, say, -1.5 stops, then immediately move the switch back to the regular On position to preclude accidental adjustment – the compensation setting wheel is disabled in this way, although the setting you dialed in is preserved. Better still (or not, if you forget), the setting survives switching the camera off. Power up and there is your setting, preserved.

I prefer to use average exposure metering in fast paced outdoor settings (Canon’s matrix metering leave me unimpressed) as there’s rarely time to take a proper exposure reading in the interest of capturing the moment. With this approach, you gain a stop of highlight adjustment while preserving some three stops of shadow recovery. Now that’s what I call dynamic range.

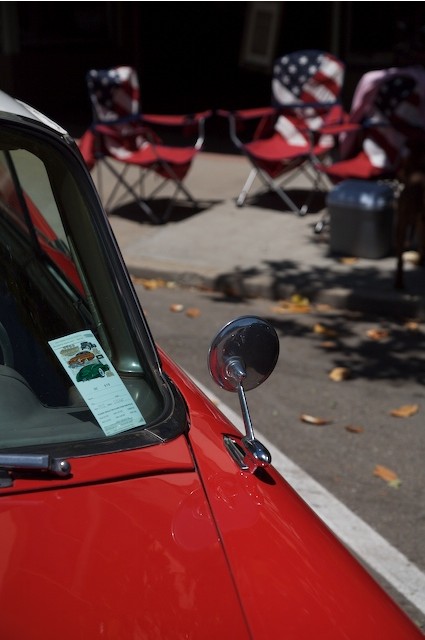
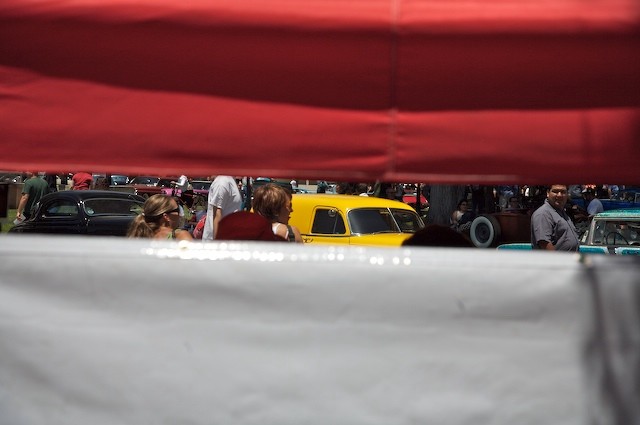
Here’s an example taken in bright sun yesterday:


5D, 24-105mm at 70mm, ISO 250, 1/3000, f/5.6, one stop underexposed

Without the underexposure, the white sheet would have been comprehensively burned out. Here, detail is preserved.