A few more tweaks and dynamic range considerations
To read the whole series on the Panasonic G1, click here
A reader mentioned that maximum ISO could be limited and, indeed, I found it in Page 4 of the Rec Menu (v1.3 firmware) under ‘ISO Limit Set’. I set this to ISO 800 as the sensor, being a good deal smaller than the one in Canon’s 5D, begins to show noise earlier and 800 is about as fast as I ever need. At 18mm x 13.5mm the sensor’s area is but 28% the size of the 5D’s, although a lot larger than the 8.5mm x 4.78mm homunculus in the LX-1. So the marketers amongst you would doubtless point out that the G1’s sensor is no less than 498% larger than the one in the LX-1. There are, as Mark Twain (Disraeli for British readers) reminds us, only three kinds of numbers – lies, damned lies and statistics. You can go to Wall Street or to camera makers for the first two. The reality is that this particular statistic just goes to show how Lilliputian the LX-1’s sensor is, not how large the one in the G1 happens to be.
For HDR fans (or for digital sensor skeptics), I note that there is a wonderful range of auto-bracketing available for successive exposures – especially useful given the sensor’s proclivity to burn out highlights. You can have 3, 5 or 7 (!) pictures in either 1/3 or 2/3 stop intervals. A very helpful graphic illustrates the spacing of your choice. Unless you like to really overdo things, I think you may find that 3 pictures at 2/3 stops is ideal. The sequence of recording of bracketed exposures can also be set between center/under/over and under/center/over, the latter being my preference.
The self timer, smartly set with a top plate switch rather than with some horrid LCD menu driven approach, is really thought out, too. You can choose a 10 second delay with one picture, the same with three pictures, with about a second between each, or a short two second delay. The red light on the top right of the G1 flashes while the self timer is running. The two second delay would seem ideal for tripod work with long lenses, especially those without IS, as it will let vibrations settle if no remote release is handy.
I confess that I find the engineering of the depth of field preview (the lower left button on the rear which doubles as the delete button in preview mode) simply magic. Magic that is only possible with an EVF camera. Depress the button for depth of field preview and that’s exactly what you get except that the screen does not dim. The software adjusts the screen brightness to compensate and, yes, you do get some EVF noise when stopped all the way down, but have you every tried making anything out on a screen using this technique with a conventional SLR viewfinder or, worse, with a large format camera and screen? If the noise bothers you, it’s easy to opt for preview on the LCD screen where there is none. Simply magic.
For Leica M2 and late M3 aficionados reading this, you will know that those Ms had a unique and effective depth of field ‘preview’ function. Notches extended in the central rangefinder rectangle allowed you to focus such that the overlap of the (non-) coincident images fell within these notches. The wider top notch would have everything in focus at f/16 with a 50mm lens, the lower one at f/5.6. That’s all you really needed, no preview was needed (or possible, obviously) and Leitz did such a truly lousy job of explaining this wonderful feature that it was discontinued with the M4 and all later bodies. Shame, I loved it. But what you get with the G1 is better – the first time I have seen non-dimming d-o-f preview in a camera, workable at any aperture. Once the Panny macro lens becomes available this feature will really sing. For that matter, you will be able to preview d-o-f on your attached 42″ LCD monitor in the studio, without any dimming, owing to the video feed provided on the G1 …. a seismic change in camera design. Add wider aperture lenses and this will become even more useful.
At the 45mm end of the kit lens’s range, focus seems to go down to one-third life size which is hardly limiting for the sort of thing I have in mind.
Boy, they must have had some real live photographers involved in the design. I simply cannot help thinking that Panny will be surprised at the sort of photographer who opts for the G1. They have stated that the G1 is targeted at the point-and-shoot user who is looking to upgrade. I think that’s a stretch – going from a $150 snapper to a $700 one is a big jump. On the other hand, Leica made, what, over one million M film rangefinder cameras and I’ll bet that at least 10% of those users are: a) Still alive, and b) Mightily disillusioned with the lack of a modern digital alternative to these masterpieces of times past. Those users have either been using a 5D for the full frame experience (and the related carpal tunnel and bad back symptoms) or been making do with a small sensor DSLR with a simply horrid viewfinder and a noisy, flapping mirror with the attendant bulky pentaprism. This camera will see a lot of those users (including Yours Truly) choosing a G1 as their daily snapper of choice.
Dynamic range: From a purely subjective standpoint (which is all I pretty much care about) the dynamic range of the G1’s sensor is inferior to that of the Canon 5D’s – I would guess by at least a stop or so. The following snap of a lovely Greek Orthodox cupola proves the point.
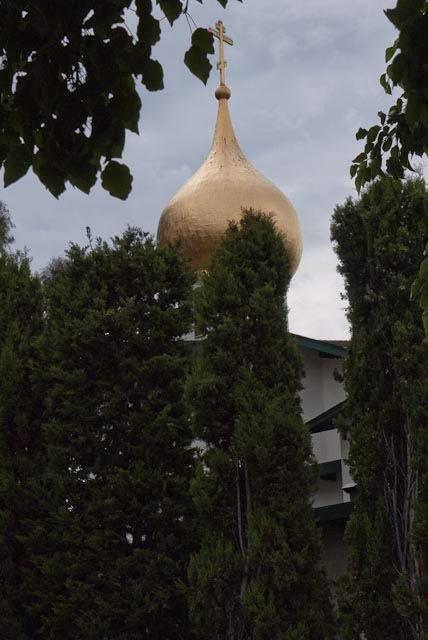
G1, kit lens @ 45mm, 1/1000, f/9, ISO250, 1 1/3 stops under exposed
I used the ‘click and turn’ front wheel to set 1 1/3 stops underexposure in the EVF and used ‘pattern metering’ which averages the overall exposure. A very simple operation. Alternatively, I could just as easily have taken a light reading from the overcast sky using spot metering in this very high dynamic range subject. Using average exposure measurement with no adjustment would have blown out the sky, past the point of recovery. When processing in Lightroom 2.4, I simply cranked up the fill light slider to bring detail back to the leaves framing the cupola, thus:
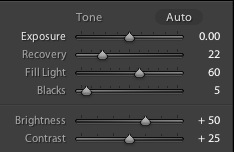
Fill light used to recover shadow detail
It is far easier to expose for the highlights and adjust the shadows; trying the reverse generally increases grain and seldom does a good job on the highlights, in my experience. So this is an important caveat for G1 users – take care to meter on the right thing and err on the side of underexposure.
Here’s a snap of my G1 Army and Navy white supremacist belt pouch into which I simply chuck the camera. It’s nice using a body with no attached straps. At $12 it’s neither ideal nor expensive, though I have found it poses some interesting challenges when you do your thing in the men’s room! A dirt cheap 8gB SDHC card ($20) is included for scale – the latter may not be very fast but the G1 handles it just fine.
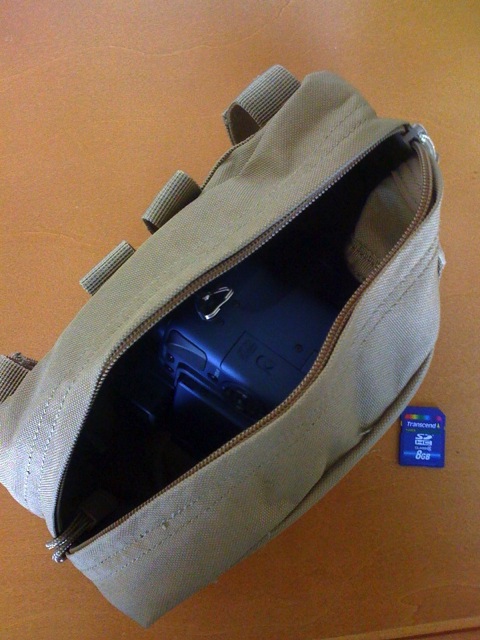
Army and Navy special
The last thing you want in this world is a camera bag emblazoned with the word ‘Nikon’ or ‘Canon’ or ‘Tenba’ et al. Can you spell ‘Steal Me’? For that matter, much the same goes for the camera:
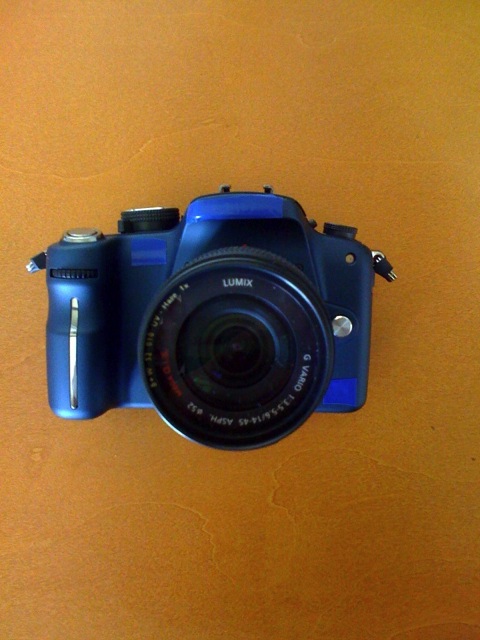
Stealth G1, Blue Tape Special
I have enough tape for about 750 G1s so I’m not about to run out ….