Some outstanding improvements.
Lightroom 3 has exited the Beta test stage and is now available as a $99 upgrade to Lightroom 2 users. I tried the Beta version but when it choked converting my previews to the new version after an hour of grinding away I decided someone else could do the testing and spent my valuable time elsewhere. Clearly something was wrong as my catalog contains a modest 6,000 pictures. Well, the final version appears to have fixed the issue because after download, a meaty 75 gB, I fired it up and it converted the 1:1 preview files in 3 minutes.
Technical background:

The LR3 preview file is given the 2-2 name by default; change it at will.
The catalog of pictures is not changed in any way.
The hardware I am running this on is my HackPro with OS Snow Leopard 10.6.3, 2.83gHz Intel Core 2 Quad CPU, 8gB of 800 mHz DDR2 RAM and an Nvidia 9800GTX+ video card driving two Dell 2209 21.5″ monitors, so it’s a very fast setup, designed for photo processing. CPU and memory use is modest and I would guess that 4gB would be just fine – Lightroom has always been good in this regard, unlike Aperture.
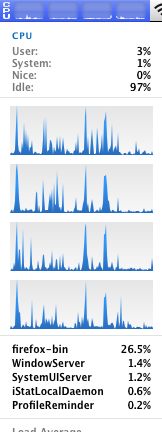
CPU use for all four cores. I show the effect of paging through several full screen previews here.
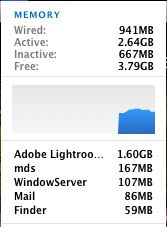
Memory use with LR3, NetNewsWire, Mail, iStumbler and SpamSieve running
LR3 runs natively in 64-bit mode.
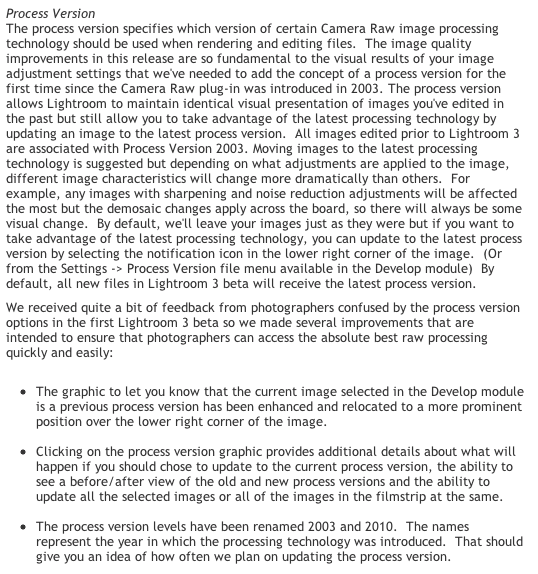
LR3 allows you to change to what Adobe calls the ‘2010 Process’ for your pictures; I avoided this in light of the warning, below, but LR3 will adopt this process for all future imports, which is fine with me. I don’t want to have to reprocess a lot of older snaps which I am happy with:
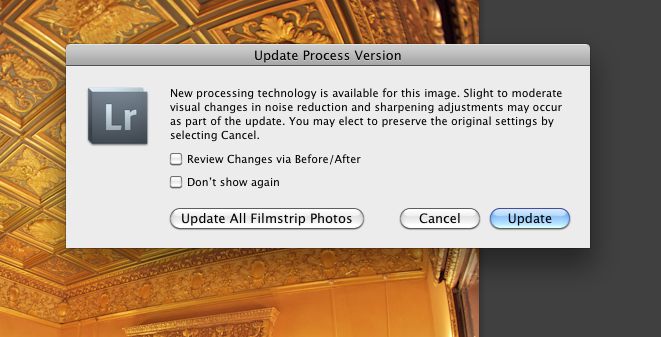
LR3 ‘2010 Process’ warning.
Click the ‘!’ logo on any picture in the Develop module and you get this message, meaning you can selectively update to the new process:
Perspective correction:
One of the biggest surprises for me is that LR3 has added perspective correction; I don’t recall seeing that in LR3 Beta. The application can automatically sense the lens used for a limited range of camera manufacturers:

Only a few cameras are supported
Loading up a Canon Fisheye snap from the 5D I see this:
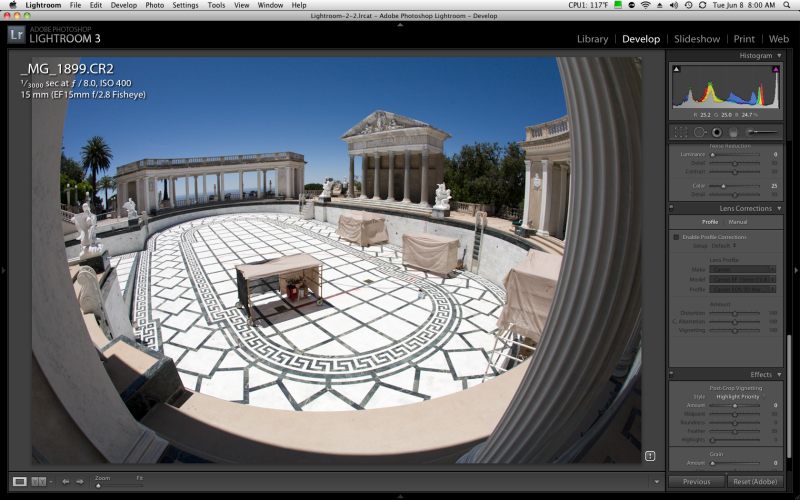
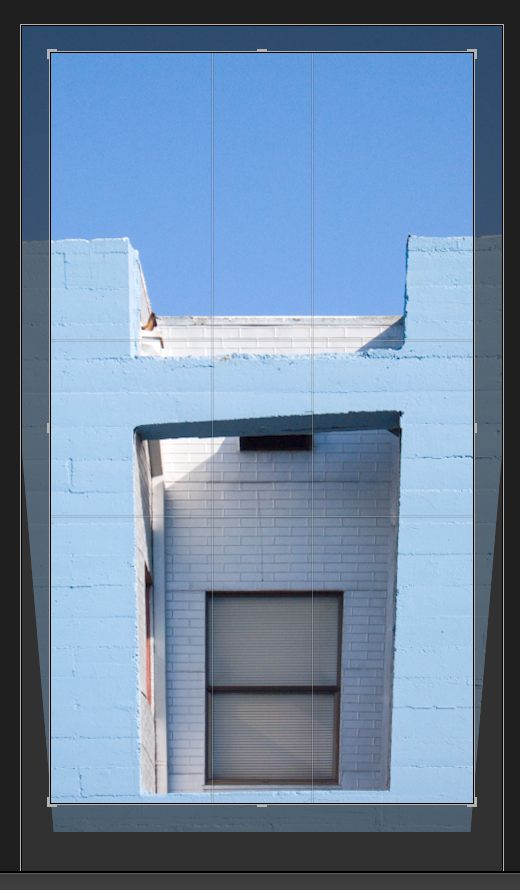
Hearst Castle pool drained for maintenance. 5D. 15mm Fisheye.
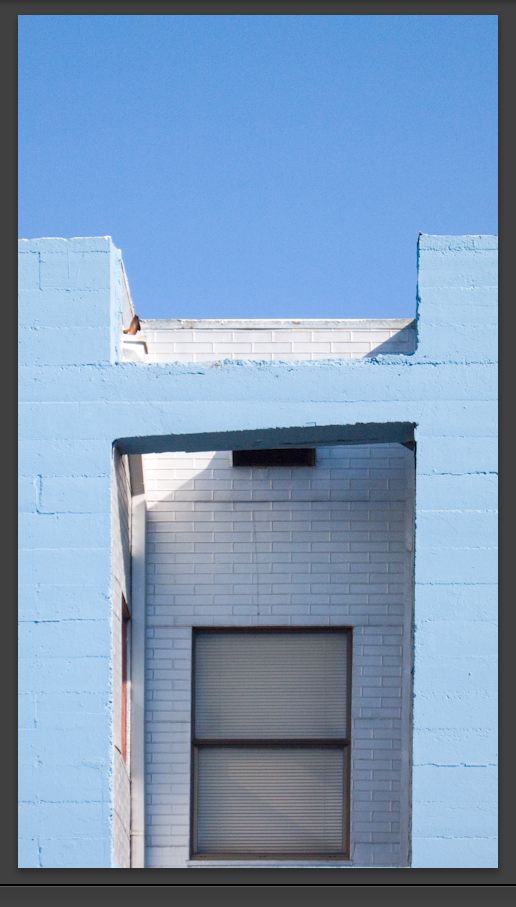
Click the ‘Enable Perspective Correction’ box and you immediately get a perfectly corrected picture:
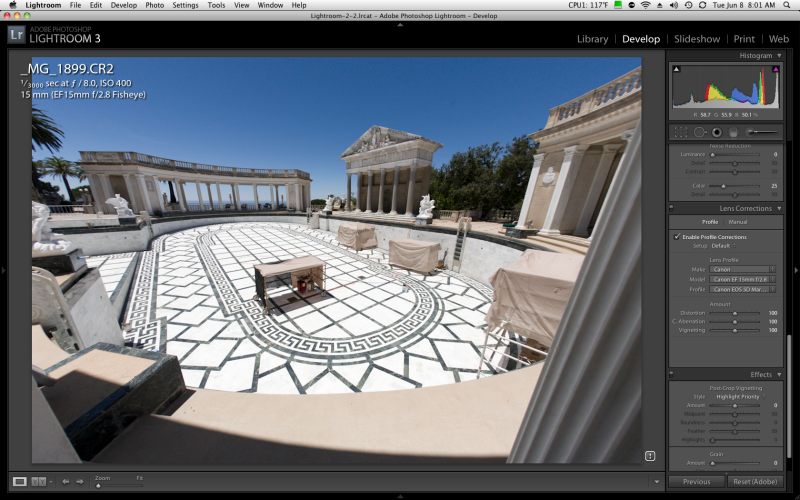
Hearst Castle pool straightened out.
You can make horizontal and vertical corrections but the ‘distort’ feature available in Photoshop is missing. Still, this adds a key tool to the LR application which removes one of the last few uses I have for Photoshop. In LR3 it is fast and perfectly implemented, right down to the remasking of the image to fill the frame after correction.
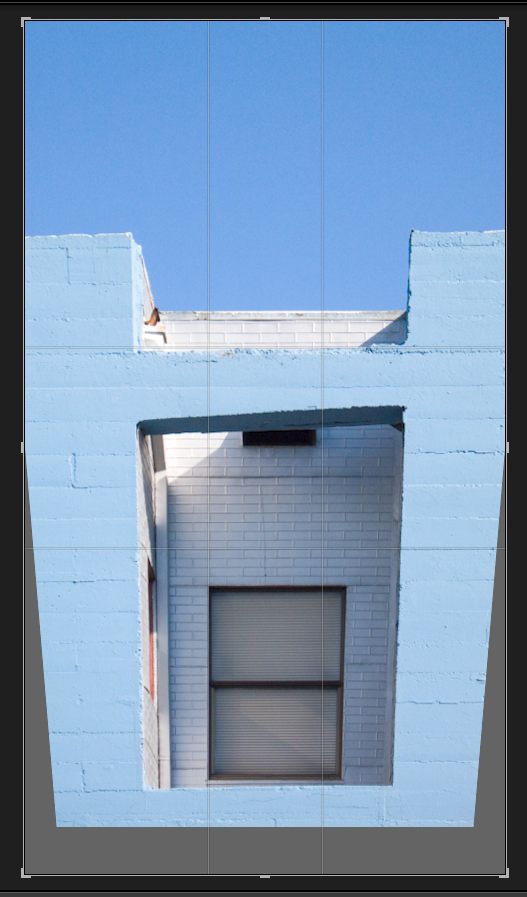
What if your camera is not listed? Simply click on ‘Manual’ and have at it – an approach which allows both lens distortion correction and correction of leaning verticals.
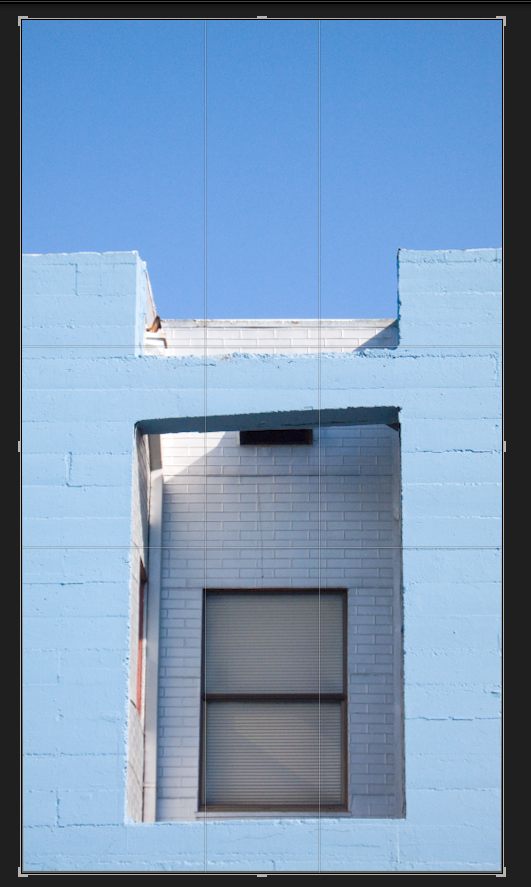
Here’s an uncorrected image from my Panasonic LX1 with leaning verticals (and leaning everything else owing to earthquake damage!):
Here it is after messing with the slider:
Next you use the Resize slider to fill the frame:
Then hit Enter and you are done:
Until now I have been using the excellent PTLens and round tripping images from LR2. Unless your lens cannot be corrected in LR3, PTLens seems obsolete, though it does boast a huge lens database so is worth keeping, just in case.
If you want to add an unlisted lens to Lightroom 3 rather than using the manual method, simply download Adobe Lens Profile Creator and follow the instructions.
LR3 does not include the useful ‘Distort’ function for dramatic corrections, so it still means round-tripping to Photoshop if that is needed, which is rarely in my case.
Tethered shooting:
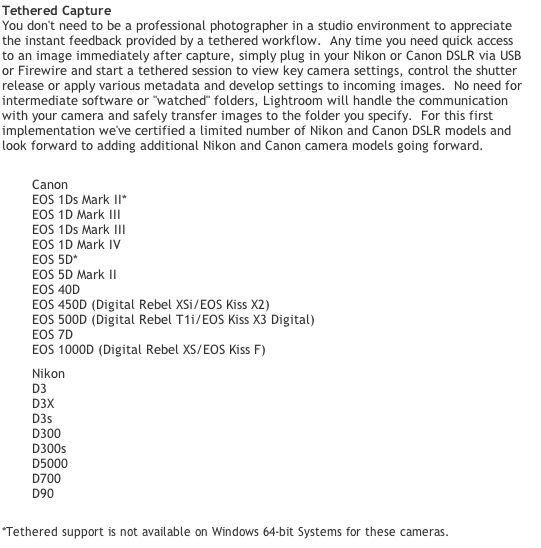
I have addressed tethered shooting here on occasion and, frankly, it has been a pain to get it working correctly, what with the need to set up capture folders, tune LR2 just so, etc. That is all in the past. Tethered shooting is now beautifully integrated into LR3 and the following cameras are supported:
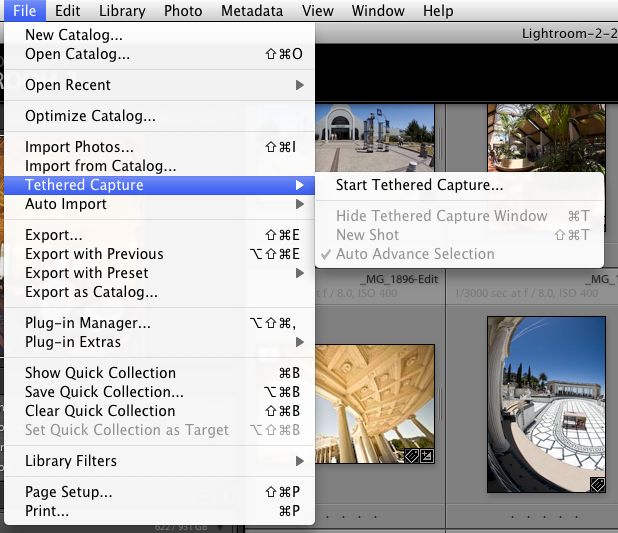
I plugged in my Canon 5D to a USB port on one of my Dell monitors and set up LR3 for tethered shooting thus, after which I named the capture folder:
LR3 displays the tethered shooting menu thus:

The big button on the right (it really should be colored red) is the shutter release, or you can use the one on the camera.
Snap, and the picture appears in LR3:

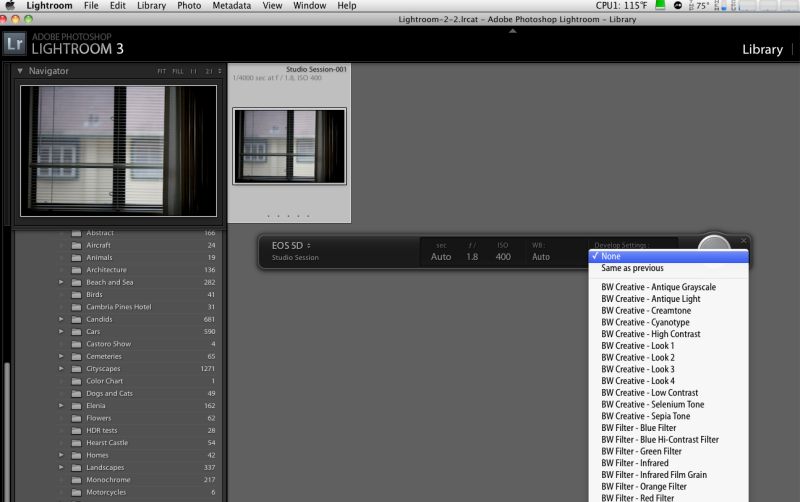
Click on ‘Develop Settings’ and you get the usual choice, together with any you may have saved:
This is a plug-and-play implementation, perfectly executed. Bravo Adobe! The sort of thing you expect from Apple ….
P.S. Adobe – you need to make your LR3 demo videos run on the iPad – face reality and get with the program.
There are lots of other improvements in LR3, including movie processing (not for me), allegedly better noise reduction (not needed with the Canon 5D or Panasonic G1 which are my daily snappers), but the two detailed above alone make the $99 upgrade worthwhile for this photographer. Speed has not been compromised, the interface remains as nice as can be and the improvements need no instruction book to learn.
Recommended. I just paid Adobe for mine!
Good overview of the key features Thomas. I’m running LR3 in trial mode pending the arrival of the upgrade disc purchased today (I still like to have a disc!).
I’ve found – as you say – that the new perspective control obviates the need to visit Photoshop pretty much completely now for day-to-day processing. The defaults for my Nikon 14-24mm lens were pretty well spot-on on the image I tried, and by switching to ‘manual’ I was able to refine the keystone correction by -1 or -2 to correct a slightly misaligned original viewpoint (subject was a rectangular display case viewed square on at close range).
The improved noise reduction is definitely one of the highlights for me as I often shoot at high ISO out of necessity on my D700. As with the Beta version, the difference between LR2 and LR3 is very apparent, perhaps even slightly more so if you opt to ‘Update the Process Version’ for a particular image in LR3.
I have yet to try the ‘Tethered Shooting’ feature but it is something that I will use a lot, having previously used the ‘Mountainstorm’ plugin with LR2 for this.(http://www.mountainstorm.co.uk/photography/Tether-Overview/Tether-Overview.html)