Maximizing internal storage.
For an index of all my Mac Pro articles, click here.
One of the most distinguishing features of the design of the Mac Pro is the ease with which drives can be removed and replaced.
Heretofore, my Hackintosh sported two internal SSDs, two internal HDDs and an external Time Machine backup in a cradle, easily removed when travelling as earthquake/incineration protection.
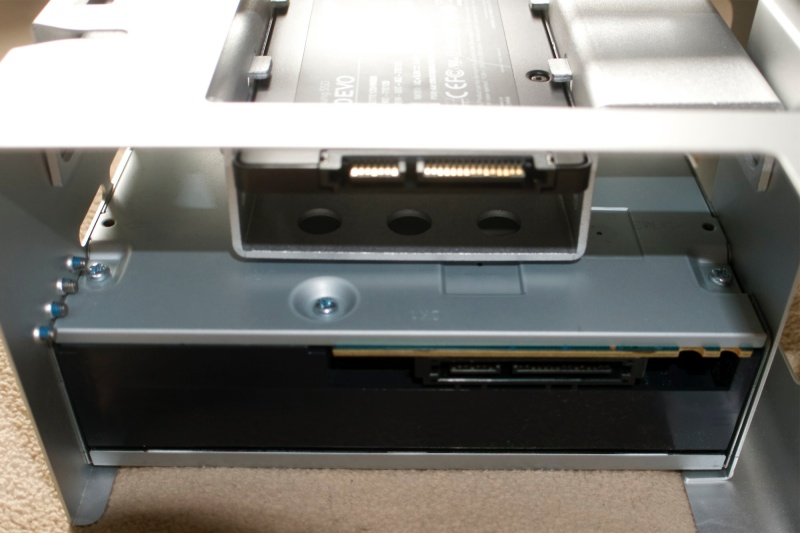
The Mac Pro makes provision for two optical disk drives, with one installed in the upper bay of a stock machine. Obviously there must be a second cable installed by default, allowing installation of a second disk drive.
SATA disk drives use the same connectors as optical drives, a power cable and a data cable, so it occurred to me that the rational thing to do would be to install the backup SSD where the space for the second optical drive is, then move the Time Machine backup inside the Mac Pro’s case. Installed on one of those beautifully engineered carriers, taking it out and on the road involves removing the side panel (one latch – 5 seconds) then pulling out the drive – another 5 seconds.
Difficulty of this process? If you can make a cup of tea this is not a challenge.
You can download Apple’s instructions showing how to remove the optical drive cage by clicking below.
Click to download optical drive cage removal instructions.
My drive cage needed a massive amount of wiggling before yielding to my ministrations, aided by not inconsiderable garage language.
My intent is to relocate the Intel SSD to the optical drive cage. Intel SSDs have a rim plate which needs to be removed to make the surface plane; most SSDs are dead flat. A small screwdriver does the job:
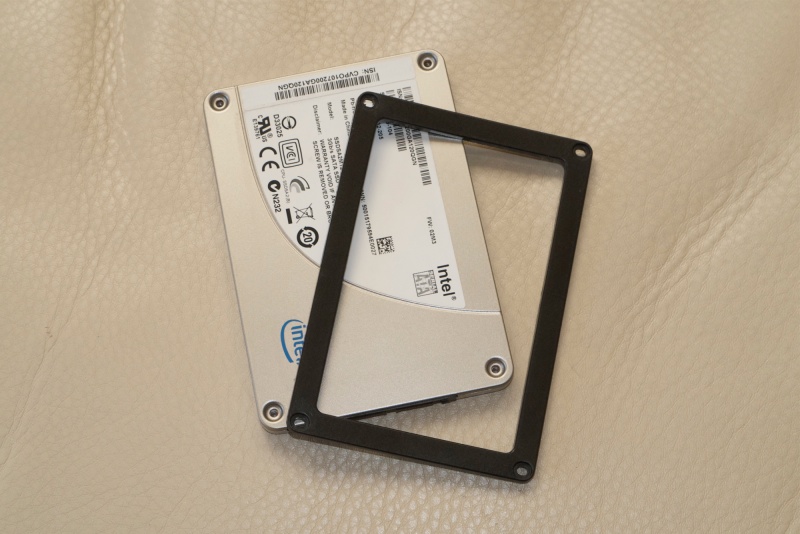
Plate removed from Intel SSD.
The screws are too long to be reused to hold the back plate in place so some Scotch tape does the job. Additionally, thick, heavy-duty, double sided Scotch tape must be procured:
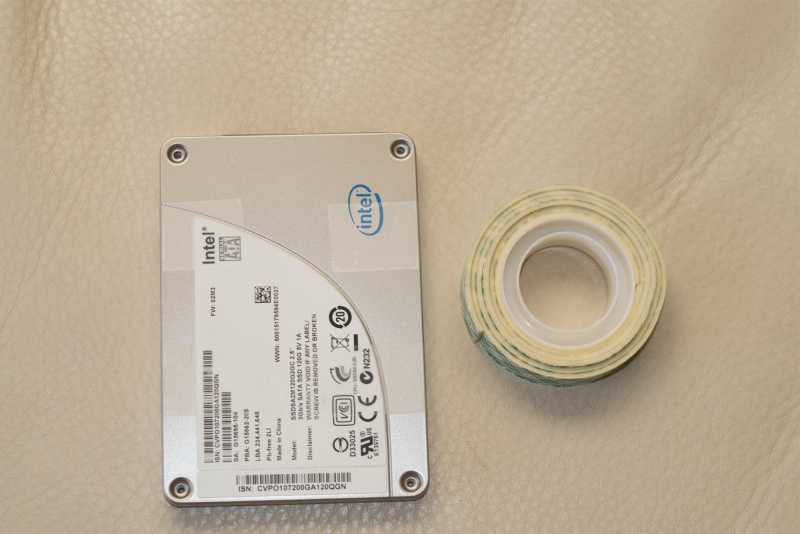
Intel SSD taped shut. Thick Scotch tape procured.
Two strips of the thick double-sided Scotch tape are placed on the front of the drive – frontal placement will allow alignment of the connectors of the optical drive and SSD, thus avoiding any cable twisting:
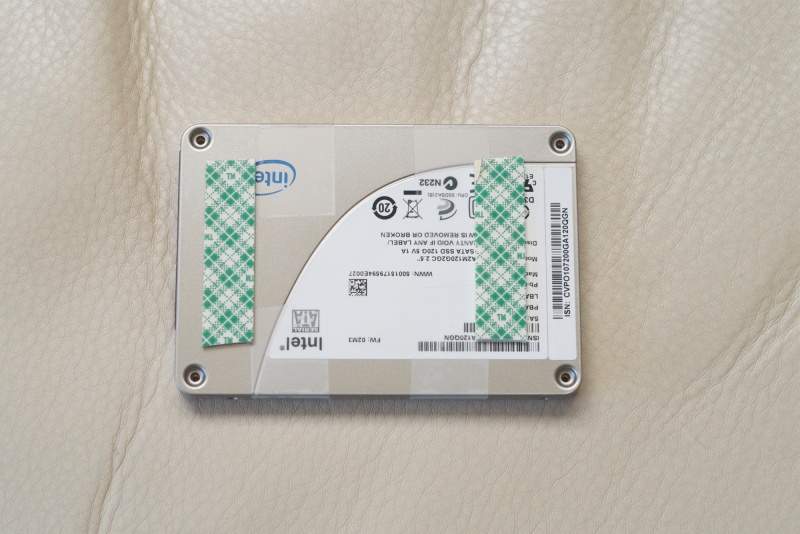
Thick double-sided Scotch tape in place.
The SSD is now attached as below:
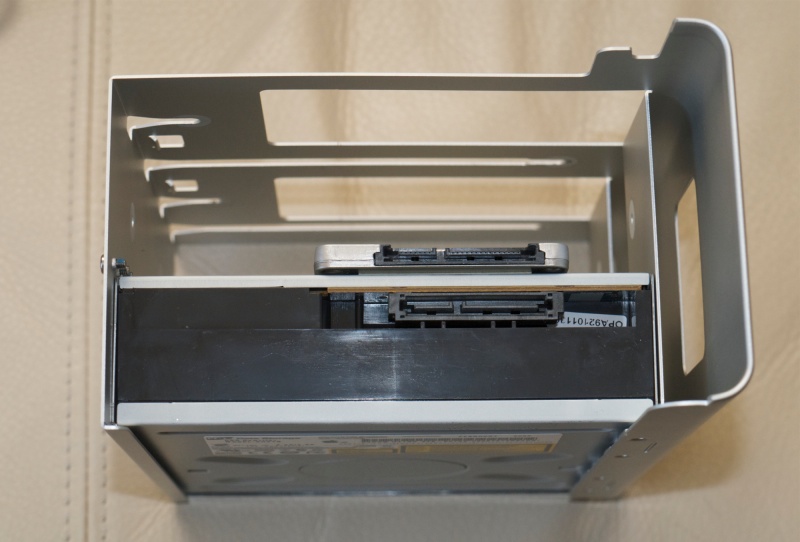
SSD in place. Note alignment of the connectors.
Note on removal: This spongy two-sided Scotch tape is exceptionally strong. Should you ever need to remove the SSD, just pulling up on the SSD’s case risks damaging the drive. Instead, take a piece of dental floss, insert it between SSD and optical drive, and ‘saw’ through the tape.
You can do an even nicer job using an Orico 5.25″ to 2.5″ drive adapter plate which will run you all of $7 at Amazon; there’s no need to pay up for silly priced OWC accessories. Four screws hold the SSD in the adapter plate, four more hold the plate in the optical drive cage. Be careful with the latter – steel screws can’t wait to cross-thread soft alloy threads:
SSD installed with a drive adapter plate.
With the drive cage partly replaced both connectors are reattached; it does not matter which is attached where:
Connectors in place.
Power consumption is of no concern. A DVD burner consumes 18 watts compared with 3 watts for an SSD.
With the backup SSD relocated, its space is taken by the full size Time Machine HDD, and the drive is clearly marked:
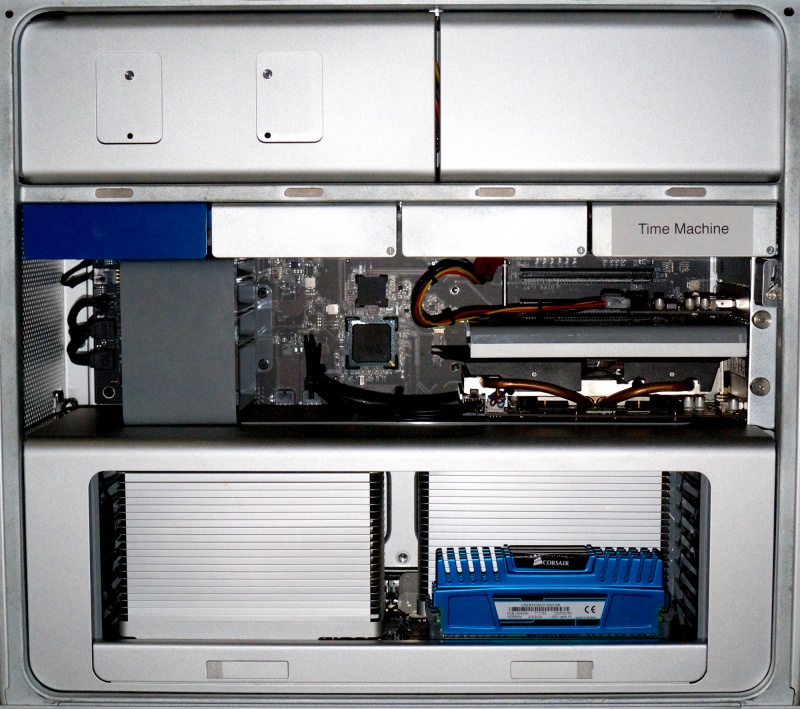
Time Machine drive on the right.
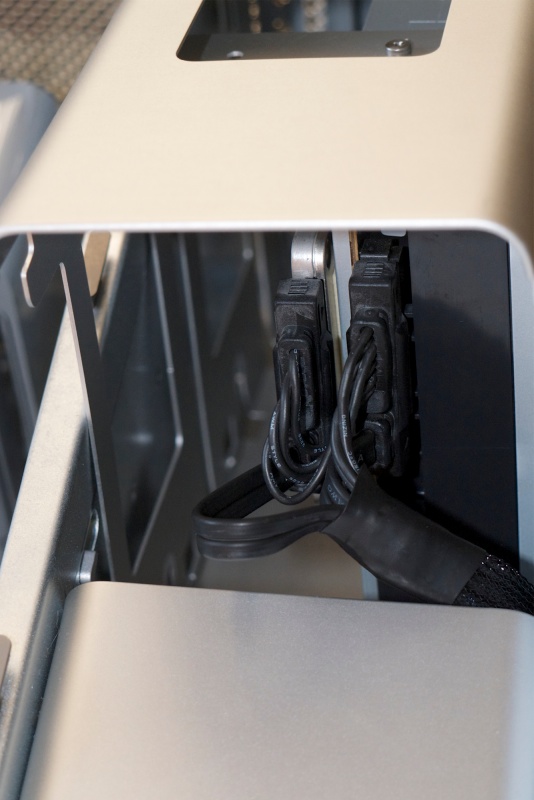
Nothing could be simpler. To clean things up, 1/4″ white cable cover is applied to the power wires to the USB3 card (see Part XIV) and 1″ cover is used to organize to all those ugly cables in the back:
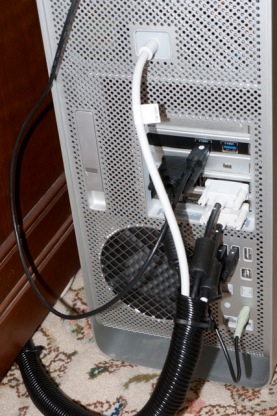
Cable covers in place.
Ugly wires have no place in a Mac Pro.
All drives are accessed as before and here they are in System Profiler – the Superdrive, two SSDs, the Data and Data Backup HDDs and the Time Machine HDD.

Drives in System Profiler.
SMART Reporter, which warns about imminent disk failures, reports all drives correctly:

Drives in SMART Reporter.
About that Superdrive:
Apple never misses a chance to hype other’s hardware as its own ‘innovation’ and such has been the case with the ‘Superdrive’. This is a bog stock optical drive (mine is made by LG according to the label) and its performance is dated. My advice to heavy optical drive users is to swap this drive, while you are doing the above transplant, for a current Blu-Ray drive for some $50. For details, see Part XIV. Then pop off the plastic fascia plate from the disc tray and it will look just like …. a Superdrive. Remove the four screws holding the geriatric Superdrive and replace with the Blu-Ray drive.
I moved the optical drive to the lower optical bay, then sat three SSDs on top, held in place by double-sided tape. Unless the Mac Pro is to be moved around a lot (40 pounds, yeah, right!) I don’t understand the need for adaptors. I did the 4,1 to 5,1 update (single processor Mac is now hex 3.33) last summer and have been enjoying the performance.
Love your writing style Thomas. Thanks for a truly stellar guide!