Adding high quality sound.
In Part I I described an inexpensive way of making in-car videos with telemetry overlays. Using a capable and inexpensive Sony Action Cam, sound was recorded using the two forward facing microphones and was not especially good, with lots of wind buffeting in the cabin of the convertible used, and generally poor sound quality. Given how small the Action Cam is, that’s hardly unexpected.
Sony’s manual is indescribably bad when it comes to explaining the use of external microphones. There is one passing reference to them but no indication where to plug them in or words about what works. After much searching I determined that the external mic shares the same 3.5mm socket used for an external power supply, and the only reason I came to conclude this earth shattering finding is that there’s an almost invisible microphone symbol on the access door underneath the camera which also conceals a Micro HDMI-Out socket (to route movies to your TV set) and a mysterious expansion socket whose purpose I have yet to divine. Quite how Sony can make such a fine product and not spend a few minutes documenting connectivity is a mystery to me. But then just about everything about this terminally confused corporation is a mystery.
It gets worse. Sony provides a small screw-on baseplate which adds a standard 1/4″ tripod socket for the Action Cam. The snag is that, once attached, this blocks the access door where the microphone (or power supply – you can choose one or the other, not both – what were they thinking of?) socket is. A moment’s tinkering disclosed that it’s possible to reverse the tripod plate and it still just clears the access door. While the plate now juts out, looking generally ugly, it does not intrude on the lens’s field of view and the whole thing is pretty solid. This is how it looks on the 1/4″ RAM Mount plate:
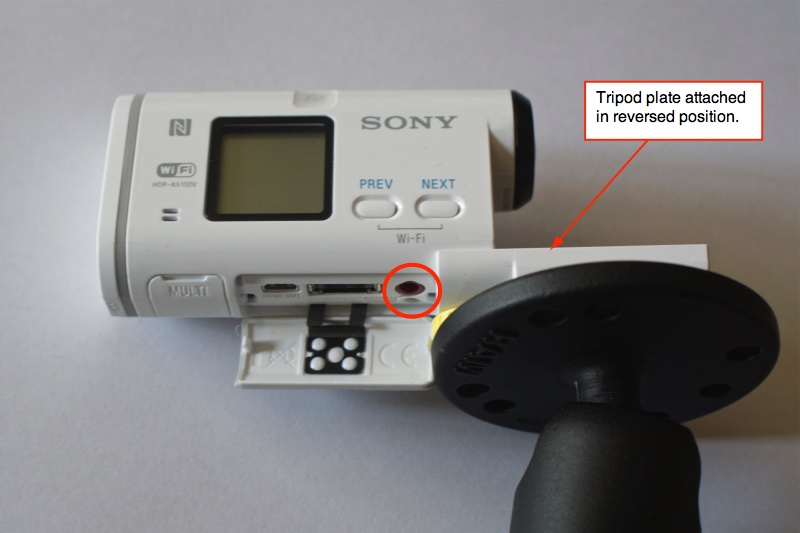
The power/mic socket is circled.
There is just enough room for the microphone plug:
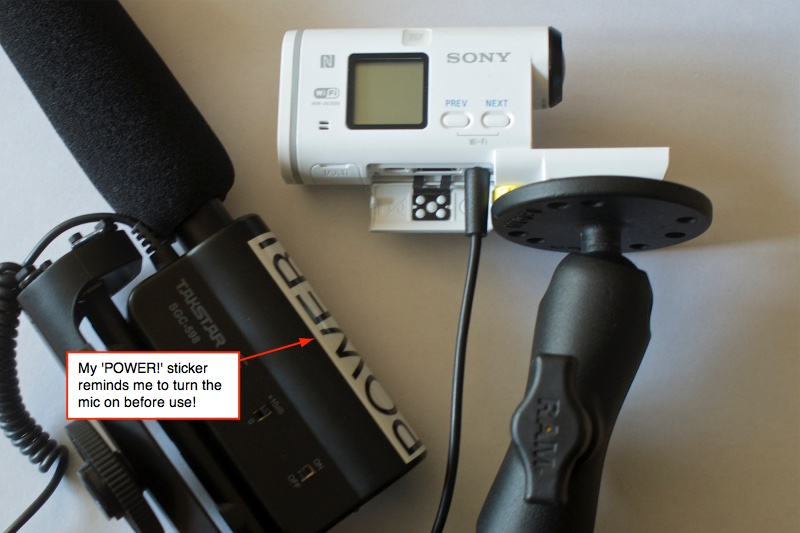
The external microphone is plugged in.
Sure, hunt around a lot and you will find that Sony makes a skeletal frame for the Action Cam which allows proper tripod mounting with access to the sockets in the base. However, reviews at Amazon disclose that this silly-priced accessory is flimsy and made to fail. Pass.
Now for the choice of microphone. Something with a directional (not omni-directional) sound field to cut down on extraneous sounds is called for here. The microphone will be moved to the rear of the vehicle, where the engine is, using a 6 foot extension cable to better capture the glorious sounds of a high revving flat six. Further, a self powered mic is essential as the additional drain on the Action Cam’s small battery would be unacceptable with an unpowered microphone. Recall that the extension mic makes it impossible to use an external power supply with the Action Cam as the same socket serves for both mic and power.
To alleviate power issues, I bought a couple of spare rechargeable batteries and a charger for all of $18 – the Action Cam does not come with a charger:
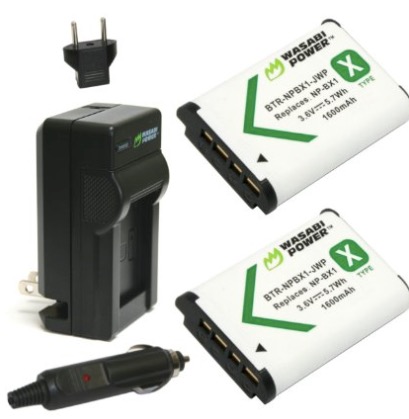
Click for Amazon.
The cells are easily inserted in the back of the Action Cam, even with the camera mounted on the inside of the windshield.
Reading a handful of Amazon reviews disclosed that the best price:performance microphone is the Takstar SGC-598 for all of $33.
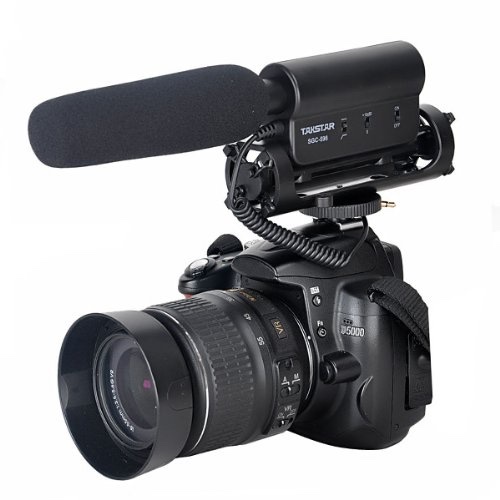
Click for Amazon.
The mic is directional, compares favorably in reviews to the ten times costlier professional Rode, uses one AA battery (allegedly good for 100 hours – yeah, right!) and has the frequency response and sensitivity distribution I was looking for:
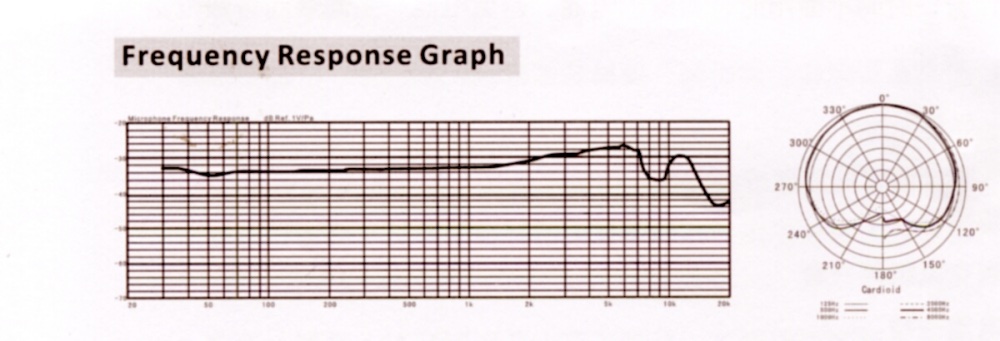
Takstar frequency response and sensitivity.
Further, the mic has a bass cut filter to reduce wind roar and includes a sponge sock for the same purpose. There’s also a +10dB sensitivity switch, though with the mic in close proximity to the motor it’s not required in this application.
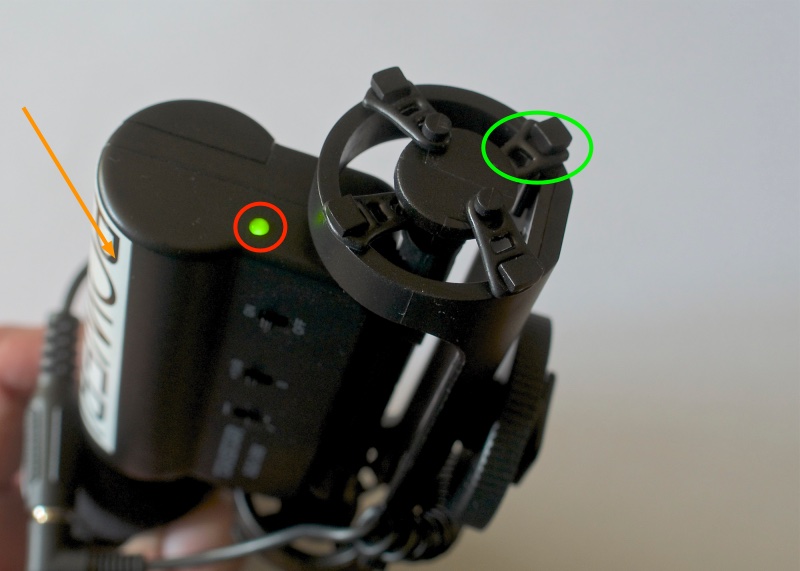
Orange arrow denotes my power-up reminder label. Red circled LED glows red
when the battery is dying. Green oval denotes anti-vibration mounts.
I stuck a large ‘Power!’ label to the body of the mic to remind me to power it on before use. The rear green LED illuminates when the mic is on, changing to red when the battery is low. There are eight rubber anti-vibration ‘springs’ upon which the mic is suspended in its mounting frame and a further eight spares are included in the box in the event of wear and failure. A thoroughly well thought out product at a great price.
The mounting base is a standard camera accessory shoe with a locking knob. As luck would have it, the removable covers for my vehicle’s optional hard top are the exact diameter of the locking knob, so it’s a matter of moments to pop one of these covers off and insert the mic in the opening thus disclosed, for a perfect and secure fit. Sometimes you get lucky. For those looking for the right vehicle to fit this mic, you can figure it out. (Hint: It’s not an SUV).

The Takstar securely installed – literally ‘plug-and-play’
Now we are ready to ….errr, truck.