For archival quality files.
For an index of all my Film related articles, click here.
I am at that point in life where legacies take on serious meaning. Wills, descendants, and so on. One of the precious legacy aspects of my photo archive is the significant number of images made on film. For the most part I scanned these some 20 years ago using a Nikon Coolscan 2000 film scanner. That machine did a good job but the speed of scans would see you to an early grave. Reckon on 5 minutes for a high quality 2000 dpi scan yielding a 5mp file. The quality is good but I thought I could do better. In addition there were many more images I wanted to scan which had missed this first pass because …. well, I got jolly tired of the waiting, and my new Canon 5D was impatiently waiting to be put to use. You see, I had finally given up on film and those Leicas and Rolleis had all been sold. They could not hold a candle to FF digital.
So the idea of doing a better job stuck in the back of my mind and when a used Nikon D800 was acquired it occurred to me that this would make for a good film ‘scanning’ device, with its excellent 36mp sensor. Extensive research on the best hardware setup concluded that the Nikon ES-1 and ES-2 film holder lens attachments would not cut it. Made from plastic with mediocre mechanicals and no lighting system, the whole thing resembled the chore of old with Rube Goldberg quality added to the mix. Alternatives using a film copying stand ($$$) and some sort of cockamamie lighting setup were quickly trash canned. Poor mechanicals, poor repeatability. The goal here it to be able to make 20″ x 30″ prints from the scanned files, not mementos for your wallet. And the whole thing has to be fast – fast to set up, fast to use.
Then I chanced on this JJC ES-2 Film Digitizing adapter. Mostly metal, it includes film and slide holders and, importantly, an LED light source. Be sure to get the version with the LED light source. Once assembled the whole thing makes for a robust whole, with the film held parallel to the D800’s sensor. It is very well made.
This tool calls for a Nikon Micro Nikkor macro lens and two are stated to fit – the 60mm AF-D of old and the latest 50mm Z optic for mirrorless bodies. I determined that the last DSLR version, the AF-S G Micro Nikkor 60mm f/2.8 was the way to go – an easy resale – and picked one up for all of $265 mint and boxed. Nice.
Assembling the whole thing I had this:
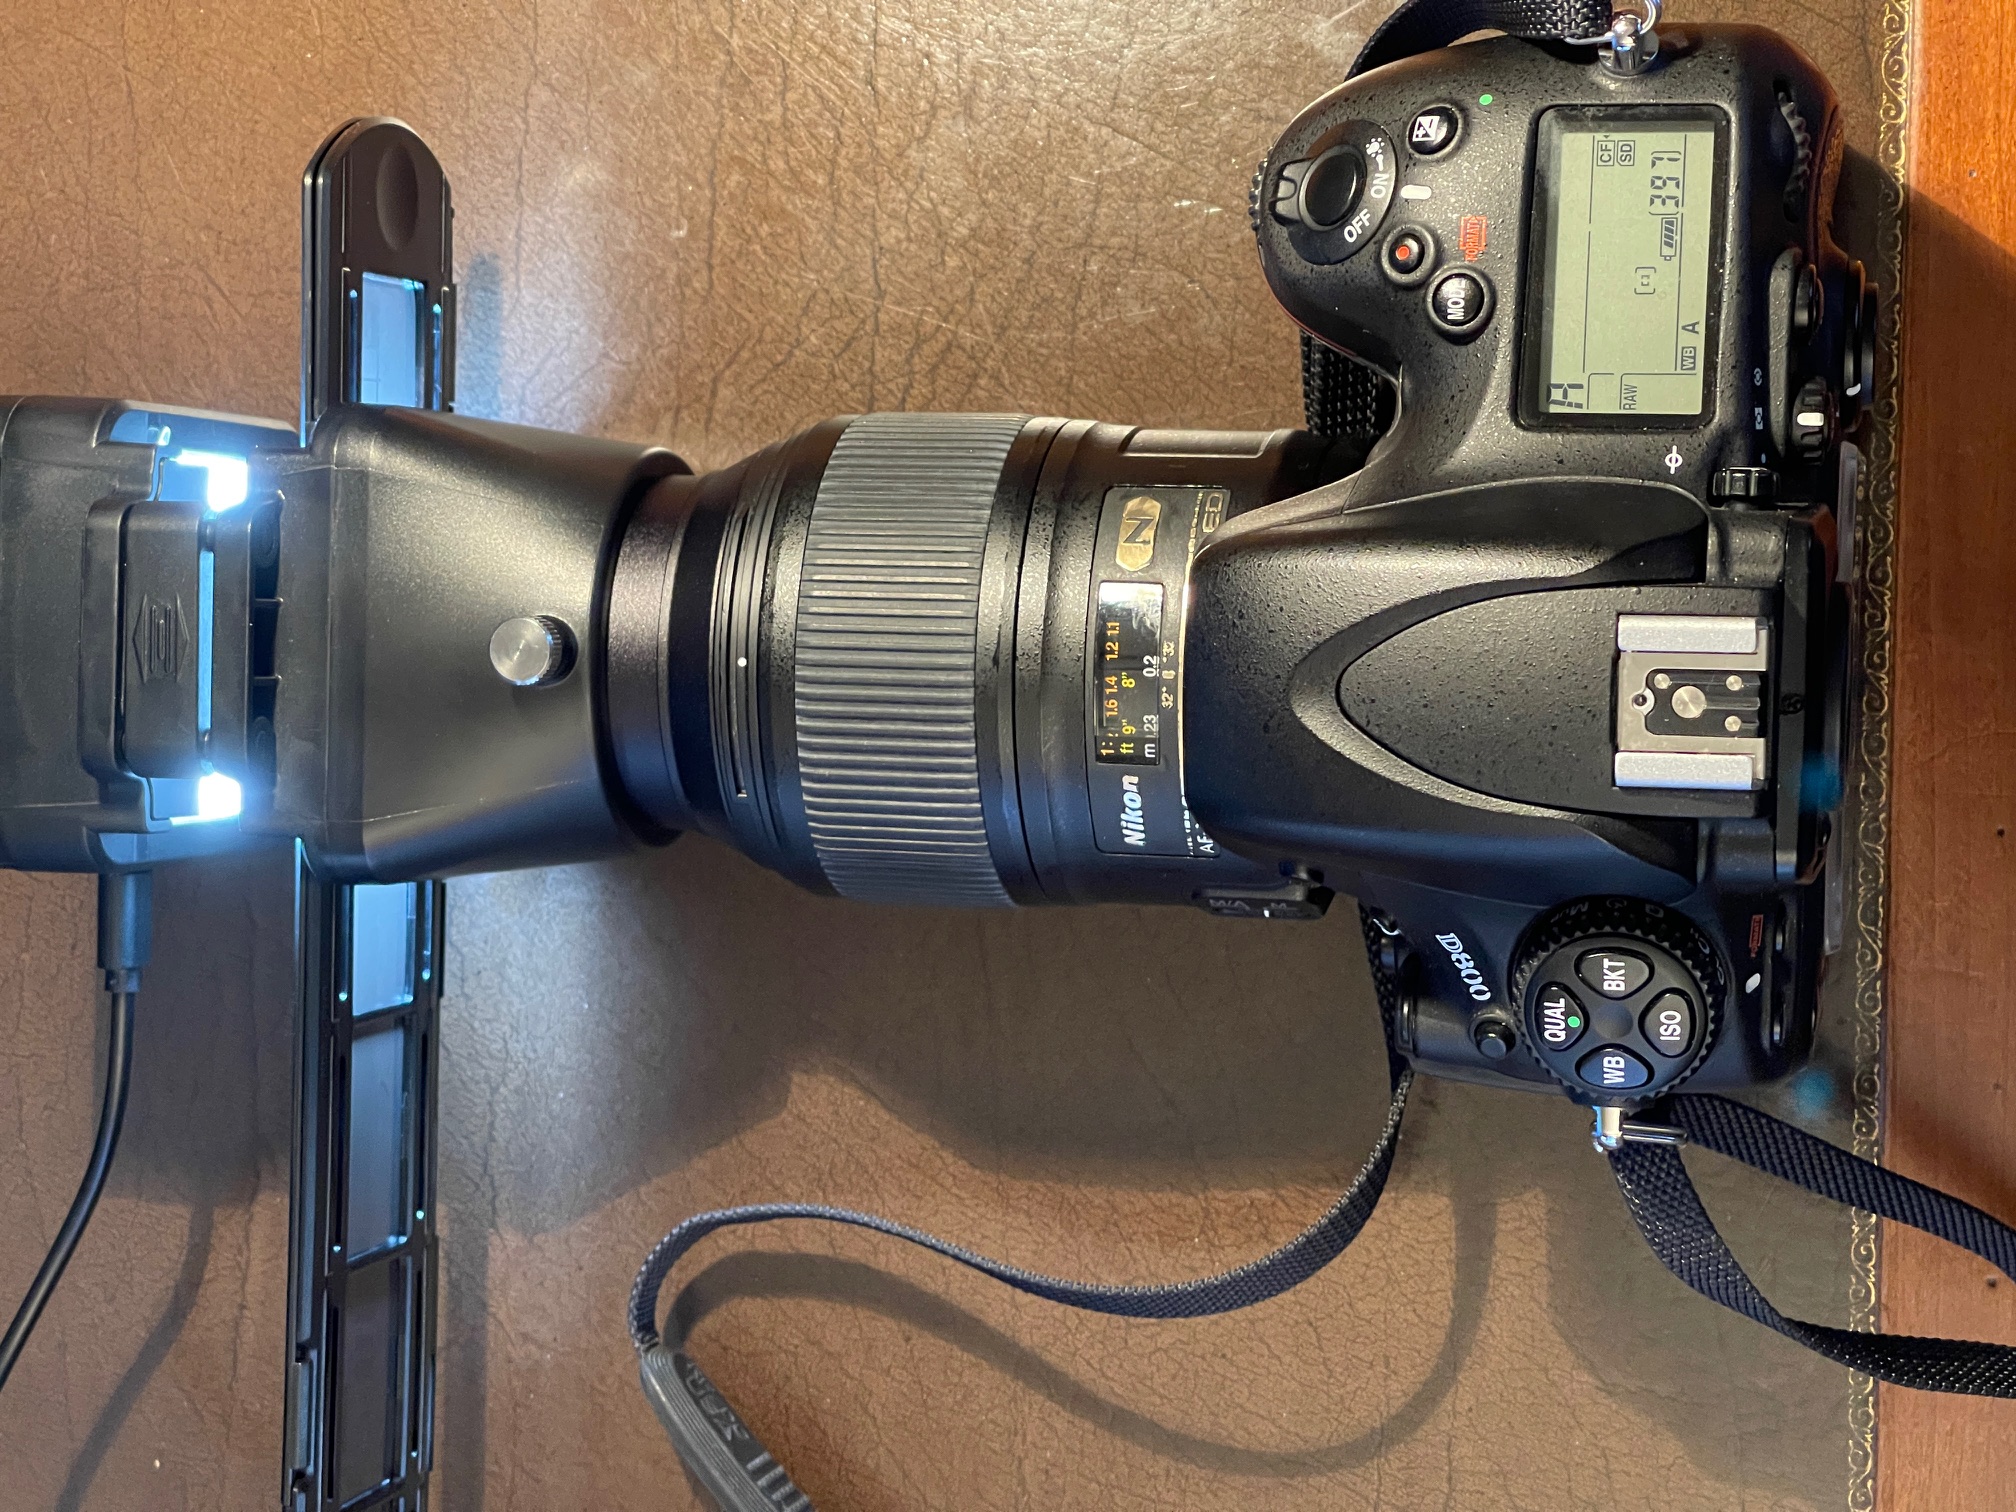
All in one piece.
Before going further it bears pointing out that there is a host of variables in this process and the more these can be standardized and saved as presets the smoother the workflow.
Image size: My preference for the AF-S Nikkor over the earlier AF-D Nikkor ($150 or so) was a mistake. Using the smallest possible extension on the JJC, meaning the stock #1 tube and the #3 62mm filter adapter ring for the lens, I could not get close enough to the film to fill the frame. The #1 tube has a lip which prevents removal, but removal of four Phillips screws and replacement of the #1 tube with one of the pair of #2 tubes supplied reduces the lens-film distance to where the 24x36mm film frame almost fills the frame.
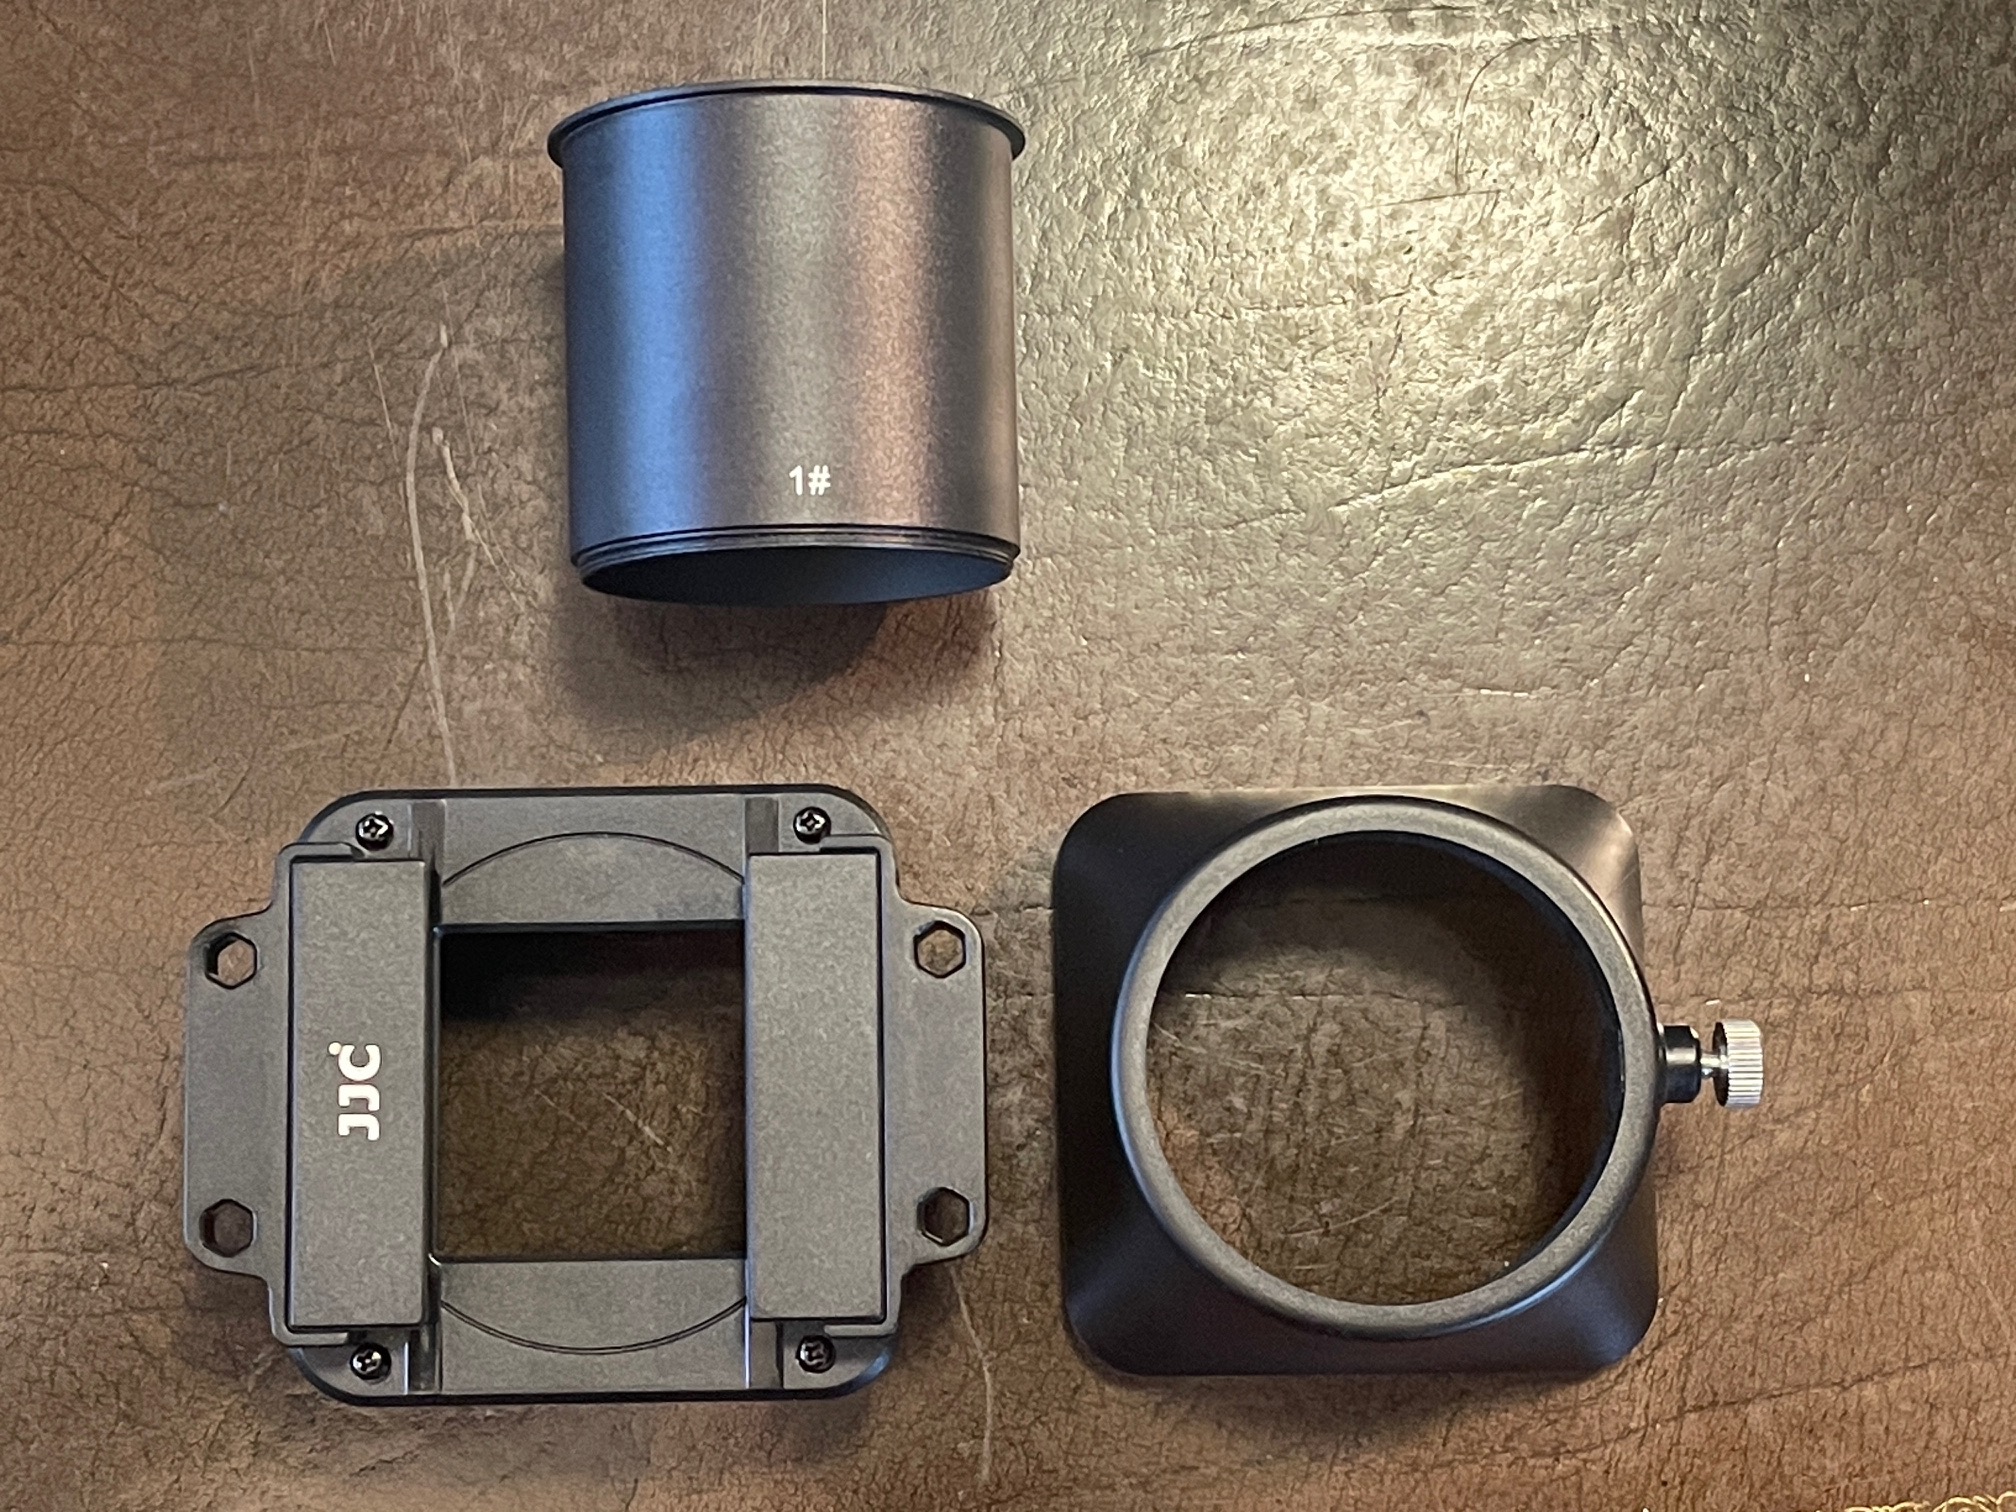
The JJC lens attachment assembly dismantled.
With the #2 tube replacing the #1 you lose the limit stop but that is of no consequence as the device will be used with the tube tromboned all the way in.
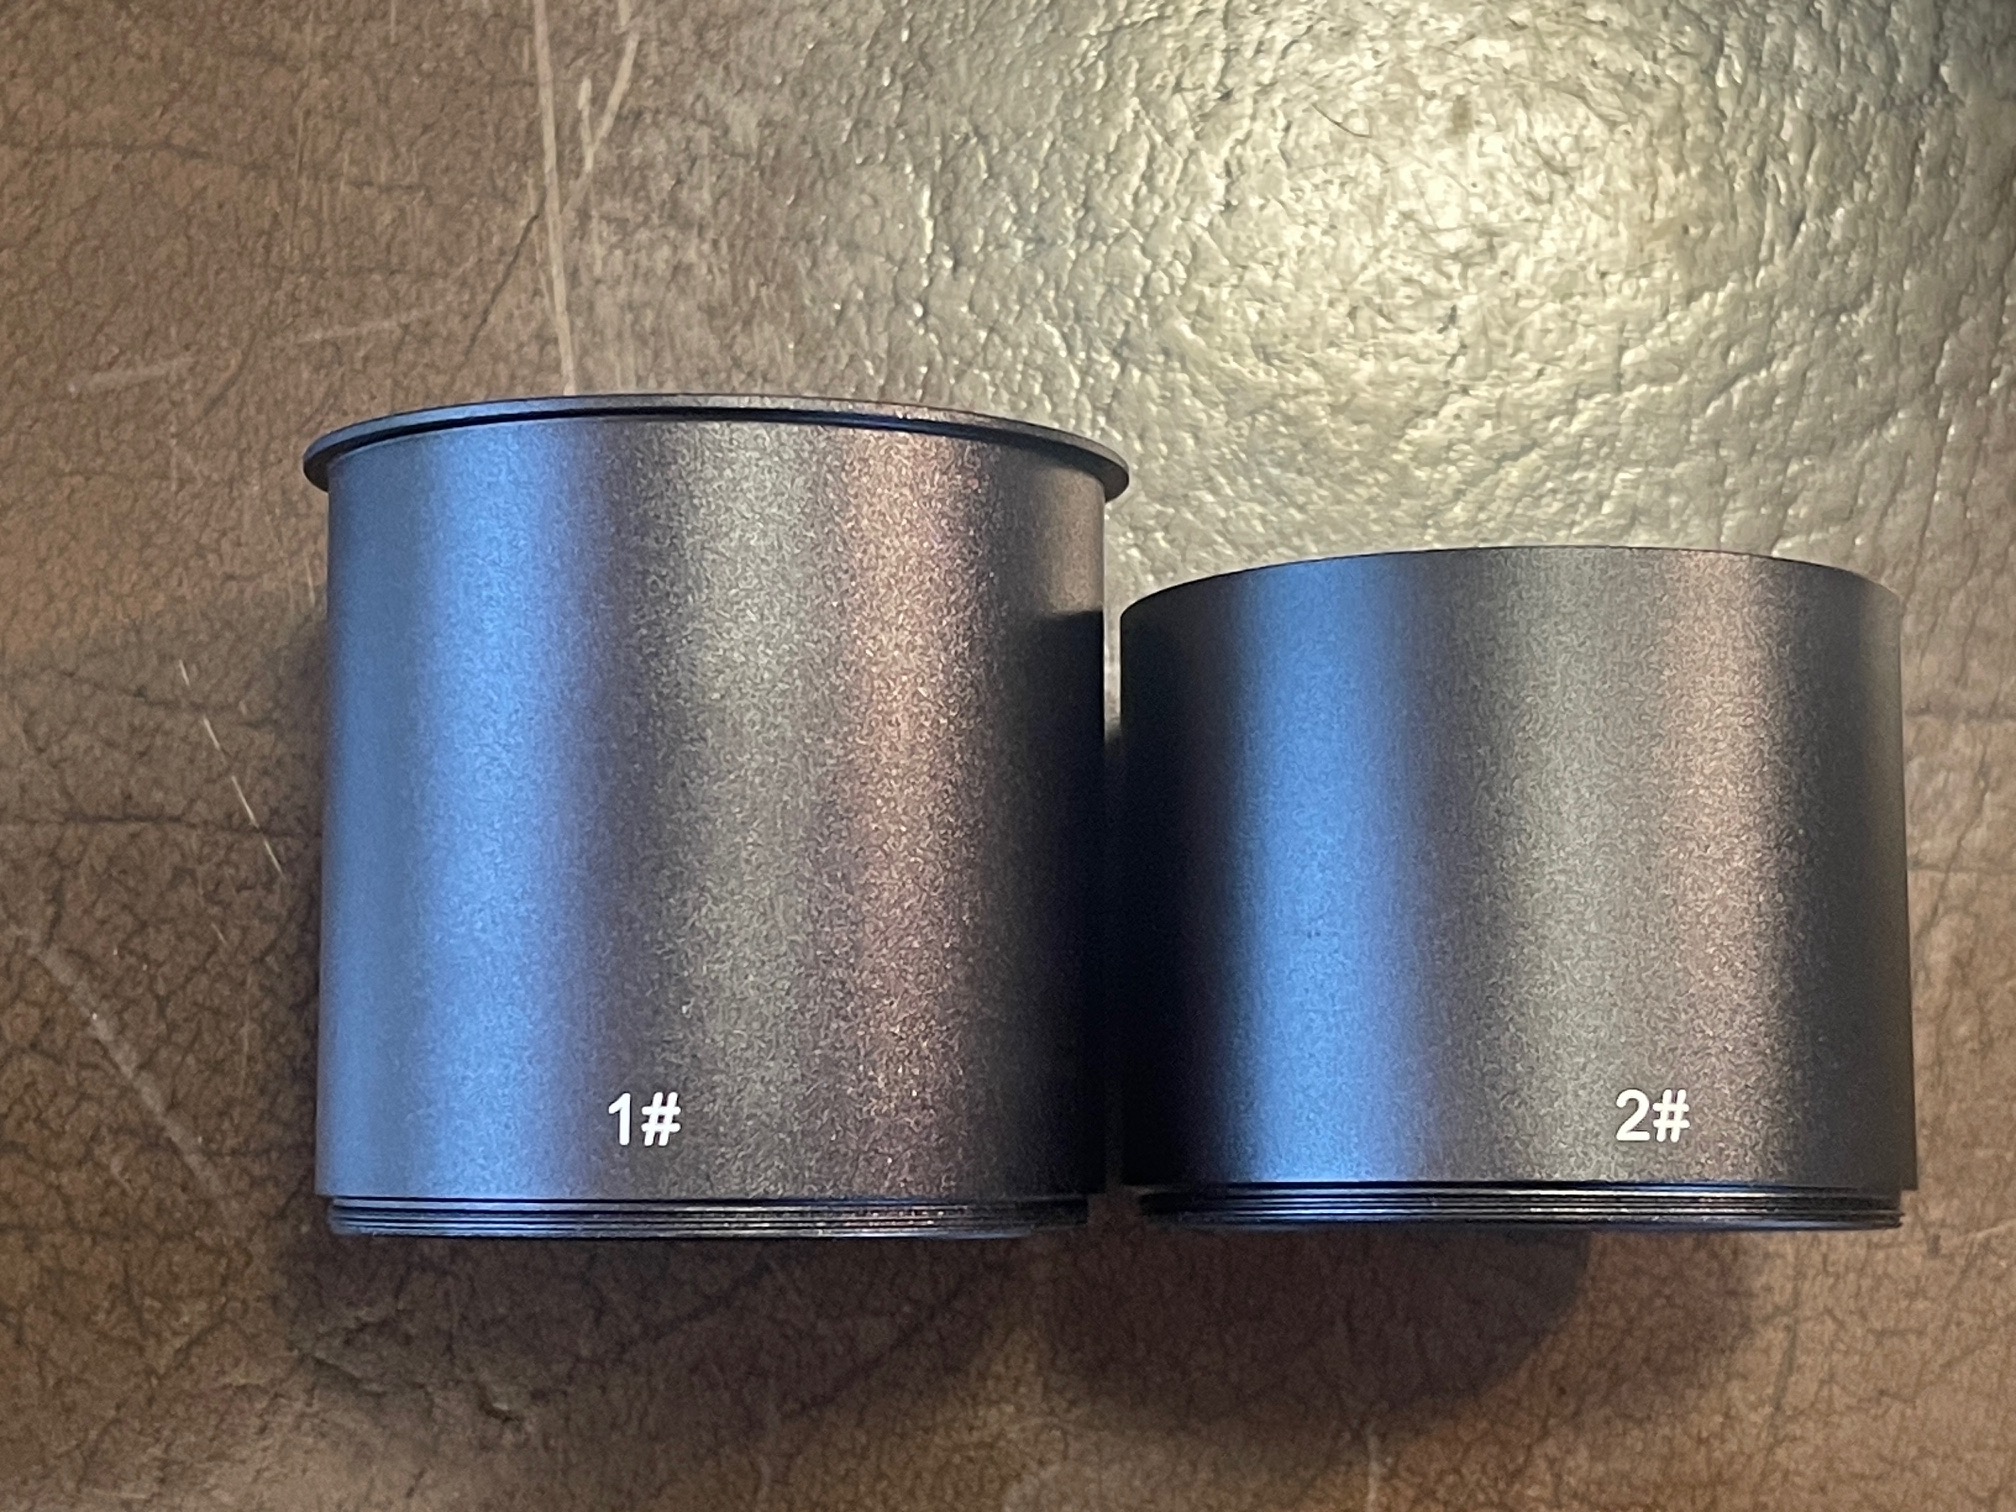
#1 and #2 tubes compared.
I reckoned that a small amount of cropping was no big deal given the high pixel count of the Micro-Nikkor, so I went with the modified version above. You can see how much shorter the tube extension is by comparing the image below with the first one above:
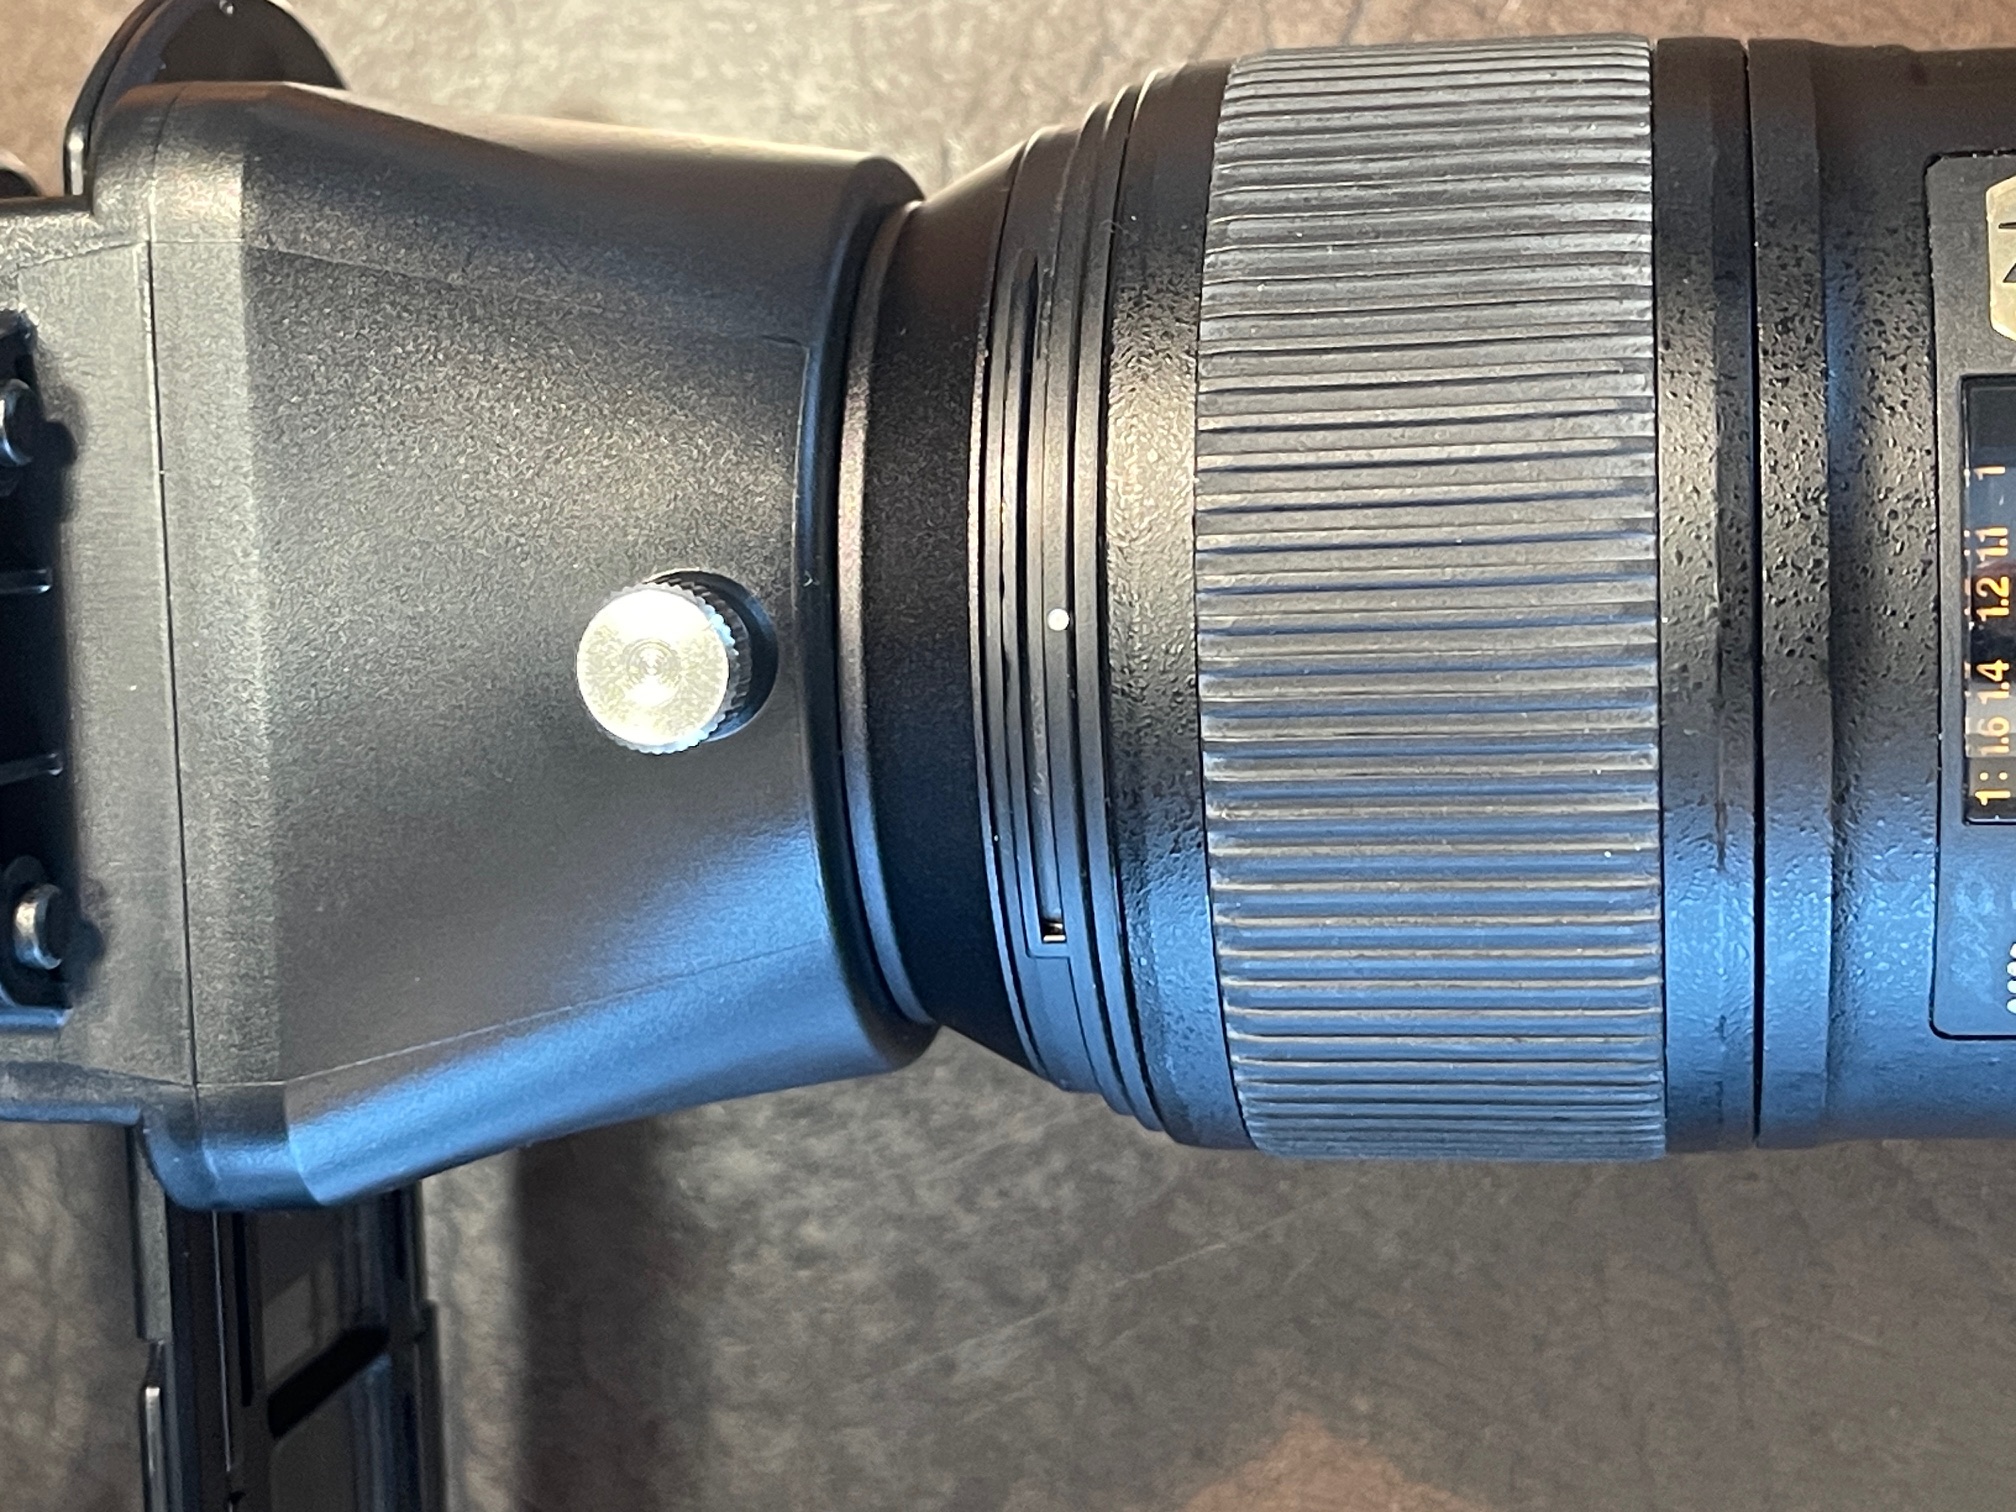
#2 tube fitted.
Lighting: Perhaps the major consideration in choosing the JJC device over alternatives is the included LED light source, with adjustable intensity. Use it right and film damage from heat is not an issue. See ‘Heat risk’, below. The ten levels of brightness saw me opting for maximum as I wanted to use the fastest shutter speed in the D800 so as to avoid blur from mirror slap. The LED light runs from a USB power source and a connecting cable is included. It uses one of those truly wretched MicroUSB connectors at the LED end so be careful, These are easily damaged.
The D800 shooting menu: Go to Shooting Menu->Set Picture Control->Vivid and set Sharpening to Max (level 9). Hit OK to save the setting. ‘Vivid’ works better than ‘Monochrome’ in my experience.
Exposure: You want ISO 100 (not Auto ISO) and Aperture Priority exposure automation. Set the lens to f/9.5 which is the optimum mix of depth of field and sharpness. Smaller apertures see diffraction limiting come into play and definition falls. Auto exposure? Yes. It works well. Forget what you read about using Manual everything. Using f/9.5 the D800 sets the shutter at 1/180 most of the time, short enough to obviate mirror slap blur.
Focus: Stick with autofocus. Nikon does a better job of it than you can using the ultra sensitive Manual focus indicator in the finder. Again, forget the nonsense you read about using Manual everything. I use the film strip holder with the glossy side of the film toward the lens. The film is slightly bowed so there is an argument to be made for focusing half way off center to minimize the effect of the bowing on focus. However, using f/9.5 I have found that edge to edge film grain definition is excellent, so I simply use the default center spot focus.
Cleanliness: Dirt in, dirt out. Handle your negatives using fresh cotton gloves – not the ones you just used for the oil change on the car – and blow away/antistatic brush away any dust on the negative before insertion in the provided glassless negative strip holder.
Heat risk: The device comes with a clear warning label regarding heat output of the LED light source:
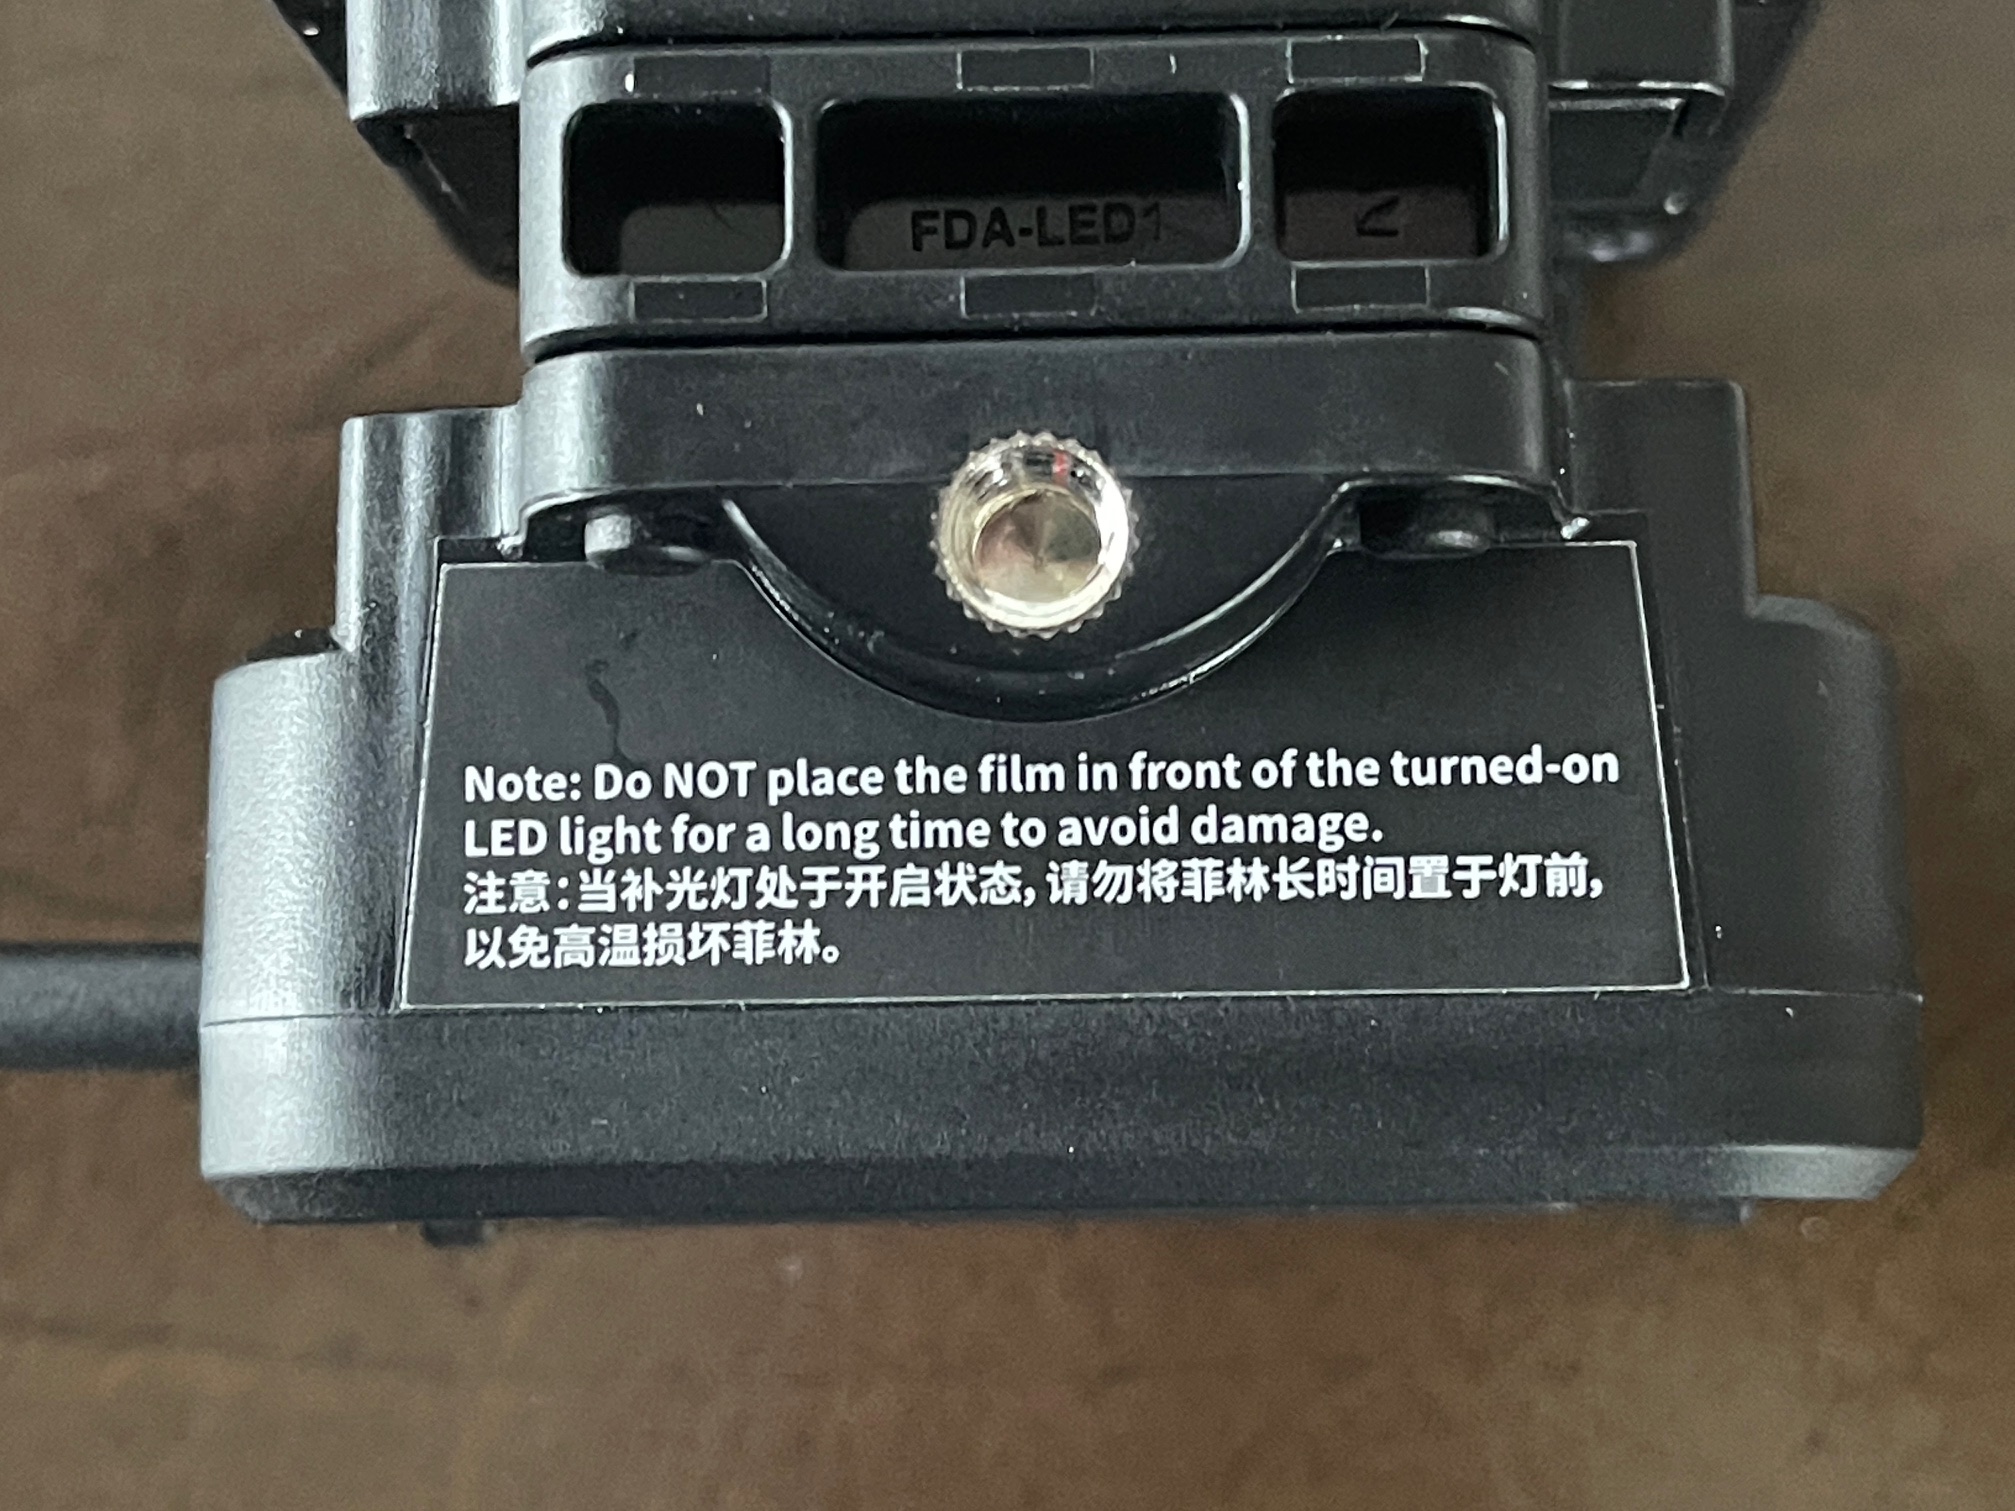
Warning label.
It’s important to note that there are two film/slide holder slots:
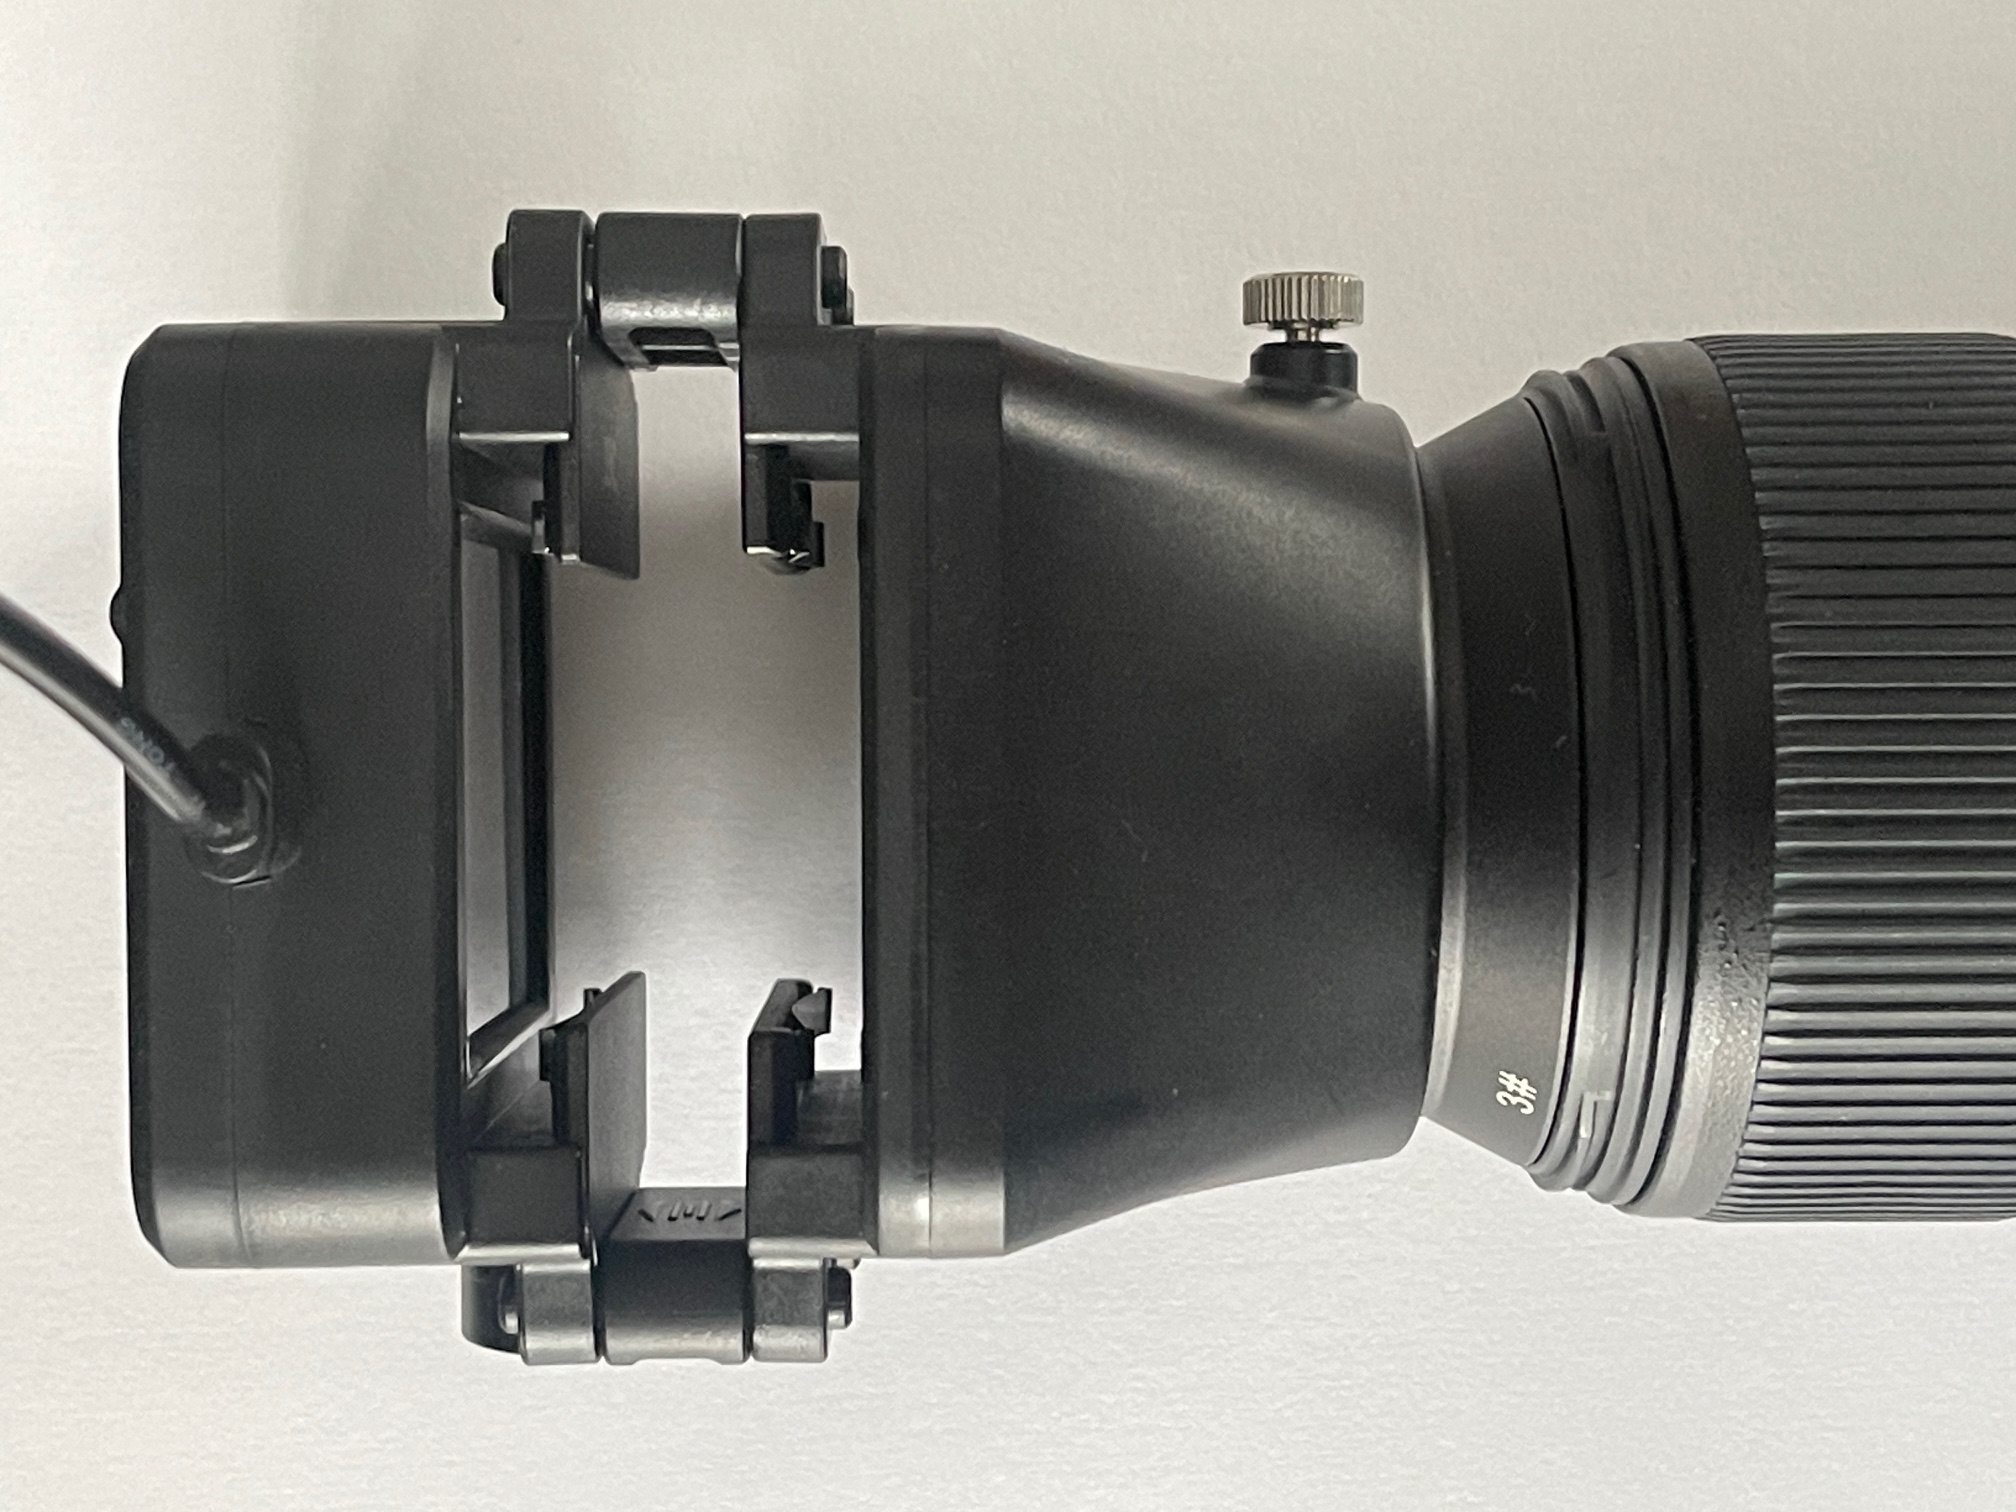
Two film/slide holder slots.
Because I get a more frame filling image, and because it’s further from the heat source/LED, I use the one nearest the lens.
How hot do things get? There’s a big difference between the temperature at the LED surface – very hot – and the one at the film negative in the more distant slot. I measured these using a laser thermometer:

Temperature rise though steady state.
So, simply stated, if you propose keeping the negative illuminated – I am using the max power setting above – for long periods of time, the safe way to do that is to use the slot most distant from the LED light source. 141F is too hot. 95F is fine – and that is reached after 10 minutes of inaction. Kodak’s TriX film survives fine in the tropics, so 95F is no big deal. But 141F is 10 degrees hotter than Death Valley, the warmest place on earth!
Horizontal alignment: The holder is excellent, allowing only a small amount of slop with the end images in a strip of six. I turn on the Grid display in the finder (Custom Settings->d->d6) to ensure proper alignment before taking the picture/scan. There are detents as you slide the holder, making frame alignment easy.
Taking the picture/making the scan: No camera support is necessary as the assembly makes for a robust whole. I just rest the assembly on my desk and click away.
Lightroom and Photoshop: I use non-subscription versions of LR (v. 6.4) and PS (v. 12.0) on a 2010 Mac Pro running OS X High Sierra (10.13). Later versions of LR and PS add nothing, but do draw down your pocket book as greedy Adobe seeks to make you a lifetime subscriber. Heck, they probably even charge your estate after you have croaked. Another legacy consideration. What a dishonest business Adobe has become.
Anyway, insert the D800’s CF or SD card into your card reader and import the negative images to LR. You then need to round trip them (Alt-E) into PS where you hit Command-I on each, which converts them to positives. Don’t bother with obscure solutions in LR which would have you messing with curves. PS knows how to do inversions perfectly. File-Save gets the converted images into LR where upon you can erase the negative originals. Crop and adjust contrast/tint/clarity in LR on one image, save those settings for the session (Alt-C) and apply them to all the other positive images in LR (Alt-V). ‘Boom’, as Steve Jobs would put it.
Comparisons: The image comparator in LR makes for easy tuning of the D800 scan with the Coolscan 2000 original:
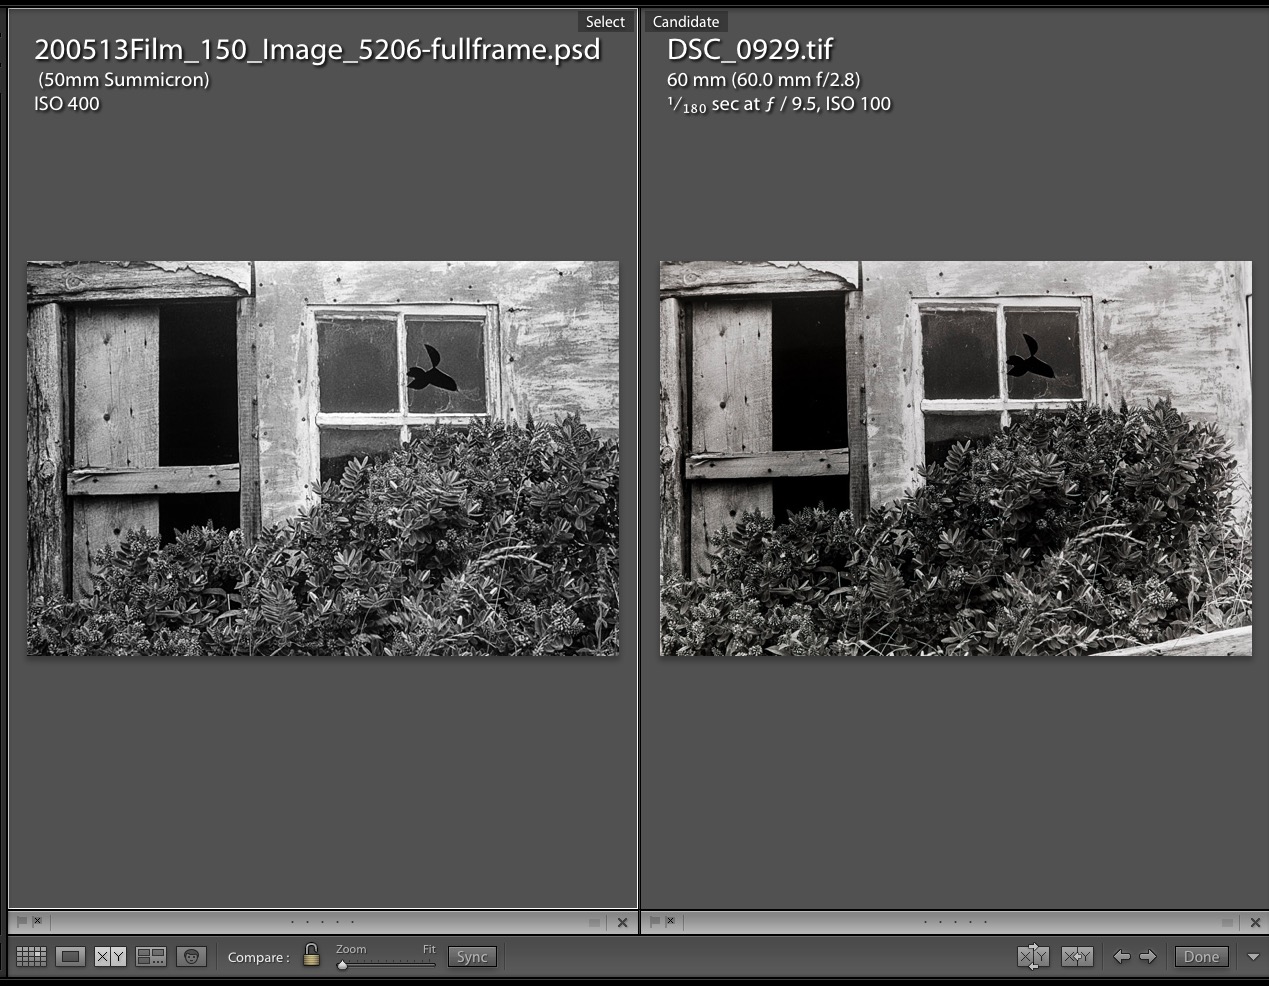
Nikon Coolscan vs. D800.
An enlarged comparison shows the TriX film grain is perfectly rendered to the edges and smaller and sharper than with the original Coolscan scan. Then again, the image from the D800 is some ten times the file size of the 5mp Coolscan original and I would guess the Micro-Nikkor’s optics are a step up from those in the old Coolscan.
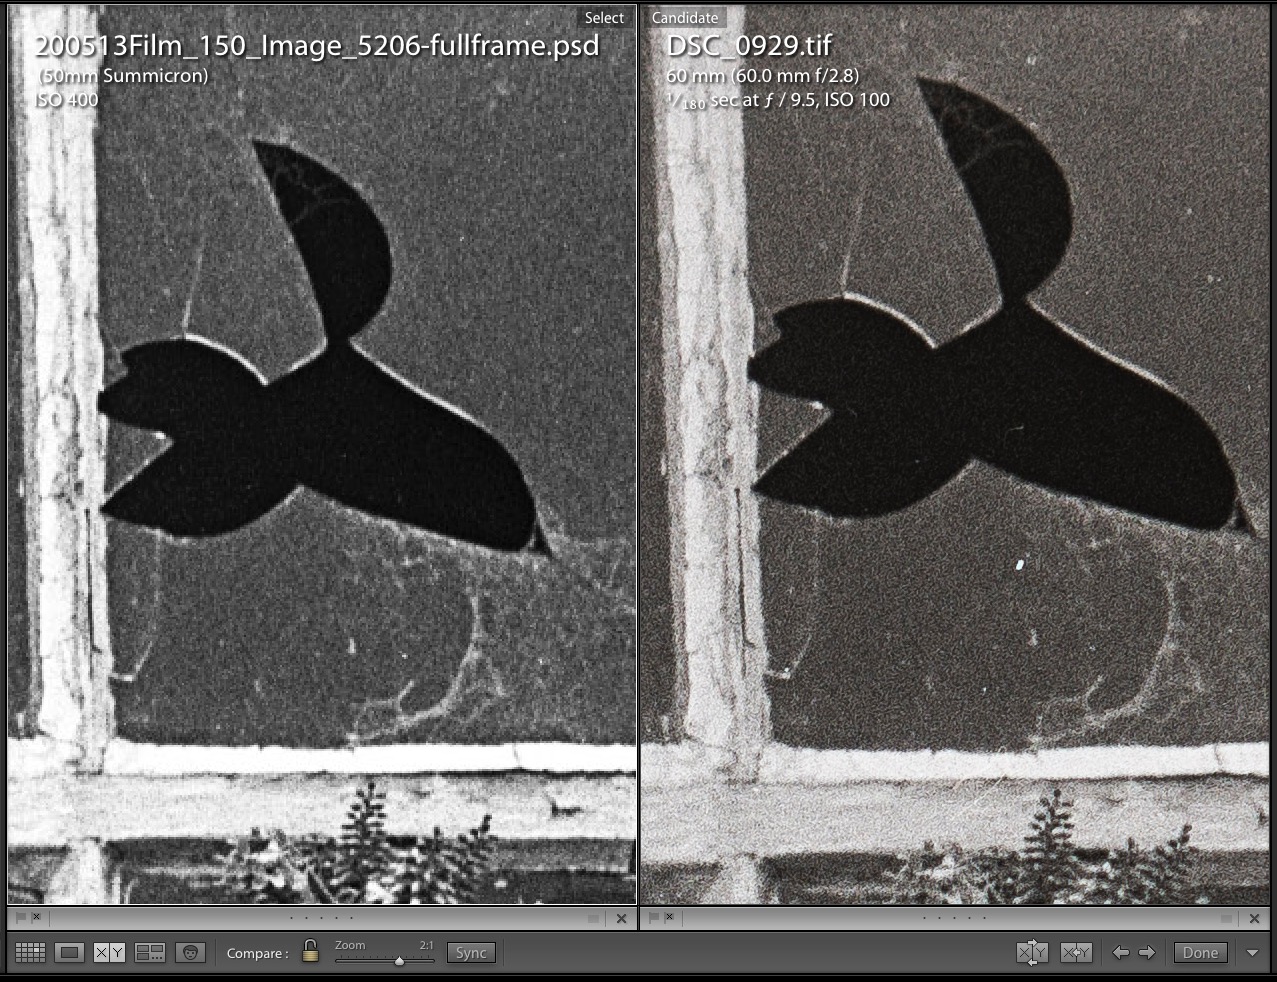
Greatly enlarged comparisons.
Speed: How long does it take you to press the shutter button, move the CF/SD card to LR and round trip for inversion through PS? A whole lot less than the five minutes a scan in the Nikon scanner. And do not be tempted to buy that now 20 year old scanner. No one has parts to fix it and it will probably break, if you do not give up the ghost first. Plus try finding connecting cables which work on your modern computer.
Cost: The most commonly used scanning tool appears to be the $400 Epson V600 flat bed scanner. You are looking at 30-60 minutes (yes, 30-60) for the highest quality scan and will die of old age before getting the job done. Quality will not be all that great – I know, I tried it after careful dismantling of the scanner for proper lens collimation. Ridiculous. Fughedaboutit. Plus good luck reselling that behemoth when you are done.
Here is what this little lot cost me:
- Nikon D800 body – I use that for picture taking, so it’s not an incremental cost factor.
- Nikon Micro Nikkor 60mm f/2.8 AF-S lens, used, mint, boxed – $265 plus tax and shipping. Easily resold for cost. I would prefer the earlier AF-D version for $100 less, see above.
- JJC film scanning attachment – $95
- Total cost – $360
It’s not nuclear physics to solve that one.
Other bodies: I see no reason why this should not work with any number of bodies. For the FF set there’s a large selection of Nikons at bargain prices as everyone dumps them for mirrorless, which they mostly do not need. A good 12mp D700 can be picked up for $250 and is still an excellent daily user. If you use Canon, MFT or other makes, check the JJC listing linked above to see whether your camera/lens combination will yield full frame ‘scans’. The large number of filter attachment adapters provided, covering 46mm through 67mm should do the trick at the camera’s lens end.
In Part II I look at the additional variables which arise when ‘scanning’ color slides and negatives. I will also look at an approach to batch processing of conversions of multiple scans in one step, further speeding this tedious process.