Category Archives: Photographs

Point Sur lightstation

On Highway One.

Go a few miles south of Carmel on California’s Highway One and you will reach a desolate windy stretch of the world’s most beautiful road to which abuts a rock which is home to the Point Sur lightstation.

It’s no exaggeration to say that I have been trying to take a half decent snap of this majestically situated relic for some two decades now. First, I can never resist the call of One and while I much prefer to take in that magical highway on a motorcycle, that form of conveyance is ill suited to carrying the sort of gear needed to do Point Sur justice.

On my most recent attempt I was actually visiting One to take some virtual reality panoramas at Point Lobos, just outside Carmel, but could not resist the short drive down to Big Sur, passing Point Sur en route.

The problem with photographing Point Sur is that it’s far away, the gates are always locked, you can’t get a good view of it from close-up, it’s windy as all get up and the place, when not shrouded in mist, is enveloped in sea haze. But this time I came prepared. With monopod and tripod and with that killer duo, the Canon 5D and the Canon 400mm f/5.6 L telephoto. The latter, while huge and unwieldy, is by a considerable margin the best 400mm lens I have used and will likely remain so because the next step up is Canon’s f/4 and f/2.8 variants and I have more sense than the money demanded for these.

To cut a long story short, I banged away from the roadside, over the fence, with the hardware neatly supported on a monopod, trying not to sway in the heavy wind. The long Canon lens does not make matters easier by offering a lot of barrel for the wind to push on. I left the lens fully open as it gets no sharper stopped down and because I wanted the shortest possible shutter speed at the optimal ISO 400 setting on the 5D’s grainless sensor. The image was made in RAW format, of course, as I knew a lot of post processing would be needed to bring up the tones and contrast, experience having taught me it is very hard to destroy the quality of a 5D RAW image no matter how much you tweak things.

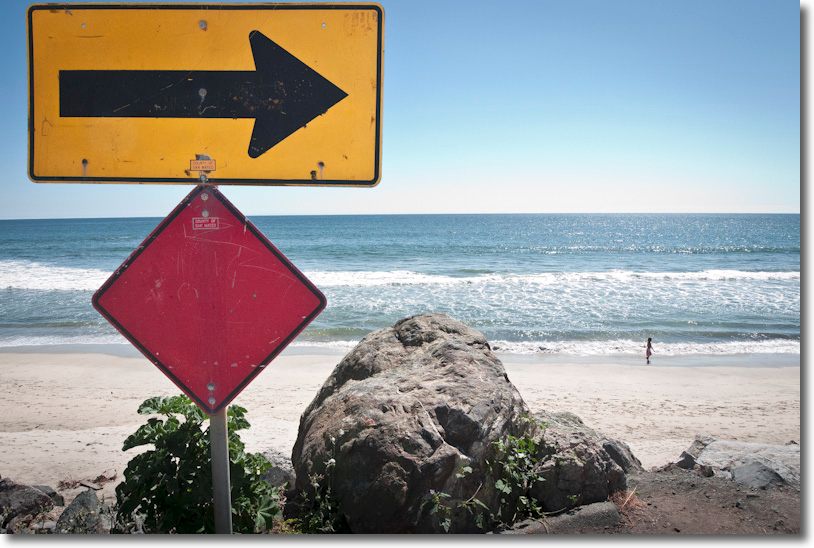
Well, here she is. I can still do better and propose to spend another 20 years trying, but this will have to do for now. The camera was maybe a mile from the buildings.

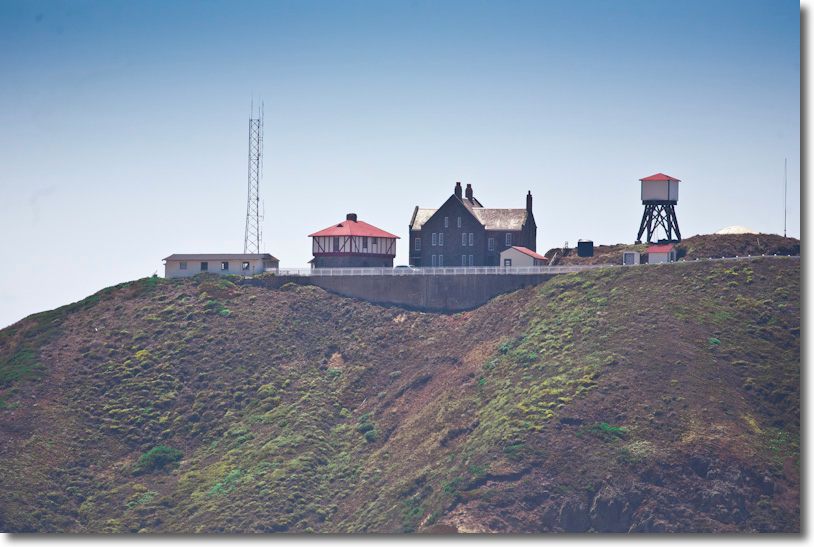
Point Sur lighstation. Canon 5D, 400mm, 1/3000, f/5.6, ISO400, processed heavily in Lightroom 3.

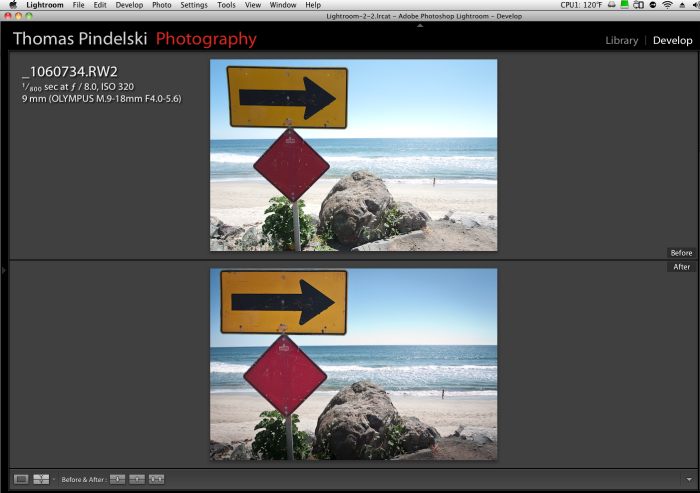
Here’s the original – let me tell you that even with a monopod it’s a challenge holding this rig level in heavy wind.
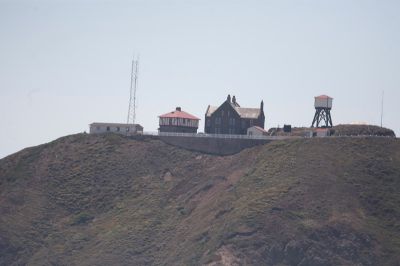
Original.

To read more about Point Sur click here, bought to you by us California taxpayers who are largely refused entry to this special place.

Lens profile correction in practice

A dream to use.

Having explained how to create your own lens profiles for use with Lightroom3 yesterday, here’s that experience being put to use.

In this snap I wanted to emphasize the foreground sign to heighten the impact of the lone child on the beach. As you can see the original is rather blah as I was trying to moderate exposure between the poorly lit sign (the sun was shining into the lens – note how flare free the image is, especially as I do not use a lens hood) and the brightly lit beach. A separate attempt using fill-in flash looked too artificial for my taste, like one of those over-lit 1950s outdoor Hollywood musicals.

Original on the top. G1, Olympus 9-19mm MFT lens at 9mm.

A quick tap on the lens correction profile for the lens in LR3, two minutes work with the adjustment brush on the signs using AutoMask and zero feather to faithfully define the edges, a local exposure adjustment of plus one stop on the masked signs, a minus one stop exposure adjustment to the whole image, a touch on the vibrance slider, a little post-crop vignetting (the Olympus lens is totally free from optical vignetting even at 9mm, as you can see from the original, above), some selective darkening of the foreground and a blah original becomes a picture, and exactly what I visualized when pressing the button. The sheer idiocy of the sign testifies to the fact that the least able in any society work for government.

Stop! Turn right! G1, 9-18mm Olympus at 9mm, 1/800, f/8, ISO 320

With images where you expect to use lens distortion correction or perspective correction at the processing stage, it makes sense to compose with a little space around objects close to the edge of the frame, as that space will be lost when corrections are added – as in this example. Things are made a lot easier by the fact that the Panasonic G1 has one of the very few viewfinders which shows 100% of the image – most crop 3-5% making it impossible to exactly preview the saved file.

Lightroom3 is a powerful, efficient photography tool. The enhancements in Lightroom3 have now almost totally obsoleted my use of Photoshop for which feature, alone, I am immensely grateful.

Thank you, Adobe. Now maybe you can convince that jerk Steve Jobs to allow Flash to work on the iPad before I resort to jailbreaking mine.

Making an eBook

The whole process, start to finish.

I thought it might be helpful to illustrate the complete process of creating an eBook from start to finish. The final eBook can be placed on your server of choice and made available to anyone you want. If it contains client-specific pictures, adding password control to the downloadable file is an easy enhancement, explained below. In this case the book created is not password protected.

The tools used are:

  • Lightroom 2 or 3 for assembly of the pictures
  • Lightroom 2 or 3’s Slideshow module to create a PDF file
  • iWork Pages to make title, colophon, etc. additional pages
  • Apple Preview to add these pages to the PDF

As I have saved templates in Pages for the Front and Colophon pages, all I need do is modify these and re-save them as PDFs before adding them to the PDF book exported from Lightroom. You should do likewise to smooth and speed the process.

Having done this a few times I thought it might be fun to time the complete process. It took me just fifteen minutes to select the 20 pictures for the eBook, move them to a new Collection in LR3, arrange them in my preferred order, save the PDF and then add front and colophon pages. I call that pretty efficient. This timing assumes you have the constituent pictures in Lightroom and that they have been processed to your liking before you start.

Here are the screenshots showing the process:

Select the pictures for a new Collection in Lightroom – I hold the Command (Apple) key in Lightroom->Library and mouse click the ones of choice:

In Lightroom, click Library->New Collection and check the box as shown:

Go into the Collection in Lightroom->Library and drag and drop the pictures in your preferred order:

Jump to the Lightroom->Slideshow module and uncheck the boxes for the Intro Screen and Ending Screen – you want to do this to ensure page numbering is correct:

Click on ‘ABC’ at the base of the screen and select the data you want to display on each picture – I have selected ‘Sequence’:

Place and size your data box:

Choose your background and frame color preference using the Slideshow panel on the right. Now, export the slideshow to a PDF by clicking on ‘Export PDF’ on the lower left. Use the Quality=50 setting shown. Extensive tests, documented here, show this to be optimal for a wide variety of display devices.

You are done with Lightroom. Open iWork Pages and create or modify the front page:

In this case I wanted an image on the cover so I popped back into LR3 and exported a JPG of my picture of choice, then drag and dropped that onto Pages. Eventually I also changed the type from red to blue to improve visibility. You have a lot of control in Pages:

Still in Pages, create the Colophon:

Note that I have added Hyperlinks to my sites at the lower right of the colophon page – easily done in Pages using Insert->Hyperlink->Webpage (or email). This is a powerful tool for marketing your services if you are a pro. Any reader of your book can simply click these to contact you.

Using Pages->File->Export, export both the front, colophon and any other pages to separate PDF files.

Now open the PDF of pictures you exported from Lightroom in Preview and drag and drop the cover page into position in the right hand Sidebar (View->Sidebar->Show Sidebar if you cannot see it):

Repeat the above step for the colophon and any additional pages. Now save the enhanced file from Preview – this is where you can add password protection if required:

You are done! To put the timing in perspective, creating the eBook and this whole article from scratch, including file upload to server and all the screenshots took me just 50 minutes. The hard work was in writing this blog piece (35 minutes) and the easy part was making the book (the other 15 minutes).

All that remains is to move the file to your display storage of choice – file server, iPad, whatever.

And to see the finished product, click the picture below. Need I add ‘Best viewed on an iPad”?

Enjoy!

Click picture to download PDF file.

More on PDF book publishing

The dream is becoming a reality.

[column width=45% padding=5%]
Before the iPad even hit the shelves I was fantasizing in these pages about the value this tool would add for working photographers. It’s easy to generate PDF files of your work using the simplest tools (Lightroom, Pages and Preview is what I use) or, if you are a real publishing maven like UK photographer Roy Hammans, you can use sophisticated tools like Adobe’s InDesign to craft very professional looking eBooks. Take a look at Roy’s splendid collection of weathered boat hull abstractions which you can download from his site here. Do yourself a favor and move it to your iPad which displays them far better than a regular computer monitor, if my well calibrated Dell 2209WA is anything to go by. Also, I much prefer GoodReader on the iPad as a viewing app for PDFs to iBooks, which is clunky to load and slow to focus and sharpen each image.

I have asked the makers of GoodReader to provide enhanced slide-to-slide transitions (fades, dissolves) – let’s see if they come through. I would have asked the arrogant fruit company to do this for iBooks on the iPad but have you ever received a response from Apple on anything? After all, this is a company whose philosophy is increasingly “That’s how we like it. Take it or leave it, pal.”

I can generate a PDF of, say, 100 pictures from Lightroom (maybe Aperture has a like feature?) in a few minutes, add cover pages in a few more and have the whole thing on the iPad seconds later; imagine how this would work at any magazine with a lot of art directors, editors and photographic content. The photographer bangs away, the pictures are moved to Lightroom and thence to the iPad and the art director, minutes later each of the many team members is holding an iPad in his or her hands and making the decision what to cull and what to keep. Separately, a version is placed on the photographer’s server for downloading to the Big Cheese’s iPad in the sixtieth floor’s corner office. Eventually, the iPad app will have a Keep/Reject function for the editor to use, will be handed back to the photographer’s assistant, sync’d with Lightroom and, hey presto, off we go to press. Or rather, off we go to ePress.

[/column]
[column width=45% padding=5%]

Anyone looking at the nineteenth century paste-up technology used by Anna Wintour in making the September Issue of Vogue would be blind not to see the possibilities.

Now that I have done this a couple of times, I checked my timing when doing a 24 page eBook of beach pictures. These were all in Lightroom 3 and I simply copied them to a Collection, added the color wash in LR’s Slideshow module, exported to a PDF, opened the PDF in Preview and then dropped in the front and Colophon pages which I made in iWork Pages. Start to finish took me thirty minutes. Had there been 100 pictures the additional time would have been a couple of minutes or so, the most time consuming step being the creation of the front and Colophon pages. I have saved these as template files for future use to make things easier. Click the picture to download the PDF:


[/column]
[end_columns]