Category Archives: Cooking

Cooking hardware that makes a difference.

Rambo meets Mitsumoto Sakari

A better mousetrap.

For an index of cooking articles on this blog click here.

Five years ago I pretty much gave up on my chef’s knife and transitioned to a cleaver. You can read about that here.

The upgrade demon reared his ugly head the other day and I resolved to try a Japanese edge cleaver for even better cutting. Japanese knives are sharpened to a 12-15 degree angle, much finer than the 20 degrees used in European hardware. Better cutting, the trade-off being faster wear of the finer edge.


A new sharpening tool and a Japanese cleaver – the Rambo. Click the image.

My electric knife sharpener – check the link above – is getting long in the tooth, the grinding wheels are now well worn and you cannot replace them. You have to buy the whole thing again. Boo!

So I thought I would try the Japanese Mitsumoto Sakari sharpener which comes with coarse and fine stones, as well as a scissor sharpener. But the real secret to this tool is that the sharpening angle is adjustable from 14 to 24 degrees. As for the cleaver, it’s a non-stainless forged steel one (I borrowed it from Sylvester Stallone when he was not making Rambo XLI) for a better edge and I immediately sharpened it to a 14 degree angle. First, however, I checked the angles on the Mitsumoto and can confirm they are dead accurate, the 14 degree setting yields a subtended angle of 28 degrees, the 20 degree yields 40 degrees and so on. Nice.

I gave the Rambo ten unidirectional swipes through the 14 degree coarse sharpener, then five more through the fine and can confirm that it’s scary sharp. The hole in the blade is for your forefinger and has nasty burrs when shipped. A few seconds with a Nicholson rat tail file saw those off. The forefinger is inserted there as a further precaution against your finger dipping into your workpiece. The Rambo comes with a sturdy leather belt pouch for those occasions when you feel it’s necessary to wreak havoc outdoors.

The sharpening rods in the Mitsumoto are fairly fine so only time will tell how well they wear. At $25 you can buy five for the price of one Kitchen Chef electrical tool, so it’s not a big concern. Recommended.

As for the Rambo, I have to do a lot more butchering before passing judgment. Suffice it to say that I feel empowered – and dangerous.

Meat cleaver

A superior tool for any cook.

For an index of cooking articles on this blog click here.

Over a decade ago I extolled the benefits of a good chef’s knife, writing like many before me that it’s the key kitchen tool.

Well, for the last three years my chef’s knife has seen very little use and I prepare three meals daily. It has been replaced – nay, obsoleted – by this:


A superior tool.

This tool is superior to the chef’s knife in just about every way imaginable. The cutting edge is much further from the fingers. The leverage that can be applied on the broad-topped blade is an order of magnitude greater. Rocking the cleaver over vegetables, like onions, to dice and chop them up is trivial and safe. But as the dents in mine confirm, the last thing you really want to do with this tool is use it for hacking up bones. Yes, the steel is soft, meaning it both blunts and distorts relatively easily. I will gradually wear through my dents, but they remind me not to be silly. You never hammer this down on anything. Make noise with it and you are using it incorrectly. Want to hack up bones? Use a saw.

The blade is very thick which just helps with the impression of control and yes, it just fits the sharpening machine I have now been using happily for over a decade:


In the Chef’s Choice sharpener.

What about the Mezzaluna, you ask? After all, celebrity TV chefs are all over this tool:


An awful, single-use tool. Dangerous, too.

I have to tell you that this is one of the worst conceived single-use tools ever. First, all you can do with it is rock it back and forth on vegetables. Second, the unprotected blade will slice you up when you retrieve it from the drawer where you placed it, because it was just too large to hang on the wall.

And unlike the cleaver, it cannot scoop up chopped material for placement in the skillet (the chef’s knife’s narrow blade is also sub-optimal in this task), nor can you use it to gently crush garlic cloves to permit easy peeling – and subsequent dicing. Fughedaboutit. It’s a solution looking for a problem, strictly for poseurs. And if you think this is the right way to slice up a pizza pie, think again and get a pizza wheel. It’s nice having ten fingers ….

Brand choice for the cleaver? I don’t think it matters. Just do not waste your $100 on a costly, hard steel German one which will be hell to sharpen. Instead, get something like my $25 choice and make sure you have good sharpening hardware available. And make sure your cleaver of choice has a hanging hole in the blade, as you will want to hang it in an accessible spot. After all, you will find you are using it daily.

The cleaver rules. All I use the vaunted chef’s knife for today is to split open large melons or cantaloupes. Point in first, for safety, then rotate.

The Full English

For the Man in you.

For an index of cooking articles on this blog click here.

The ‘Full English’ denotes the traditional English breakfast, one described in great historical detail, with regional variations, by Wikipedia.

Now that I have found a reliable source for smoked mackerel kippers (thank you, Whole Foods) I serve my son a Full English monthly, though I do drop the baked beans – there’s only so much a Man can take – and Winston is no coffee drinker.

I have so many pleasant memories of the Full English.

When a young lad – I would have been 14 or so at the time – in London, I got a summer job at the Habit Diamond Tooling Company. Their byline was “Make it a Habit” and they cranked out machine tools with diamond abrasives for industrial use. I was paid some $20 weekly – this was in 1965 – and was further provided with 5 Luncheon Vouchers. The face value was some 40 cents and yes, that got you a Full English at the local ‘caff’ with money left for a tip. And yes, it was absolutely delicious. The job was incredible fun and I learned to operate a pantograph, a lathe, a mill and an industrial grinder. The lessons garnered in working class attitudes were invaluable, and the many posters of buxom, undressed women on the walls of the factory harken back to a time when men were Men and women were in the kitchen. Or naked on posters.

British Railways used to serve a Full English on their sleeper trains from London to Scotland and it was absolutely delicious also, the kippers floating in a sea of butter. This was always preceded by a gentle knock on the door from the cabin attendant who woke you with an offering of tea, inviting you to the dining car. Another great tradition recently discontinued in a cost saving measure by a nation in terminal decline. Sad. A Full English on a train hauled by the Flying Scotsman was really something, as I can personally attest. (My eldest sister was an undergraduate at St. Andrew’s in Dundee, hence the Scottish trips. Plus, I love Scotland).

When I vacationed in Scotland before immigrating to the US in 1977, the Full Scottish would add black pudding or haggis. Once when overnighting at a B&B in the western Highlands I expressed dismay to the landlady on noticing how much larger my breakfast was than that of the young woman tourist staying in the same home. “Och no, lad” quoth she “Ye have tae go oot and work”. OK.

Anyway, here’s Winston contemplating his Full English the other day:


Bringing the boy up right.
Bacon, eggs, smoked kipper, fried tomatoes, whole wheat toast and milk. No baked beans in sight.

iPhone 11 Pro image processed in Focos.

The perfect egg in a shell

Doing it right.

This is one of an occasional series on cooking devices which make a difference. For an index of cooking articles on this blog click here.

Few things are more satisfying than a properly cooked egg in its shell, be it soft or hard boiled.

The perfect soft boiled egg is a breakfast staple, but often overcooked and poorly presented. Further, it simply does not do to have hard boiled eggs in an egg cup. Decorum and civilization dictate that eggs in cups be soft boiled and runny. And proper presentation is essential to the whole aesthetic.

You can make these in a pot with boiling water but there are so many variables that your chances of consistent success are remote. Thus, an inexpensive tool is called for. Actually, several tools. Tools convert pretense about ‘art’ into the predictable results dictated by scientific method, the core tenet of all good cooking.

First is the egg maker shown at left. Typically holding up to seven eggs – always broad side down, please – this can be had from any number of vendors for under $20. Mine came with an unreadable, graduated plastic measure for determining the correct volume of water required. It was useless. You need a clearly marked, glass laboratory measure and a syringe to get soft boiled eggs right. The larger measuring cup is used for hard boiled eggs only.


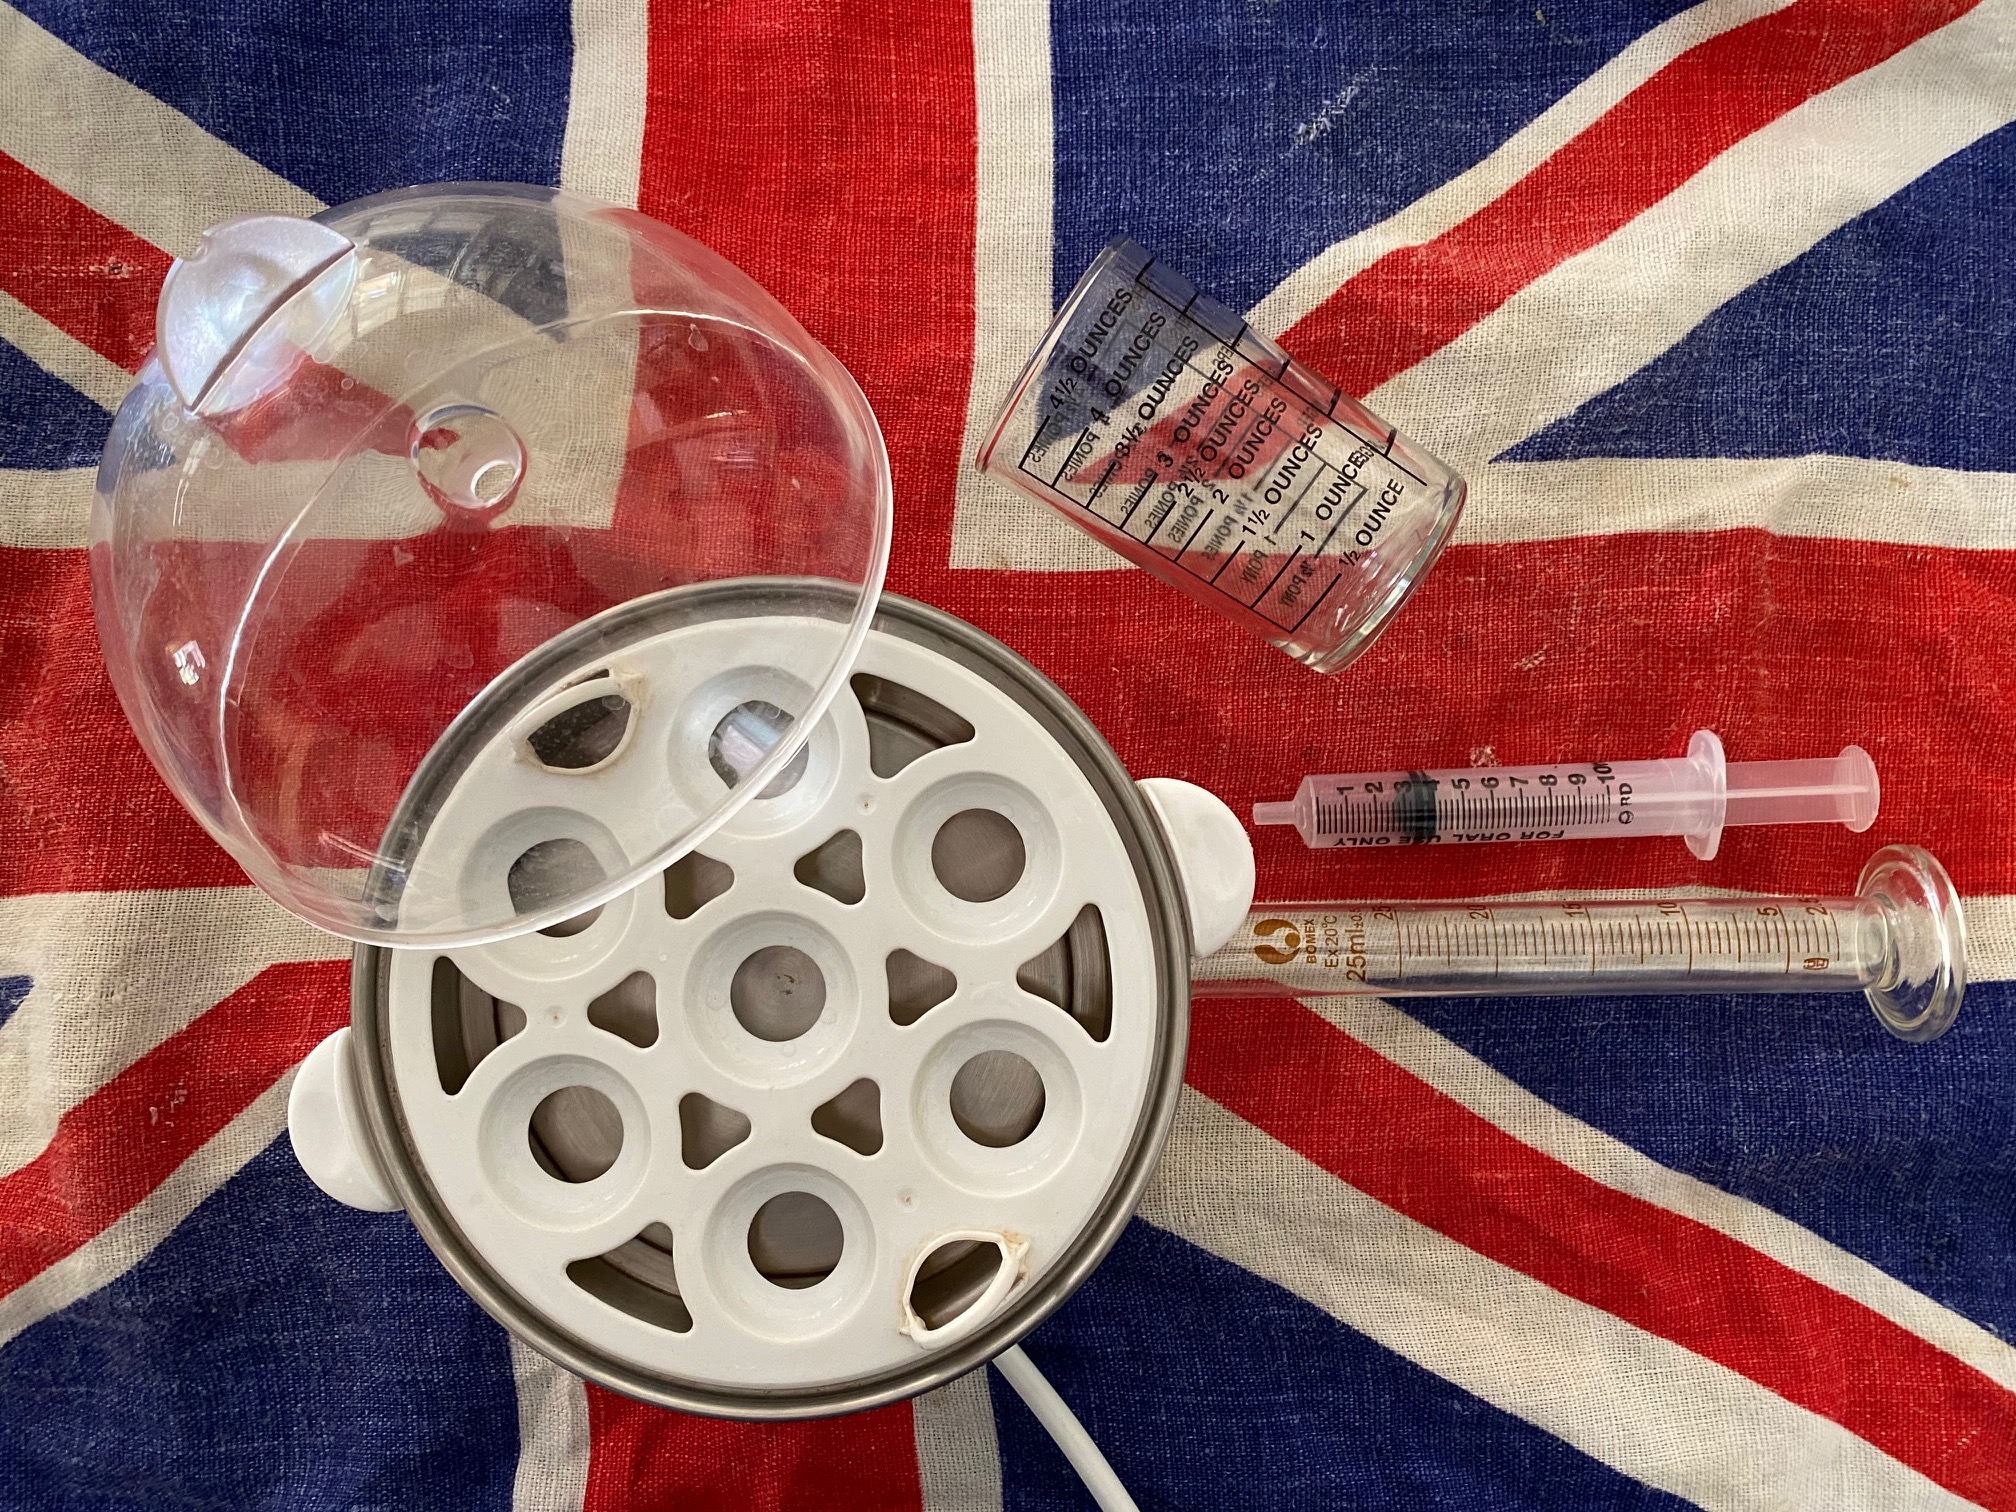
Egg maker, large measuring cup, syringe and 250ml graduated measure.

The design of the egg maker is simplicity itself. Water is added to the platen which is then covered with the egg holder plate, eggs are added and the ‘greenhouse’ cover is put in place and the power turned on. The critical thing for a soft boiled, nicely runny egg is the volume of water and ‘critical’ is the right word. The volume of water used determines cooking time. The amount must be right to 5ml or the result will be unsatisfactory. After some experimentation I established that 4 eggs, straight from the refrigerator (forget the gobbledygook about letting them warm up – sheer nonsense) require exactly 175ml of water. That’s where the graduated measure and syringe come in, making accurate measurement of the required volume a simple matter. Your device may vary, so be prepared to experiment.

The key to consistent success is to remove all variables from the equation. Use the same sized eggs from the same source, stored at least overnight in the refrigerator for a consistent starting temperature. And be sure to use the exactly correct volume of water in the egg maker.

The egg maker will pop off after 3-4 minutes when the water has evaporated, thus setting off the thermostat, and you will have four soft boiled eggs. Four perfect soft boiled eggs, every time.

But you are not through.

Topping your eggs to access the runny goodness inside should never, never, never be done with a knife applied to the shell. You will bruise and crack the shell randomly and risk injury into the bargain. The result looks awful. Check the last image below. An egg is one of nature’s most perfect creations and it should be respected as such.

So purchase an ‘egg topper’ – search on those words at Amazon. Mine came in this set – it’s the stainless steel tool removed from its storage cut-out – along with properly sized and shaped spoons. The latter need to be small and slim to properly access the yolk without spillage. Your coffee spoon is not the answer.


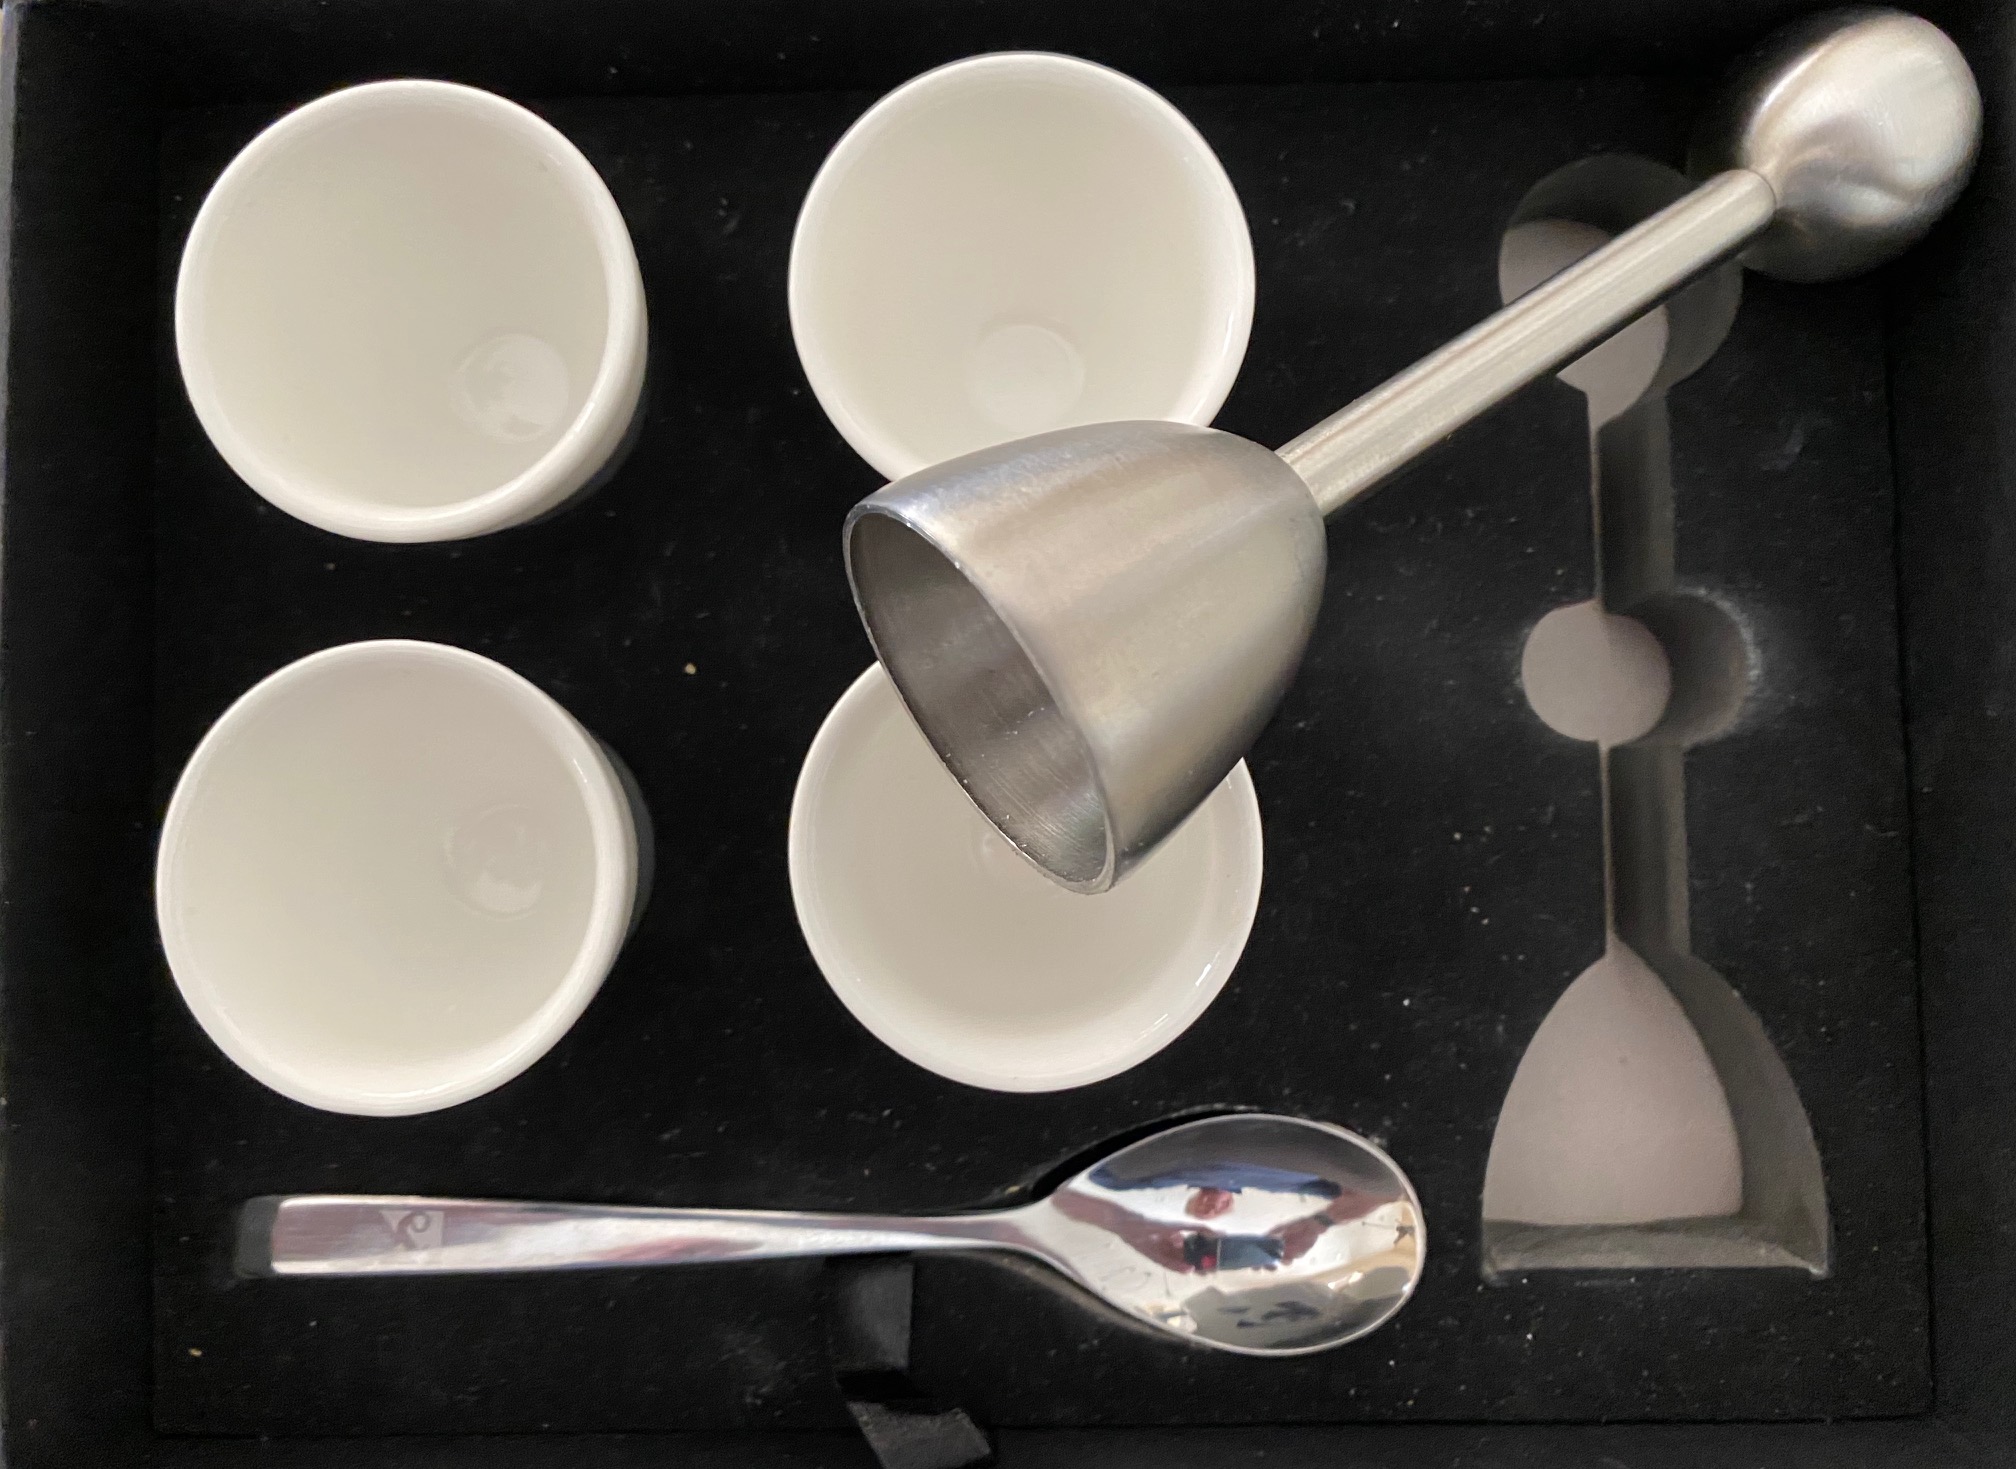
Egg cup outfit with topper. The circumference of the topper’s cone acts as an impact cutter.

The cooked egg is placed, broad side down, in the cup and the tool is placed over the top. The sprung plunger, terminated with the alloy sphere, is retracted and released, whereupon it scores/cuts a perfect circular top on the egg shell. Mine has to be retracted only part way to avoid damage to the rest of the shell, (I marked the optimum retraction distance) and the tool must be carefully removed holding the base of the egg with a cloth. A little practice and you will get a perfectly scored shell top. Now get out that sharp knife – a thin fish boning knife is ideal – and slice through the albumen and flesh of the egg white along with the scored shell part. A properly designed cracker will score the shell just above the yolk. You now have the perfect soft boiled egg, along with high job satisfaction.


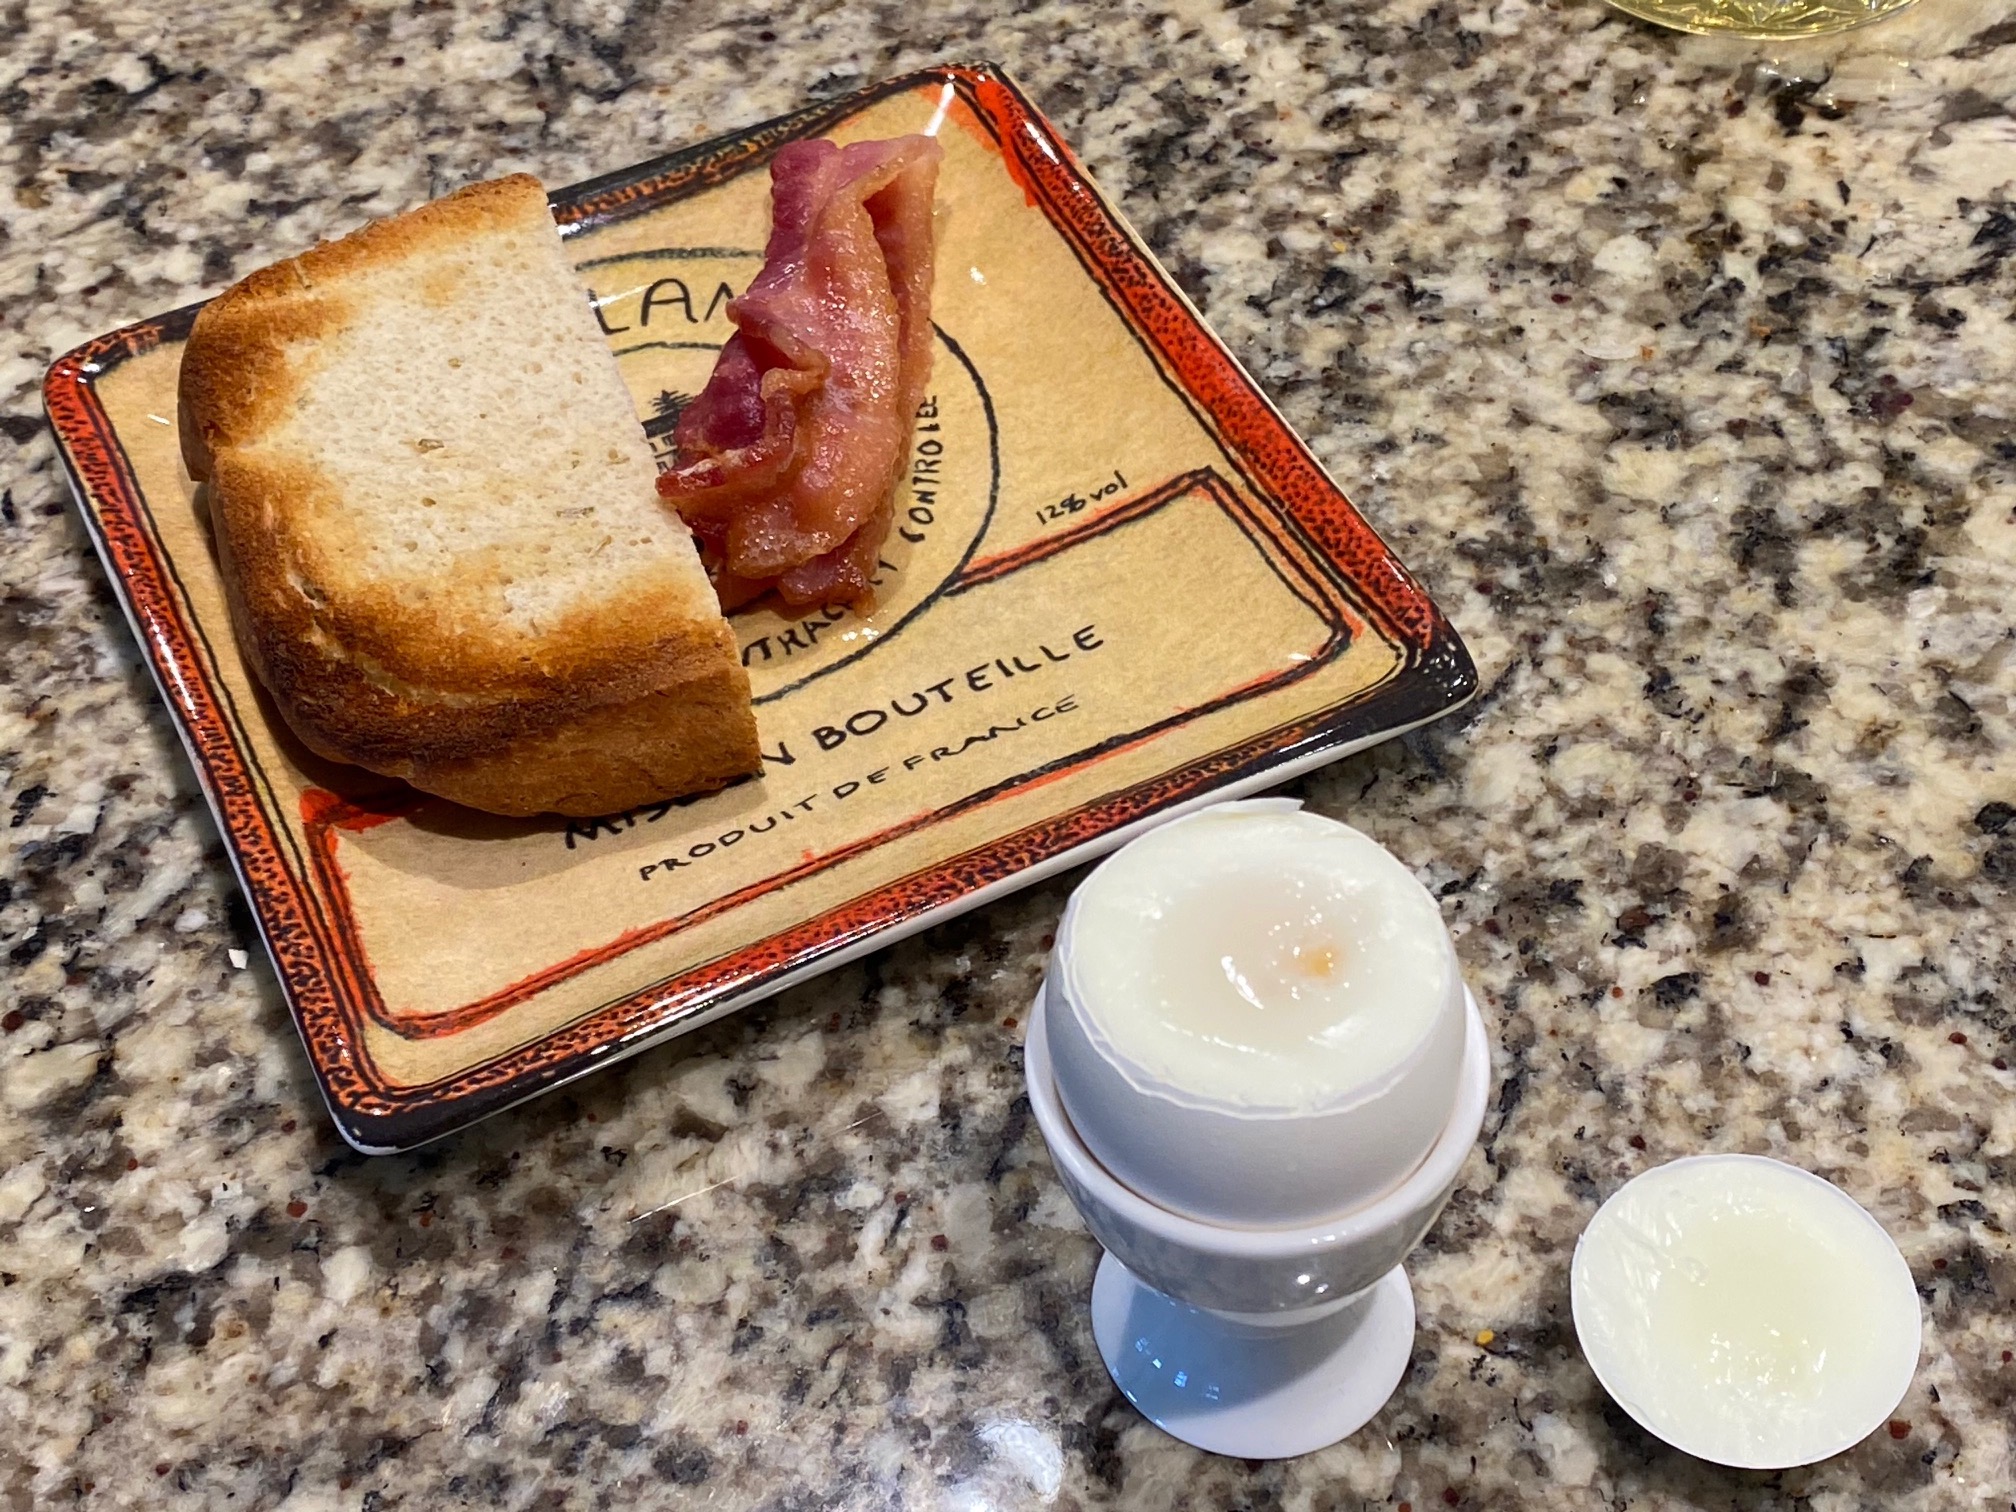
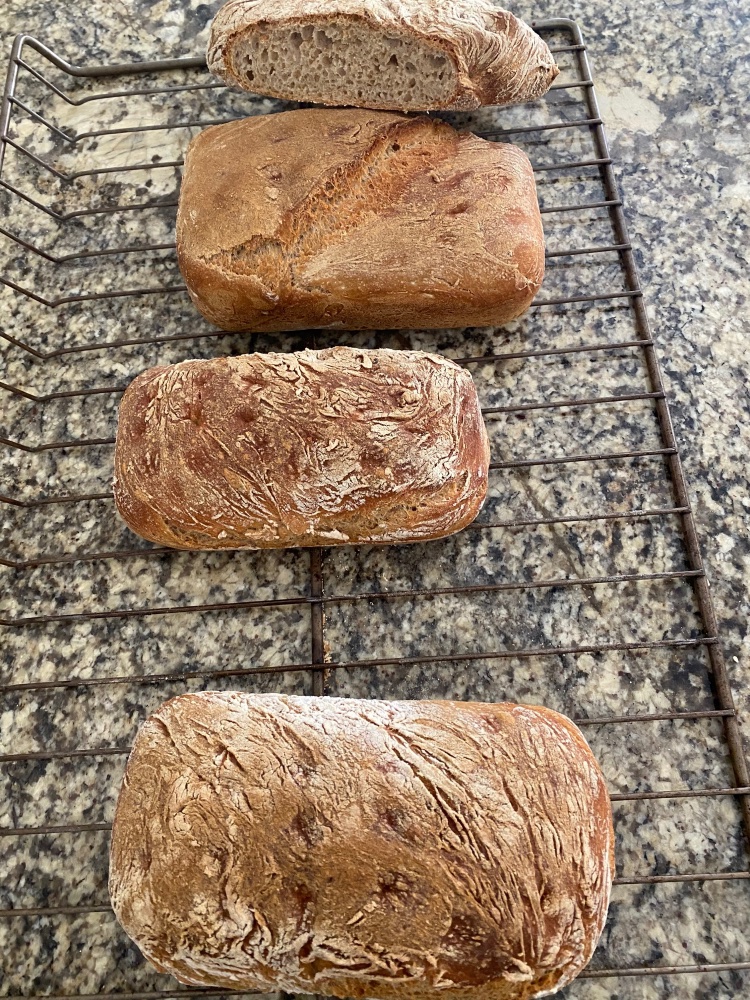
A perfectly topped egg along with obligatory bacon and home made Italian rosemary bread.

As for hard boiled eggs, these are trivial to prepare. Load up all seven if you like, add 1.7 fl.ozs. of water (or the quantity that experimentation indicates) using the large measuring cup in the first image, let the egg maker tool do its thing and you will have seven perfectly hard boiled eggs with none of that disgusting grey ring around the yolk your spouse creates as a result of over-cooking. Soak them in iced water for 5 minutes and you are ready to make salads of your choosing. I have found that the freshest eggs are also the easiest to peel when hard-boiled.

The water in my area has significant mineral deposits which make the egg holder plate and heated platen go a revolting brown after much use. Some medium stainless steel wool cleans things up nicely.


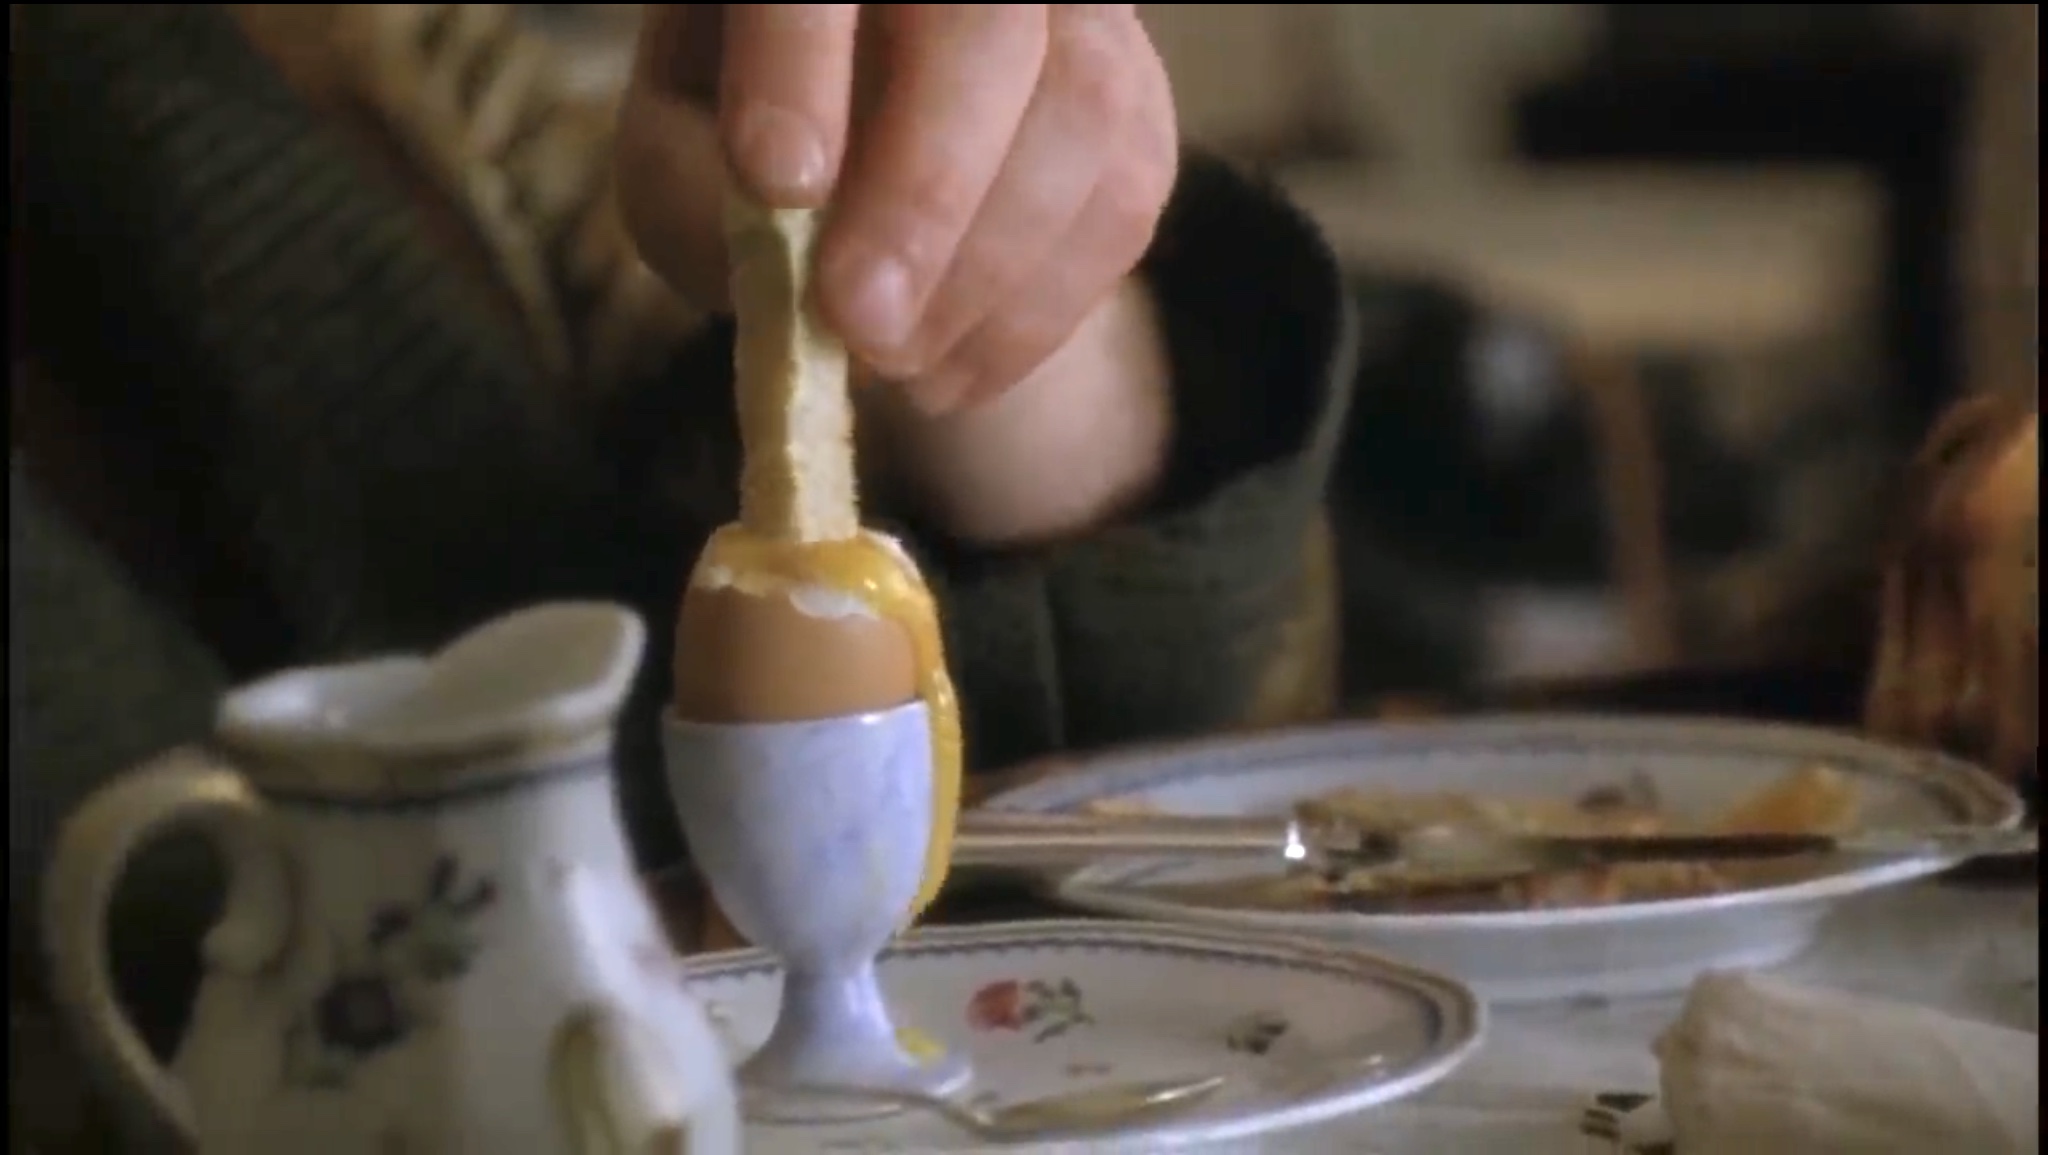
How not to do it. Albert Finney as Churchill eats his breakfast egg in ‘The Gathering Storm‘. Hacked off top and wrong tool use. Gustatory shortcomings notwithstanding, he did OK otherwise.

Update November, 2025:

To make hard boiled eggs easy to peel I have found that using eggs which have been in the refrigerator a few days is the way to go. Now there’s a better method, attributable to this ‘hack‘. No need to use a spoon to tap the rounded end of the egg. I simply tap it gently on the counter. The change in tone from sharp to dull (the latter sounds as if the shell cracked, though it has not) is impossible to miss and, yes, this works. Event eh freshest eggs are easy to peel once hard boiled.

Kitchenaid Artisan 5-Qt. stand mixer

An all time classic.

This is one of an occasional series on cooking devices which make a difference. For an index of cooking articles on this blog click here.

The BMW airhead motorcycle first came to market in 1922. The Kitchenaid Artisan stand mixer beats it by 3 years, having first been sold in 1919. Unlike that wonderful bike engine, last made in 1997, the Kitchenaid mixer soldiers on to this day. If you make dough for bread or cakes, it’s the only way to go and, surprise!, it’s made in Ohio. That’s Ohio, USA not Ohio, Wuhan, China.

I do not have that many hours of use on mine but the gorgeous, classic design of this model dates from 1936. Forty years of happy mixing with no failures are routinely reported:


Making bread dough.

The mixer has a sterling reputation for reliability and longevity. Repair parts are easily available and the commutator brushes are simple to replace, located under the black screw plugs visible in the picture. The mixing tool’s motion is planetary, meaning the tool rotates one way and the mixing assembly the other, conferring the folding motion your grandma used to use while kicking the dog across the kitchen. Mine came with a J hook for heavy dough and a mixer paddle for light work. The latter is ineptly designed and you will want to replace it with the scraper design which looks like this:


The scraper paddle tool.

There are all sorts of tools available and the circular chrome port on the top will accept lots of additional gadgets for pasta making and the like. I have never used that power take-off source as my main interests are making bread dough and saving my aging wrists.

That doyenne of America-French cooking, Julia Child, used one for ages and hers, along with her kitchen, appears in the Smithsonian. Only in America is this possible.


The Artisan in Julia Child’s kitchen.

Kitchenaid has other designs, including rising column ones in lieu of the tilt feature. These are for those with no sense of history and even less taste, like owners of post 1997 BMW motorcycles. Stick with the original. And it really must be white, though about five million colors are now available. The machine is exceptionally heavy and if I have one complaint is that it tends to wander over my polished marble countertop at higher speeds with heavy doughs, so I have placed it on a rubber mat. Kitchenaid needs to add a weighted counterbalancer to cancel out the vibes.

Note that it’s really not a tool you want to hump in and out of storage. It’s simply too heavy.


The original 1918 patent drawing.

If Child’s ‘Mastering the Art of French Cooking‘ should be in every kitchen, it needs to share shelf space with Carol Fields’s ‘The Italian Baker‘ which does for bread what Child does for everything else.


Italian Pane Bigio, a delightful wheat bread courtesy of the Kitchenaid mixer.