Old can still be good.
It would be wrong to caption this column ‘Camera of the Year’ or something similarly pretentious. After all, I’m an amateur snapper, not a journalist reviewing free hardware who gives the award to the maker paying the biggest kickback/free gear gift/trip to Osaka or the Black Forest. This is my money and my preferences we are talking about, not other people’s money and advertising dollars.
That said, I do give careful consideration to where my money goes and that is rarely to the latest and greatest. Obsolete means nothing to me, except maybe a good entry price and low depreciation, and buying new tends to be anathema to my psyche. Plus I like the gestation and discovery period that something a few years old has undergone.
So if I tell you that my favorite camera body was last made 7 years ago – aeons in DSLR terms – and the lens is no less than 4 decades old, I would be quite understanding were you to write me off as some sort of nutty eccentric, like the guys still doing wet collodion in 8″x 10″ view cameras.
However I have long known that a change of gear acts like a kick in the pants for yours truly, if nothing else to justify the outlay by making some decent pictures. And if the use experience confers tactile and mechanical pleasure, both keenly developed senses in my case, then all the better.
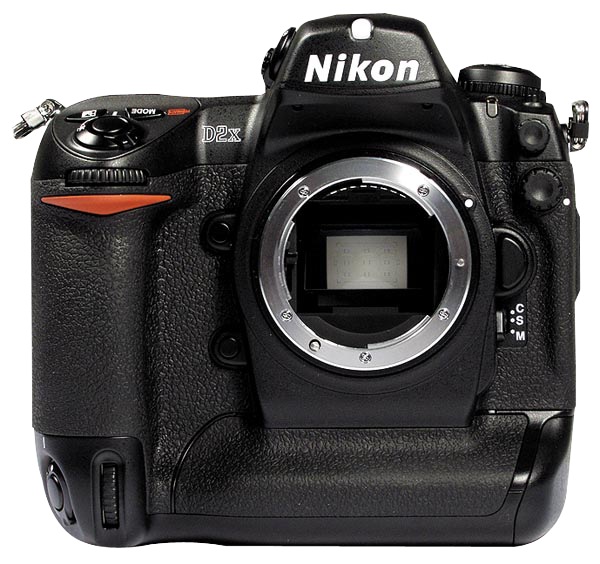
Click the picture.
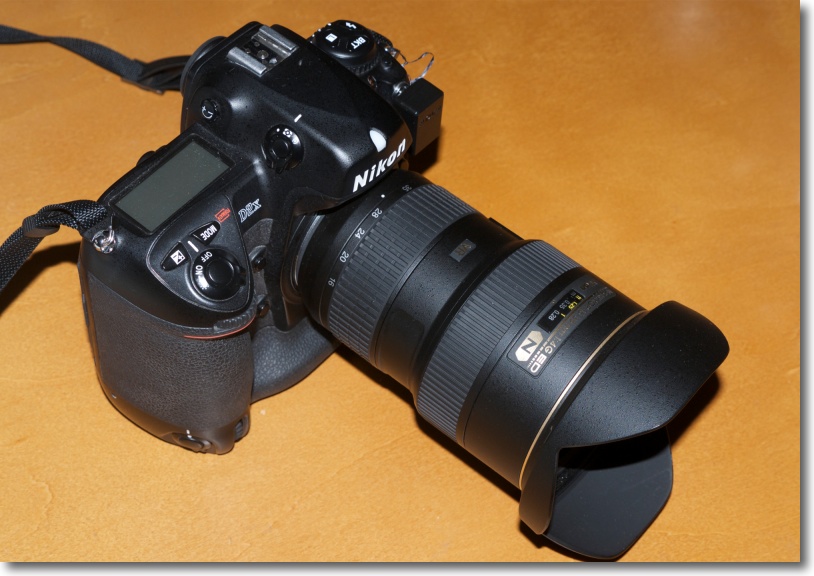
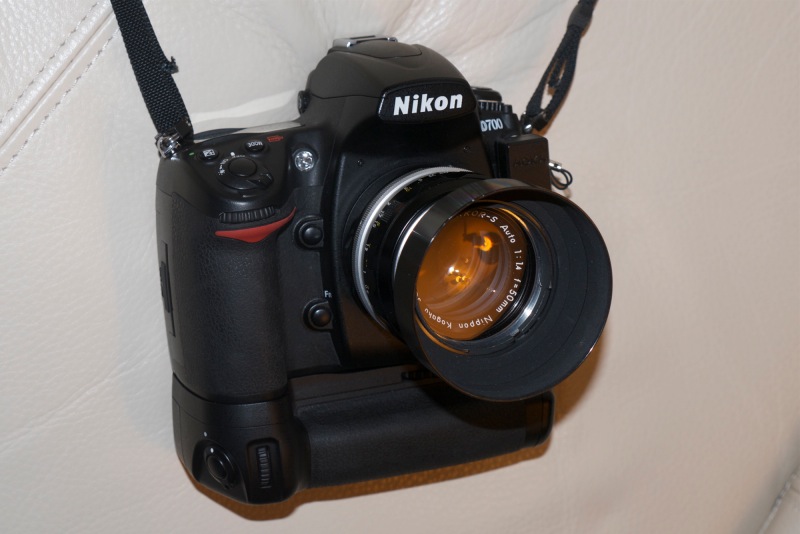
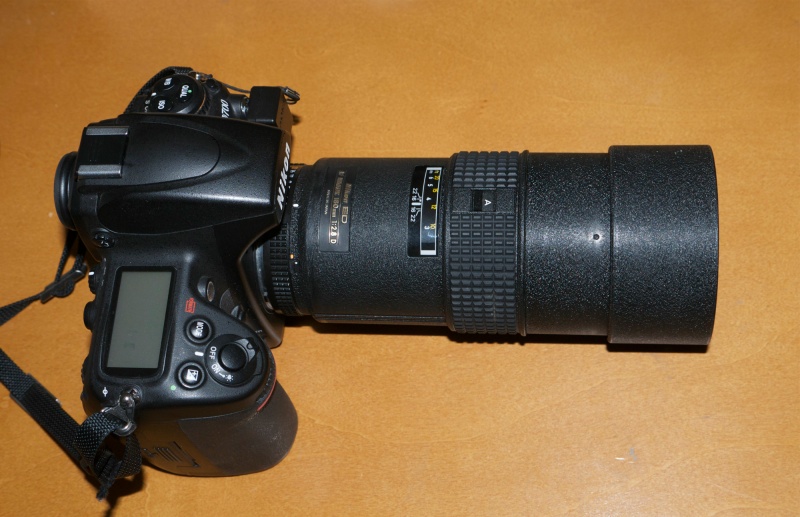
My favorite gear of 2012 is the 2005 Nikon D2x with what I can only describe as a thrilling lens, the 50mm Nikkor-S f/1.4 pre-Ai MF lens. That’s like a 75mm portrait lens on the APS-C sensor in the D2x body and the handling, balance and ease of use of the combination are really special. The trade-off is more time in the gym to carry this far from svelte outfit around but, surprisingly, as a street snapper I have not experienced any of the ‘it’s intimidating to your subject’ syndrome that many ascribe to these big bodies. Quite the opposite. Maybe the loudly emblazoned ‘Nikon’, married of course to my massive build and no less threatening physical presence, does the trick, but I rather fancy I may be fooling myself here. Sylvester Stallone I am not.
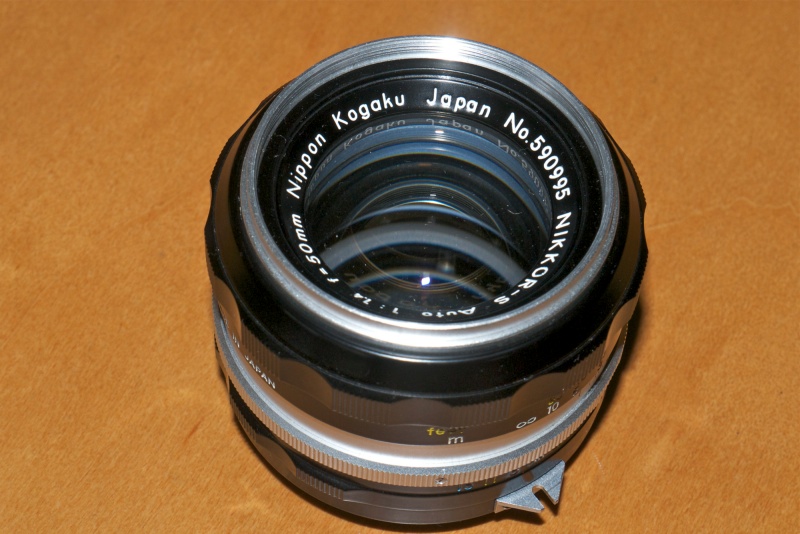
The 50mm Nikkor-S f/1.4. One of the most beautiful optical masterpieces yet conceived.
Click the picture.
Why pay $700 for an obsolete digital body? That money gets you a competent, current DSLR body, certainly less robust, but with a sensor sporting better high ISO performance. Maybe even a decent kit lens for that price will come with it. It will not get you much in FF DSLRs, with the original and superb Canon 5D being the best bargain in that price range. It also gets you an exceptionally well sealed body which, though it has no dust removal shaker, has no need of one. My FF D700 has such a mechanism yet I am regularly cleaning the sensor with brush and blower. There’s nothing wrong with the D700. It has far better performance above ISO800 and when fitted with the MB-D10 battery pack mimics the well designed vertical shutter release on the D2x. Plus it’s FF, so wide lenses remain wide. And neither body has a reputation for problems. Older D2x bodies can exhibit the ‘blank first frame’ symptom but that’s about all I have read of. Either body will last the average amateur longer than his stay on this mortal coil.
So why did I buy it? Because it is a far greater pleasure to use than the consumer grade alternative. It will not, however, take better pictures. Those are solely a function of the person pressing the button.
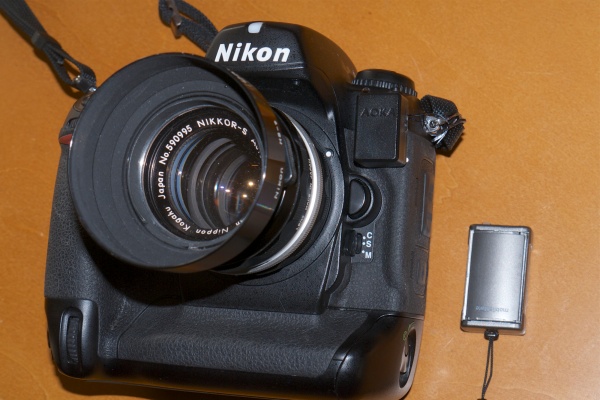
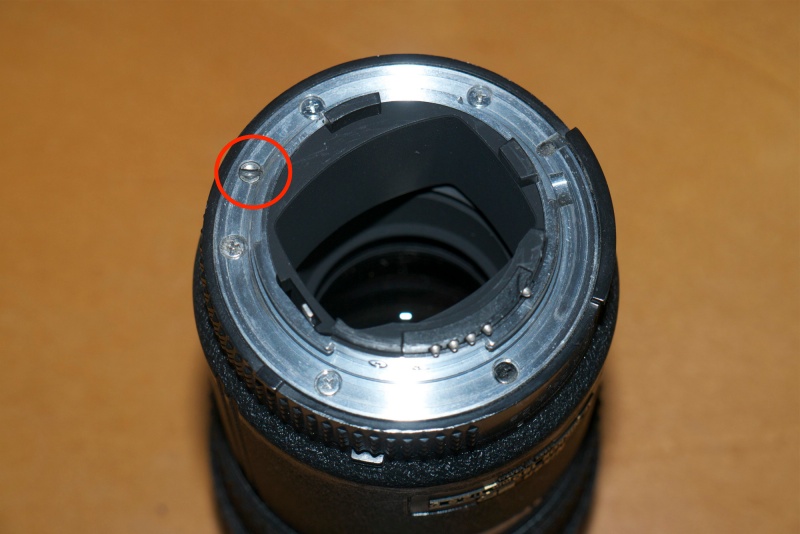
The lens is another story. Click the above picture and you will see how adding a $29 CPU confers proper EXIF data recording, automatic invocation of the appropriate lens correction profile, matrix metering and transfer of aperture control back to the lens, away from the control dials on the body. That works for me as I support the lens with my left hand in any case and, as an old fart, that’s how I have been changing aperture for several decades now, and I am strictly an ‘aperture priority’ guy when it comes to auto exposure. Manual Focus? No biggie, especially with the focus confirmation LED in the Nikon’s finder, the latter made so much the better by fitting Nikon’s magnifying eyepiece. The 50mm f/1.4 delivers performance indistinguishable from the 50mm f/2 of that era, offers one stop more speed and the bulk and weight balance with the heavy body far better. Focus and aperture clicks are simply a dream to use. Compared to modern multicoated optics you maybe trade off a little contrast in strongly backlit situations, but that’s what Lightroom is for.
The whole use experience is a tactile, aural and sensual thrill. That is never lost on me. This outfit makes for an integrated whole of quite exceptional utility and ease of use.
Highly recommended – the kit will run you under $800 if you shop around and there’s no way you are ever going to wear it out. And the only people who will point and say ‘Ugh, how dated’ are not ones you want to know in any case. They are called equipment freaks and photography is anathema to them.