Category Archives: Hardware

Stuff

The Panasonic G3 – Part IV

Finally here!

Under attack dog guard. Bert keeps an eye on the G3.

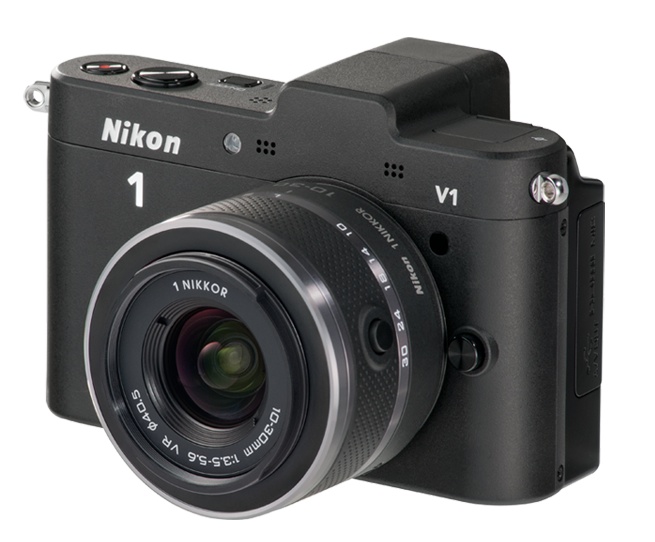
The Panasonic G1 was a truly revolutionary camera. It was the first to incorporate a proper, usable electronic finder and interchangeable MFT lenses. The design is now reaching a broad audience and will do great harm to slow moving Canon and Nikon who have either awful alternatives (like Nikon’s V1) or none (Canon). Click in the right hand column under Categories->Photography to access my earlier articles on this ground breaking design. I passed on the G2 which added a movie mode and a touch screen but used the G1’s sensor. There was no compelling reason to upgrade for my purposes.

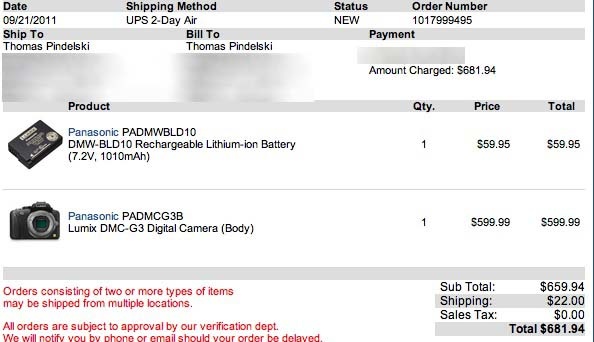
While the wait for my Panasonic G1 has been just short of six months, it would be churlish to complain. Japan has been ravaged by an earthquake, tsunami and radiation in that time and is digging its way out without a single case of looting or crime. Imagine saying that of any other nation on earth. So, thanks, Panny, for getting things together and back into production. Though the G3 says ‘Made in China’, unlike the Japanese G1, many of the components originate in Japan, so the delay is understandable.

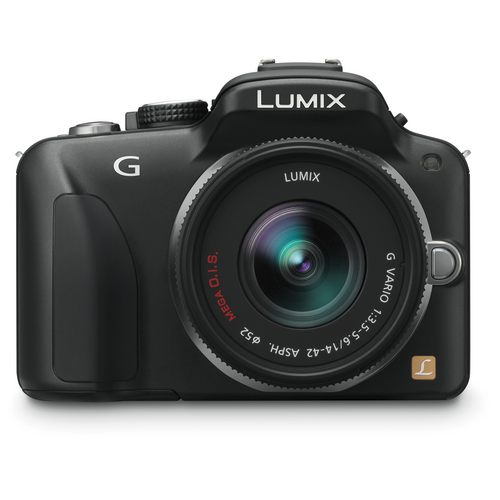
If I say that 14,000+ pictures later that the G1 is second nature to me, that’s not quite true. No modern camera with the myriad of adjustable variables can ever be second nature, not when there are literally millions of combinations permitted. But once you have it set just so, it does become an old friend; I find that once set, I never change my preferred settings. Thus I went about cloning these settings to the G3 as soon as it arrived. The battery is half charged, so I simply charged the spare while doing this. It took almost two hours to get it right, not helped by the fact that there are many more menu choices in the G3 – movie modes and touch screen options being the dominant causes of bloat.

I will not be saying much about the touch screen, as I have no use for LCD screens in cameras. It’s actually ‘push’ rather than ‘touch’- it’s pressure sensitive, unlike the superior capacitive one on an iPhone or iPad. I shoot from the eye, using the Electronic ViewFinder (EVF). The day I compose snaps holding a camera at arm’s length and squinting at a poky screen will be a cold one in hell.

Immediate reactions? The body really cannot get much smaller. For my largish hands it’s at the limit of smallness to be easily worked and some controls, like the countersunk Display button on the back panel, are tough to use. Mercifully, that one is rarely, if ever, used after the initial setting. The smaller front handgrip is as comfortable as the G1’s larger one, and the rotating adjuster wheel is now in the rear (like on the G2) but has been stiffened to prevent accidental depression – an action which permits aperture or shutter speed change in the respective modes. I still struggle with the front mounted wheel on the G1, occasionally depressing it by accident. So while the G3 wheel is a tad rough to the feel, the trade off is worth it.

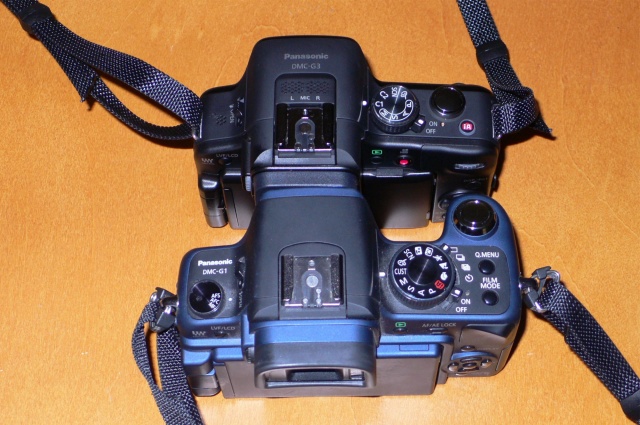
The G1 and G3. Only a twit uses the stock strap. Those are Upstraps.
Note the much improved, ringless strap attachment points – silent for movie makers.

The AE lock button has disappeared but the Fn2 button is easily assigned that task, allowing locking of exposure when recomposing.

Shutter noise is the same as on the G3. Quiet and low frequency, so you will not draw undue attention to yourself in other than silent settings. I never use multiple shot mode so cannot comment. Decisive moments are not caught with machine guns.

The proximity sensor for the EVF has gone. If you use the LCD then a mechanical switch to the left of the EVF has to be pressed to alternate between LCD and EVF. I never use the LCD so it’s a non-issue. If you open the LCD it comes on. Close it and it reverts control to the EVF. But if you keep the LCD open, then the switch has to be worked. In the G1/G2, the proximity sensor did this for you. A cost cutting exercise in the G3, then, but not one which intrudes for this user.

One immediate improvement is the provision of two custom settings on the top dial – C1 and C2. This is wonderful for me, as I take most of my snaps at ISO320, but like to switch to ISO1600 for poor light. In the G1 that means fiddling about with EVF displays (or the LCD which is hard to read in bright light). Here, once programmed, it’s simply a case of turning the dial one notch – I have C1 at ISO320, C2 at 1600. All the Scene settings on the G1/G2 have been consolidated into one click on the dial and are invoked using display controls. A camera of this calibre does not need easily accessed Scene modes, so it doesn’t matter if these are deleted from the mode dial.

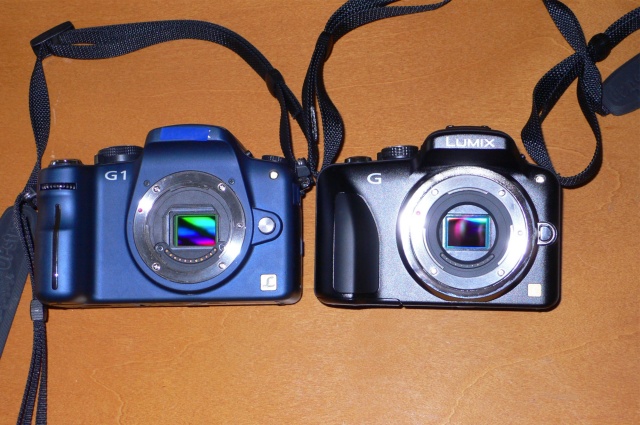
Note the escutcheon surrounding the G3’s lens mount – likely required to pad out the very thin body.
Sadly the G3 does not come in Blue or British Racing Green, so Black it is.

On an 8gB SDHC card (the G3 will also take high capacity SDXC cards, for long movies I suppose) the G1’s 611 RAW capacity falls to 459, exactly in line with the G3’s larger 16mp file size compared with the G1’s 12mp. The G2H is the only other Panny to include this higher pixel count sensor at this time, the GH2 adding sophisticated movie modes and the ability to use high quality external microphones; the G1 makes do with two small built-in mics.

The overall feel of the camera confers slightly greater confidence than the G1; while the weights are similar (G3 – 11.8 ozs, G1 – 13.4 ozs), the G3 packs more into a smaller volume, thus seeming more solid. I’m sure it’s just a psychological effect, for it’s not like my G1 had any reliability issues.

Strangely, the provided G3 body cap does not lock on the G1, but all three MFT lenses I own – the Oly 9-18, the 14-45 and 45-200 Panasonics – couple properly. If you want to switch off anti-shake in the latter two (the Oly has none) you can use the switch on the lens. Users of later lenses like the 14-42 kit lens will have to dive into the menu system. A step back, but a non-issue as I’m sticking with the outstanding 14-45 kit lens. The new, not yet available, Panny 14-42 OIS PZ kit lens with electronic zoom is much smaller than the 14-42/45 variants with their manual zoom control. The PZ optic claims higher performance than the already excellent manual zoom kit lenses, so it’s an intriguing prospect. I’ll take a look at the new $400 PZ 14-42 when it comes out to see if Panny’s design genius makes it workable for still photographers, the appeal being that it is very small, a size in keeping with the whole ‘small and light’ Micro Four-Thirds design ethos. It will quite possibly make the G3 a pocketable outfit – a true dream harkening back to the compact screw mount Leicas of yesteryear. I have fond memories of using Leica IIIA, IIIC and IIIG models many years ago with the collapsible 50mm Elmar. Tweed jacket-pocket specials.

One area where it’s hard to imagine any improvement is in manual focusing. In the G1, with focus set to auto, turning the manual focus ring would enlarge the image in the EVF for truly critical focus, as long as you kept up a first pressure on the shutter release. However, you lost any sense of composition in the G1, as you were looking at a hugely magnified part of the center of the image. The G3 nails it. Now a central rectangle opens in the EVF for critical focusing, yet the rest of the image appears in regular size around it. It’s as if someone had taken the center RF rectangle on a Leica M body and vastly magnified its content wthout changing the periphery, allowing composition to continue. Magic!

Over the weekend I’ll be wringing out the G3 on the streets and will comment on sensor quality when I have some images to work with. Needless to add I will have the sensor set to a 3:2 aspect ratio; 30+ years with Leicas have me composing in that format and I’m not about to change. 4:3, for me, is too square. I’ll be using SilkyPix to convert the RAW files to TIFF before import to Lightroom 3. A pain, but once Adobe adds the G3 to its PS/LR RAW engines, that nonsense will cease. Hopefully something good will present itself, allowing creation of 18″ x 24″ prints on the HP DesignJet wide carriage dye printer. That is the touchstone of quality chez Pindelski.

Part V is here.

The Panasonic G3 – Part III

Some things do not change.

The operating manual for the Panasonic G1 is 166 pages of useless. That for the G3 is in the same format but has shrunk to 56 pages, making it one third as useless. The completely useless long form 208 page version ships on the provided CD.

Click below to download the Panasonic G3 manual which I have placed on my server. Trying to find anything on Panny’s site is as futile as attempting to divine intelligence in government:

Click to download the Panasonic G3 manual

When my G3 arrives this evening, I’ll be setting it much along the lines of the G1; my street snapper settings appear here.

And if you want to read about touch screen this and movie that, go elsewhere. I’m a still photographer, a street snapper, and LCD screens simply have no utility value in those avocations. I never use the one in the G1 and the G3’s use will be no different. That will also help with battery life which has never been an issue for me in the G1. The G3’s battery is noticeably smaller, holding 19.2% less power. 500 shots on one 8gb SDHC card in the G1 (which holds 608 RAW snaps on the G1), is typical, as I do not use the battery draining LCD. Based on the larger RAW file sizes in the G3, I expect card capacity to fall to 456 shots and battery capacity to 491 shots. Not a problem.

The main focus of my comments on the G3 will be, in priority order:

  • The sensor. Is it noticeably better?
  • Operating speed. Is autofocus faster? What is the shutter lag like in real world snapping?
  • Ergonomics. Does the smaller body hamper handling?
  • Shutter noise. Is it quieter than the already quiet G1?

Looking at that largely useless manual, the layout of the various menus seems much the same as that in the G1. Good. One less thing to learn before wringing it out on the streets.

In its two years of intensive use I have made 14,275 snaps on the G1, of which 3,234 survived the cull, according to Lightroom3, a 23% retention rate. If the G3 works out, the G1 will pass to our 9 year old son, and will also do duty as a backup. Wish I had had a dad like me ….

RAW processing:

I only use RAW in the G1. LR3 makes it invisible and I retain the best file quality in that way. Converting to a small JPG for the web, using LR3, is easy. Unfortunately, at the time of writing, Adobe has yet to update Photoshop or Lightroom (I’m on 3.4.1) to read G3 RAW files (Apple’s Aperture does not support G3 either), so I will likely have to use Panasonic’s provided SilkyPix as a RAW conversion tool and then import the (lossless) TIFF files into LR3. A bit of a pain, but I’m not willing to process in SilkyPix as I like the idea of one LR database for all my files and am very comfortable with the LR3 processing flow.

MFT lens range:

Click the picture to see the large range of MFT lenses now available:

Click the picture to see the full range of 26 MFT lenses available.

Part IV is here.

Nikon V1

Incredibly useless.

It takes quite an effort to accomplish all of these design criteria:

  • Make the ugliest camera since digital was invented
  • Equip it with a microscopic sensor in a body the size of the MFT competition
  • Trash your reputation and an expectant, loyal user base

Nikon, with its new mirrorless V1 has accomplished all three at the highest possible level of failure.

Nikon V1 – camel as camera.

It’s said a camel is a horse designed by a committee. Well, the V1 is a camel of a camera, doubtless with lots of costly market research thrown in. Steve Jobs has famously stated that Apple uses no market research. Rather, it gives the consumer what Apple thinks they need – the Next Great Thing. But had you told Nikon to listen to their user base and give them something useful, like an APS-C camera with an EVF and a range of small, fast lenses, they would doubtless have deferred to the committee. And you would still have ended up with a V1.

The funniest part? They will make an adapter which will allow use of gargantuan Nikon-mount lenses on this piece of crap.

At least Fuji’s equally worthless X10 is pretty to look at. And if you don’t think looks matter, how do you feel about your picture taking chances when you have to fight the gag reflex every time you pick your camera up?

For those looking for portability and other uses for their pocket camera, get an iPhone 4 or, better, next month’s iPhone 5 with an 8mp sensor.

The Panasonic G3 – Part II

Finally shipped!

Part I is here.

A sharp eyed reader dropped me a line to say that black Panasonic G3 bodies were in stock at B&H (thank you, Bill!) and it took mere seconds to cancel my Amazon order for the G3 and buy the body from B&H, along with a spare battery. The G3’s small size means the battery is smaller than in the G1, so I’m playing it safe.

Given that my AMZN order was placed on May 12, I felt it only right to splash out $22 on expedited shipping from the center of the world to the left coast!

I’m getting 80% of the quality of my (sold) Canon 5D from G1 snaps in 18″ x 24″ prints, and as the G3 is the first MFT camera to use the latest generation 16mp sensor I’m hoping that results in a little more headroom when the light is poor or the original needs a bit of cropping. The bulk and weight saving with MFT hardware over full frame digital is tremendous and the main reason I switched.

Stay posted as I wring this new body out with my existing complement of Oly (9-18 MFT) and Panny (14-45 and 45-200 MFT) lenses, all known quantities extensively covered here in past articles.

Part III is here.

MacMini – just say No.

Horribly overpriced.

Let me preface this piece by saying that I own the previous generation MacMini with the Core2Duo CPU. It does service as a movie file server and has attached to it, using USB, 10 tB of HDDs containing movies. It’s small, quiet and fits in easily with the other electronics required for decent pictures and sound with a modern TV, though the poorly engineered slot loading DVD drive needs constant cleaning. However, as a stock computer for photo processing I can’t think of a worse choice. (OK, I can, but this writer does not use Windows).

This piece was prompted by a friend who asked whether the MacMini is a good choice for photo and video processing. The short answer? Not remotely.

The Mini fails on many fronts. The heat management is awful. The very last thing I would ever do with mine is use it to rip DVDs or compress movies using Handbrake for the iPad, having tried it just once. Try it on a Mini or any iMac, for that matter. Fire up the (free) Temperature Monitor from Bresink Software, invoke the history chart window and watch the CPU temperature go ballistic from some 105F (ambient) to 160F+ when ripping or compressing. That’s very close to the temperature limit of the CPU used. Even to get the ambient down to 105F I use a fan utility to spool up the pathetic single fan – there’s no room in the box for more – over the inadequately low stock setting.

Try and add more memory (easier in the latest Mini) or a larger HDD, and I have done both, and you have to be pretty smart with tools not to damage something when you crack the case open. It’s obviously the last thing Apple wants you to do given their default ‘form over function’ design philosophy.

The latest Mini addresses only the ease of RAM replacement (now easy, through a cover in the base) and use with SDHC cards. It has a reader, albeit inaccessibly placed in the rear. It now uses an Intel Core i5 (or i7 for another $100) CPU but both are significantly detuned, likely owing to heat management problems. The Mini’s i5 runs at 2.5gHz (3.3gHz is stock if you buy the CPU in a box) and the i7 manages a poor 2.7gHz (3.6gHz stock). The stock, boxed CPUs can be overclocked to 3.6gHz and 3.8gHz without voiding the warranty, if you buy the ‘K’ unlocked models for a $20 premium.

Not that you even need to overclock the i5/i7 if you make a Hackintosh. The i3 built for me by buddy FU Steve runs as fast as the i5 in the Mini.

Short of buying a MacPro ($$$$$) your only choice for robustness, ease of maintenance, proper cooling and reliability is a DIY Hackintosh. The iMac is not an alternative. It comes with a glossy screen which cannot be properly profiled for photographic use, owing to the restricted gamut. Both features help the machine pop when displayed in the Apple Store but neither does anything for photo processing veracity. Further, the iMac is every bit as heat challenged as the Mini (I have lost three iMacs from overheated GPUs so it’s not like I am making this up). But unless your time is worth so much that you don’t care (in which case you should buy a MacPro) just compare prices.

Here’s the Mini with 8gB of RAM and a 500gB HDD. You need the external DVD drive as the new Mini has none – go figure. You need the DVI adapter to actually make a regular monitor work.

That’s a whopping $1,105 and you still have to add a mouse.

Now compare that to my HP10 Hackintosh. This runs an i3 CPU (as fast as the de-clocked i5 in the Mini), comes with a way superior dual-DVI Nvidia 430 graphics card (compared with the poor integrated one used in the Mini which shares its space and heat output with the CPU with which it is integrated) and has enough cooling for a small block V8:

  • Intel i3 CPU – $124
  • Coolermaster 212 Plus CPU cooler – $28
  • Gigabyte H67M-D2-B3 motherboard – $100
  • 8gB Corsair 1333mHz DDR3 RAM (same spec as the Mini) – $60
  • EVGA Nvidia GT430 graphics card with discrete fan – $64
  • Coolermaster 371 case with case fan – $40
  • Thermaltake 430 watt power supply – $41
  • Kensington wired keyboard – $38
  • 500gB 7200rpm 6gb/s HDD – $40
  • Sony DVD reader/writer – $40 (two @ $20)
  • IOGear Bluetooth dongle – $12
  • Broadcomm wireless card and PCIe-MiniPCIe adapter – $40
  • OS Pussy, err Lion – $30
  • SDHC card reader – free with many SDHC cards -$0

Total for that little lot? $657.

Expandability – any number of internal SSDs or HDDs can be added in minutes. The i5 or i7 CPU is a drop in replacement for the i3 used. The graphics card supports two DVI-D single link or dual link monitors (meaning you can use two 27″ or 30″ whoppers with any dual-link DVI cable). Heat rise when ripping or compressing a DVD? From 84F ambient to 115F – compare that to the 160F+ in a Mini or iMac.

Assembly time – 1 hour. 2 hours if this is your first Hackintosh. Lion installation – 1-2 hrs with the free modern tools now broadly available and easy to use. And this will not only last you, if anything breaks a replacement is 24hrs away by mail order, with no part costing over $124.

Impossible to cool properly under stress. The latest MacMini, dismantled by iFixit.

Here, by contrast, is a CPU temperature chart from my i3 Hackintosh, ripping and compressing a full length DVD – a real stress test:

Stress test – Coolermaster 212+ CPU radiator used.

If you want to save $28 and use the stock Intel CPU fan shipped with the i3 CPU, your CPU temperature will rise to 149F, which has to be a false economy. $28 for the large and efficient Coolermaster 212+ radiator to keep it really cool? I can’t think of a better way to buy reliability and longevity.

The Mini is the worst possible choice for a hard working photographer who stresses his gear. Buy a MacPro or build your own. And if you need to do heavy movie compression, this is the machine for the job. Yes, the Hackintosh comes in a big box, enough to hold many Minis, but why would you care? Do you want looks or function?

If you really want to try and spend as much as Apple will charge you for its compromised MacMini, you will end up with a rig sporting an overclocked i7 CPU, a better motherboard (the one I use above does not support overclocking), a sexier box and performance 50% better. But you will fail on the spending front as you will still have $200 left over. Hey, it’s your money.

What is your time worth? The true comparison is between the $657 Hackintosh here and a like-spec’d MacPro which runs $2,973. Assuming it takes four hours to build the Hackintosh for a saving of $2,316, that figures to $579/hr, or an annual income of $1.2mm. So if you are making $1.2mm or more annually from your labor after tax, buy a MacPro as your time is worth too much to waste it on computer building. And congratulations – you are in the top 1% of US plutocrats who control 50% of the country’s wealth – a statistic last reached in 1929 ….

What use is the Mini? For light processing, web surfing and the like, it’s fine. None of these stress the Mini’s poor thermal dynamics. For use as a movie server or for accessing services like Amazon VOD which are not available on the AppleTV, it’s fine, especially as the latest model adds an HDMI socket, making connection to a big screen TV easy. But as a desktop, even for light use, it’s a poor choice. By the time you add a half decent display and a DVD player to the $600 base model you are getting close to the $1,000 base iMac in price, with inferior performance.