Category Archives: Hardware

Stuff

Snow Leopard 10.6.7

The latest release.

Snow Leopard 10.6.7 came out yesterday, with bug fixes and security enhancements, and before you could say ‘Hackintosh’ I had it installed on the HackPro.

It’s worth the upgrade. Running in 64-bit mode here is the Geekbench (OS performance as reflected in CPU and RAM throughput – no disk factors, so the SSD I have recently installed is irrelevant to comparisons) report:

Snow Leopard 10.6.7

Here is 10.6.6 with the same configuration:

Snow Leopard 10.6.6

That’s 2.4% faster. Not enough to notice, but nice to know that the newer version is not the victim of performance drag from code bloat. The biggest component of the overall change is in the memory performance result which is 8.0% faster. Nice code optimization, Apple!

On the 2010 MacBook Air (mine is the 11″ with the base spec and minimum RAM) the change in speed is +5%. Once again, not noticeable but nice to know.

Goodbye, Canon and Thank You.

The end of a beautiful friendship.

My Canon 5D and its collection of Canon lenses are for sale.

5D and friends.

You can see all the journal pieces I wrote on this transformational camera by clicking here.

The decision to sell was not an easy one, but I am a user, not a gear collector. In my book, it’s a crime to have equipment of this quality sitting around unused. Simply stated, when the 5D, with its full frame sensor, came out it instantly obsoleted all the 35mm and medium format film gear I owned. A short time thereafter my Leica M bodies, used by me for 35 years, my Mamiya 6, Rollei 3.5F and Rollei 6003 Pro were all gone, along with their lenses. Such was the quantum leap in image quality and versatility offered by this magnificent camera. My Canon 5D journey commenced over five years ago and as my first serious digital camera I thank Canon for its 5D, which revitalized my interest in taking pictures, while simultaneously obsoleting the sheer drudgery of film processing. I have always preferred pressing the button to time in a darkened room with smelly chemicals.

But a couple of significant changes have occurred in my life since the 5D was purchased. First, we sold our vineyard in the country and moved back to the San Francisco Bay Area. It was a fun experiment, my zinfandel grapes won a lot of prizes but the whole farming thing started to get old. Plus, we wanted our son to grow up with all the diversity and distractions offered by one of the world’s great cities. And, from a snapper’s perspective, being close to the City by the Bay meant a return to my first love, street snaps. So while landscape work was fun and my one man show of landscape snaps was a success, my heart remains on the streets, a genetic code inculcated during a youth in London. And a street snapper the 5D is not. It’s not that it’s a big camera, it’s that it’s simply not the best instrument for my way of working on the street. I tend to get really, really close to my human subjects and the 5D just is not right in that context. Yet whether it’s outdoors for infinite vistas, QTVRs with a fisheye, bugs and birds, or in the studio, I have yet to use a finer instrument.

Other things changed in my life. Testifying to the abuse of my hands over many years of tinkering with cars and engines and woodworking, I started to develop tendonitis in my wrists. Make me lift a heavy weight and it’s not a lot of fun. Further, with age, my back has started to give out and carrying heavy gear compounds my problems. Canon 5D gear is built like a tank; it is not featherweight.

I still believe that in a world where very few prints are made, there’s simply nothing like a large print to do justice to a great photograph. For those, the 5D is unbeatable. Photo exhibitions still favor mounted, framed prints, not LCD screens. The 5D is crazy sharp and grain free, at any rational enlargement size. Want prints over 36″ on the short side? The 5D Mark II is for you.

Update 4/23/2011: All my 5D gear has been sold. I hope the new owners will enjoy this superb equipment as much as I did.

Thank you, Canon, and Goodbye.

The HackPro gains an SSD

Speed, speed, speed!

You can’t be too rich, too thin or too fast. And while adding a Solid State Drive to your work computer doesn’t demand great riches, it is thin and, my goodness, is it fast.

My first hard disk drive was bought in 1982, It was the size of a shoe box, made loud clicking sounds when accessed, stored 10 megabytes and cost $1,200. Today our home has no less than 12 terabytes of storage, or more than one million times what that shoebox stored, the whole thing is the size of that same shoebox and the replacement cost is …. $1,200. The spinning disk drives making up that storage may represent a technology in the last quarter of its life, but that technology is a triumph of function over form, and represents the peak of American engineering and materials science genius.

Sharp eyed readers will have noticed that Western Digital, a large HDD maker, just bought Hitachi’s HDD business last week. Well, there’s an old saying in investment banking of which WD is blissfully ignorant: “If you tie two rocks together, they still sink”. It’s a bit like getting into LP manufacture based on some nut’s claim that “the sound is so much better”. Uh huh.

Within a generation all that spinning disc storage will have been replaced by flash memory, which is already the only storage found in every iPad ever made and in most iPods. It’s no surprise to learn that Apple purchases 60% of the world’s flash memory chips. Laptops increasingly use it and if you want to give your G3/4/5 PPC Mac a last lease of life, flash storage in the guise of an SSD is the single best thing you can do for it.

Out with the old, in with the new.

What clued me in to the idea of adding an SSD to the HackPro, my daily workhorse, was the outstanding operating speed of my MacBook Air, which despite using a very small SSD and a poky 1.4gHz, dated, Intel CPU mated with a modest 2gB of RAM, spanks the HackPro for overall speed, despite the latter’s 4 core Intel CPU which runs at 2.83gHz with 8gB of RAM.

And because I’m constantly in and out of Lightroom, Photoshop, iWork Numbers, Safari, Firefox, iCal, Mail, NetNewsWire, Excel and Word, as well as several stock market systems for my day job, the difference in operating speed of the HackPro compared with the MBA was beginning to irritate me.

So when the HackPro’s builder, the pseudonymous FU Steve, was in the vicinity the other day, he offered to pop my newly acquired Intel SSD into the Hackster. FU did the work, I snapped the pictures and screen shots.

SSDs are still expensive. I bought a 120gB Intel SATA model from Amazon to place the OS and applications on it. I opted for Intel as it has the lowest failure rates and the most capital supporting it. It has a three year warranty and cost $230. By contrast, a 500gB spinning disc notebook drive can be had for well under $100. Is the SSD worth it? Read on.

In time, SSDs will become as cheap as traditional drives are today, a related appeal being the SSD’s lower power consumption. A typical notebook drive uses 1-2 watts compared with 0.15 watts claimed by Intel for its latest 35nm technology second generation (G2) SSD with no moving parts. If you are interested how Mac OS X handles TRIM for an SSD (garbage management), click here. I am unaware of the absence of TRIM yet being a problem in Macs.

Here’s the size of the relevant directories on my HDD which will have to be moved to an SSD for the OS and applications to work:

FU Steve says you can chuck the CD which comes with the Intel SSD if you use a Mac. It seems that those afflicted with Windows need it – an OS at the same point in its life cycle as the spinning HDD. Before installing the SSD, FU formatted it in my Aluratek USB cradle which ordinarily plays host to my TimeMachine HDD, using Disk Utility (Mac OS, GUID, journaled). That took all of 30 seconds.

Using the external cradle allowed FU to test everything. He copied the above directories to the SSD, adding in Users but excluding my user data files (pictures, movies, music, etc.) and 95 minutes later we had this, using Carbon Copy Cloner.

By purging old, unused applications,
I now have almost 60gB of free space.

There’s still a lot of space left on the SSD for new apps and OS upgrades. If you want to add that nifty SSD drive icon which FU used, surf the web looking for ‘Mac ICNS files’, download the icon of choice, then do a ‘right-click, Get Info’ on the SSD and drag and drop the ICNS file on the small top left picture, above.

One of the best ways to see what is taking up space on your disk, and hence determine what can be erased, is to use a product like OmniDiskSweeper, which will show space use by directory and size. Of the 60gB or so used on my 120gB SSD, no less than 10gB is for WinXP + VirtualBox. I would dearly love to get rid of XP but it’s still essential for the occasional business application where no OS X version exists. If you erase apps, use something like AppCleaner which will erase not just the app but also any related files which may be lurking in other directories.

Before going further FU Steve made sure to install the boot loader from the HDD to the SSD to make the drive self booting. It does not get copied over otherwise and your SSD will not be bootable. If you don’t know what he’s doing here, click on ‘Hackintosh’ in the right hand column and read the build articles. The boot loader is a small piece of code which fools the OS into thinking it’s looking at a regular Mac. FU booted from the cradle-mounted SSD and all was well.

Next came installation. Here’s what’s needed from the box, plus the Antec case mounting plate from the Hackpro:

Adapter plate top left, Antec Sonata HDD plate top right, data and power cables, Intel SSD

There’s no need to buy an adapter plate to fit the notebook-sized SSD in the regular HDD drive bay. Intel thoughtfully provides it. The SSD is screwed to the adapter plate using the small screws provided. If you use the excellent Antec Sonata III case which FU used in the HackPro, the other set of screws is too short to mount the SSD on the silicone shock resistant bumpers which Antec provides for its hard drive mounting plate. Use the long collar screws provided by Antec.

Here’s the SSD mounted with the (locking) cables in place:

Installation in the HackPro was trivial for FU – he simply connected the power and data cables and slid in the assembly, connecting the data cable to an open SATA II socket on the motherboard. The Antec case has so many redundant power supply cables that finding a free one for the SATA power connector was not an issue. The whole mechanical part of the installation took FU Steve maybe 30 minutes, much of it spent undoing his neat tie wraps of all the unused cables so as to fish out an additional power cable for the SSD. His snipping off of the old tie wraps had me looking away, I confess. As usual, FU made sure all the loose cables in the HackPro were anchored with new tie wraps before replacing the cover.

Intel SSD in the HackPro. Two 1 tB Samsung HDDs to the right.

Finally, a quick change in the BIOS (hit ‘Delete’ at boot) to make the new SSD the boot drive:

Heat:

Temperature Monitor reports that the Intel SSD runs at room temperature. There is no temperature rise. The two Samsung 1tB HDDs show no rise either and all three drives have a large fan almost in contact with them to draw away any heat. You will not get this sort of heat management in your Mac, where looks trump function.

CPU:

My HackPro uses an Intel Core 2 Quad Q9550 CPU; I have read that the later i5/i7 CPUs, like those found in the latest Macs, require a firmware update for the Intel SSD to work. That means you have to download the firmware from the Intel site while running on your existing HDD, load it to the SSD then proceed. You should do your research first if you are using an i5/i7 Mac. The Intel link is here.

Other applications:

Some precautions/changes are called for when you first boot from the SSD.

Photo processing

You have to tell Lightroom, Photoshop, Aperture and iPhoto where to look for data files. Likewise most other apps which use databases are clueless until pointed appropriately. Be sure your Carbon Copy Cloner settings for overnight backups are correct.

To redirect iTunes, which is now booting from the SSD, hold down the Option key while starting iTunes then point it to the library on your HDD data drive.

Make sure Lightroom Preferences use the SSD for the Cache – cache files are created by LR when you roundtrip RAW files to Photoshop:

Lightroom3 directory created on SSD Boot->Users->Tigger (me!)

Next, make sure Photoshop is using the SSD as the scratch disk for temporary processing files – PS can get pretty disk intensive with complex photo processing:

Photoshop Preferences for the scratch disk.

Finally, if you use TimeMachine, check that it’s backing up from the right data drive to the TimeMachine drive. I left the OS on the HDD I previously used to boot from, in case the SSD blows, so there’s no need to backup the SSD.

1Password:

If you use the excellent 1Password app to keep your passwords and software licenses securely sync’d on all devices using Dropbox, delete the 1Password.agilekeychain in your cloud Dropbox folder, and send the new file from the SSD to your cloud Dropbox folder, using 1Password->Preferences->General->Data File->Move to Dropbox.

The data file shown is on the SSD, NOT on your old HDD.

If you fail to do this your local changes on the SSD’s 1Password will disappear at the next automatic sync and will leave you scratching your head!

Speed?

Time is money. Any statement to the effect that SSDs are too costly in $ per gigabyte is trying to solve an equation with a missing, key variable – the value of time.

Boot and related times for common apps are 2-4 times faster. Here are some examples (current application versions unless indicated otherwise):

Lightroom: 3-4 seconds
Lightroom – create TIFF file from RAW and open it in PS CS4: 5 seconds if PS is open, 8 seconds if PS needs to be loaded
Lightroom – Create a 240dpi print file from a RAW original and open it in Preview for soft profiling: 8 seconds
Photoshop CS4: 3 seconds
Aperture 2.5 : 3 seconds (I gave up on Aperture after this version)
iPhoto (8.1.2): <3 seconds iCal: <1 second Apple Mail: <1 second NetNewsWire (RSS reader, 50 feeds): 2 seconds MS Word (2008): 3-4 seconds MS Excel (2008): 3 seconds iWork Numbers: <1 second (startlingly fast) iWork Pages: <1 second (even faster than Numbers) iTunes: 2 seconds Bento (database): 4 seconds Win XP SP3 (under VirtualBox): 25 seconds (no comment!) Cold boot: Not measured. My HackPro runs 7 by 24 and is never switched off, so cold boot time is irrelevant to me. That said, it's probably twice as fast - MacSales has some videos which make all sorts of comparisons. MacBook Air, 11" 1.4gHz Intel i5 CPU: This speedy machine takes one-and-a-half to twice as long to load all of the applications listed above, except for Aperture and Win XP, which I have not tested. I will not be testing those, having better thing to do with my time. Here are the xBench HD scores. Higher is faster. These data bear out the '2-4 times faster' claim I made above. First the 7,200 rpm 1tB Samsung HDD:

Then the Intel SSD:

Once you have an SSD, there’s no going back.

Current drive topology:

Here are the drives in and around the HackPro:

Drives in and around the HackPro, with thanks to FU Steve.

Here’s the thinking:

  • If the SSD blows I can boot from either internal HDD as each has a full bootable OS on it.
  • If the SSD and one of the internal HDDs blow, I can boot from the other internal HDD.
  • If the HackPro gets incinerated, I can restore from the external TimeMachine back-up.
  • If the HackPro and the full TimeMachine back-up get incinerated, I can at least restore my Pictures from the notebook HDD in my car, though the OS and apps are lost..
  • If the Big One hits locally I’m SOL.
  • No back-up in the ‘cloud’. Just don’t trust it or its custodians.
  • And I would rather lose the lot than entrust anything to some schmuck bankster’s safe.

There are four additional remote drive enclosures, each containing two 1 terabyte mirrored Samsung drives, for movies. Those are not shown here, and will soon be obsoleted by the growing ‘cloud’ storage of movies.

Doing this on a real Mac:

You can buy SSD options in new MacBook Pros, iMacs and MacPros. Cost premia are little more than buying your own. If you want to install an SSD later, it’s plug-and-play in MacBook Pros and MacPros, and a real pain in iMacs (where the glass cover has to be removed with suction cups) and MacMini’s (which are hard to dismantle). In MBPs your warranty is not invalidated; I don’t know about the others. For the MBP user, there’s an attractive option to remove the DVD drive and install an SSD in its place, if you do not play DVDs. This allows you to retain the HDD which came with the machine. MacSales and other vendors have the kits.

Use the drive in an external enclosure or cradle:

If internal installation is too hard, you can always have your Mac boot from an external SSD. (System Preferences->Startup Disc or hold the Option key when starting your Mac). When FU Steve was setting mine up using the external cradle, he tried booting from it and overall speed was comparable to when he eventually installed it inside the HackPro. That’s surprising as it compares a relatively slow USB connection (cradle) with a SATA II one (internal). A viable solution when you cannot open the computer’s box or do not want to and ideal for older G4 and earlier iMacs which are hell to open up.

What’s next?

Unless you are doing heavy video editing, the ever increasing clock speeds and number of cores in CPUs and GPUs are of little practical use. Few applications take advantage of multiple CPU cores and your rig is only as fast as its slowest part. As an example, my HackPro is little faster with 8gB of RAM than with 4gB and overclocking the CPU adds stress to the hardware with little effective speed gain.

A speedier graphics card with more video memory is an excellent investment if you process pictures or video (or play games), if your motherboard will support it. It will do more for your productivity than faster CPUs and RAM. The HackPro uses an EVGA Nvidia 9800GTX+ with 512mB of RAM; there are faster cards but for photo processing the 9800 is probably more than you need already.

In practice, for users accessing the web or the ‘cloud’, that slowest part, by far, is their broadband connection. The US is cursed with very poor broadband speeds compared with Europe and Asia, so until those improve, loading up with faster CPUs and RAM accomplishes little. Optical fiber, like Verizon’s FIOS, is slowly being rolled out and promises speeds far higher than the modest 5-10 megabits/second common with regular broadband. But it’s costly to install, so don’t hold your breath.

Then, when you finally get through to your web site of choice, you are beholden to the speed of its servers, which can be frustratingly slow, especially at peak use times.

So while an SSD would not be the first item on my list when in search of overall operating speed, it was the next logical step, as I already had a very competent CPU and GPU and cannot do anything about AT&T’s poor broadband speed. (I use Uverse which, unlike FIOS, still uses copper wires for the ‘last mile’ to the home and when they tried to ramp me up from 10 to 15 mb/s my speeds actually dropped!)

* * * * *

Thank you, FU Steve, for once more moving the HackPro to the front of the line.

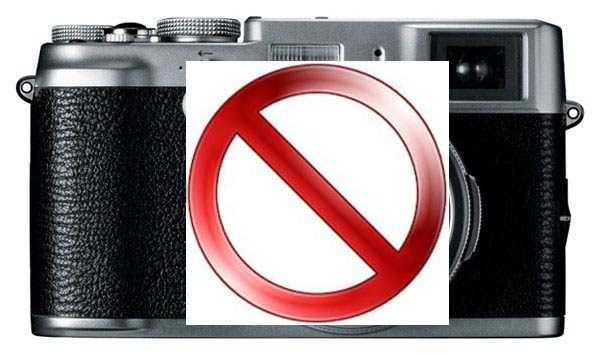
Fuji X100 manual

Lots to like.

Click below to download the Fuji X100 manual:

Click to download the Fuji X100 manual

What follows is based on a reading of the X100 manual; only real-world picture taking will allow critical evaluation, but what follows is encouraging.

The best way to read the PDF manual, if you download it, is using GoodReader on an iPad or, for those with younger eyes, on an iPhone. Both devices provide a superior PDF reading experience to anything on a computer and have the added benefit that you can take the manual with you for those occasions on which you get stuck. Since I first reviewed it the very inexpensive GoodReader app has been enhanced multiple times and I recommend it unreservedly.

First and foremost, all praise and thanks to Fuji for a great English translation and a logical layout. All you never want to know about manuals can be found in Panny’s for the G1 which is by a considerable margin the worst manual I have ever read and still, on occasion, try to decipher.

In summary, a reading of the manual discloses that Fuji has not blown it; while many or maybe all of the programmability choices exist on competing cameras the point here is that Fuji has not omitted any I consider important. What follows is addressed to travelers and street snappers for whom the X100 is an optimal design. Thus I do not address macro or movie modes or LCD displays and the like.

Here’s what caught my eye. What follows builds on and corrects some of the statements in Fuji’s Brochure which I reviewed earlier.

The Command Control, p4:

Longitudinal pressure on the Command Control toggle switches to magnified image view for precise manual focus. Akin to the G1 which will switch to this mode in the EVF when the focus ring is operated on Panny lenses.

OVF display options, p5:

Much of this can be switched on and off (see below), meaning you can get it down to the essentials. It seems even the distance indicator scale is optional. Nice. All I want is shutter speed, aperture, ISO and exposure compensation, plus the focus area. Note the ‘temperature’ indicator. This caused me to flashback to all those overheated, blown Macs I have suffered ….

Strap fastening, p9:

The instructions are incorrect. You want the loose end threaded such that it is between the two external strap lengths. Buy an Upstrap to see how it’s done. And buy an Upstrap anyway as it will absolutely not slip off your shoulder and, yes, you guessed it, the one from Fuji is emblazoned with the words ‘FUJI’ in bright white. This is so that your insecure American friends, who put stickers in their cars and on their clothing telling all and sundry they went to Texas Ballspond Road U or some similar degree mill, can share in your tasteless advertising display.

SDXC cards, p12:

The X100 takes SD, SDHC and SDXC cards.

The LCD display, p17:

Mercifully, it can be turned off.

OVF display, p19:

Here’s a better illustration of which display elements can be toggled on/off. The OVF is 0.5x life size. It’s unclear what the EVF is – I would guess 0.7x (no frame lines, image extends to edges) and very handy in poor light where OVFs do not cut it – and don’t let Leica M bigots tell you otherwise. For comparison, the Panny G1 is 0.7x at 50mm FFE, or 0.5x at 35mm FFE, so the viewed image in the X100’s OVF will be the same size at that of a G1 set to 35mm FFE. By contrast, the X100’s EVF image will be some 40% larger than the G1’s at 35mm FFE.

Shutter sounds, p 21:

This is actually far from trivial. Sometimes you want audible confirmation of the shutter, and until we know about the mechanical feedback from the shutter release button, having these options makes sense. Also handy when doing panoramas, though I doubt I will be switching on the ‘mirror reflex’ sound.

OVF power saver mode, p22:

The fact that the power saver mode applies to the OVF is a tad disappointing, as it suggests the OVF displays use quite a bit of power. The problem is that in power saver mode autofocus is far slower. Evaluation of this compromise in the light of battery capacity will have to await real-world use.

Quick Start mode, p.22:

The normal ‘start from cold’ is 2.2 seconds which seems very slow. The Quick Start mode cuts that to 0.7 seconds at the expense of battery life. That’s fast enough (a quick first pressure on the shutter release when lifting the camera to the eye should do it) but the battery life impact remains to be determined.

Shutter speed combinations, p27:

Not all shutter speeds are available at all apertures. The fastest at f2 and f/2.8 is 1/1000th, compared to the camera’s 1/4000th minimum. So if the light calls for 1/1000 @ f/5.6, you would set the lens at f/2 and switch in the 3x Neutral Density filter, getting f/2 depth of field but an effective working aperture of f/5.6. A bit of a pain but you can get there – meaning shallow depth of field in bright light. You can also assign the ND filter function to the Fn button for instant availability – see below. (The above assumes you are using Aperture Priority auto exposure, where you choose the aperture and the X100 figures the shutter speed).

Exposure compensation indicator, p29:

The indicator is available in all three viewfinders. It’s essential if you use the manual exposure compensation dial to remind you if you have set it at something other than ‘0’. Easily forgotten.

First pressure focus, p30, 45:


Phew! Confirmation at last that a first pressure on the shutter release button can be used to lock focus, exposure or both. Like most street snappers I will set this to lock focus and set the rear panel AEL/AFL button to lock exposure. Then I can focus-take first pressure-recompose-snap for those times when the main subject is not in the center of the frame. Let’s pray the focus confirmation double-beep can be silenced.

Burst mode, p36:

For serial shooters there are two burst bodes – 3 and 5fps. The camera’s buffer is 20mB in size (p113, below) which is small. Two to three buffered shots at best. No indication of how quickly the buffer flushes and it will be interesting to see whether faster SDHC/SDXC cards make a difference or whether the buffer’s native flushing speed is the slowest link in the chain.

Panoramas, p38, 39:


Panoramas for street snaps? Actually this is potentially very useful as it affords ultra-wide opportunities and, if I am reading the book right, the implementation is brilliant. After taking the first snap, you hose the camera around and it knows when to take the subsequent ones! And you can do horizontal or vertical panos which suggests some interesting opportunities. Panos can span 120 or 180 degrees. I’m hoping that exposure is locked based on the first frame, much as it is in Burst Mode, above. Otherwise stitching will show.

Auto-ISO, p50, 83:


Note the reference to reduced dynamic range at ISO 100. Note also the reference to AutoISO kicking in if exposure cannot be accommodated otherwise. Nice, I use this constantly on the Panny G1. Note also the ability to limit upper ISO in the second page, above.

Exposure metering, p51:

The street snapper will probably elect ‘Average’. There’s no time to mess with spot metering when taking candid snaps.

The Fn button, p52:

A nice selection here. Given that there’s a separate AFL/AEL button on the back to lock focus or exposure (I will use it for exposure), being able to assign the Fn button to another function is very useful. The ND filter, in view of the shutter speed limitations explained above, would appear particularly useful, instantly forcing a shutter speed 8x longer. I assume this is a ‘one press per picture’ control, but it’s unclear.

Th replacement of the Fn button on the top plate, rather than on the rear of the camera, is interesting. It’s next to the shutter release and should make for ease of use – one quick push and you have your change of choice.

Custom settings, p54:

There are many. Hooray! They can also be recalled using the Fn button. Double Hooray! The very last thing I ever want to do on the street is hunt around for settings on an unreadable LCD screen. Unfortunately, it doesn’t seem that the ND filter can be assigned to a custom setting.

In camera RAW processing, p67:

Nice to have until Adobe creates X100 RAW conversion for LR3 and Photoshop.

Aspect ratios, p68:

There are two. For someone with 35+ years of Leica M use coded in his genes there’s only one – 3:2.

SilkyPix with the Mac, p95:

Contradicting the impression from the earlier brochure, SilkyPix will work with the Mac, both PPC and Intel variants. This is nice as it’s currently the only app which will process X100 RAW images, until Adobe gets up to speed. I suppose that’s a relief of sorts, though Silky Pix has a very poor UI and you will have to reimport all your RAW files to Lightroom, or whatever you use, later.

Card capacities, p113:

The chart is wrong. They mean ‘3:2’ where they write ‘4:3’.

That said, an 8gB SDHC card will store a claimed 420 RAW pictures, meaning 19mB a snap. If you opt for RAW + JPG storage with ‘Fine’ JPG, one combined snap will take 23.9mB, meaning 334 picture-pairs on an 8gB SDHC card. Note that a Class 4 card is recommended as a minimum for movies – higher Class numbers mean higher write speeds. The 8gB cards I use in the G1 are Class 6 so they should work fine.

Battery and charger:

The battery is shipped flat and takes 2.5 hours to charge. Bummer!

The weight of the battery charger, above, seems incorrect – way too low.

* * * * *

Here’s my X100 kit so far:

Upstrap and spare battery. Wanted: One X100!

Now all I need is the camera ….

The HackPro upgraded

In the real world, do its dated specs matter?

Update March 14, 2011: Adding a fast Solid State Drive for the OS and applications is discussed here.

If you are into serious video processing or game play on your computer the answer may be ‘Yes’. If, on the other hand, your goal is fast processing of photographs and vast amounts of cheap storage, there’s no compelling reason to build a newer HackPro.

Since my HackPro came to life thanks to master builder FU Steve, the following component changes have redefined the state of the art in the fastest Macs, albeit still with compromised cooling and poor to non-existent expandability in all but the MacPro:

  • The Q9550 Core2Quad Intel CPU is now replaced with the i7 four core
  • 800 mHz DDR2 RAM is now 1600 mHz DDR3 RAM – faster

Other than that, there has been little change. LightPeak/Thunderbolt is not yet available on the MacPro and you can bet PCIe cards for the PC and HackPro communities are just around the corner. Graphics Processing improves little on the superb Nvidia 9800GTX+ in the HackPro with the current Nvidia GT260/ATI 5770 models largely reflecting a name change, not real-world speed improvements for photographers. The ATI card is 10-20% faster on some games but for PS/LR3 use there’s no practical difference.

But, if you want to make a HackPro today, several of the components FU Steve used in mine are no longer available. No matter. Ace tech journalist Adah Pash, who inspired my techie colleague FU Steve to create the original HackPro ‘build’, has updated his piece for the latest components, and you can read it by clicking the picture below:

Click for the article.

Cooling? You will not improve on the HackPro. Large case, power supply, HDD and CPU fans, a huge CPU radiator and a separate GPU fan all in a large box keep the Hackster as cool as a cucumber, no matter what you throw at it. It’s so well cooled, in fact, that I have finally shaken my paranoid habit of constantly checking temperatures – a legacy of my Mac days and burned wallet.

The process remains as simple as before and if you can assemble a Lego kit you can make a Hackintosh. If you are serious about photo processing and want seriously reliable hardware, consider it.

OS X Lion, you ask? Will it work? Fear not. You can bet that the hacker community will have that one up and running a few days after Lion is released. Just two warnings. If you use xrite’s EyeOne match colorimeter, then keep an installation of Snow Leopard or earlier running on a separate HDD or HDD partition. It will not run on Lion. And if you use a Hewlett Packard DesignJet 30/90/130 printer like I do, then keep a version of Leopard (not Snow Leopard) or earlier available as the System Maintenance and color profiling tools will not work on Snow Leopard or later. What a mess.

The best upgrade:

The best improvement in speed, if you built the original HackPro, is not from ripping out and replacing CPUs and RAM and motherboards. Rather, it results from replacing the traditional spinning disk HDD with a Solid State Drive (SSD). As my MacBook Air testifies, SSDs boot very fast, even though the CPU in the MBA runs at a modest 1.4gHz – half the speed of the one in the HackPro. Yet apps load in under half the time in one quarter of the RAM! The latest Pash ‘build’ uses an SSD as an OS X and application drive (your option – it is not cheap to do this) and when I get FU Steve to upgrade the original HackPro to include one of these, you can be sure I’ll explain how he did it here.